![Fear of Dyeing]()
by Ariane Zurcher | Dec 8, 2016 | Art, creative process, Dyeing |
I was going to entitle this post Fear of Dyeing (and Silk Screening) but Where’s the Pun in That? But it was too long so I just went with the edited version… a girl can have a little pun. Okay, okay that’s enough. I’ve filled my quota of puns and I’m barely out of the starting gate. It’s all going to be very serious from here on out.
In my last post I promised screen printing, so here we go. All the photographs below are of techniques described by Elizabeth Barton in her wonderful class Dyeing to Design over at the Academy of Quilting.
The last and only time I did screen printing was when I worked (briefly) for the fashion designer Zandra Rhodes while living in London having just graduated from Parsons School of Design about a hundred years ago. Zandra Rhodes is known for her beautiful silk screened fabrics as well as being the “Queen of Punk” a distinction given to her back in the late 70’s. All I remember from that time, aside from the time she told me to clean her bathroom, was using a huge squeegee-like thing to scrape paint across the enormous screens she used. I wish I could remember more as it might have helped me get over my fear when tackling Elizabeth’s silk screening lesson. I have to admit I was completely intimidated reading the lesson over, so much so that I read the lesson and then didn’t do any of the exercises mapped out in it for at least three days. Then another person in the class posted her gorgeous silk screened fabrics and it motivated me to at least try some of the techniques suggested.

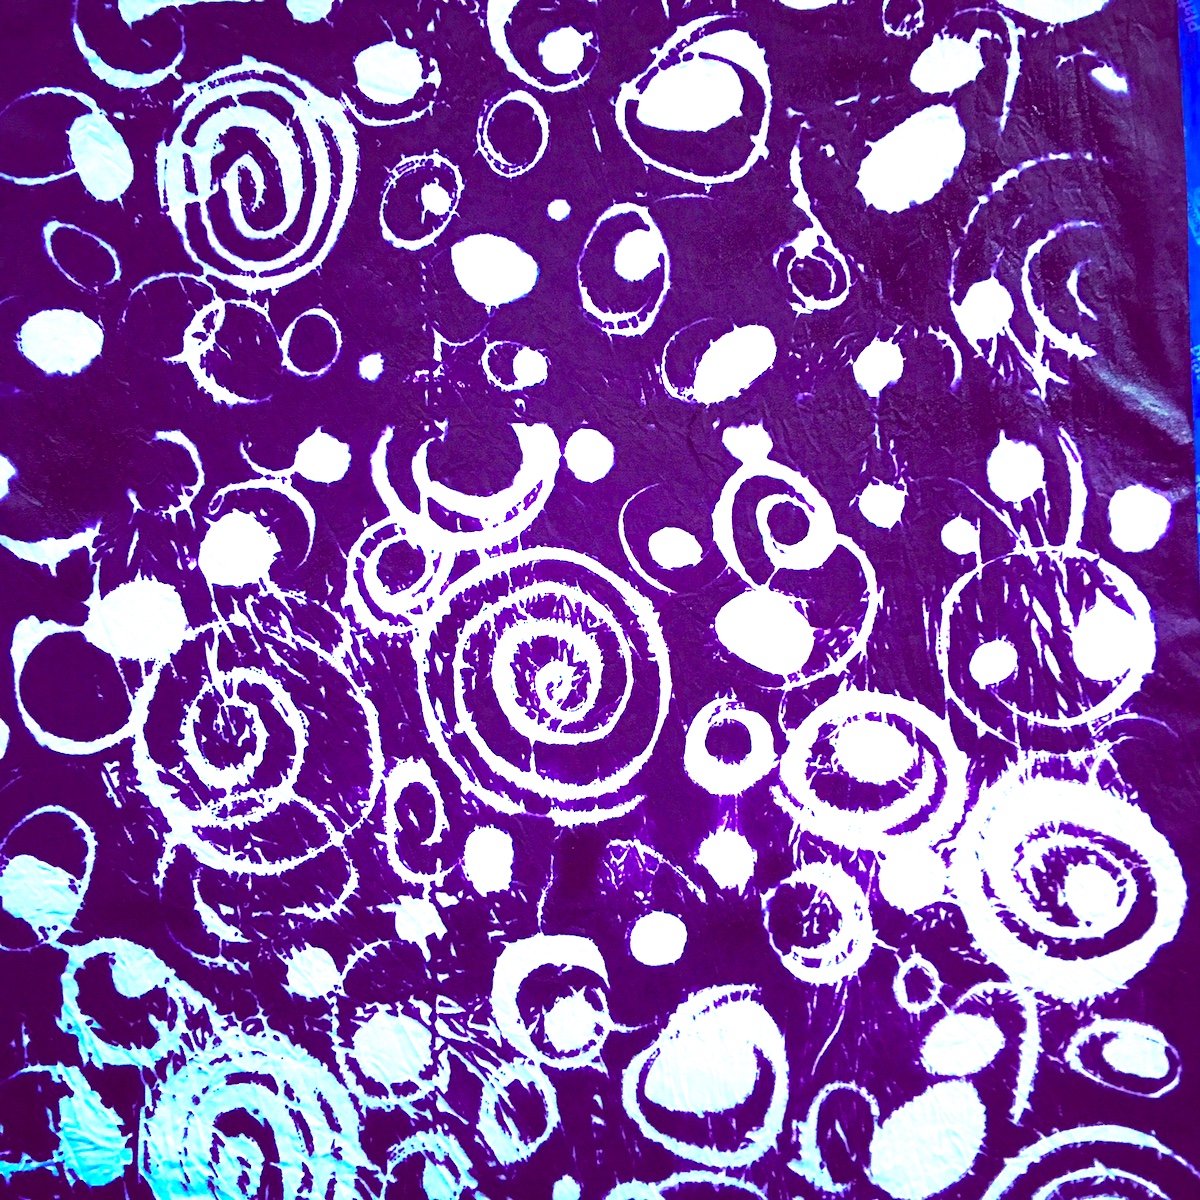
Using newsprint this was my first attempt at silk screening on white cotton
Have I talked about fear during the creative process? I know, I know, I have. But maybe you didn’t read that post and anyway, I’m feeling compelled. I’m always surprised when I feel fear while designing or doing something art “worthy”. Why feel frightened when creating something? Why should I feel anything but joy? How does fear, even a twinge of it, make itself known through all the curiosity and excitement? And while I don’t have complete answers for these questions, I do know it isn’t unusual for artists to feel tremendous fear when creating. So much so that there’s even a terrific book written on this very subject called Art & Fear ~ Observations On The Perils (and Rewards) of Artmaking by David Bayles & Ted Orland. Heading up the chapter entitled: The Academic World is this quote from Howard Ikemoto –
“When my daughter was about seven years old, she asked me one day what I did at work. I told her I worked at the college – that my job was to teach people how to draw.
She stared back at me, incredulous, and said, “You mean they forget?”
I went to Parsons School of Design for my undergraduate degree and majored in Fashion Design. Much of what I learned had to do with the business of fashion design and that there’s no such thing as new, that everything is recycled and that in order to succeed one must be as determined, if not more, about the business as one is about creating. The truth is, I learned little about being an artist and more about the challenges of being a designer in the business world. By my last year my fairy tale notion of what it would be like to be a fashion designer was thoroughly squashed and in my disillusioned state I felt only dread at the idea that I was about to go out into the world and seek a job, much less in the fashion world. After floundering for a few years I abandoned fashion design in favor of a series of jobs/careers that I thought might be more fulfilling and less soul wrenching. And while all the things I tried my hand at varied, even dramatically, they were all in the “Arts” of some kind. What I’ve learned is that artists tend to have a difficult time making a living with their art, no matter what the medium is.
There’s a wonderful quote from Oscar Wilde that begins Part II of the book Art & Fear.
“When bankers get together for dinner, they discuss Art. When artists get together for dinner, they discuss money.”
How does one price one’s art, something that might have taken hundreds of hours to create through trial and error, through missteps, through experimentation, through FEAR? If artists used an hourly wage system to price their work, all art would be so expensive no one could afford it. So most of us don’t. We can’t. And while in an ideal world no one would have to concern themselves with making money from their art, and instead would just spend all their time making it, few live in such a privileged world. The fear of being able to sell our work, and how that inhibits the process is a whole other topic and one most of us can understand, but there is another fear that is far more complicated. It is the fear one feels when confronted with something new, something one has never done before, but would like to learn. There is the fear of failure or appearing incapable or of ridicule, criticism or being seen as incompetent by others, but also by oneself. To create art, is to be at once vulnerable and confident, and it is a tricky balancing act to not lean more one way or the other. Both carry their own pitfalls.
Creating is a messy process. Most people never see all the discarded bits, the beginnings and first steps taken to get to that finished piece. What I love about blogs is that people are willing to show their process. My favorite blogs, in fact, are the ones that do just that.
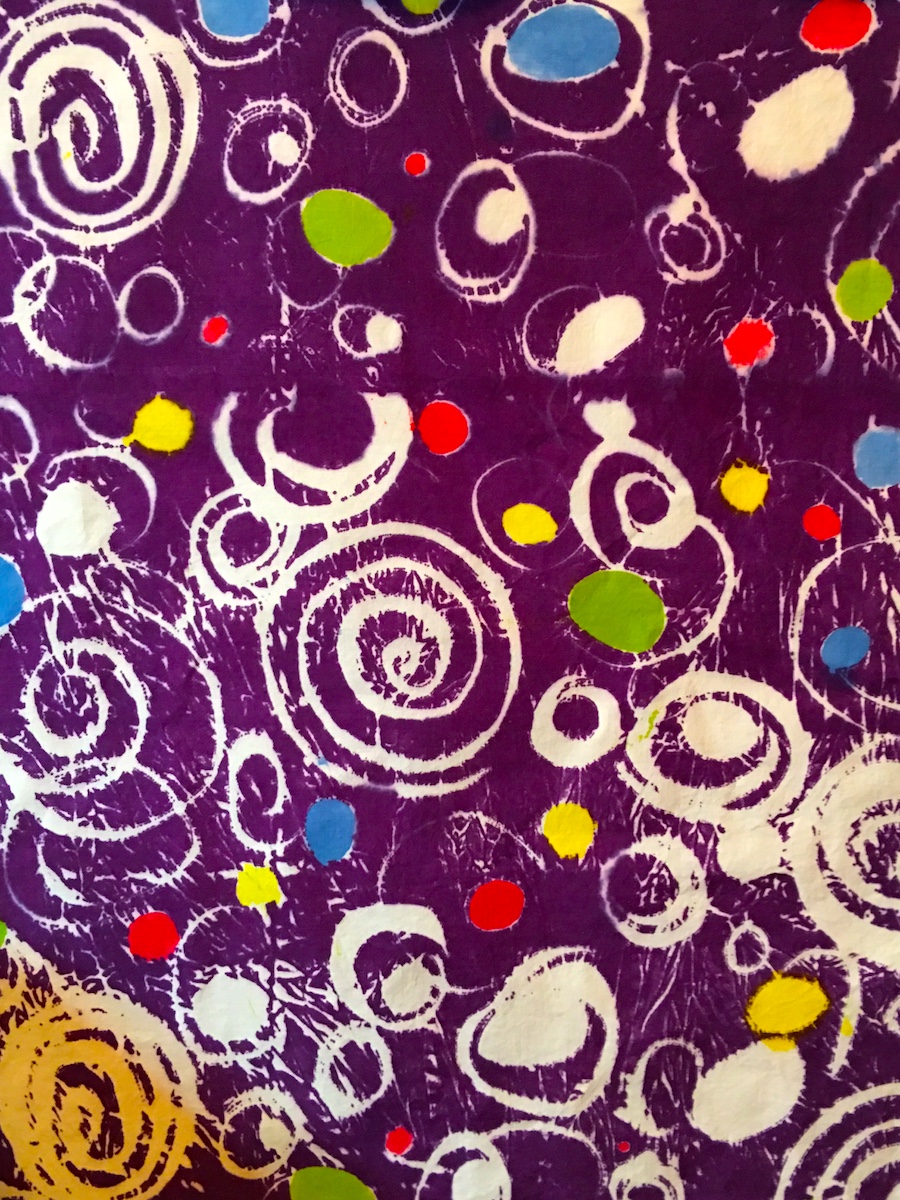
Adding color to the purple
When I am starting something new I often have an idea in my head. What I envision is always spectacular, but creating that idea takes skill, talent and knowledge, things I do not always have. So I have to learn, practice, and explore in order to be able to get the skills to (hopefully) produce the image I envision. Sometimes I’m successful, but more often I’m not. Sometimes I realize it will take me years to achieve the level of expertise required to make what I envisioned. So I have to accept that I won’t be able to do something as I’d hoped or modify what I’m doing to compensate or continue to practice, with the idea that eventually I might be able to produce what is in my mind.
Torn newsprint
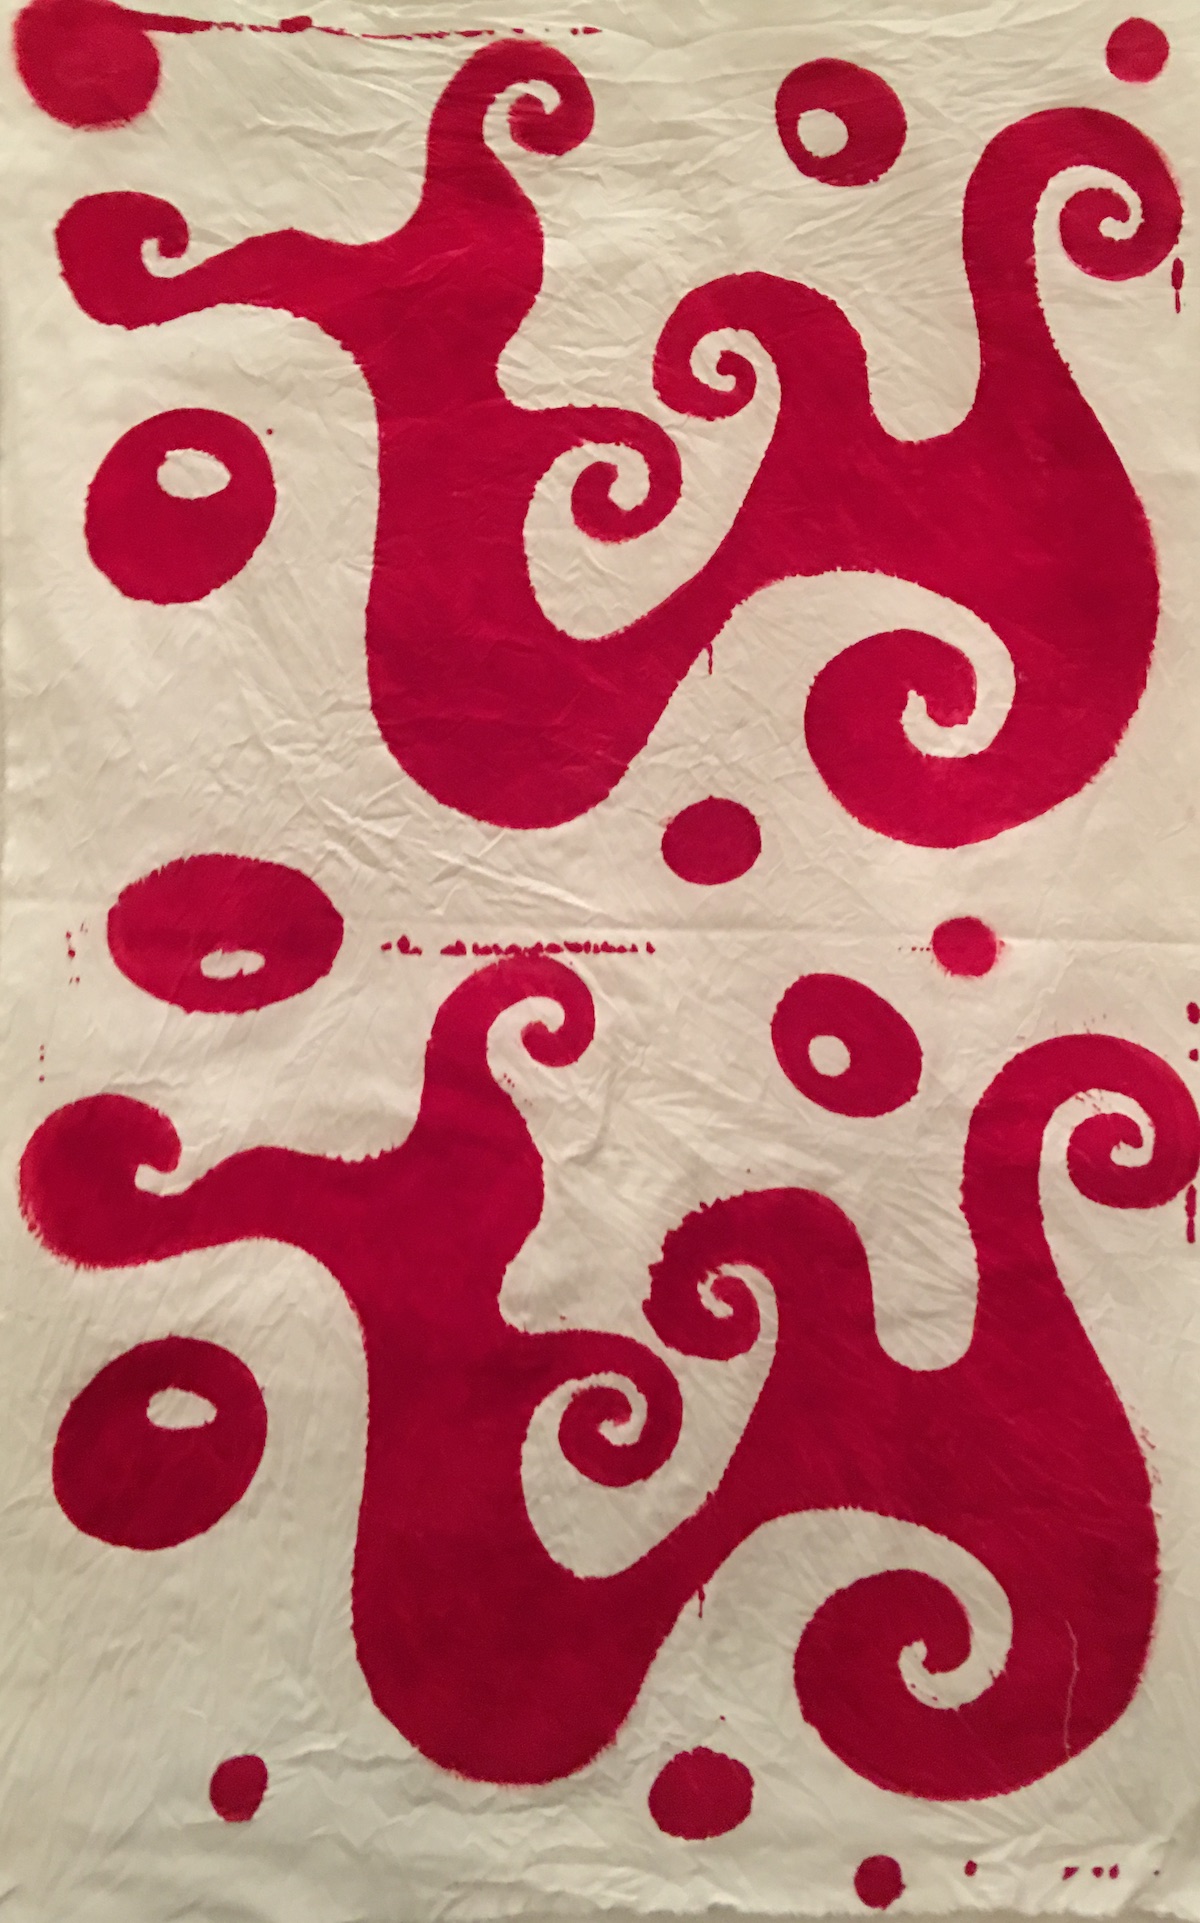
For this piece I cut stencils out of a thin plastic sheet, before silk screening on top
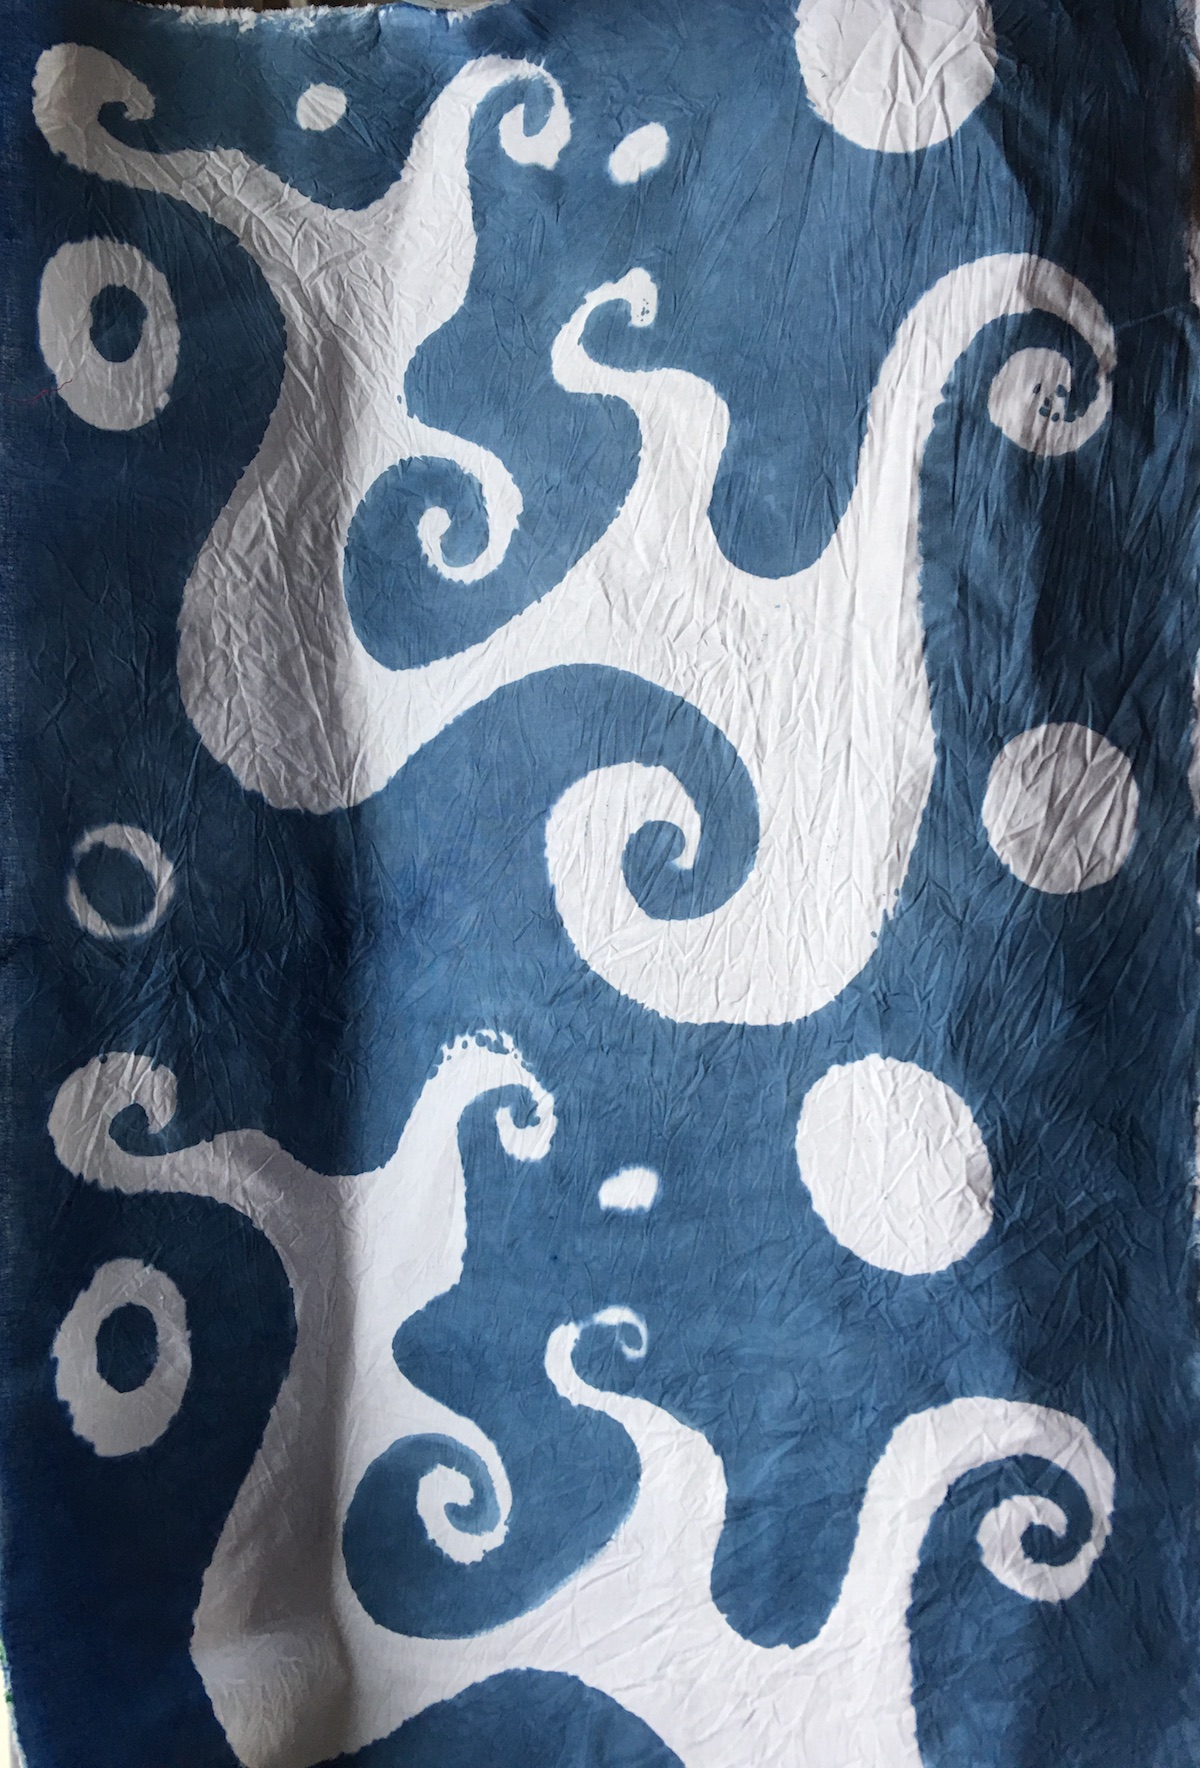
This is the result of using those stencils that I removed for the red piece above
A technique attributed to Kerr Grabowski. This piece has yet to be washed, so who knows what it will look like!
Another technique described in Elizabeth’s class.
Regardless of the approach I take, perfectionism is truly the greatest kill joy and, for me anyway, the root from which almost all my fear springs. While some argue that without perfectionism, we would settle for less or not work as hard, they are misunderstanding perfectionism at its most destructive. I am referring to perfectionism that lacerates, the kind of self-talk that abuses and brutalizes. It is that awful voice that needs to be muted before anything can be created. Free from perfectionism I am allowed to explore and play.
I have no idea what I’m going to do with any of the fabric I’ve silk screened, and in some ways that’s beside the point. I didn’t approach this lesson with a preconceived idea. And that’s the beauty of taking a class like this one. The assignments require you to explore and play first and then after you’ve done that, consider what you’ll make. Most of these fabrics have been done for almost two weeks now and I still don’t know what to do with any of them. Or as one of the many talented and wonderful people taking this class said, “I’m waiting for divine inspiration.”
![Fear of Dyeing]()
by Ariane Zurcher | Nov 8, 2016 | Art, Dyeing, Elizabeth Barton |
I almost didn’t post this today as it’s Election Day and figured many of us would be out voting or thinking about voting or waiting in anxiety for the presidential election’s outcome and then I thought – a perfect time for some levity while waiting in line to vote or for those reading this from elsewhere… okay not sure where I’m going with this, so here it is…
“Dyeing to Design” is the title of the terrific five week online class I’m taking given by the talented artist Elizabeth Barton through the Academy of Quilting. I wrote about the first week ‘here‘ and promised to write about the second.
I started the second week by pretty much dyeing every bit of white cotton fabric I had. Seriously. I went through the ten yards that was suppose to last us the entire five weeks of the class. Restraint is not a strong suit. In addition I went through so much dye that I realized I was not going to have enough to get me through the rest of the course, which meant I had to order both fabric and dye. Waiting was excruciating. I was going to work in a pun using the word “dyeing”, but restrained myself. See. I try where and when I can. While I waited however, I had all these beautiful fabrics to look at and consider for my next design.
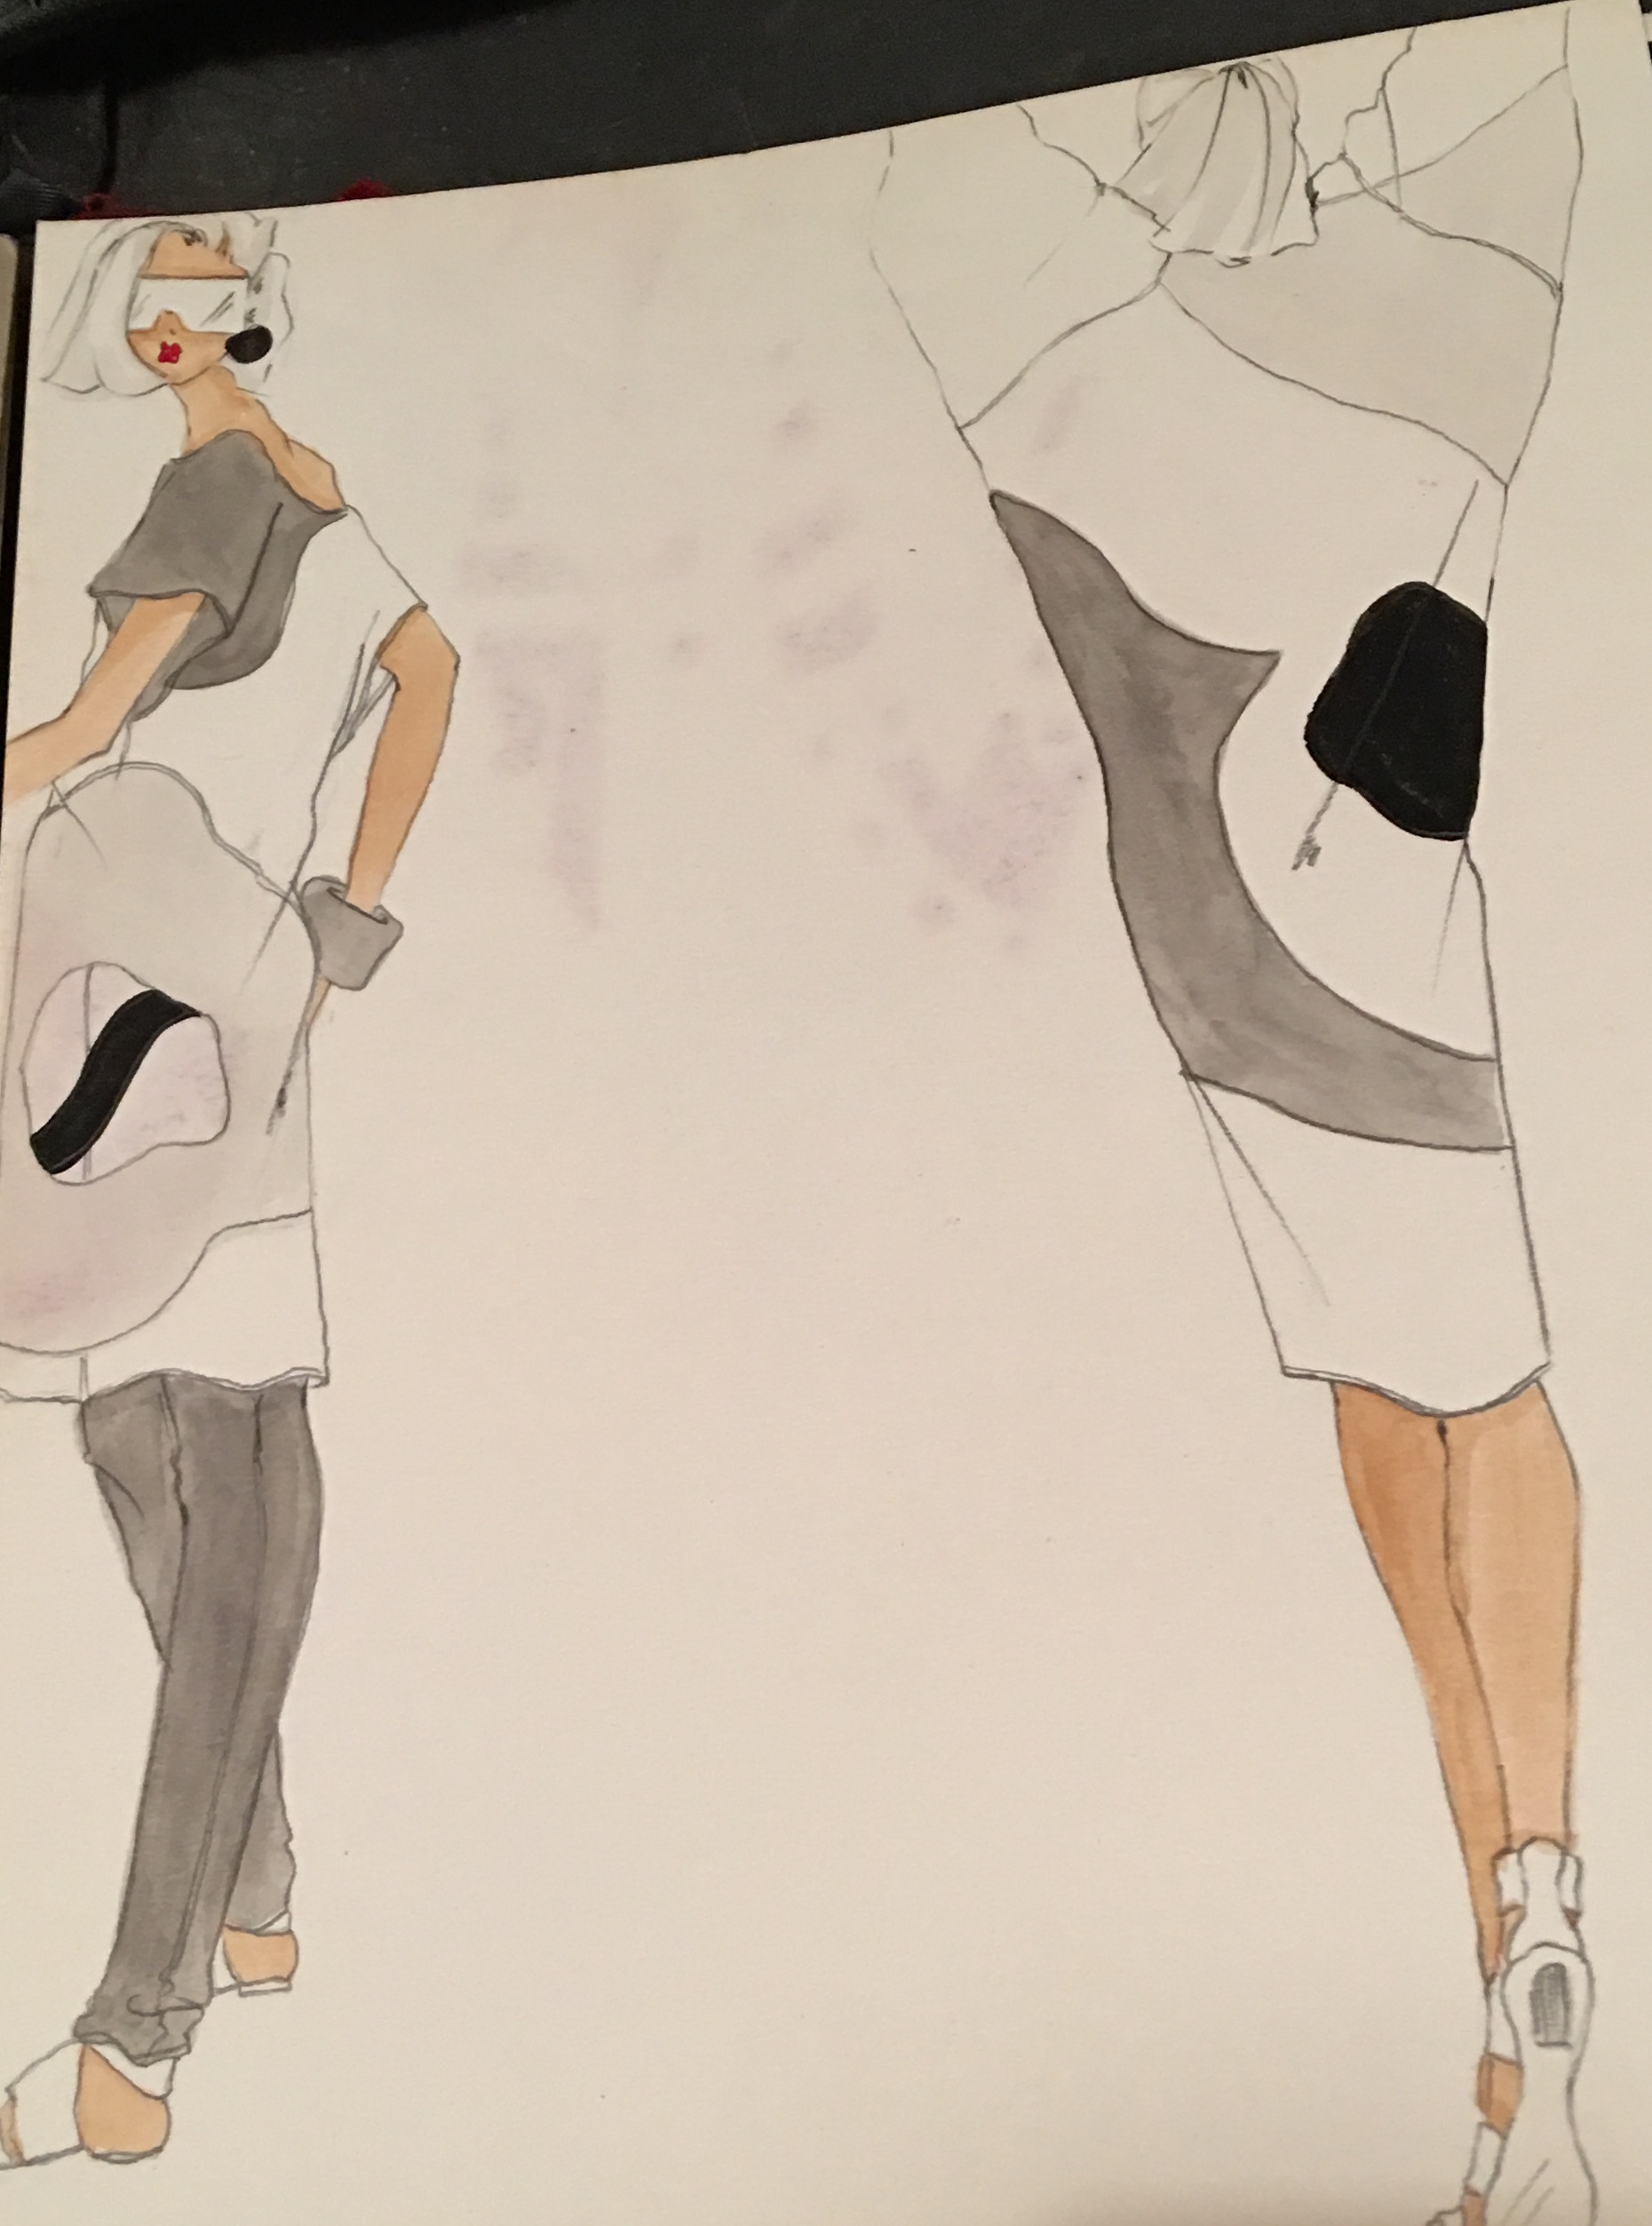
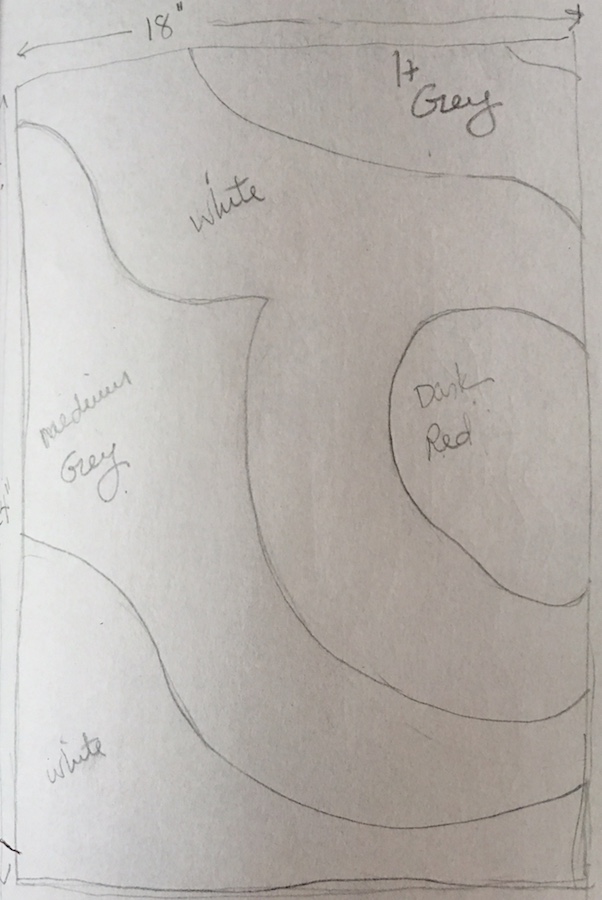
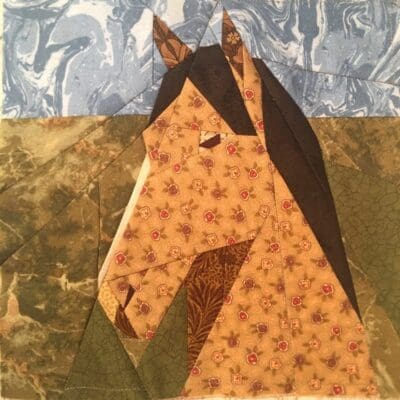
The design I decided to do used shapes I come back to again and again, long ago when I was a fashion designer, now still designing jewelry and again this past week while using my hand dyed fabrics. Let’s not spend any time analyzing this, yes?
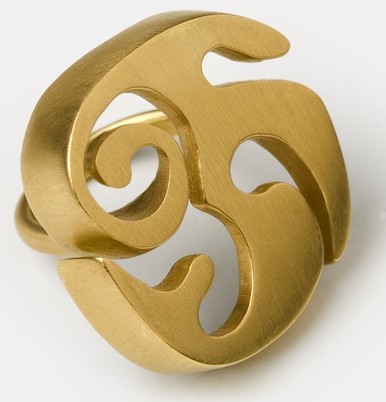
R17 – 18 Kt Brushed Gold
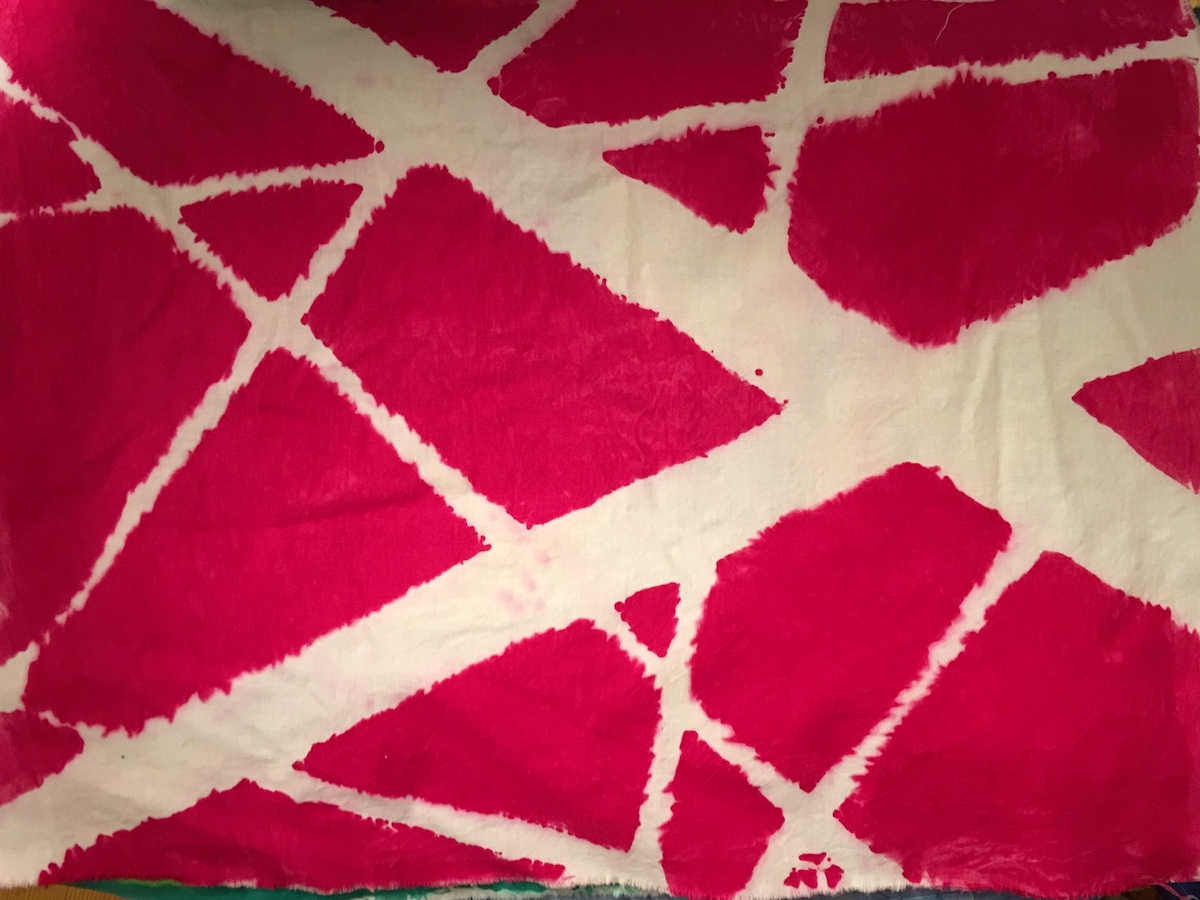
I chose two colors to work with, red and, with Elizabeth’s suggestion, an olive color. Elizabeth encouraged me to play with the olive color using it’s various gradations, which of course required more fabric that I didn’t have. Not easily thwarted, I pulled out some muslin and dyed that. It was at this point that the faucet in the kitchen sink suddenly stopped working. It was a drought. Nothing, but the slightest trickle of water, a whisper, really. However, we have a slop sink in the pantry. It was one of my brilliant ideas when we gutted the place; I envisioned our loft as a veritable greenhouse with furniture. Think Max’s bedroom when he falls asleep in Where the Wild Things Are. This vision of mine never came to fruition and so the slop sink became a receptacle for rags, cleaning supplies and other items no one knew what else to do with. And to add insult to injury underneath the sink we keep the kitty litter box. As we live in NYC our “pantry,” while sounding grand and spacious, is actually the size of a very, very small closet, combined with the kitty litter under foot, a stacked washer and dryer, the slop sink overflowing with assorted cleaning supplies… Let’s face it, it’s really really cramped.
I was determined to make it work, and while this made for some interesting maneuvering on my part, I did fall in love with my slop sink, but not so much that I didn’t call the plumber. He came a few days later and fixed the kitchen faucet, but in the meantime I washed all my dyed fabrics in my now beloved slop sink inside our closet, I mean pantry. It was all very Alice in Wonderlandish.
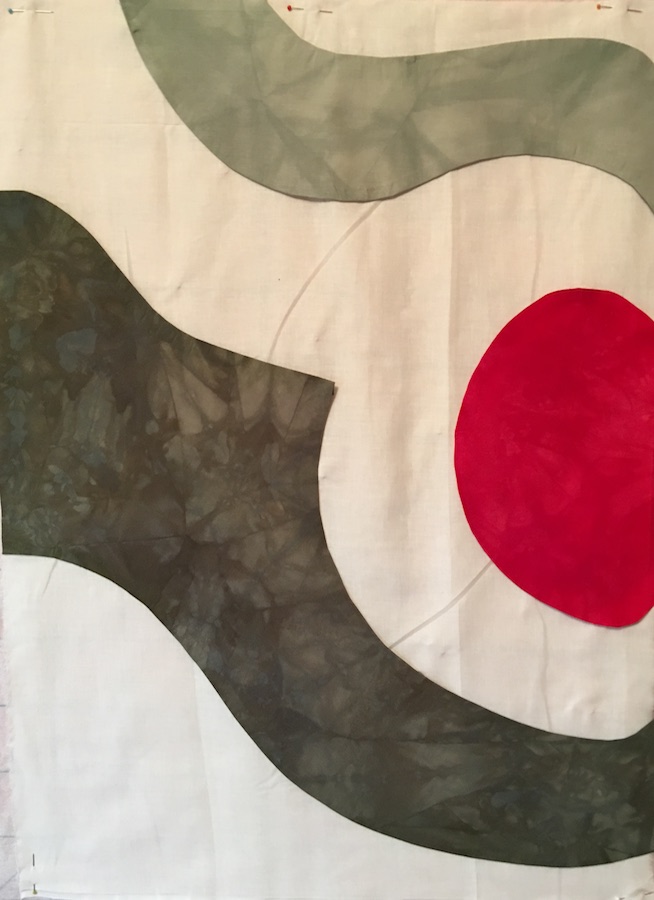
Two days later, after the sink was working again I came home to the smell of smoke and asked FH (fabulous husband) what happened. “Well,” FH said, and then after a lengthy pause and with a pained expression he finally added, “I think our washing machine blew up.” I would have suspected wild exaggeration on his part had it not been for the lingering evidence of noxious smoke wafting through our home. Evidently he was doing a load of laundry and heard a loud bang. He went over to investigate to find smoke billowing out of our front loader. You have no idea how happy I am that I was not there to witness. So for the next few weeks we are without a washing machine. But I digress… Here is the preliminary piece on my design wall.
Slowly it began to take shape and as everything seemed to be falling apart, exploding, going dry and whatever else, my sewing machine, not wanting to be left out of all the fun, decided it was no longer going to play nice with my walking foot, perhaps it was taking a cue from our presidential race, requiring me to spend more than five hours watching various you tube videos, reading the instructions over and over again to troubleshoot. There were a LOT of late, late nights. Eventually I was able to convince my sewing machine it was in its own best interest to get along and all is well. In actuality I realized that my walking foot was causing the automatic threader to jam. When I thread it manually everything works.
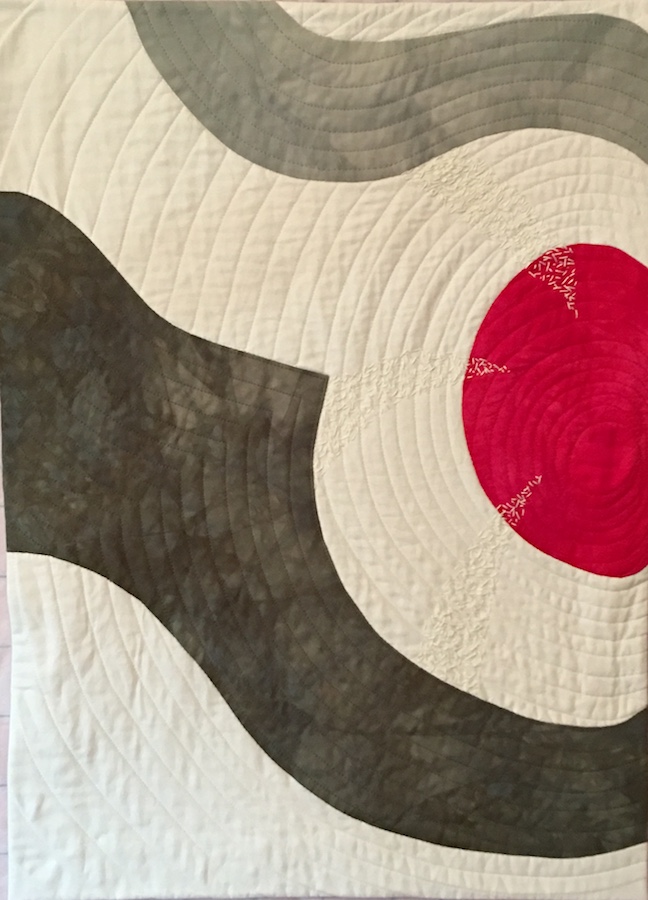
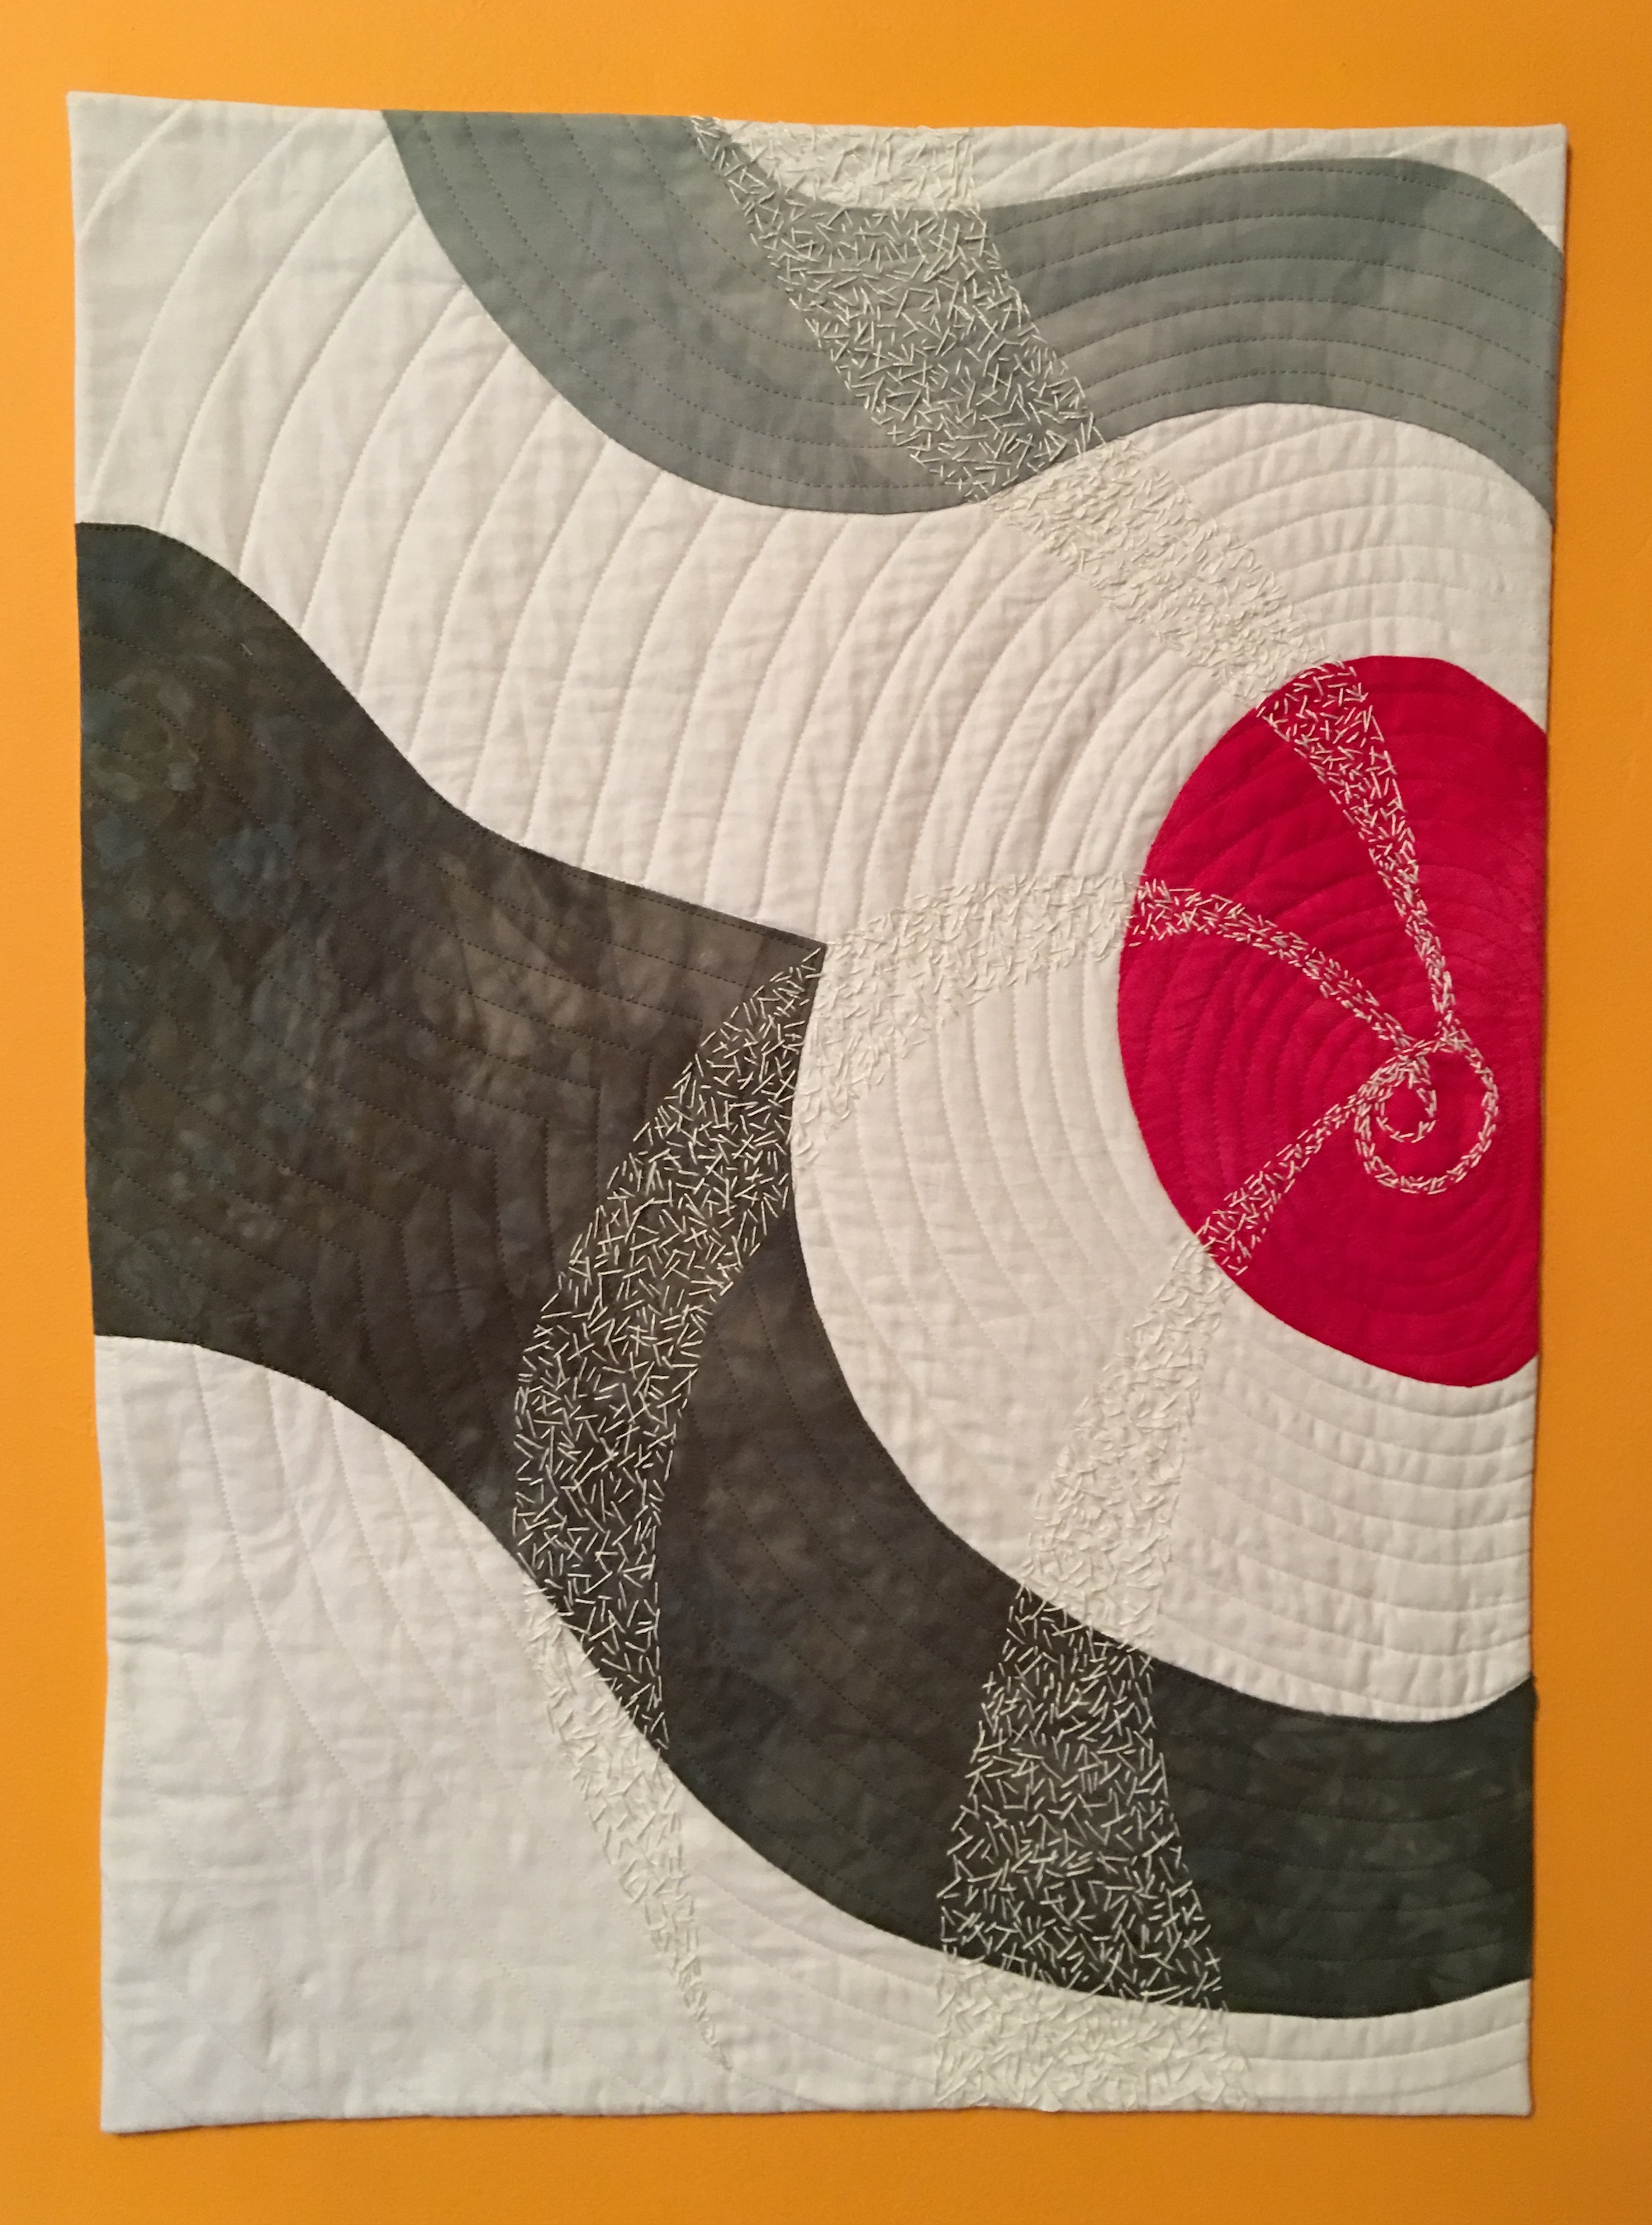
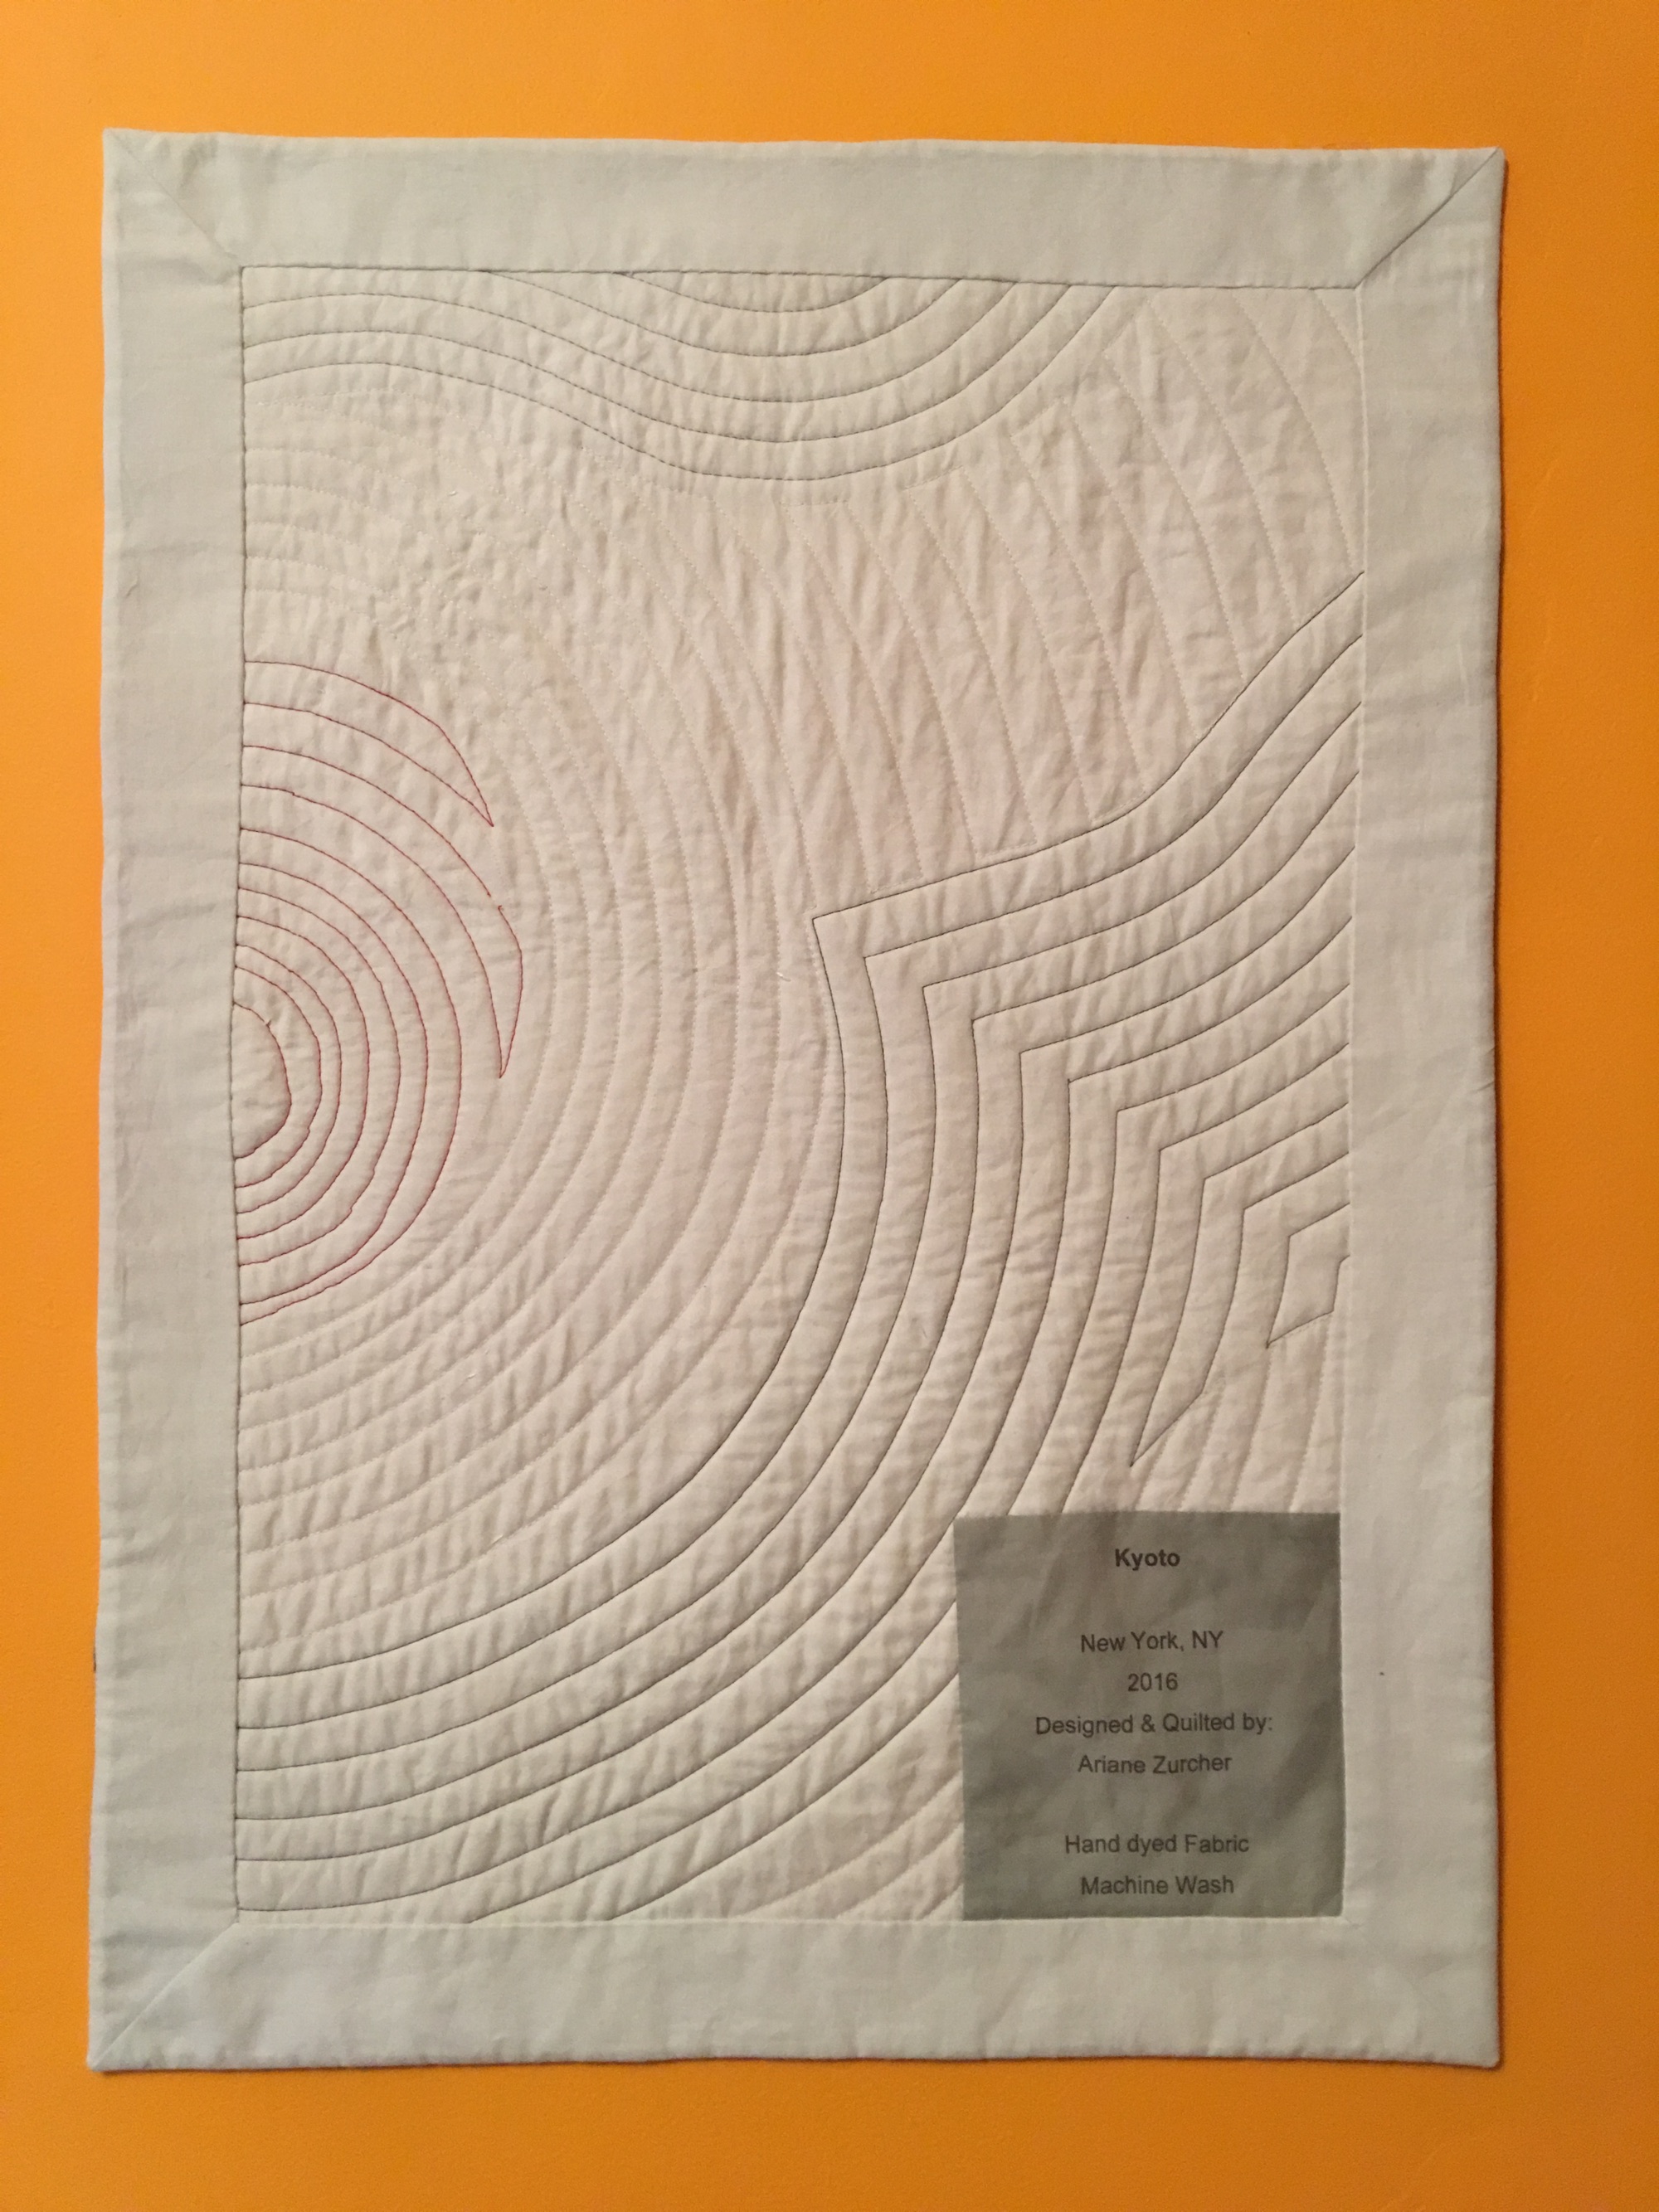
After I did the quilting I decided to add some hand stitching, but couldn’t decide whether to do more or take it all out. So what does one do when you’re not sure? Ask Elizabeth and others in the class for feedback, of course!
Which led to this…
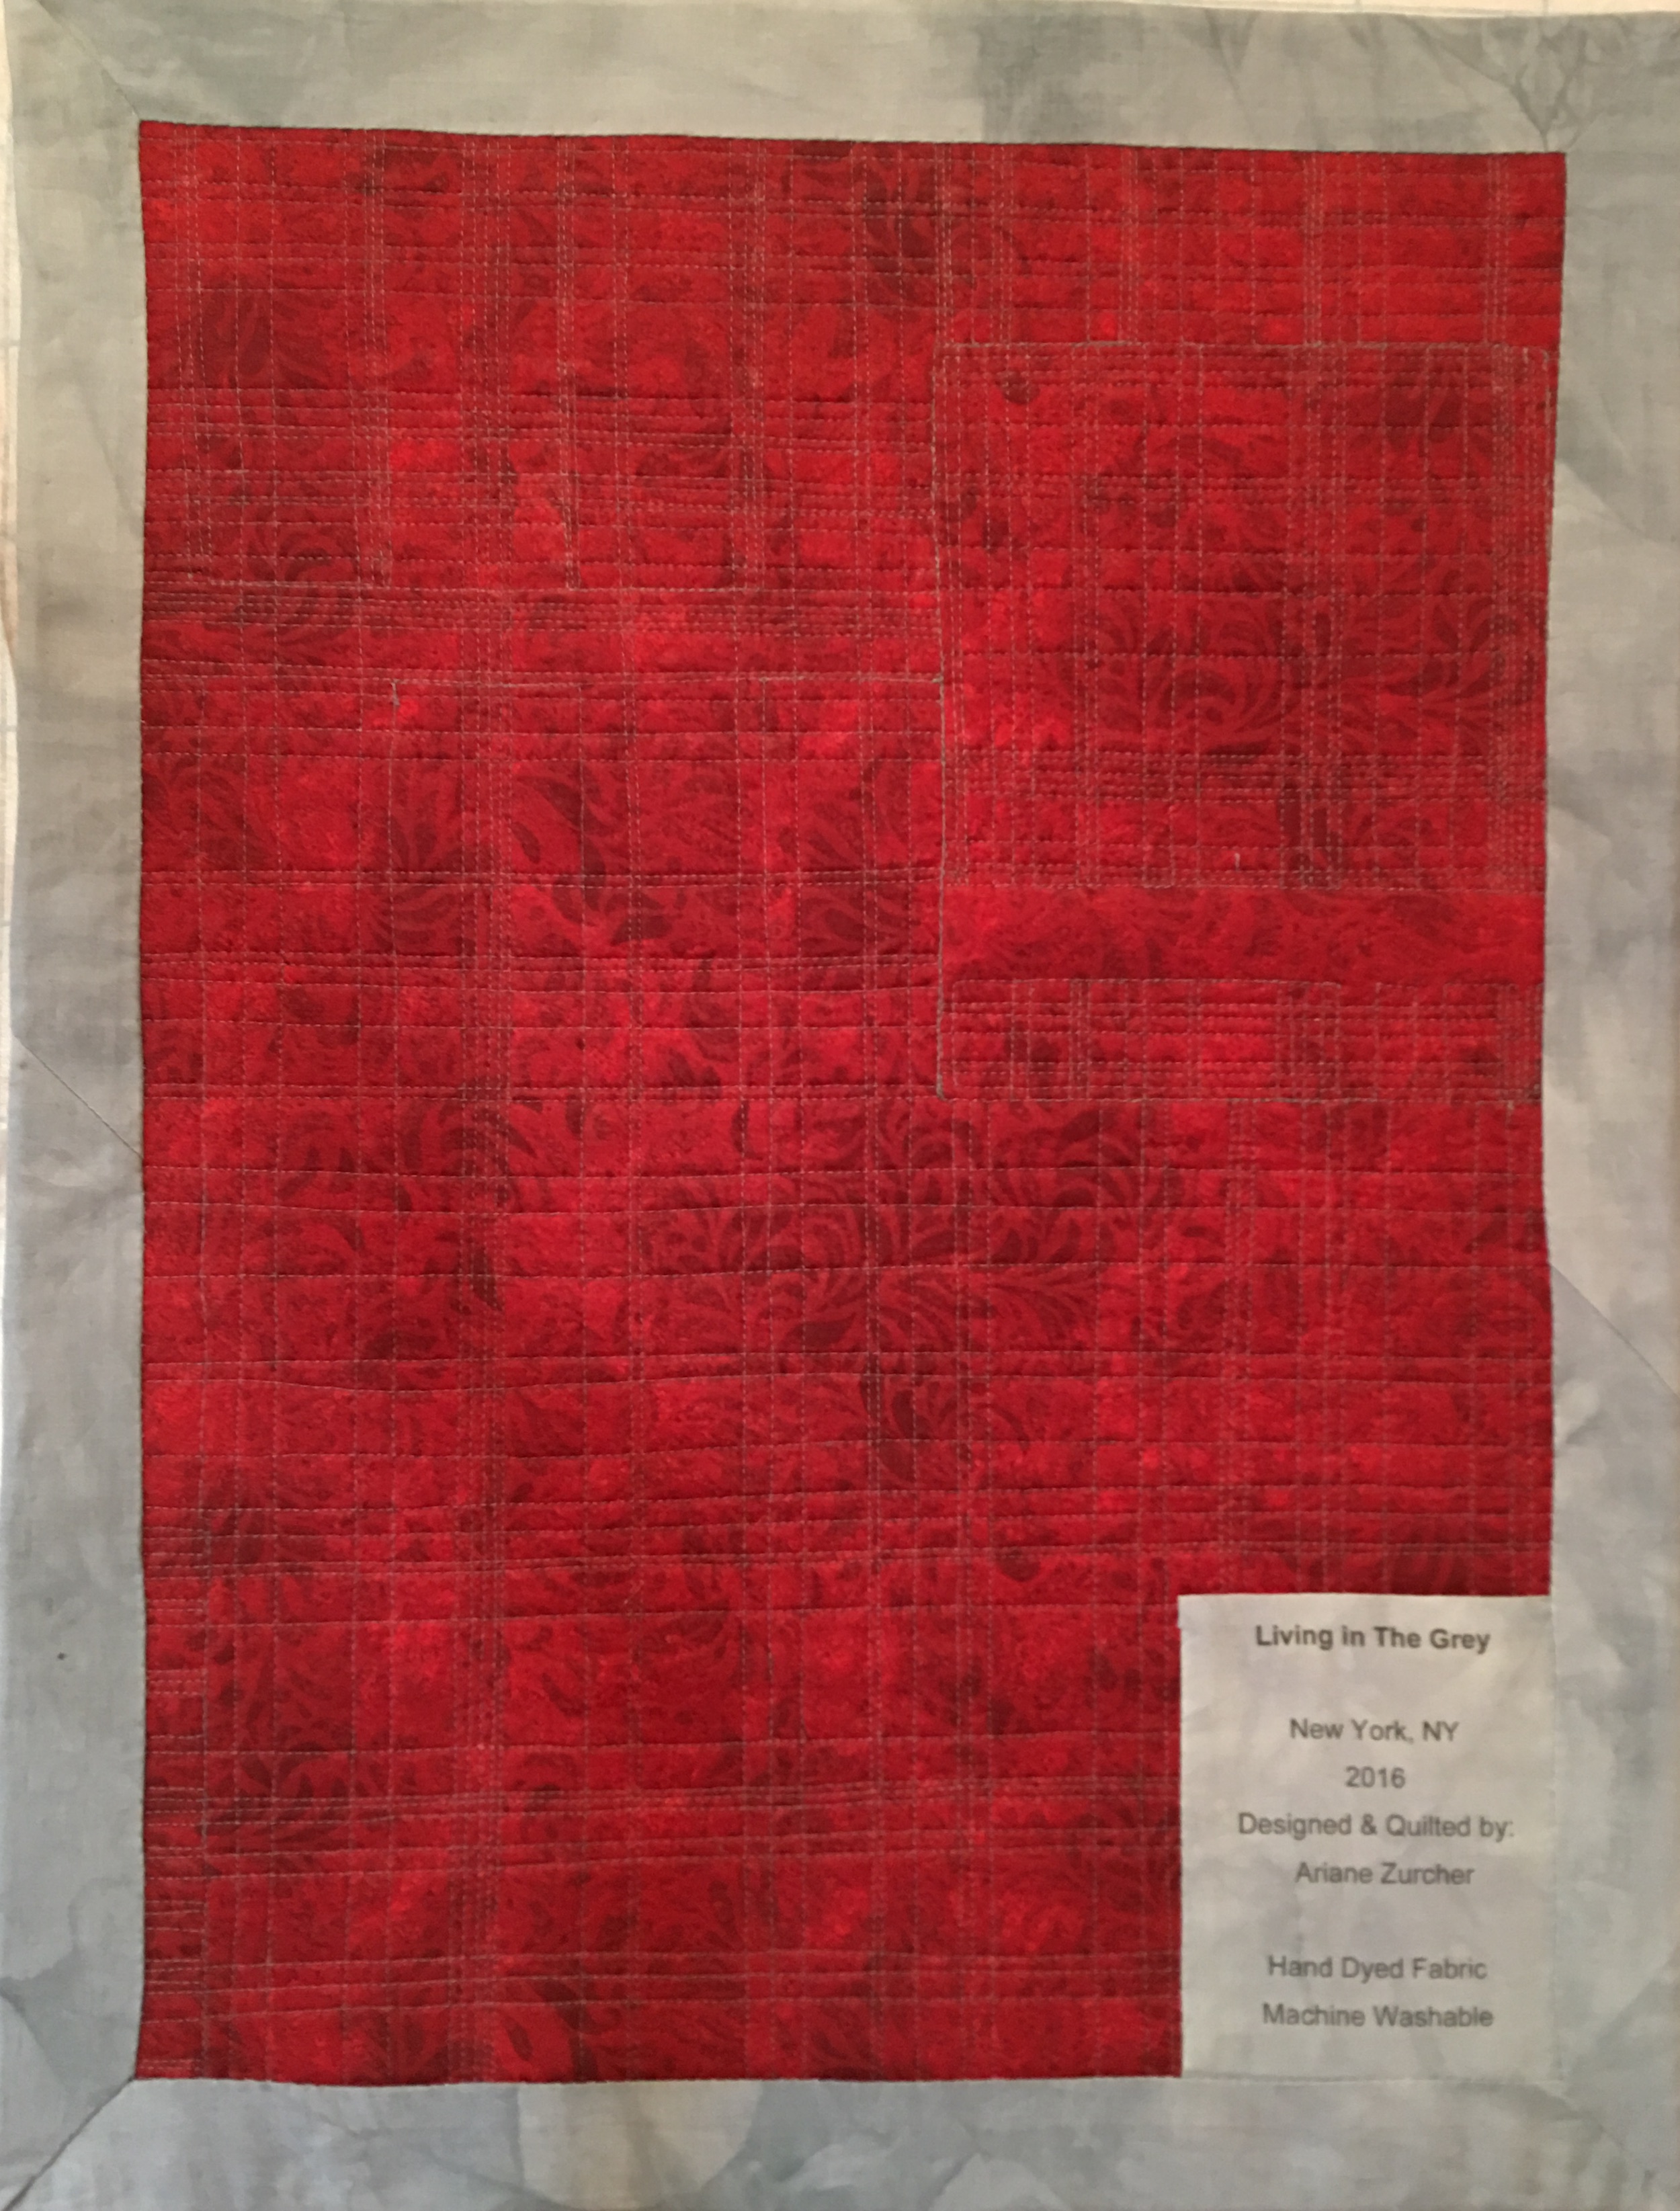
And here’s the back.
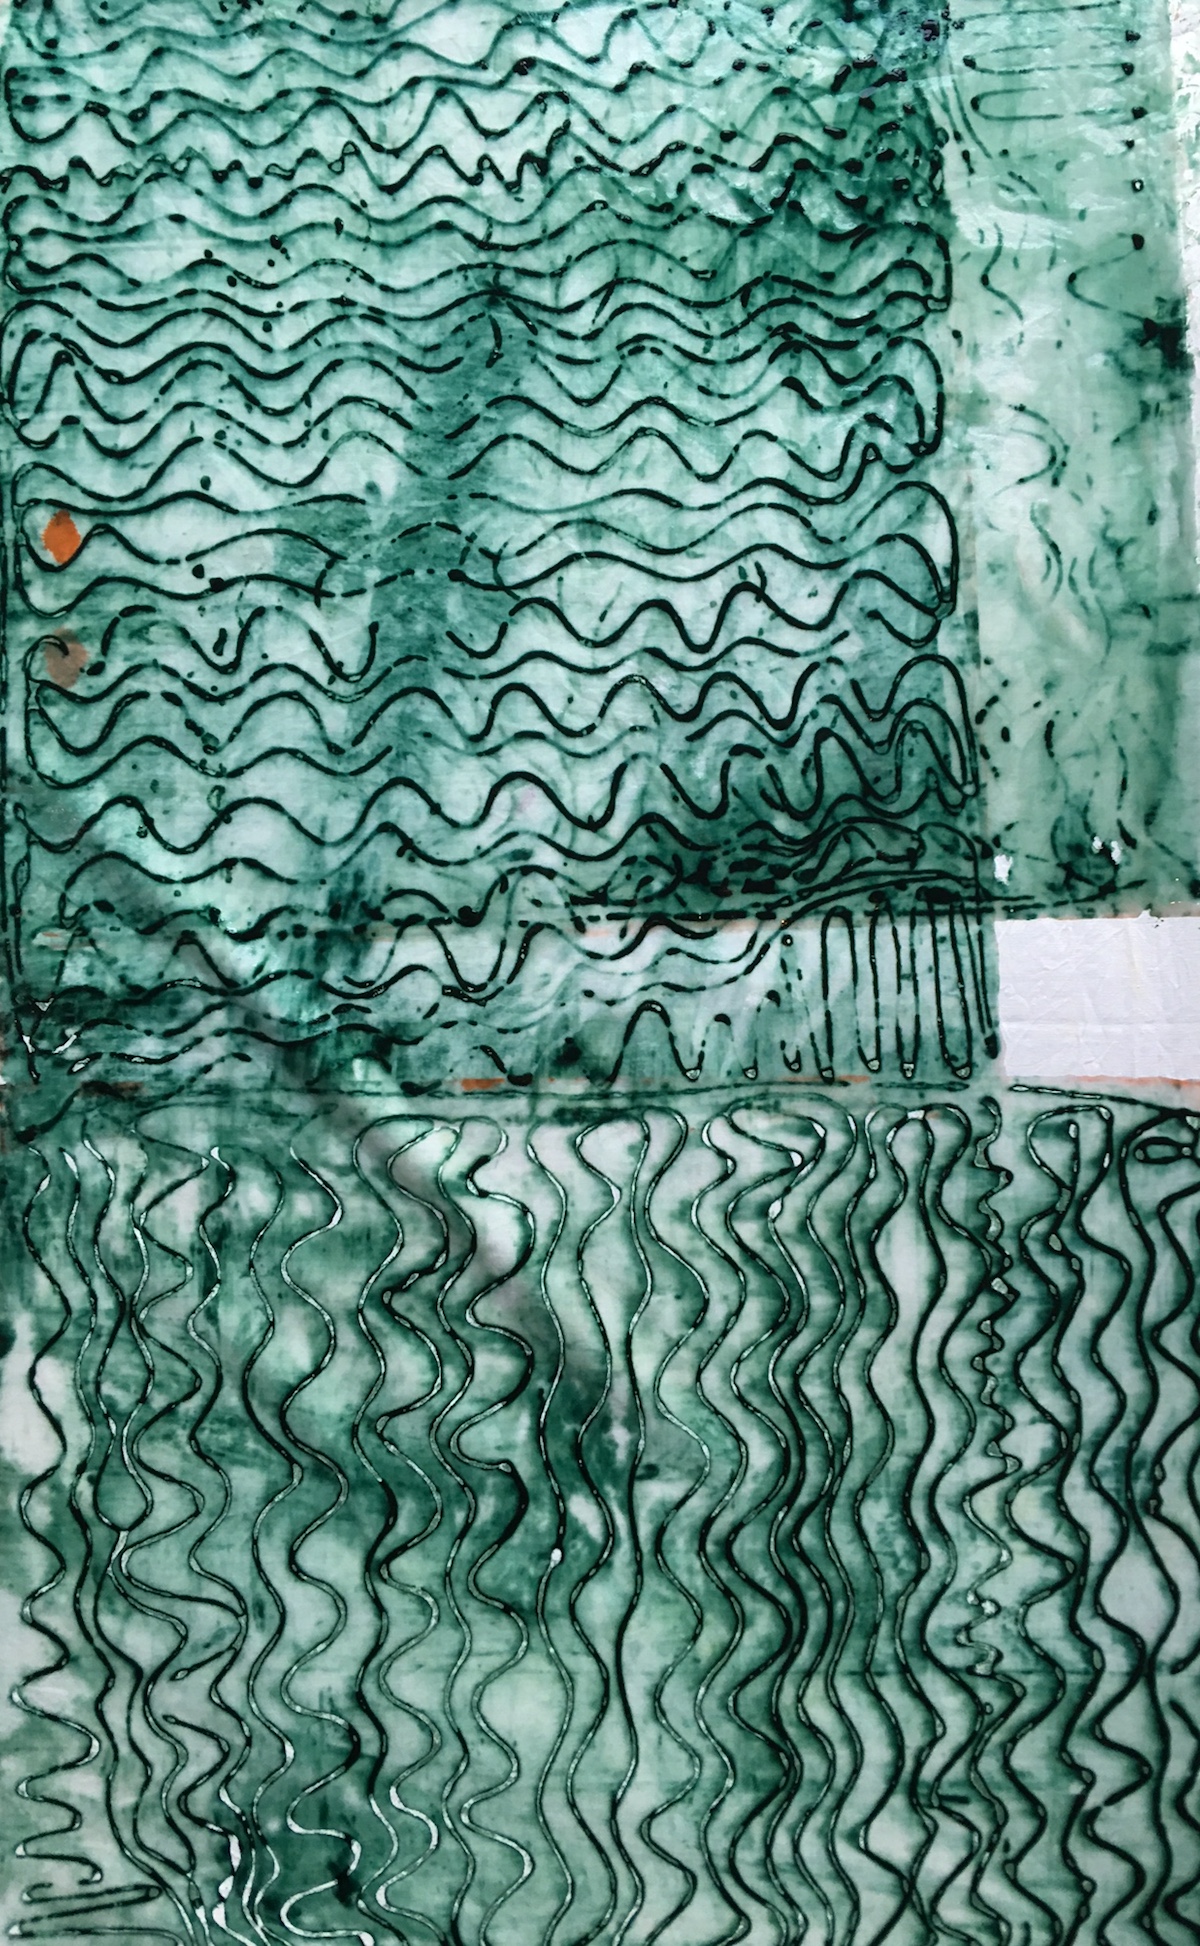
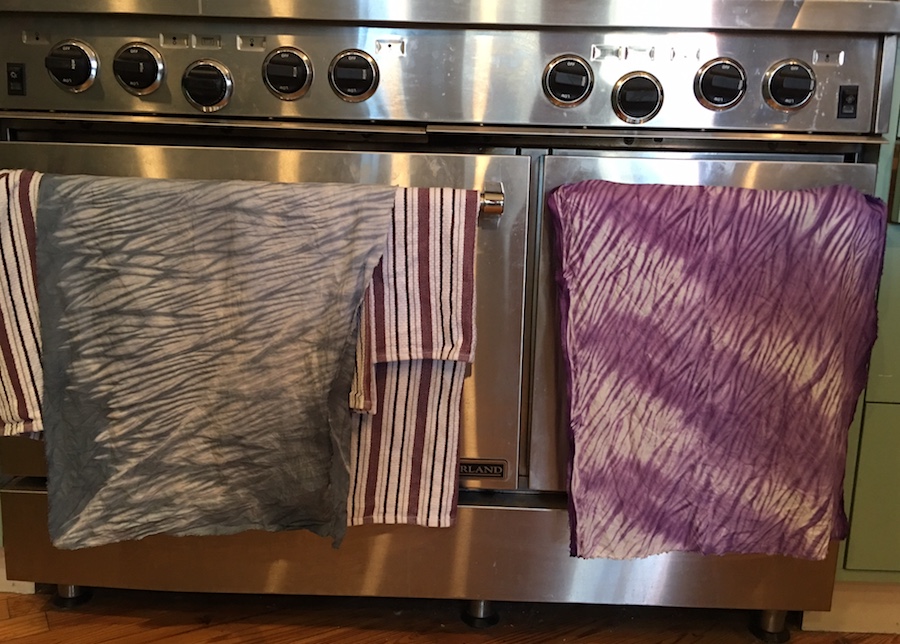
The third week of the class is well underway, my fabric arrived, the sink is running as is my walking foot (haha) and oh what fun I’m having! We are learning basic Shibori arashi dyeing. I still don’t have a washing machine, (and have two teenagers in the house) but these are luxury problems. I haven’t figured out what I’m doing with my beautiful dyed fabrics, but will come up with something in the next day or so. Here’s a sneak peak at this weeks dyeing and drying New York City style. And I didn’t make a single dye joke. The title doesn’t count because it’s Elizabeth’s name for her class. How can you not love that title? I may go back and edit a few in, just to amuse, or you can make a few in the comments!
![Fear of Dyeing]()
by Ariane Zurcher | Oct 31, 2016 | Art, creative process, Dyeing |
Lest you, good readers, misread the above and think this is going to be about a metaphoric death resulting from an existential crisis, let me set you straight, it’s not. This is about dyes, dyeing fabric and design. Now if you’re like me, you might be thinking – oh who has time for all that? – but let me tell you, there’s so much more to dyeing than you think. Get it? Trying not to laugh, really, really trying… It’s impossible to write a post about dyeing and not keep thinking of all the puns one makes without even trying… This is just too easy. You might dye of laughing… hee-hee!
Ahem.
Okay.
Seriously.
I never thought I’d enjoy dyeing fabric. I always felt there’s so much great fabric out there, why would I want to dye my own? Well… it turns out, not only was I wrong, but what a beautiful world it is once you begin dyeing! Before I get ahead of myself, this all began because I was looking for blogs by quilters who are also artists. As I was looking around I found the extremely talented artist Elizabeth Barton, and her blog, Art and Quilts, Cogitations Thereon. What a find! I read this post, The Proliferation of Online Classes, which I then felt compelled to comment on, which in turn led me to investigate the classes Elizabeth teaches and in particular one that began a week ago Friday, which I promptly signed up for. Her five week online class, given through The Academy of Quilting, is titled – Dyeing to Design. Love that.
Dyeing has never called to me, but I enjoyed reading Elizabeth’s blog, really like her work, and this class had the most immediate starting date and I’m impatient, so I thought – Why not? This is one of the many wonderful things about being new to something, it never hurts to try something you’ve never done before and the worst that can happen is you discover it’s not for you and you move on. On the other hand, you might fall in love with whatever it is, become totally obsessed and that is a indescribable joy unlike any other. The latter pretty much describes my experience with quilting and fiber art. And so it was again, with dyeing and this class, now in its second week. What a fantastic class. I cannot recommend it, and Elizabeth Barton, more highly!!
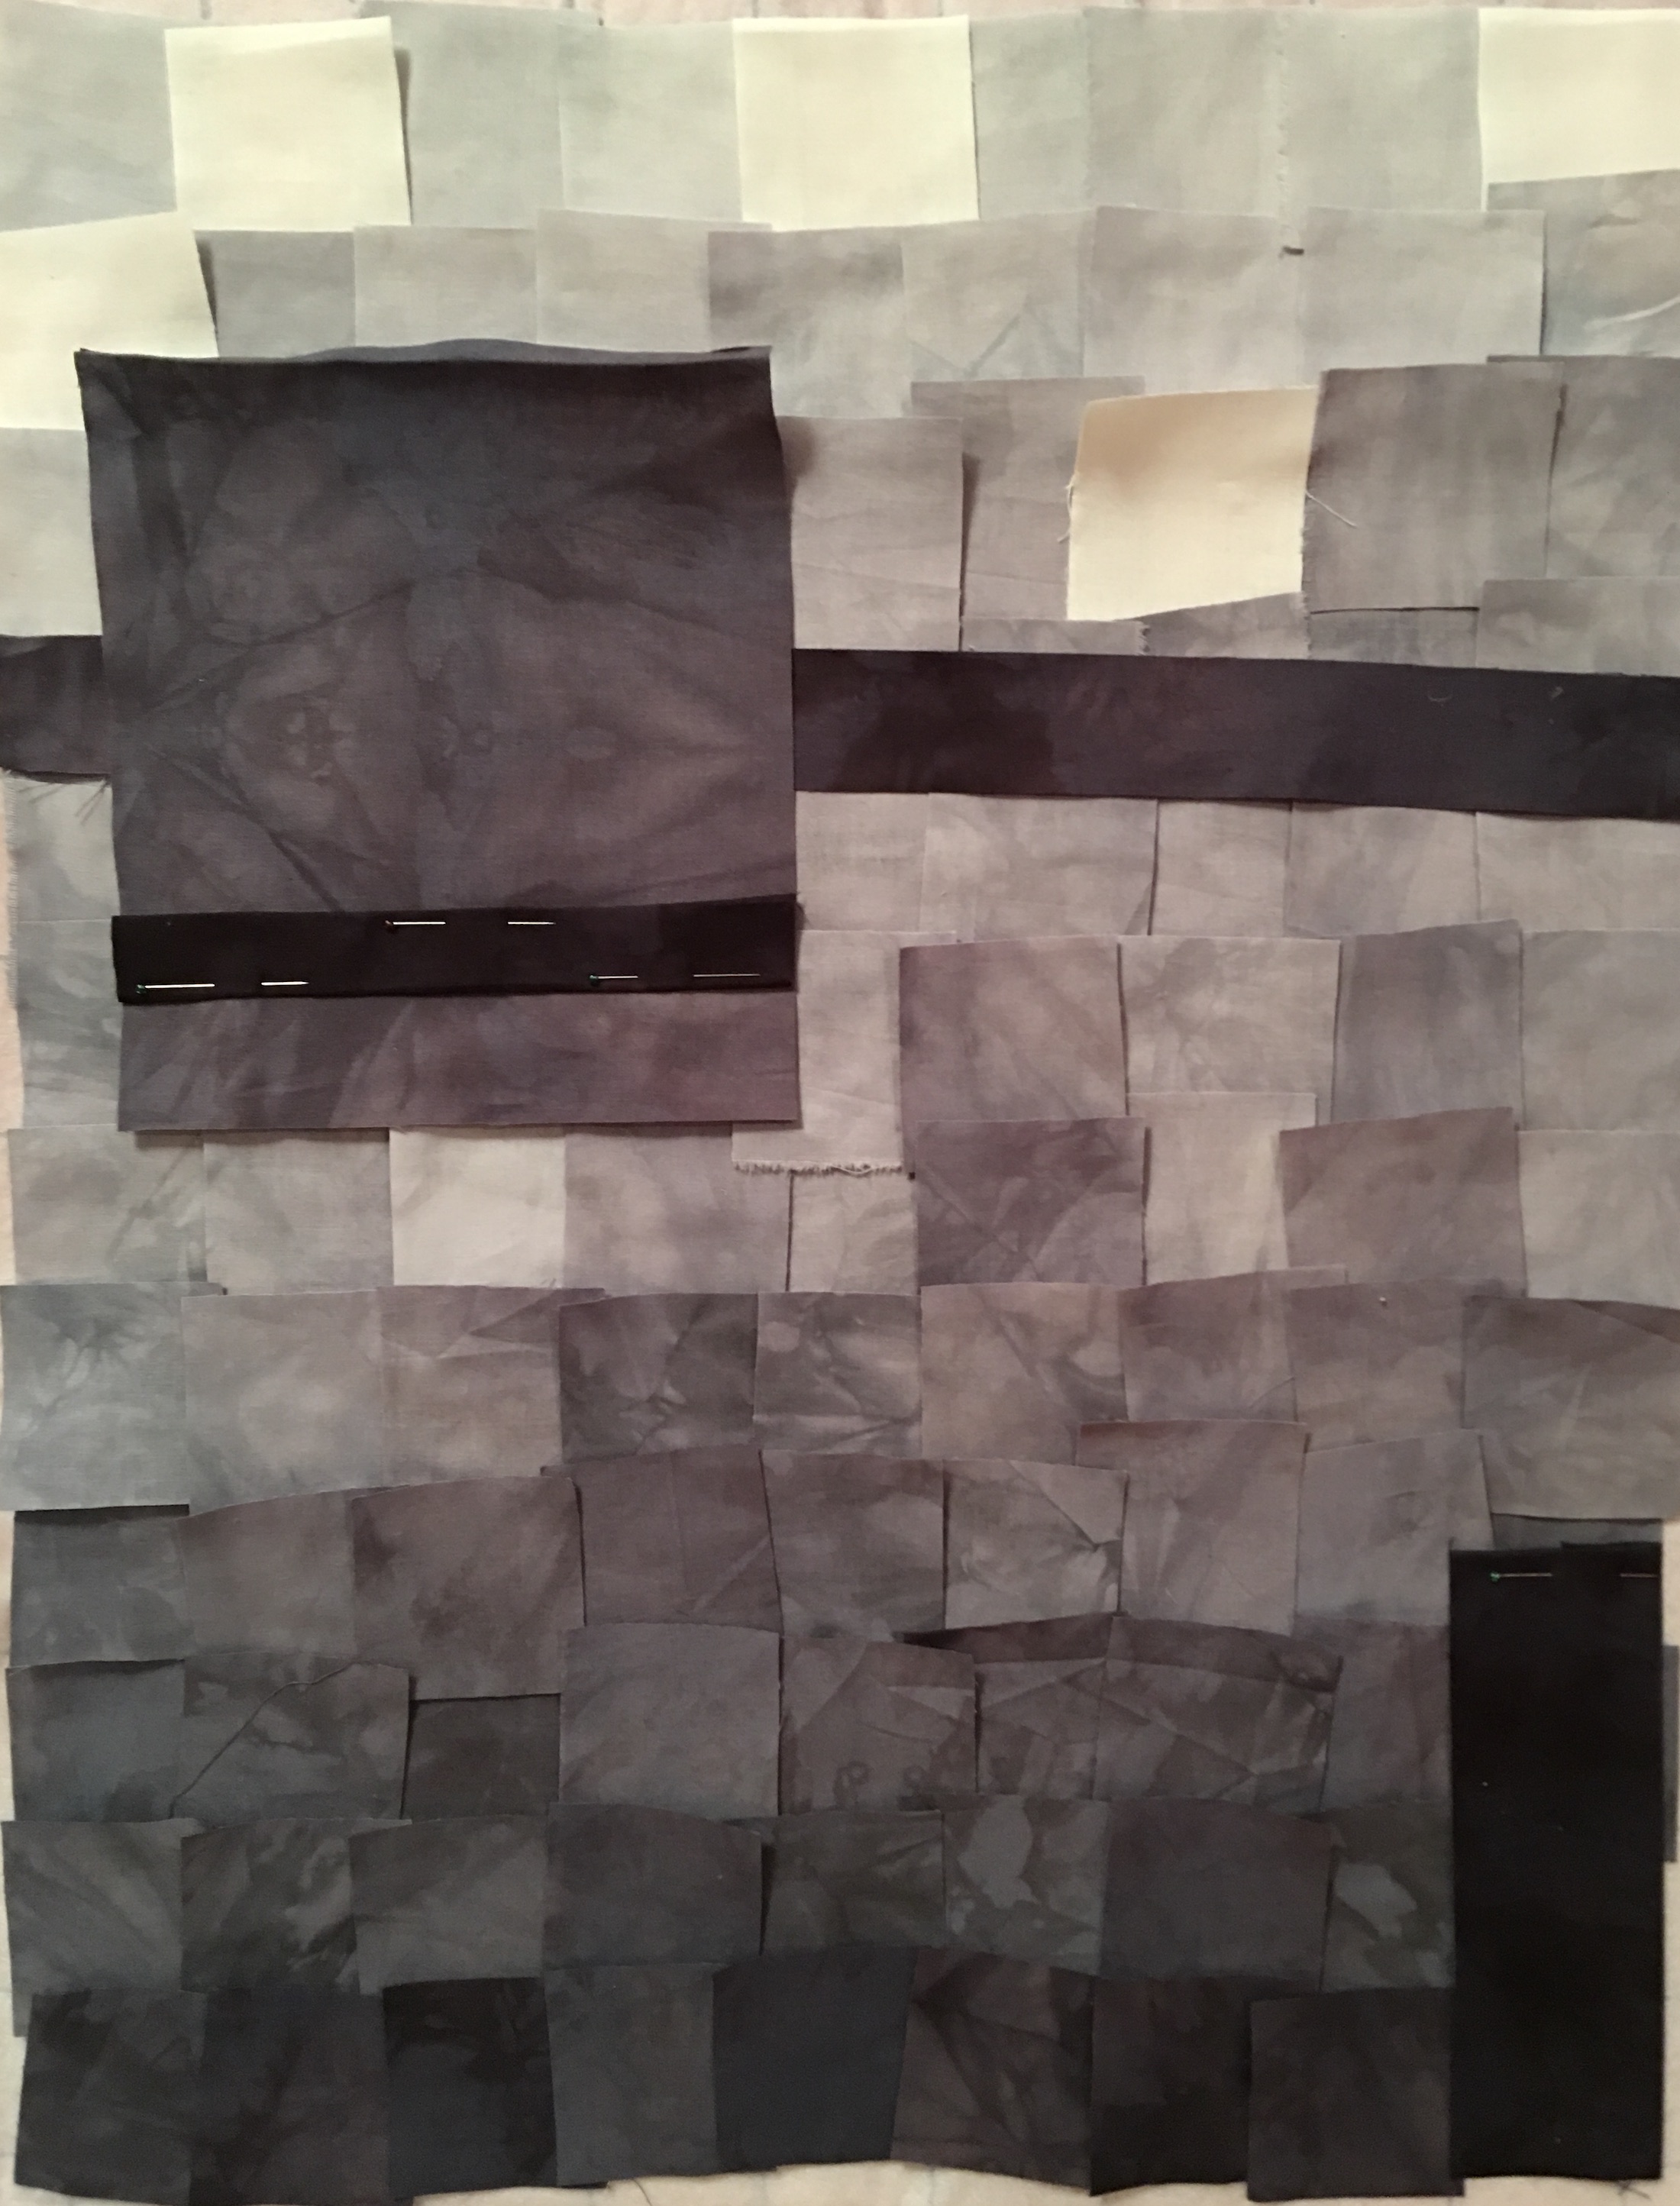
It helps that Elizabeth is a terrific instructor, very responsive and thorough, has a great eye, and gives excellent feedback. She writes extensive instructions with good explanations and examples of her own work to illustrate what she’s talking about. The first week we dove right in mixing all our various dyes for the next five weeks and did this – gradations of black (photograph below.) You’ll notice the mottled effect, which I think is so beautiful and striking. As we were working with black and since there’s no such thing, the blues, pinks and greens can be seen in different areas. The organic look to the fabric also appeals to my sense of design and so I was hooked. Totally fell in love. Completely. Dramatically. In. Love. Designing a piece using these gradations was next. I had a couple ideas and with Elizabeth’s encouragement settled on this one, which also happened to be the first idea I came up with.
I decided I would cut the fabric into 2.5″ squares, which meant that after they’d been sewn together they would be 2″ squares, gradating from light to dark, but a little unevenly to keep things interesting. This is how it looked positioned on my design wall.
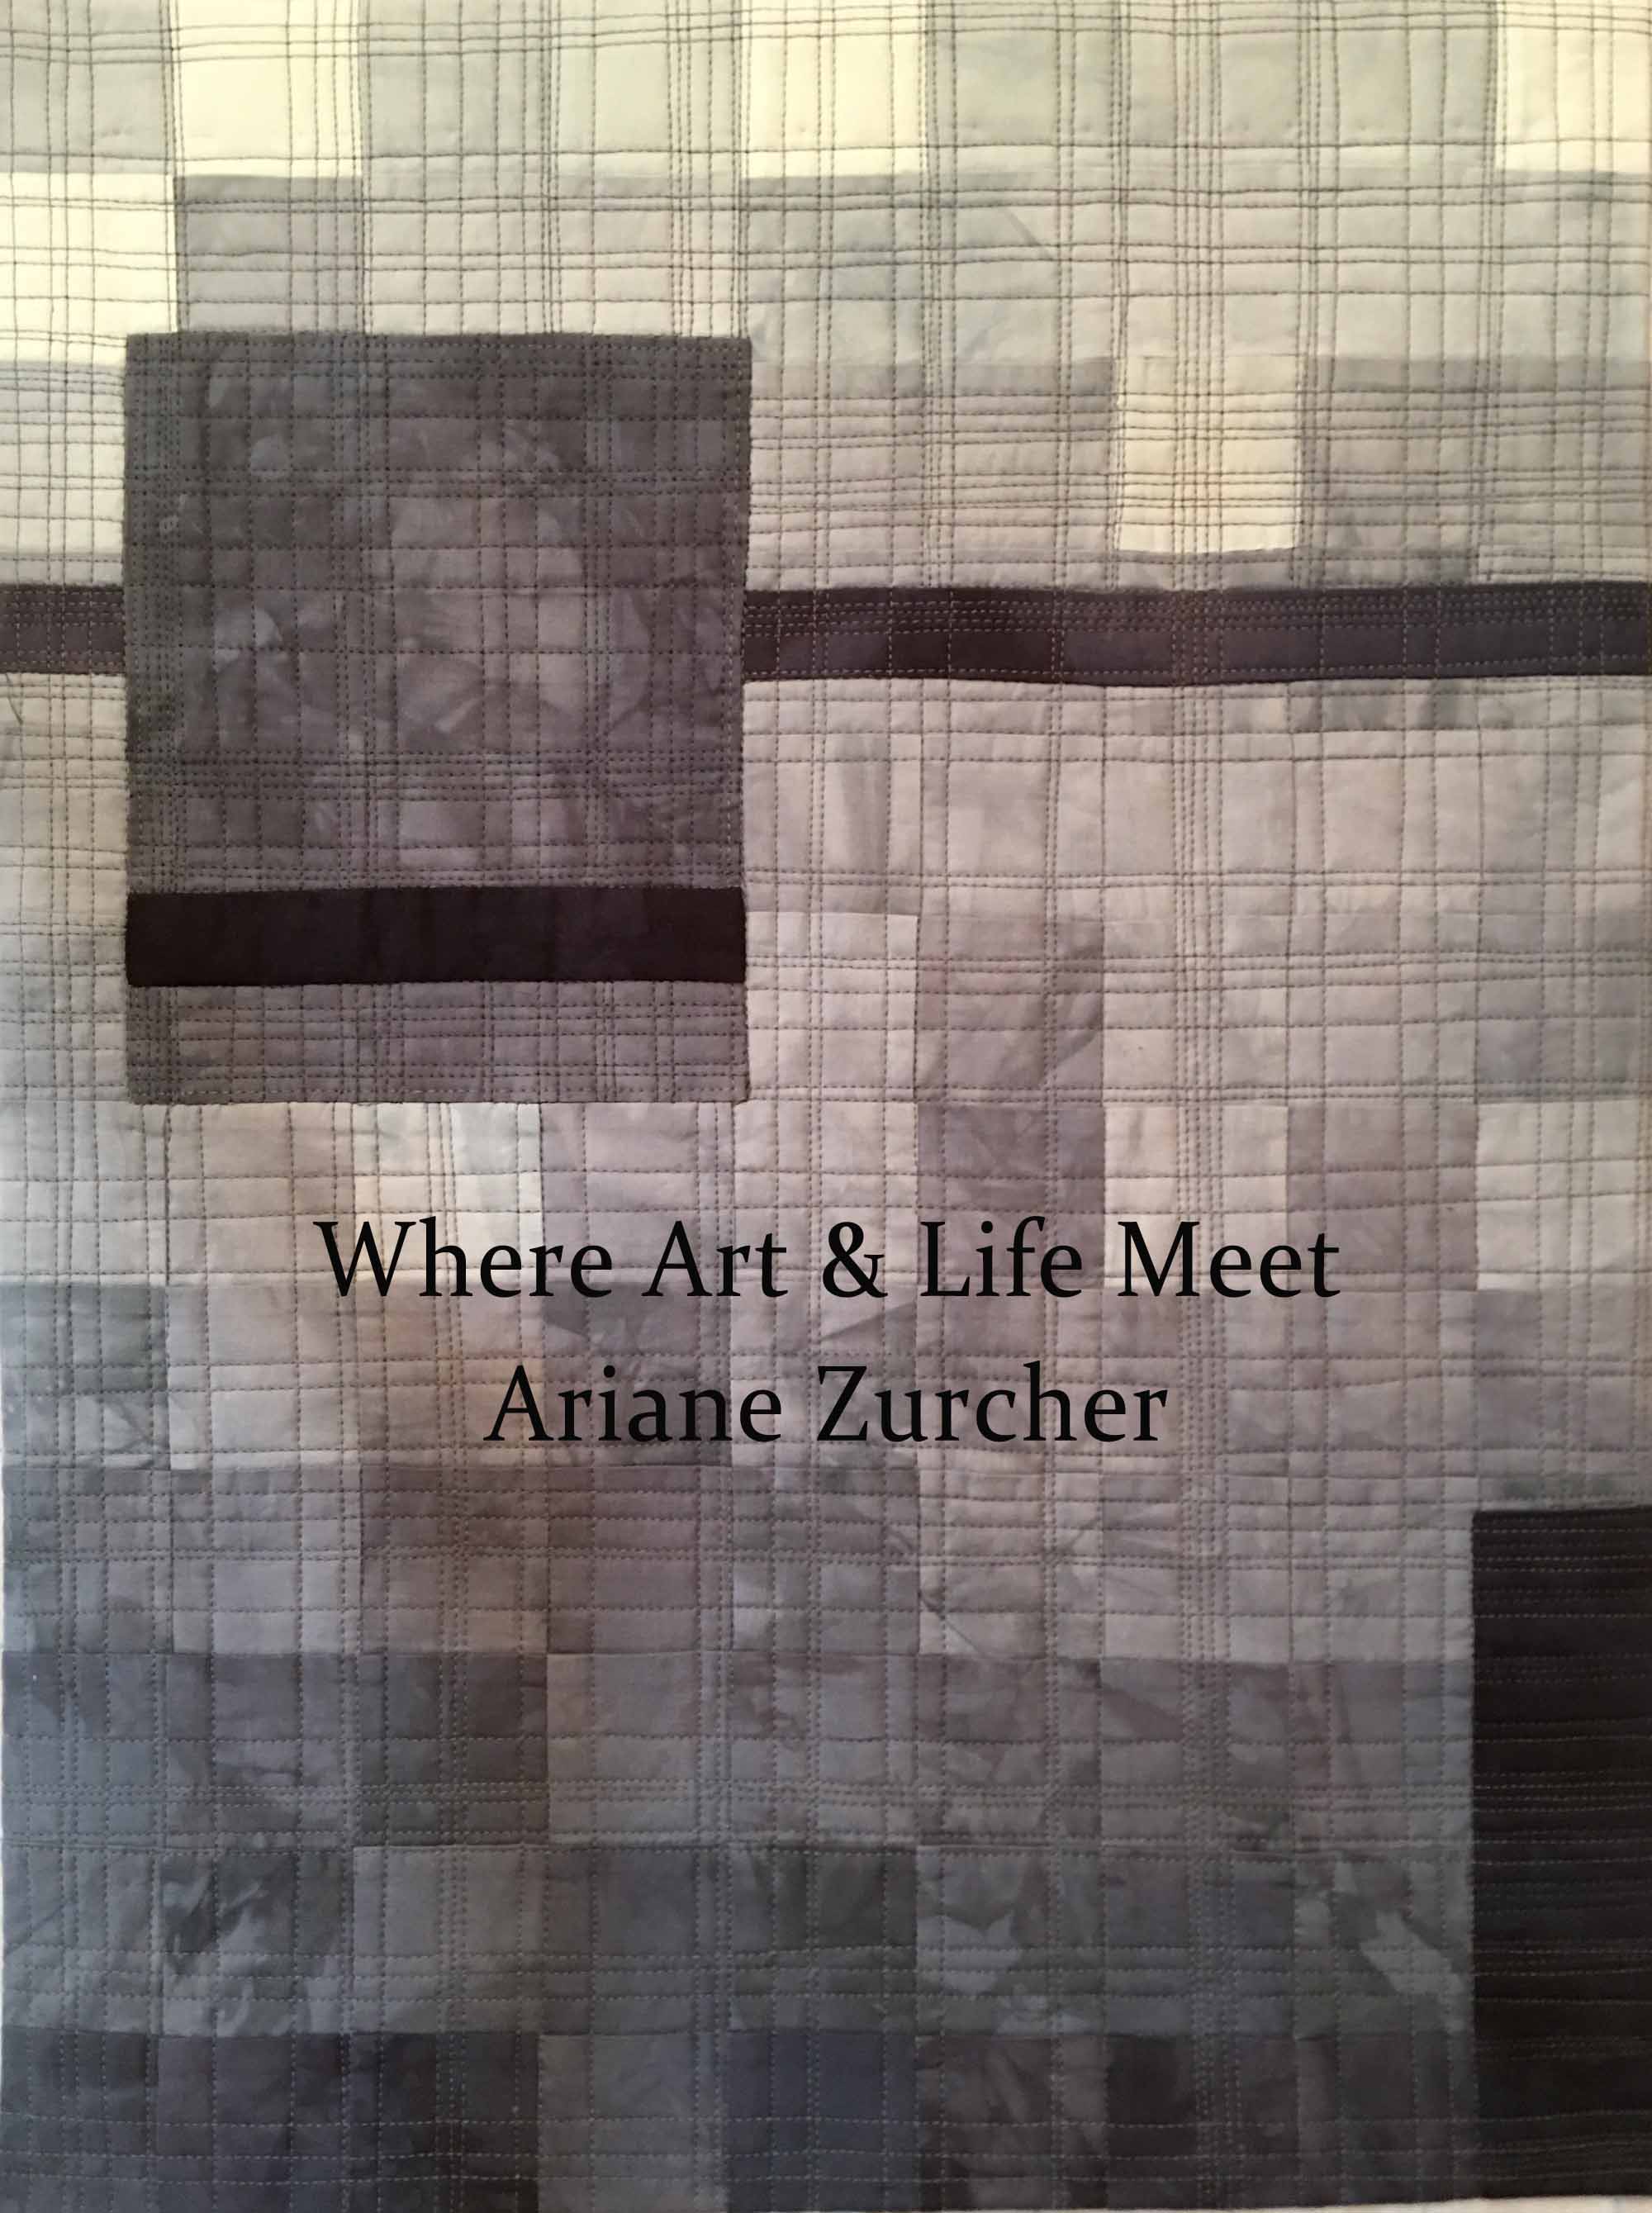
Emboldened by Elizabeth’s helpful suggestions, I made a few adjustments and began sewing all those squares together. That’s a whole lot of squares… After consulting Elizabeth (again), she suggested linear and horizontal stitching, I began quilting, but left the larger square alone as I wasn’t sure what to do with it. I wanted to do something, but couldn’t figure out what.
Back to Elizabeth who gave me more excellent feedback, suggesting a different color thread and syncopating the stitches so they didn’t meet with the other lines from the larger piece, and off I went to finish it. I decided against a binding, instead made a facing out of my lightest grey and backed it with a piece of red fabric I had. I made a label, again from one of the light greys and voila! This piece, entitled Living in the Grey, is 17″X 23.5″.
The thing about dyeing your own fabric is how utterly seductive it is. You can mix any color you want by tweaking the proportions of your primary colors. The mottled effect enhances the overall feel of the fabric, making it completely unique and like no other.
We are now in Week Two and are dyeing as many colors as we have the time, inclination and material for. Of course I went totally nuts with dyeing all the possibilities. I admit – I’ve now dyed every color including varying intensities and am eager to start experimenting with the subtler, more nuanced shades of each, but ran out of fabric, dye and other materials I need, so will have to wait until all the things I’ve ordered arrive. Here’s a sneak peak of a few of the colors I dyed over the weekend, (and stayed up until 3 or 4am, I can’t remember now, to do so!) getting ready for my next design using colors. Lots and lots of colors. You could even say… colors to dye for. Oh behave yourself!
I’m just dyeing to read your comments. Okay, okay, I’ll stop.
No, really.
I promise.
You have no idea how hard I’m restraining myself right now.
![Fear of Dyeing]()
by Ariane Zurcher | Oct 4, 2016 | Art, creative process, Free Motion Quilting |
My mother has always been a self proclaimed “student,” whether that’s a student of life or of a specific topic, she has always been curious and an avid learner, and as a result, she is a really interesting person to talk to. I, too, am a constant “student.” What this means is that I am often a beginner, which means I’m learning, practicing, making mistakes, perfecting, learning more. When I was younger I wanted to be an expert at something, anything, but as the years wore on I have learned to love the “beginner’s mind,” which can be applied to just about anything. (There are some things I do know quite a bit about and as a result I have strong opinions about those topics, but I’m talking about learning and how it applies to the creative process.) Having a beginner’s mind means being curious, open and filled with wonder. This post is about creating, and in order to create I need to be open to new things.
Last January I took a class, an actual class, not a virtual one, at the soon to be closed City Quilter. It was a BOM (Block of the month) class, and though there were not 12 blocks, but instead six, I figured it would be a good way to learn the process of taking a quilt from start to finish, and it was! I learned a different appliqué technique, I had the support of other classmates, I enjoyed going in once a month to see what everyone else was doing. It was wonderful. It was my first BIG project and I’ve written about it at length in previous posts ‘here’. Each block was hand appliquéd (I’m adding the link to the Craftsy class I took, that helped me enormously, with the hand appliqué technique) and I applied all the stitches I learned from Sue Spargo’s Craftsy class. I’ve talked about the joy of Craftsy in other posts ‘here‘ so I won’t go into all that again.
Once the quilt top was put together, I had to learn how to quilt the whole thing, which took me to this class and this one and this one. I am now in the final stretch and I continue to learn, make mistakes and try again and then learn some more. Each time I don’t know how to do something I google it and look for websites that focus on what I want to do. For Free motion quilting, Lori Kennedy’s The Inbox Jaunt blog is absolutely fantastic with free tutorials on specific motifs. For stitch inspiration there’s of course Sue Spargo’s fantastic website, store and blog, but there are also some great blogs out there that concentrate on stitching, such as Sharon Boggon’s Pintangle where she features a TAST (take a stitch Tuesday) and Mary Corbet’s NeedlenThread, which is more traditional embroidery and oh my goodness is her work beautiful, then there’s Eleanor Pigman’s blog, she’s a bead artist and her work is absolutely incredible! A couple other, not-to-be-missed-blogs are: Kelly Cline Quilting, a blog filled with amazing work, both stitching AND quilting and Trish Burr, the queen of embroidered birds and flowers, though all her work is absolutely incredible and beautiful.
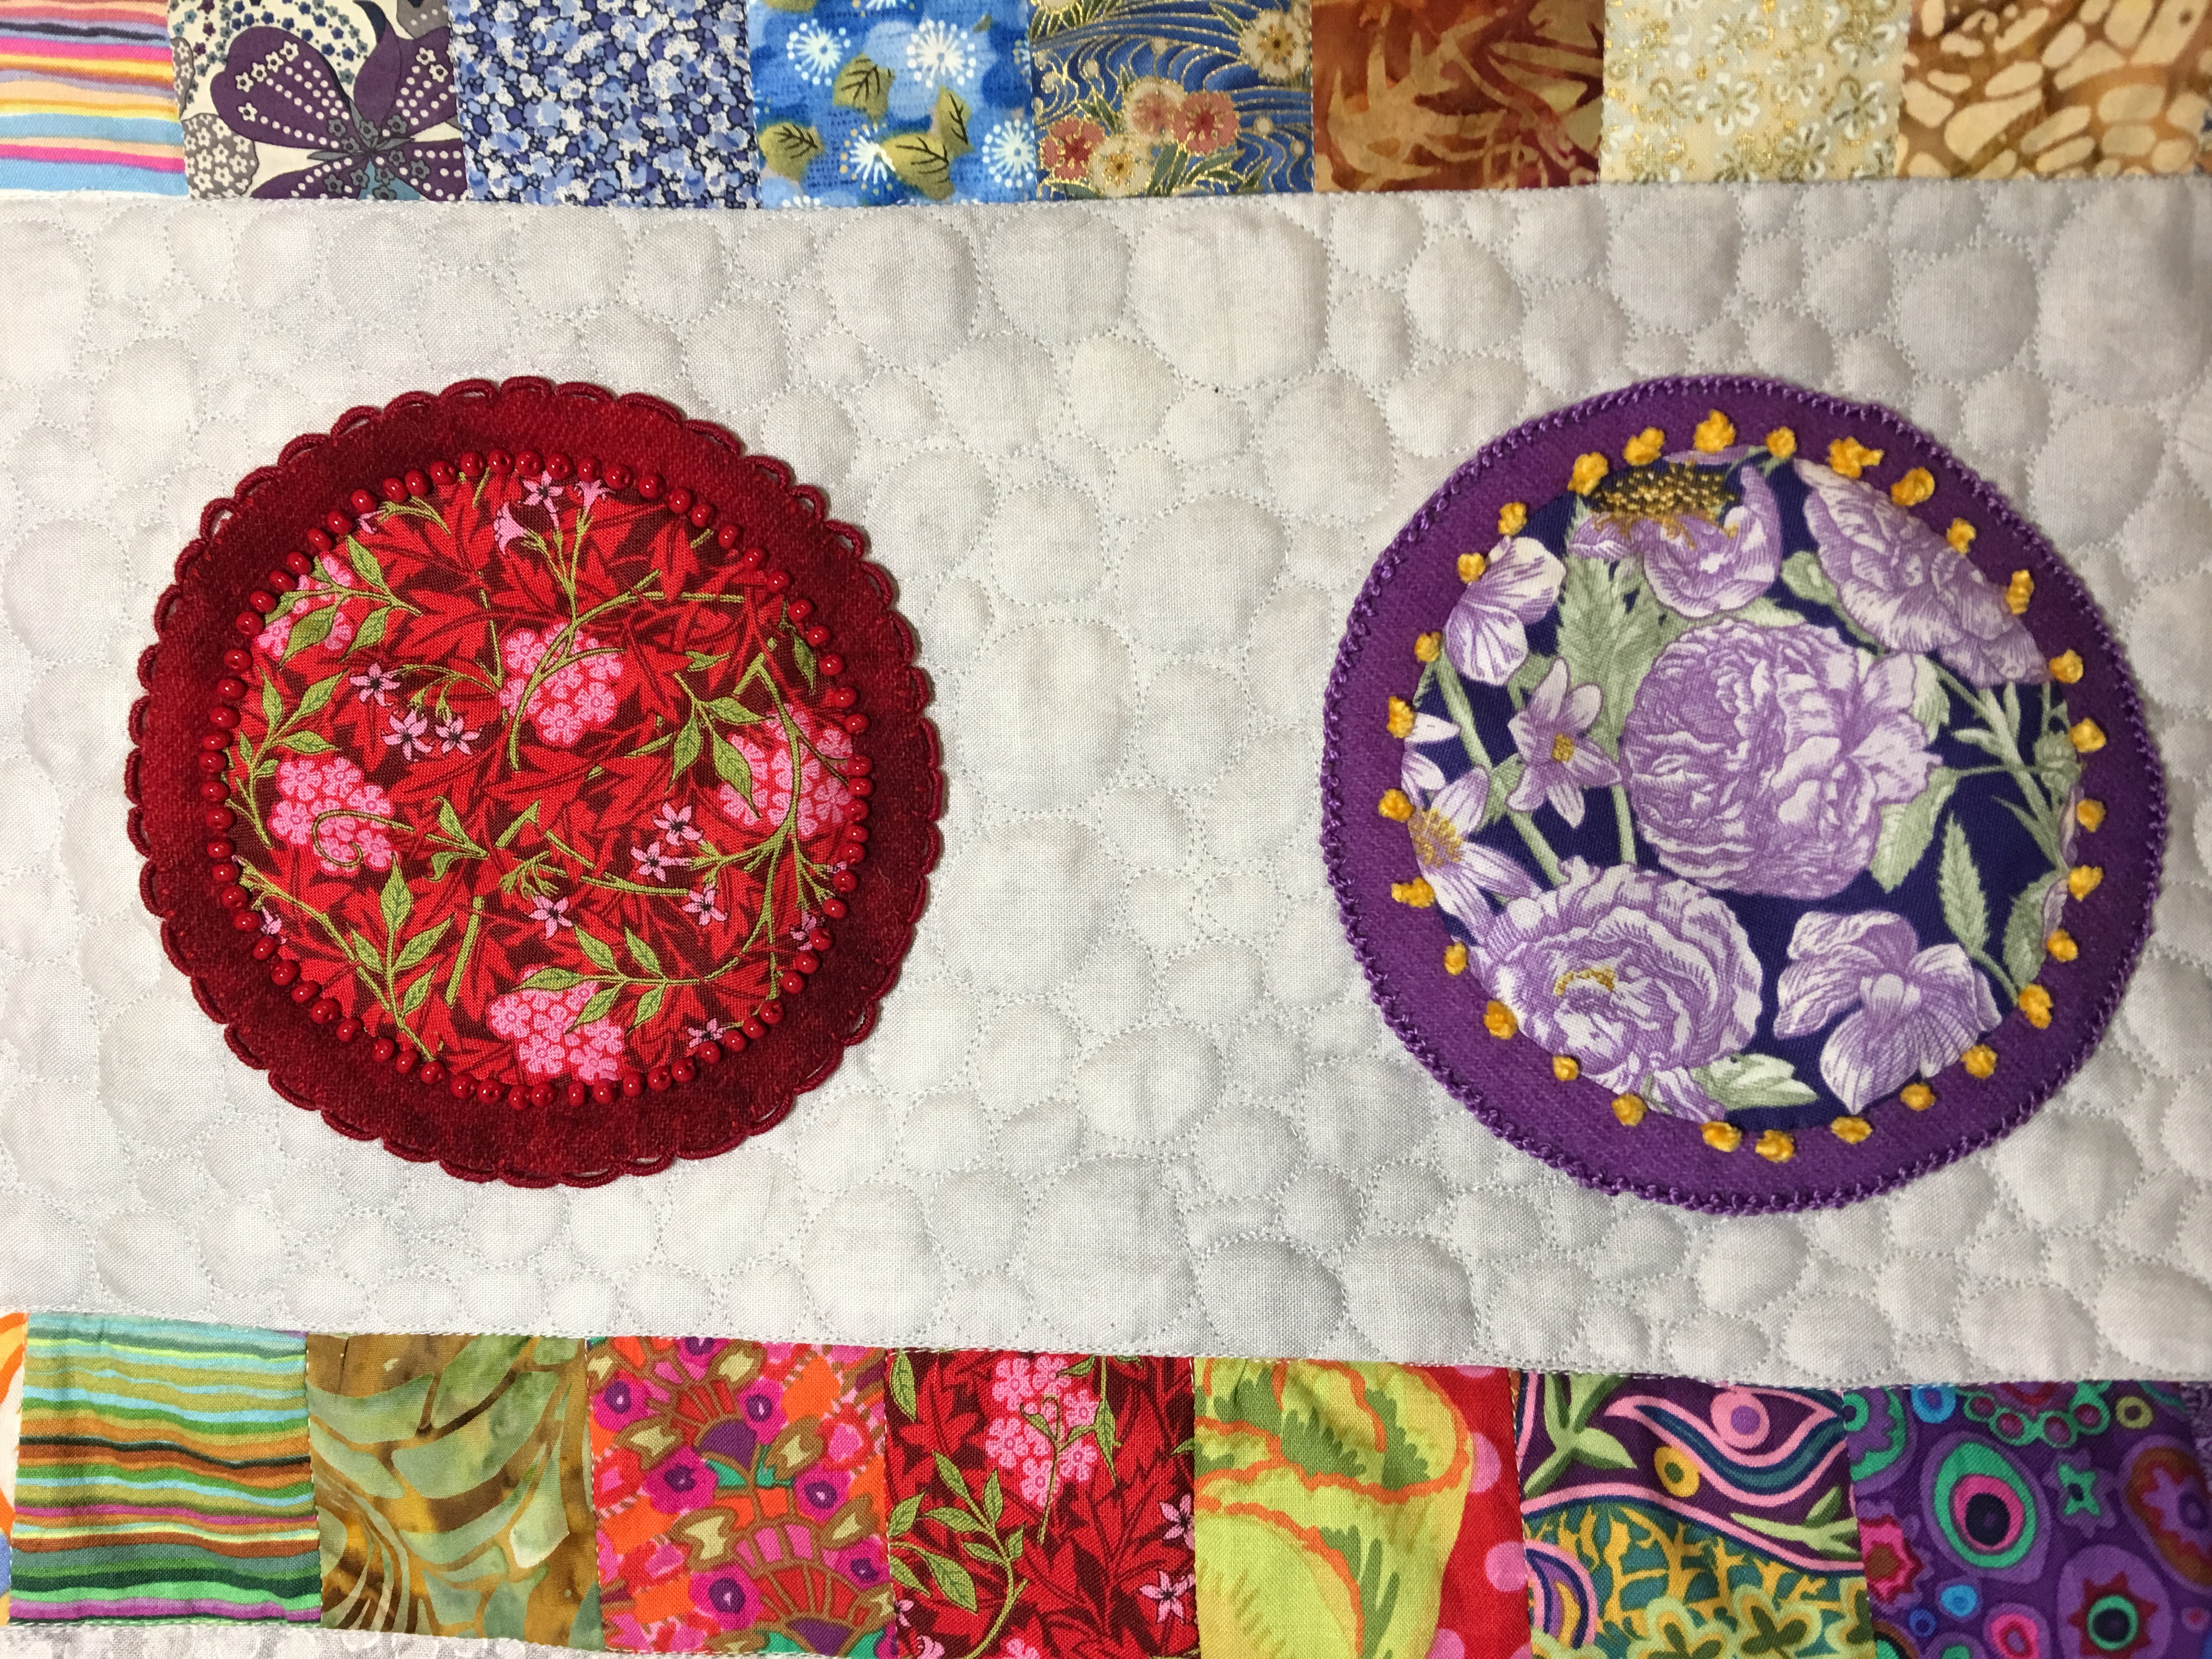
There is a whole world of knowledge, expertise, creativity and art out there and I love finding, learning, applying that knowledge and then creating my own designs. Interestingly I’m drawn to similar motifs over and over again, no matter what the medium is. Below is my 18 kt Gold, Tourmaline and Paraiba Bracelet from my Lotus Collection. It’s no surprise one of my favorite free motion quilting motifs is Pebbles!
Ariane Zurcher Jewelry – B26 Lotus Collection – 18 Kt Brushed Yellow Gold, 25.08 ct Pink Topaz, 2.69 ct Pink Sapphire, 12 ct Tourmaline, 2.96 ct Aquamarine, 17.21 ct Mandarin Garnet, 4.03 ct African Paraiba
Free motion quilting Pebbles on my Queen-Sized Quilt Top
Here’s to autumn and here’s to the joy of creating and learning new things!
![Fear of Dyeing]()
by Ariane Zurcher | Feb 11, 2015 | Art, crafts |
Last May we pulled our daughter, Emma from school and began homeschooling or non-schooling or… I’ve written more about all of this on the other blog, the one I share with my daughter: Emma’s Hope Book. One of the many benefits of homeschooling, aside from the huge relief and plummeting stress level, is that we get to explore, together and separately. The beauty in exploring is that the goal is to be curious and discover. There’s no right or wrong and there’s tremendous comfort in that. The entire process of learning becomes one of joy and experimentation without the burden or stress of feeling one should know something before having learned it.
So it was, some eight months ago when I sat down with Emma and asked her what she was interested in learning about. She typed that she wanted to learn German and take a ceramics class among a number of other things. So we bought Rosetta Stone for German and Emma began taking pottery lessons at a nearby ceramics studio. Her teacher, seeing my obvious excitement and interest, asked if I might like to make some things too. I eagerly said, “Yes, please!”
Learning anything new is full of experimenting, exploring, tweaking, practicing and refining techniques learned. To dive into something you’ve never done before can be daunting, but only if you are comparing your work to another’s. Particularly crushing is if you expect you will be able to produce something that is of similar expertise as someone who has been studying and refining their technique for decades. The exhilaration comes with the process of learning, practicing and improving. But so often we are not taught that this process is wonderful at all. In fact, we are taught that it is hard work and the end product, only produced after years of practice and toil, is all that is of value. Everything else pales in comparison.
I disagree.
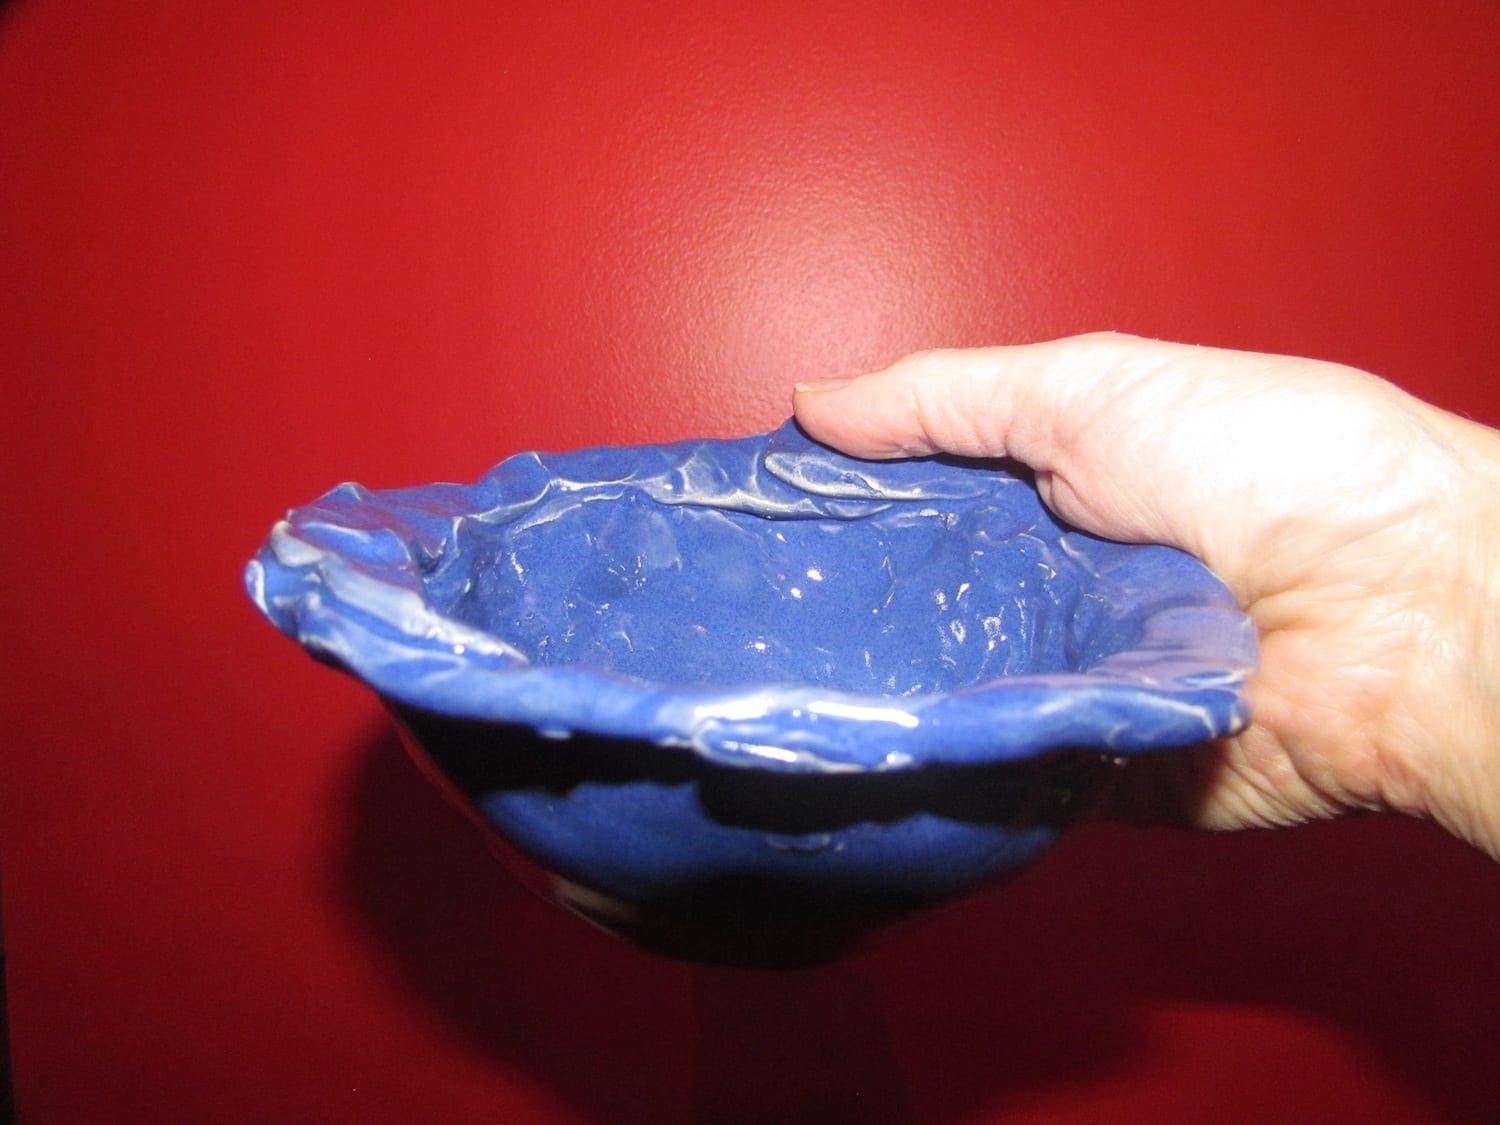
This cereal bowl that Emma made for me is perfect for walking while eating. It has an indentation that perfectly fits one’s thumb while cupping the bowl in your palm. Why hasn’t anyone designed a bowl like this? I’ve never seen one before, but oh, how I love it. This is my new, favorite bowl.
My favorite cereal bowl made for me by Emma.
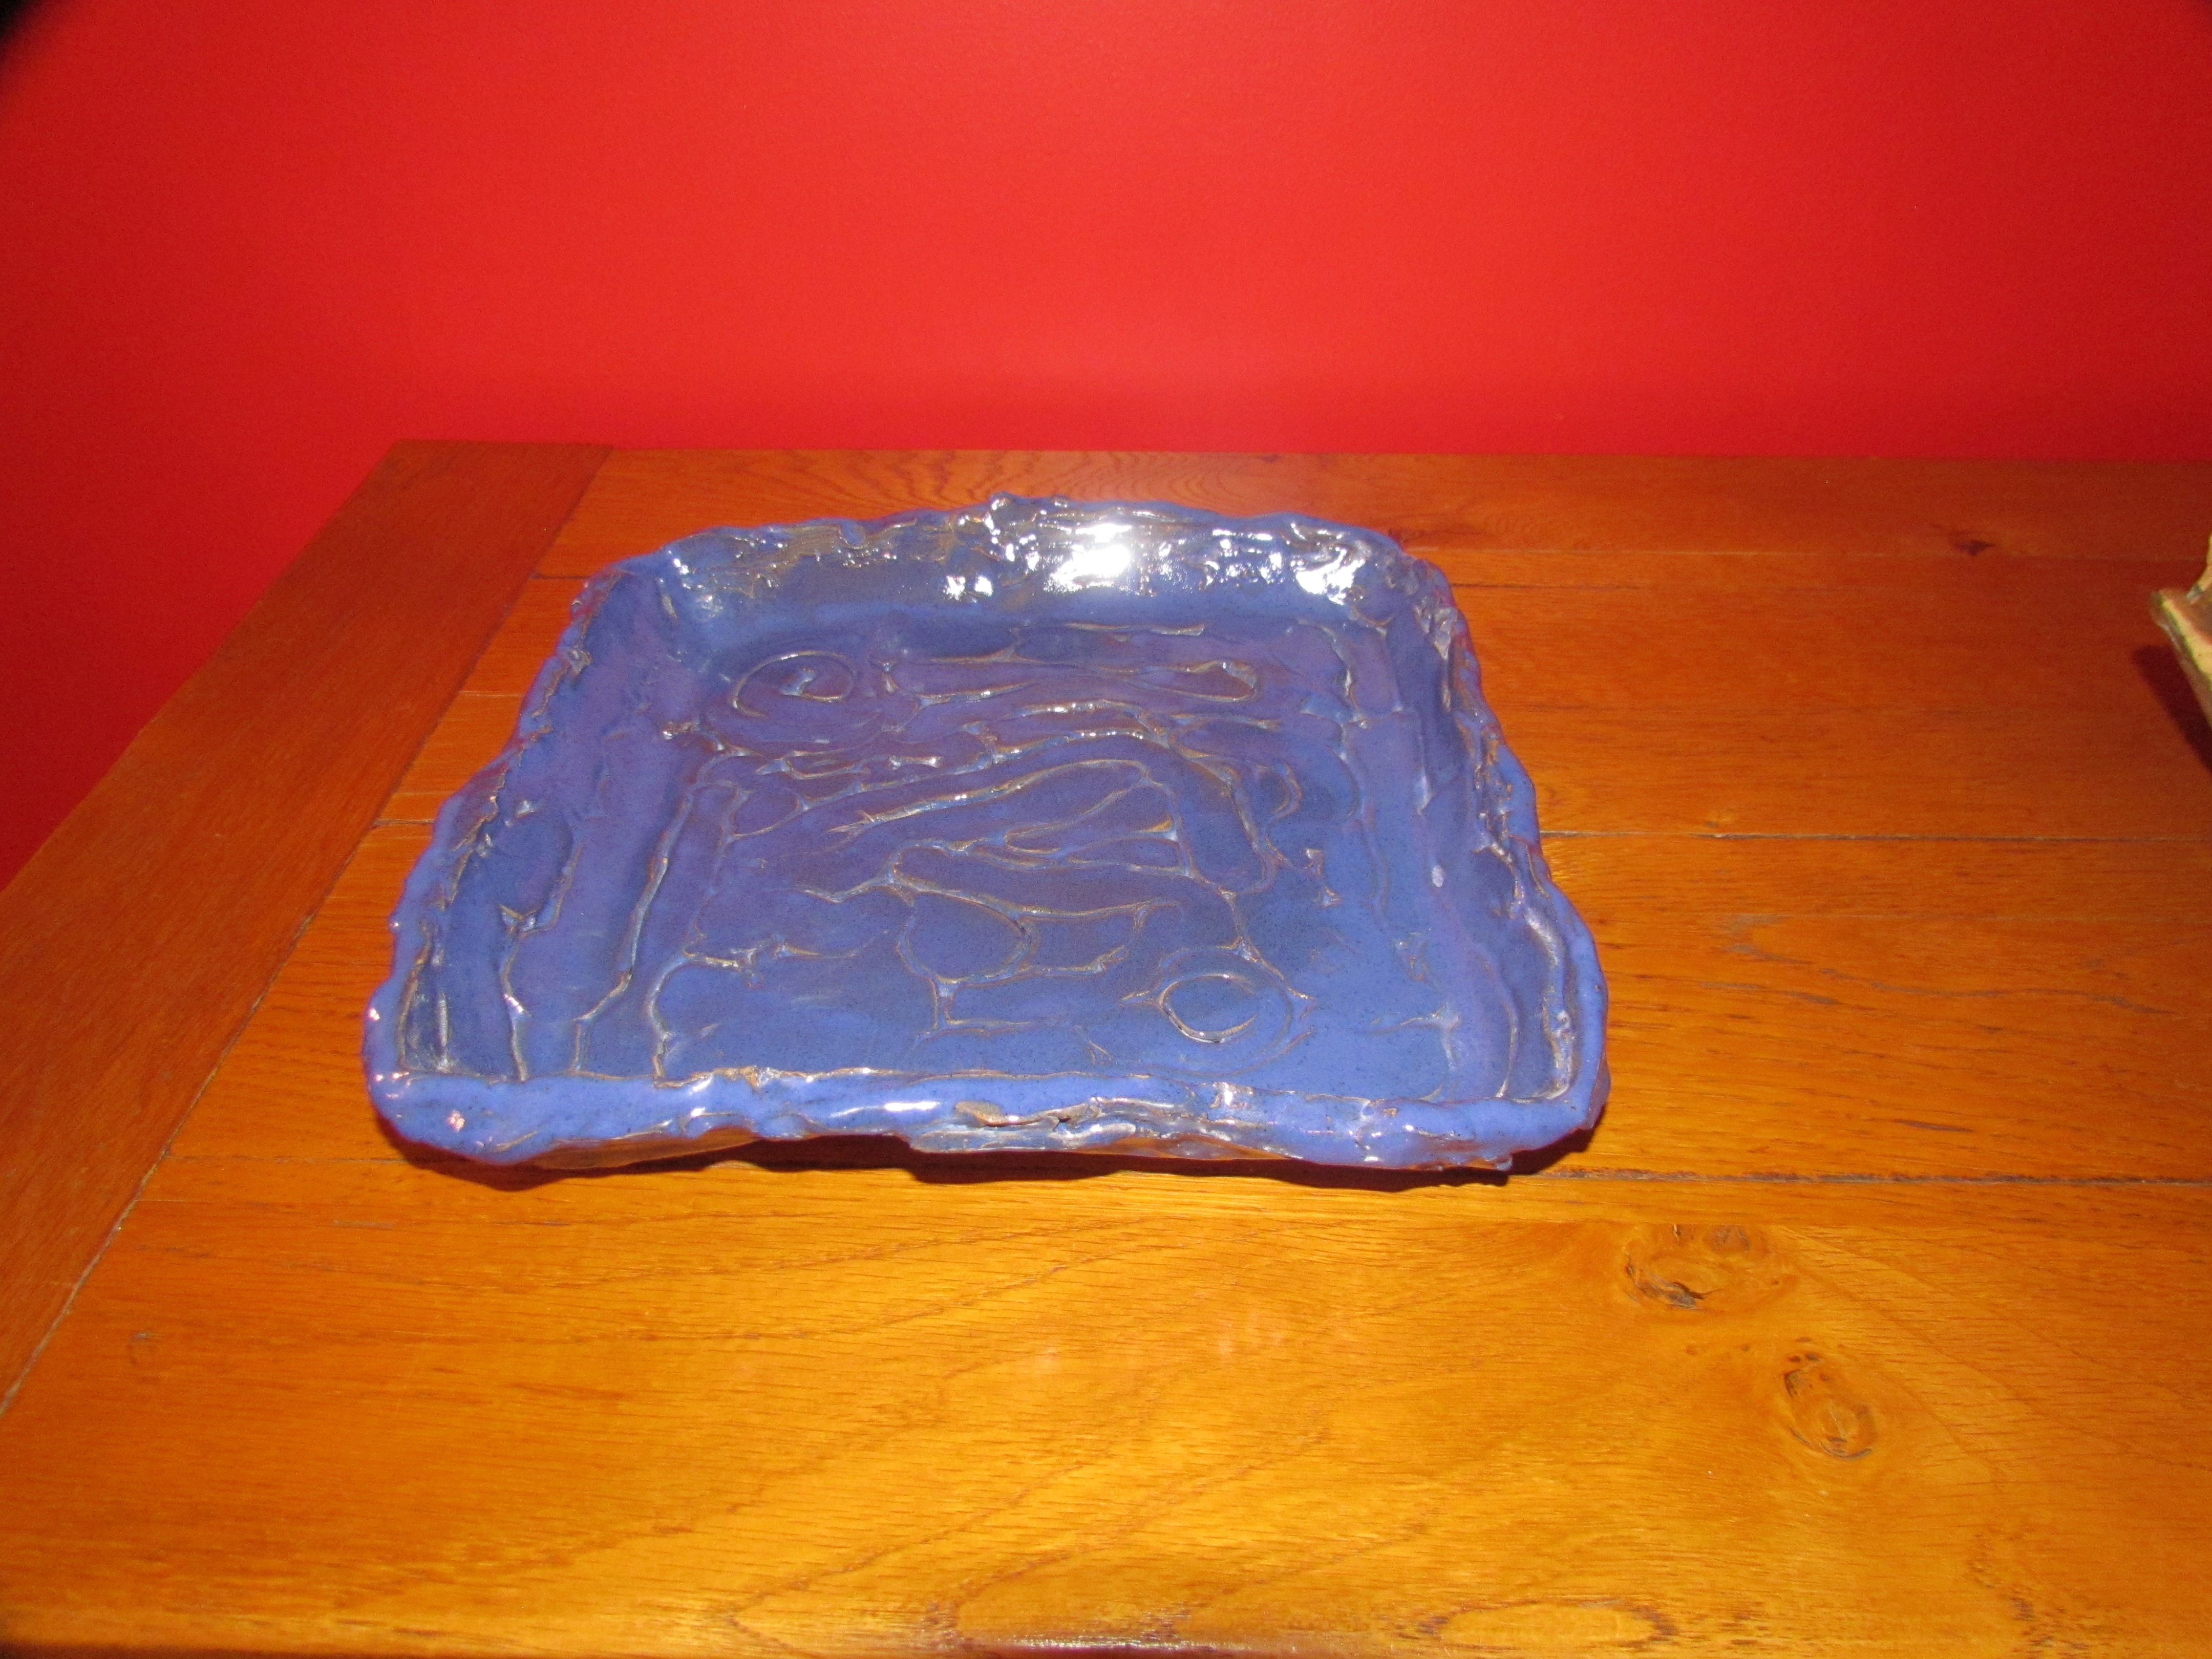
The platter below? “It matches” was what Emma typed in reply to my exclamation that I thought it perfect for serving cheese and crackers or maybe a brioche en croute with fresh baguette.
Emma’s Platter
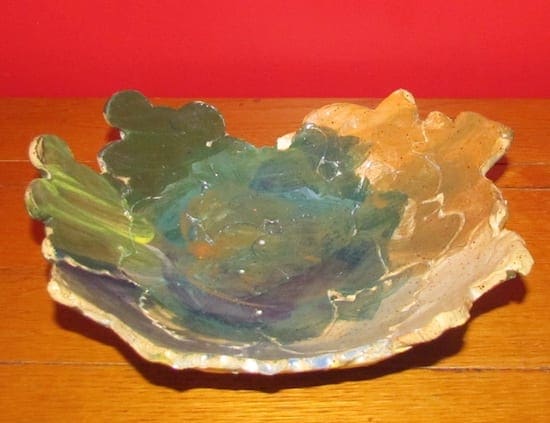
This bowl that Emma made used cookie cutters and then she painted after joining all the shapes.
An Autumnal Bowl
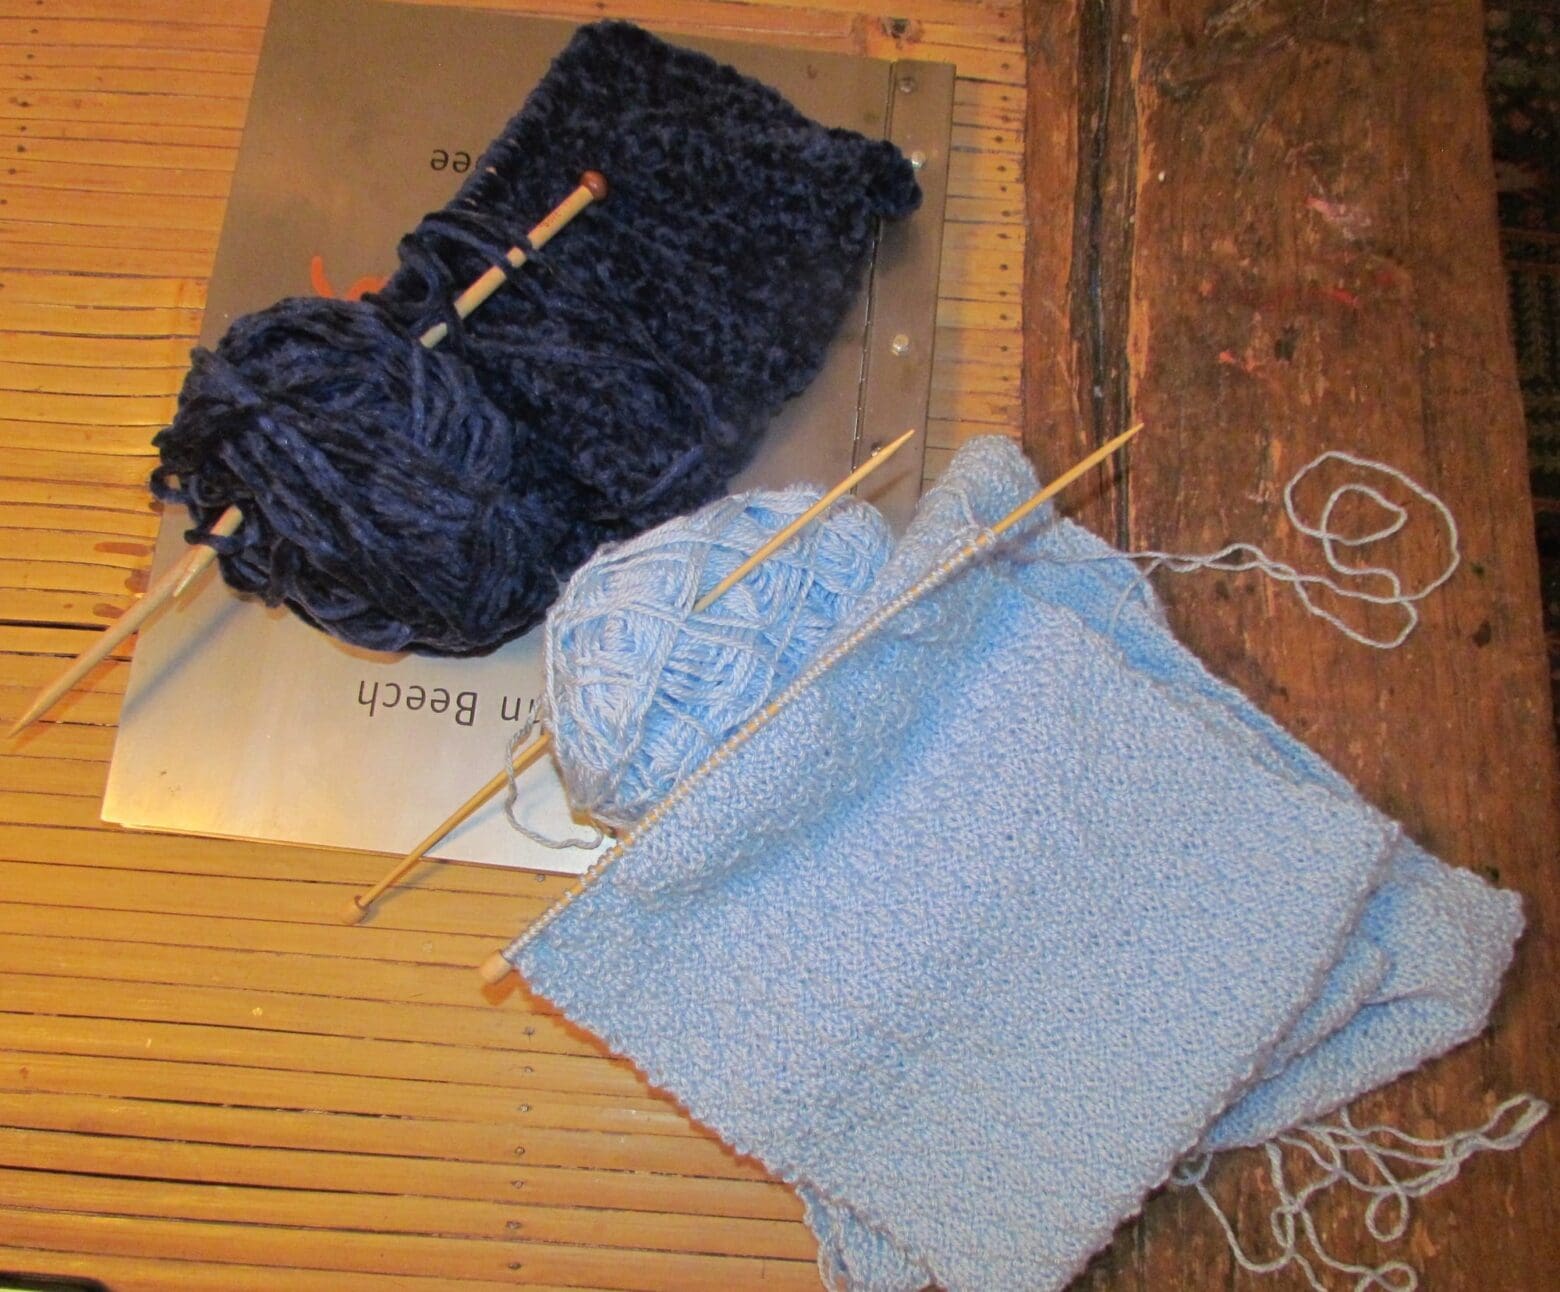
A few months ago, or maybe it was years, (this is an aspect of getting older, the years feel like months, yet another example of that saying people tell you when you first become a parent – the days are long, the years are short) I asked Emma if she had any interest in learning to knit. She said she did, and as I love knitting (I wrote about some of that “here“) and used to design knitwear, I thought we’d start with something simple, like a scarf. Emma chose a light blue yarn. After a couple of tries, she lost interest and so I began making a long scarf using an alternating knit 2, purl 2 pattern. I rarely use knitting patterns or cooking recipes for that matter, but that’s another post. Anyway the scarf began like this.
Light blue scarf in alternating Knit 2, Purl 2 pattern with the beginning of a navy blue chenille infinity scarf in the background.
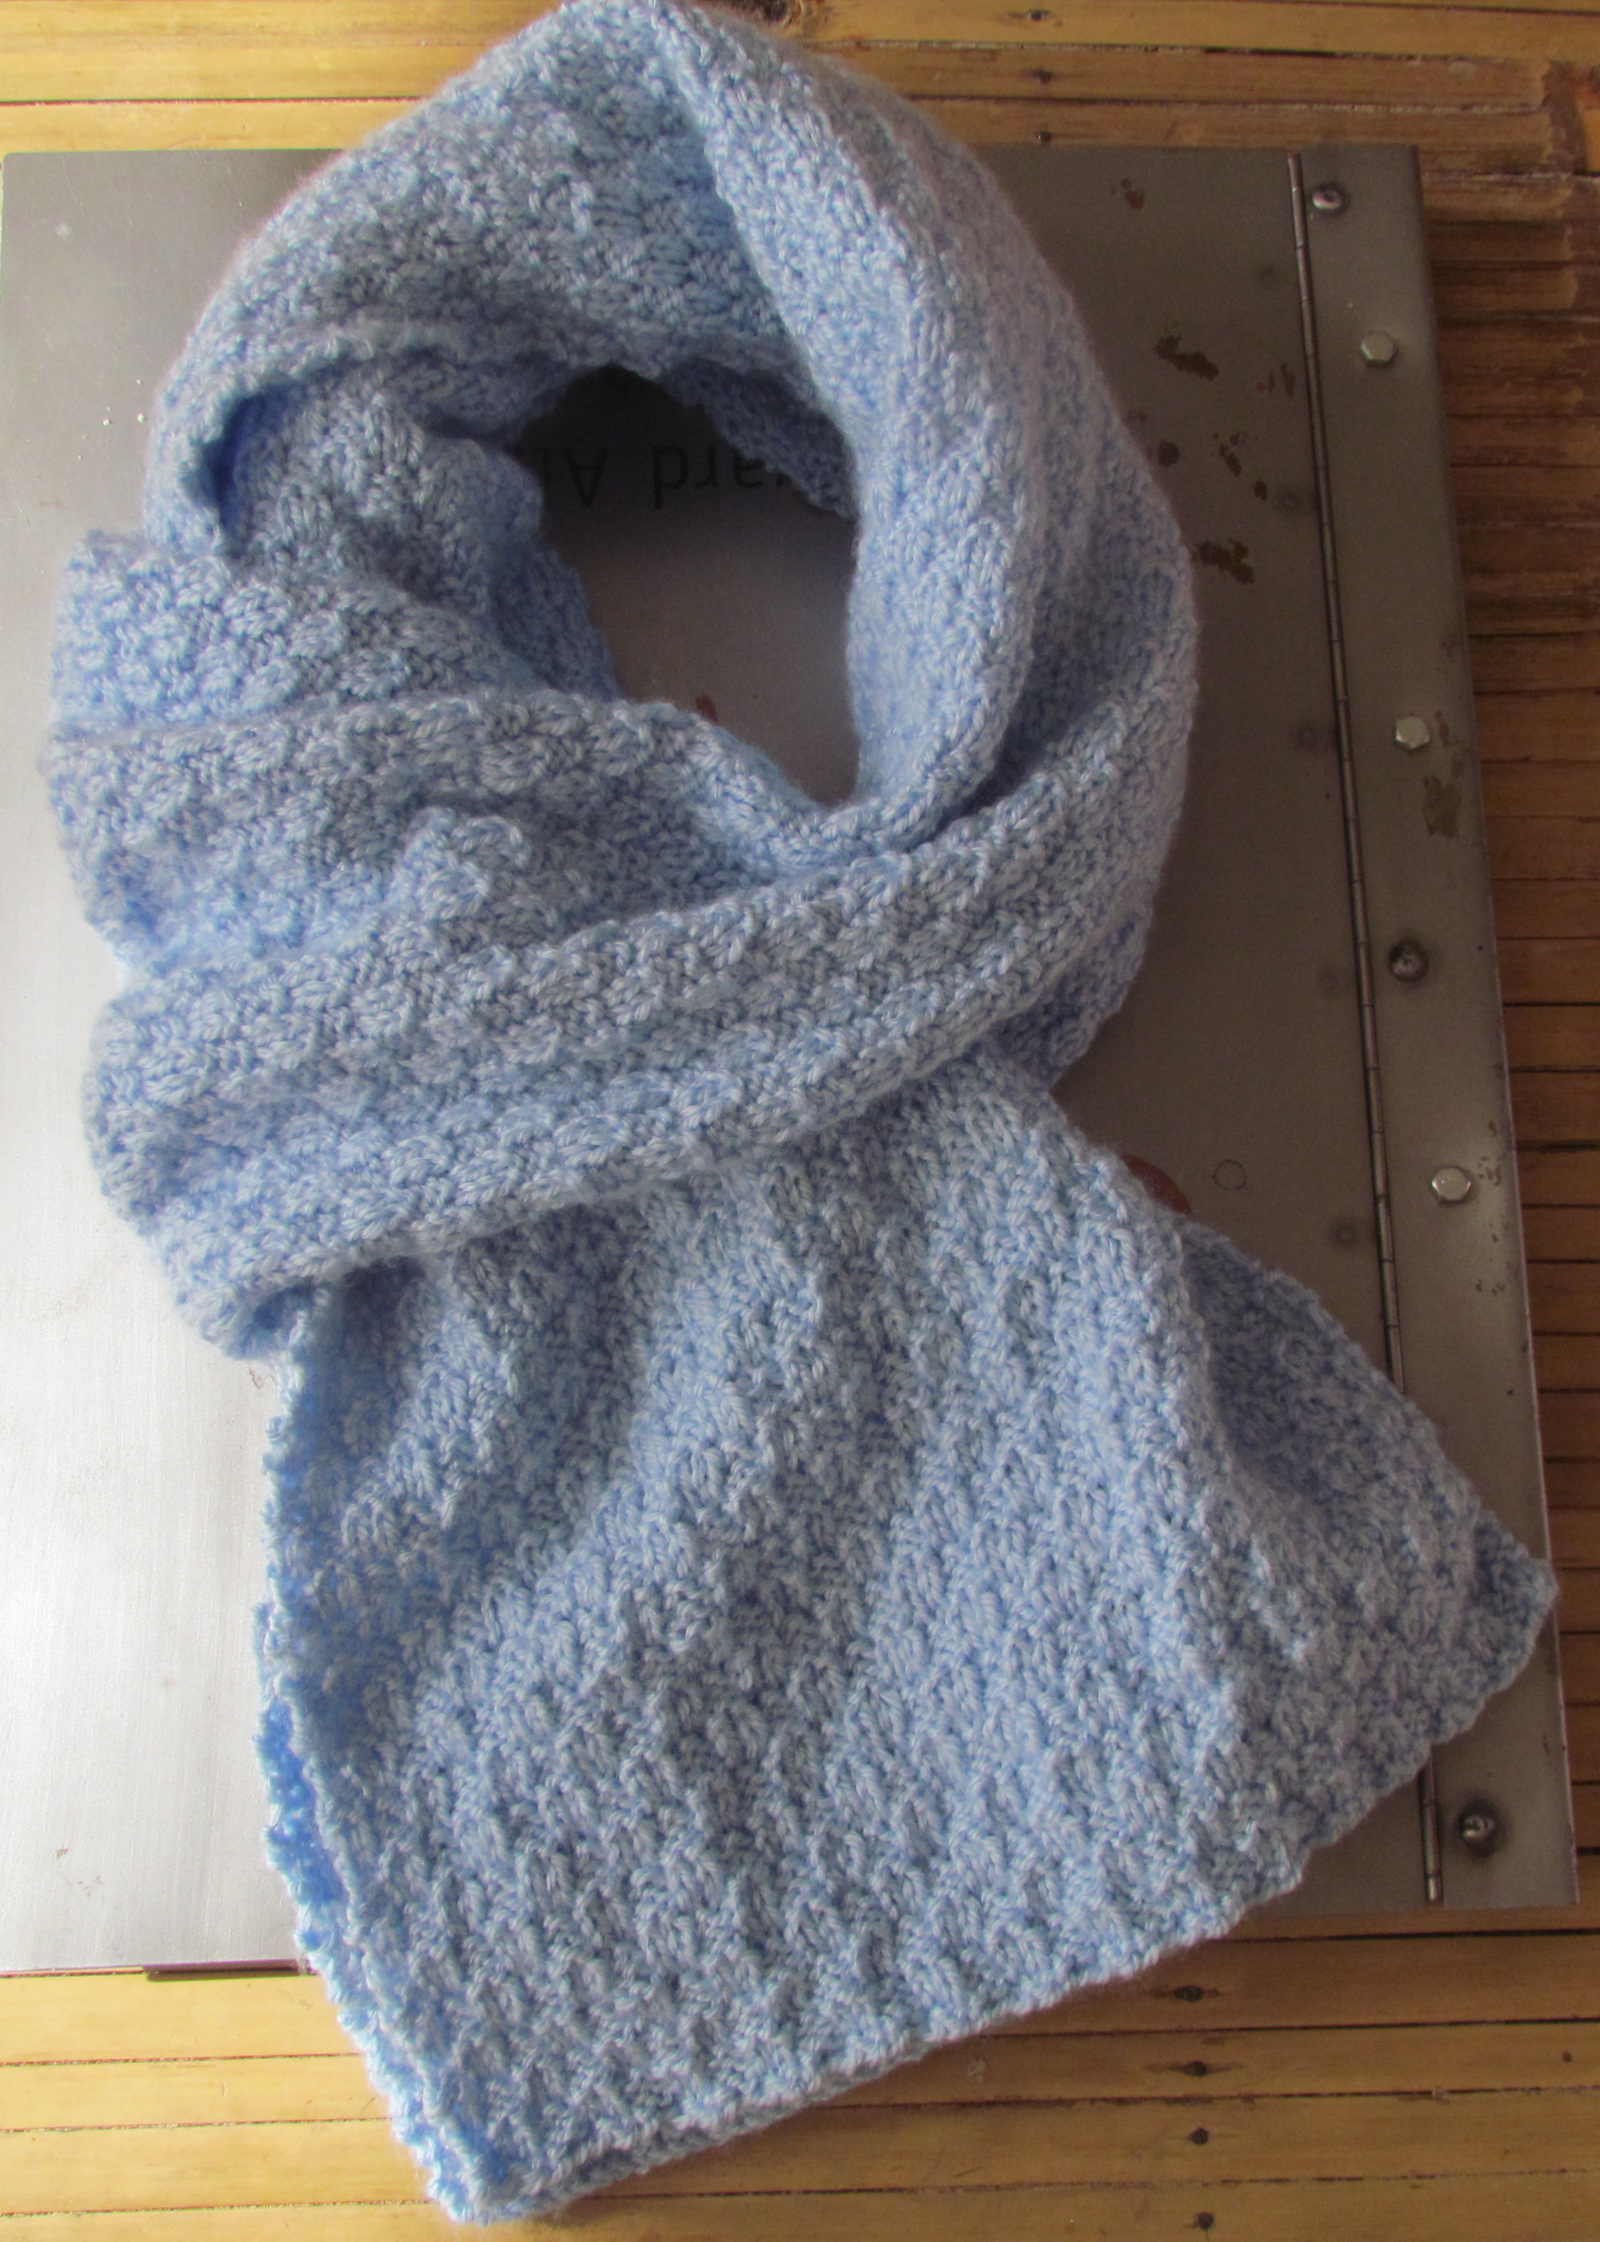
The finished scarf ended up measuring 87 inches in length and 11 inches wide. What you don’t see is the other side where I changed my mind after an inch or so and decided to make the pattern more elongated.
The Finished Scarf
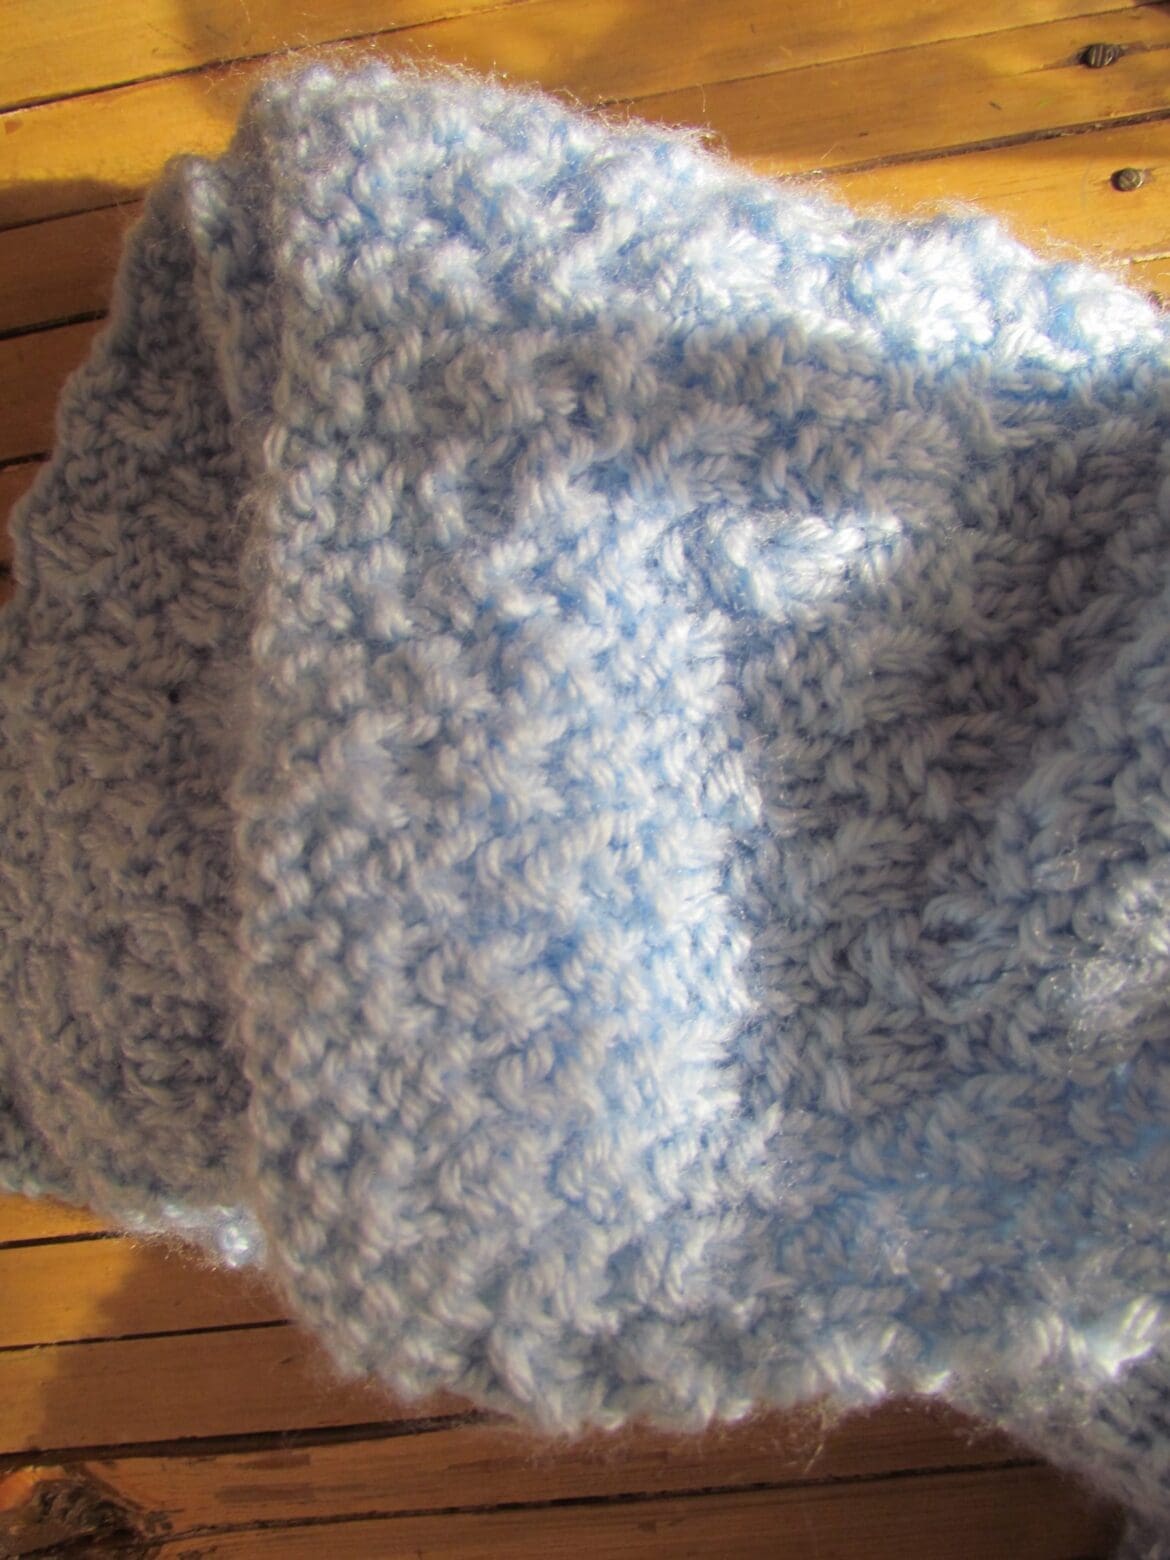
This is the edge where I began knitting and decided to change the stitch. Three times. The final stitch pattern is a Knit 2, Purl 2 for three rows and then Purl 2, Knit 2 for 3 rows and repeating for the remainder of the scarf.
The I-Changed-My-Mind-Edge
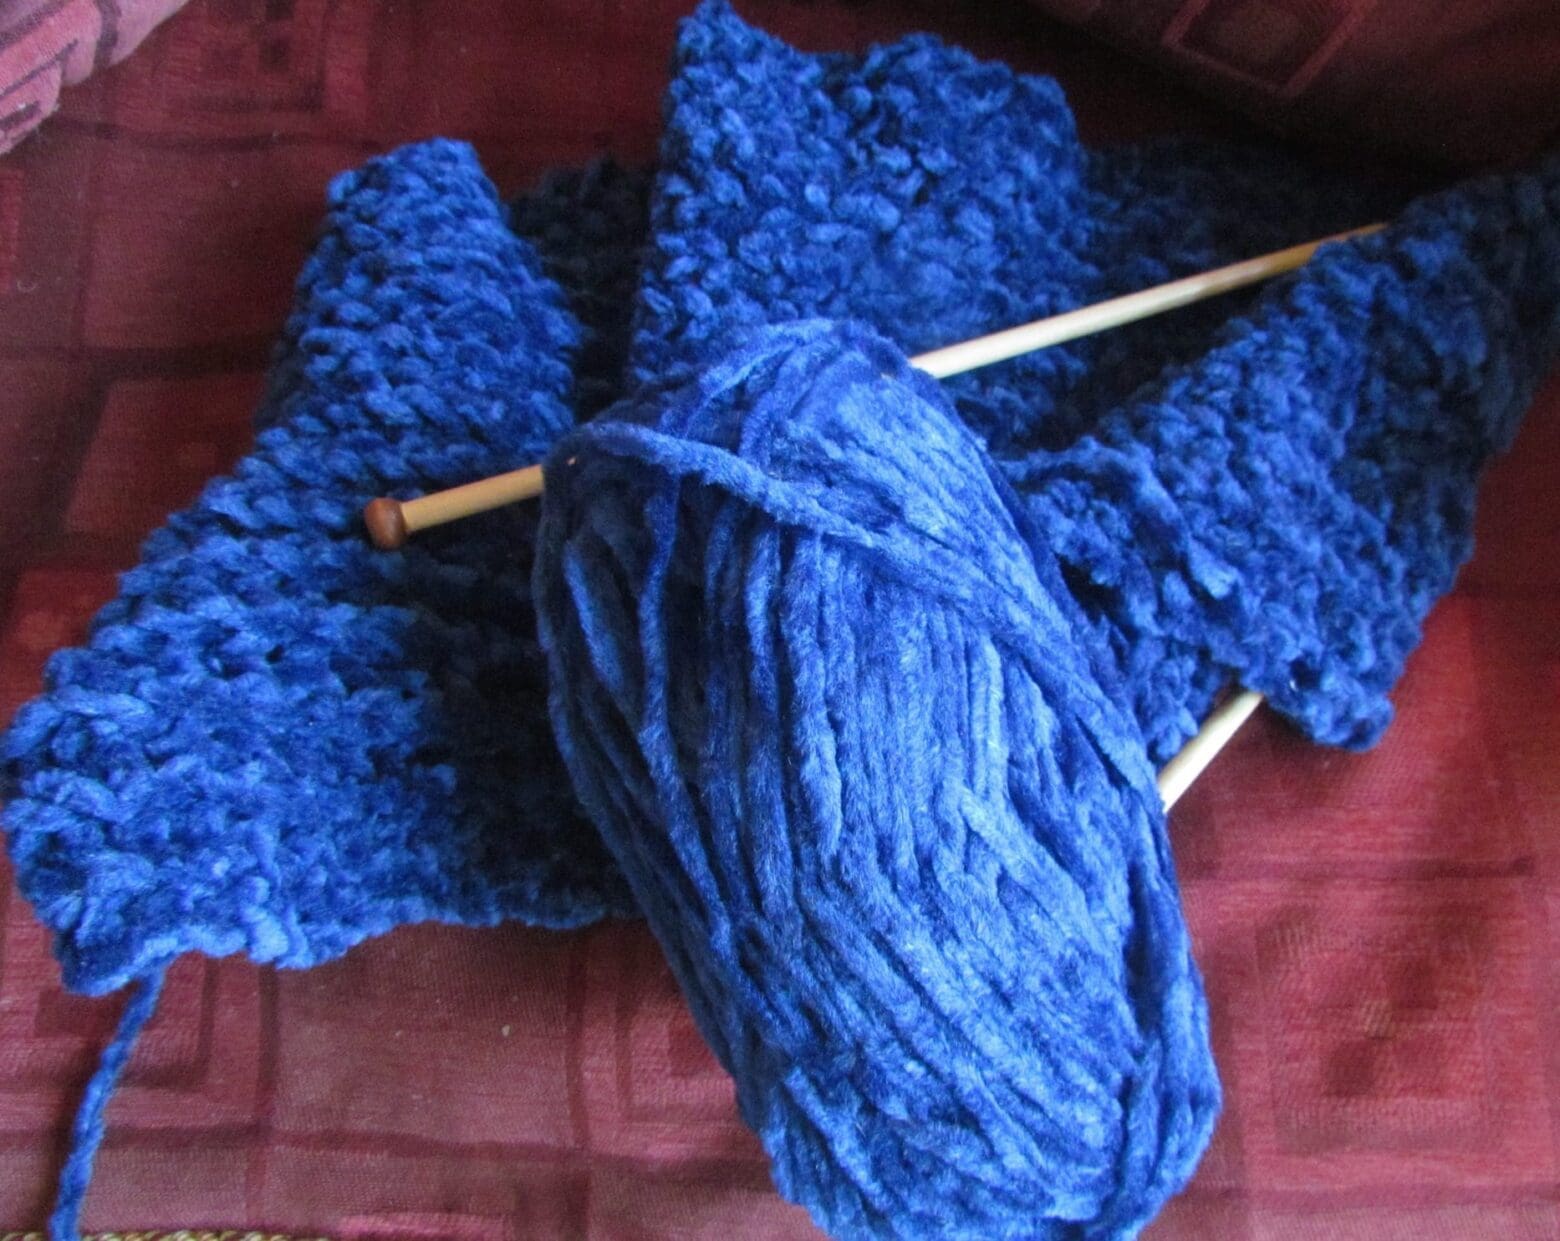
I’m hoping Emma will try knitting again sometime, but in the meantime, I’ve started a couple of other projects, one is this deep blue chenille yarn that I’m knitting, using a newly learned brioche stitch, into an infinity scarf for a friend.
The makings of an infinity scarf using a brioche stitch
And finally this is one of my ceramics projects.
Pebbles in a Plate
For those familiar with my jewelry, this may remind you of something else…
Ariane Zurcher Jewelry – B26 Lotus Collection – 18 Kt Brushed Yellow Gold, 25.08 ct Pink Topaz, 2.69 ct Pink Sapphire, 12 ct Tourmaline, 2.96 ct Aquamarine, 17.21 ct Mandarin Garnet, 4.03 ct African Paraiba

 And I didn’t make a single dye joke. The title doesn’t count because it’s Elizabeth’s name for her class. How can you not love that title? I may go back and edit a few in, just to amuse, or you can make a few in the comments!
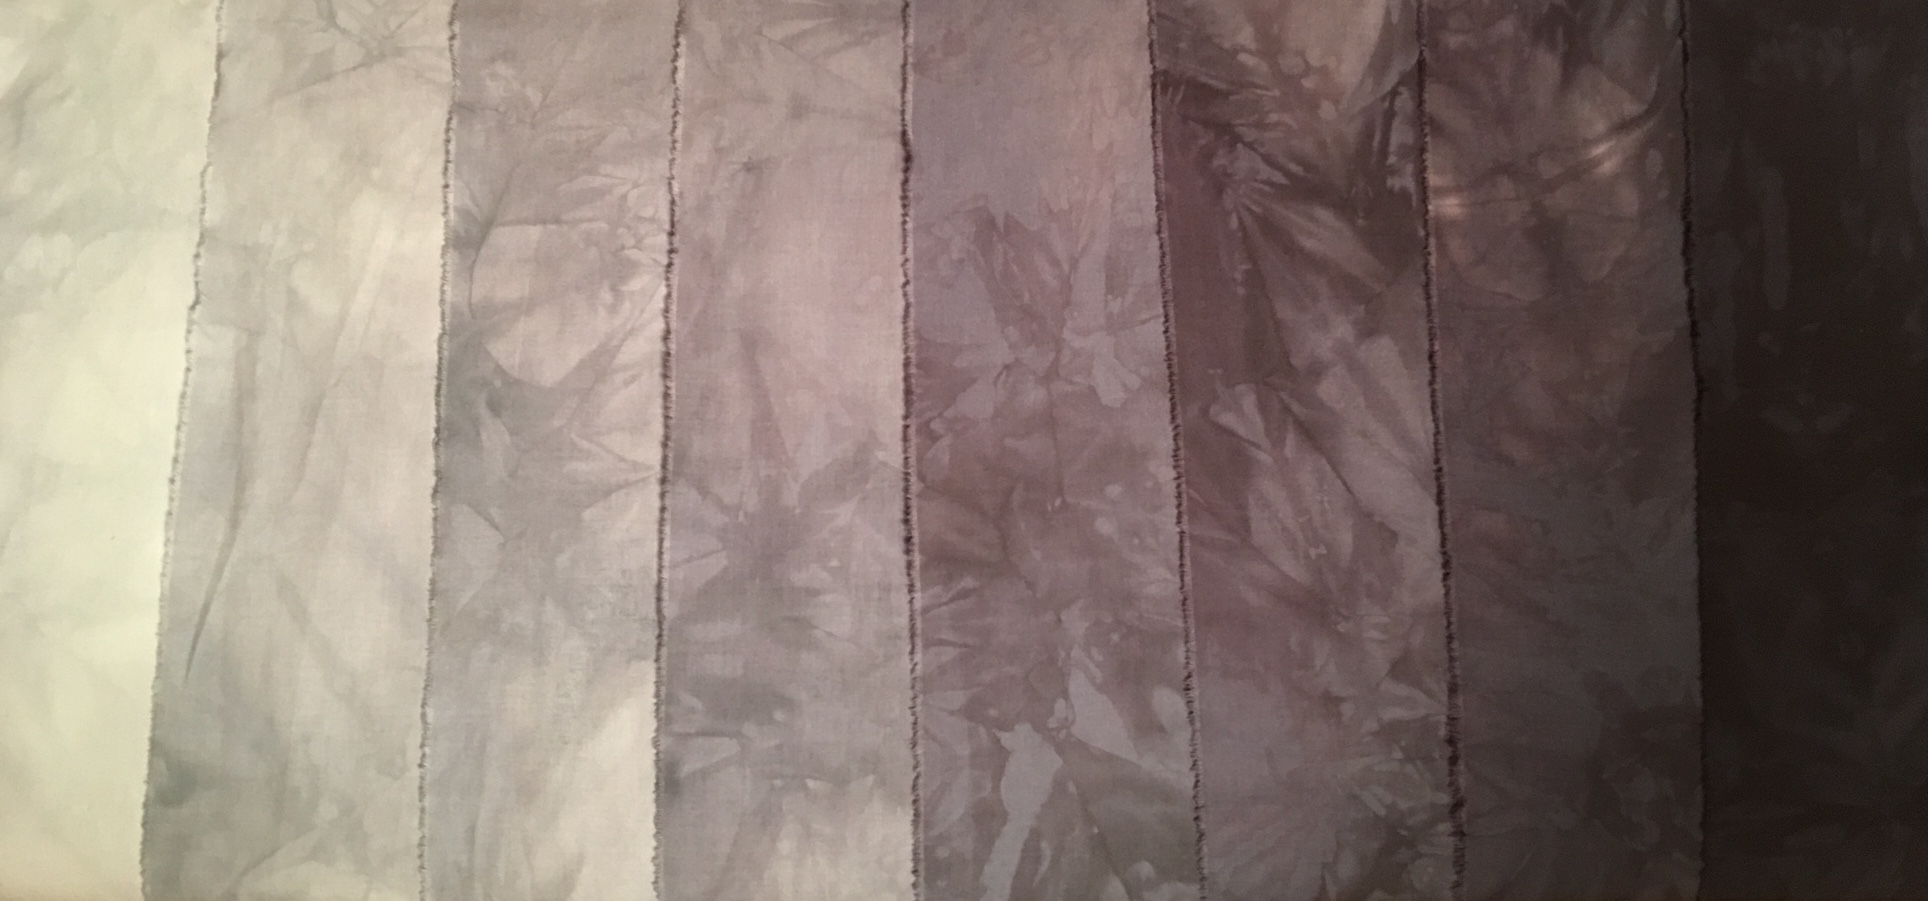 Designing a piece using these gradations was next. I had a couple ideas and with Elizabeth’s encouragement settled on this one, which also happened to be the first idea I came up with.
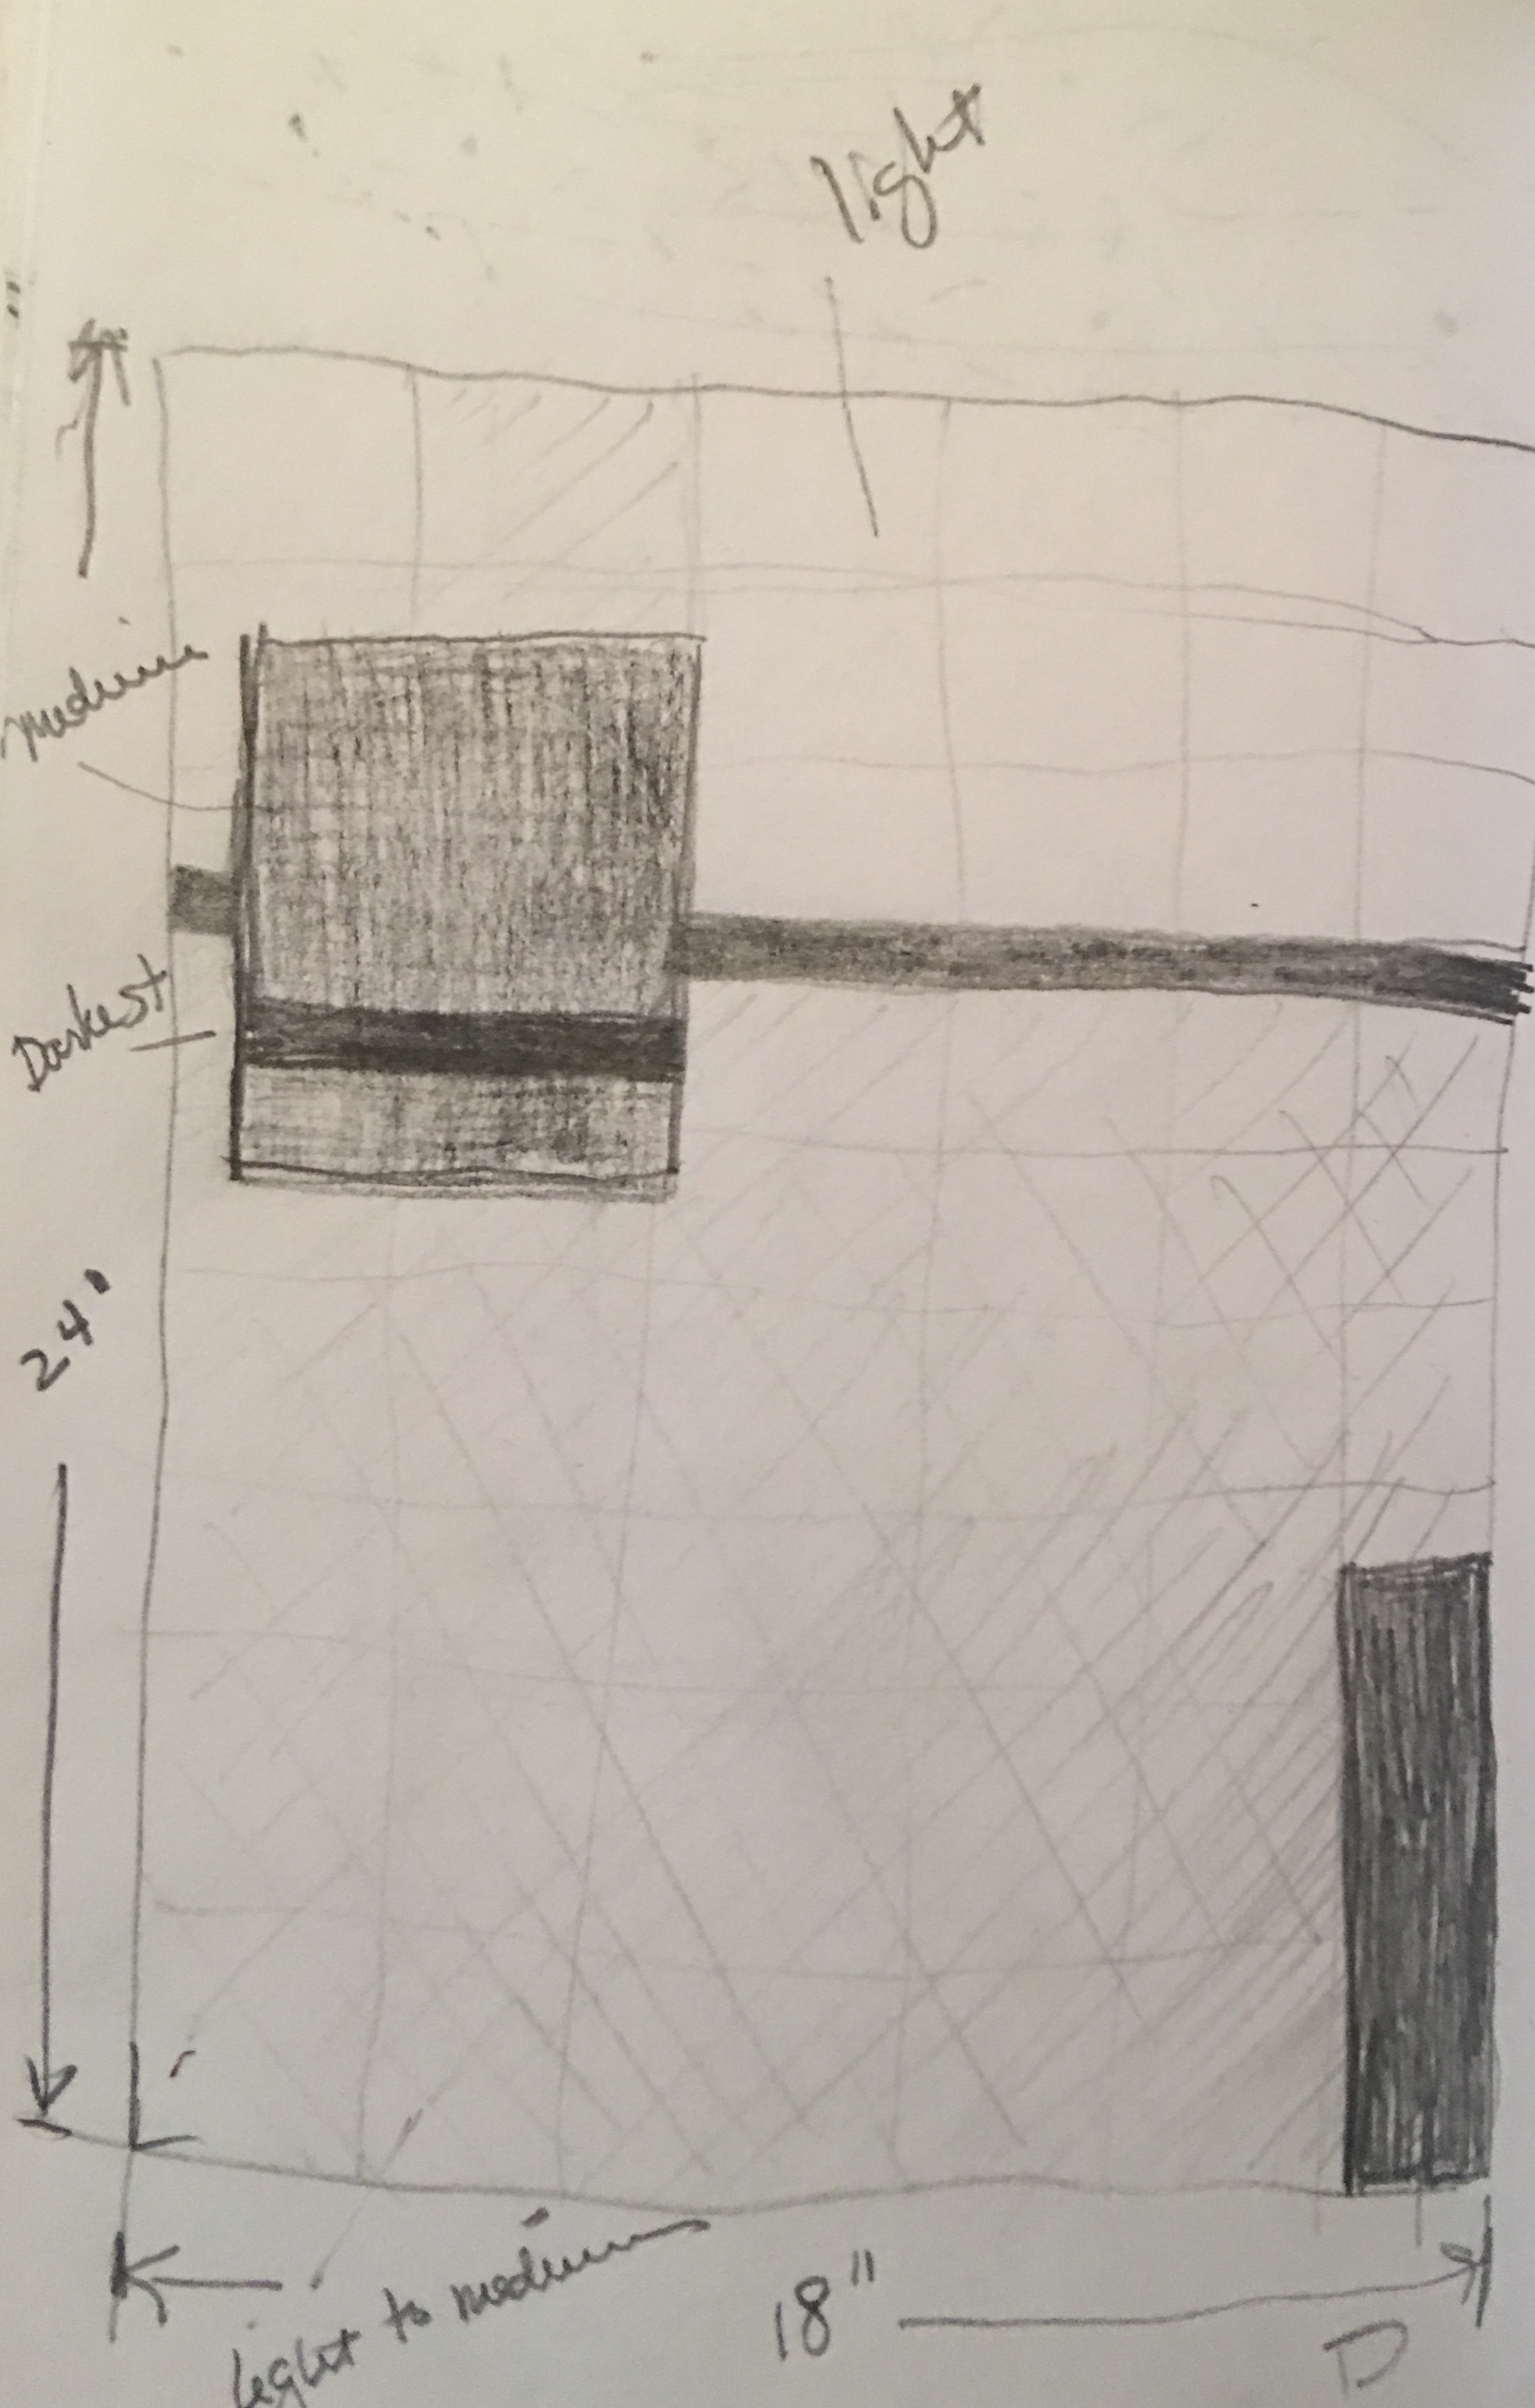
 After consulting Elizabeth (again), she suggested linear and horizontal stitching, I began quilting, but left the larger square alone as I wasn’t sure what to do with it. I wanted to do something, but couldn’t figure out what.
 The thing about dyeing your own fabric is how utterly seductive it is. You can mix any color you want by tweaking the proportions of your primary colors. The mottled effect enhances the overall feel of the fabric, making it completely unique and like no other.
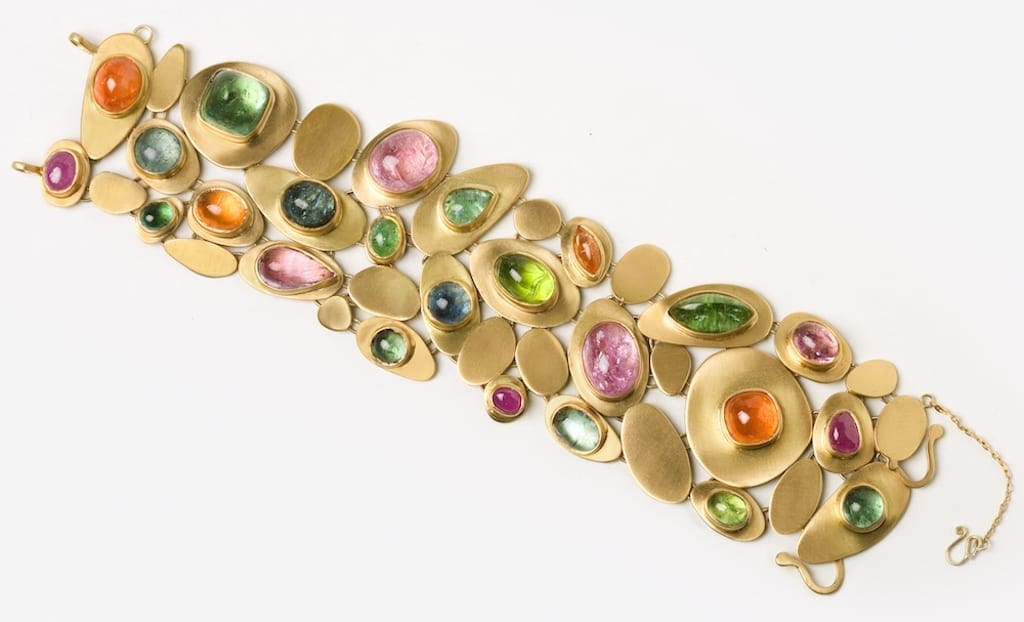

Recent comments