Yesterday I had to have an MRI because I’ve been getting headaches that often wake me in the middle of the night. I was quite sure I was fine, but it’s a precaution and being an adult and all, it seemed the responsible thing to do. So off I went feeling I’d prepared myself adequately. I don’t care for small, enclosed spaces, so I knew I was going to need to practice breathing and asked for something to put under my knees so my back didn’t begin to hurt. I believed I was on top of the situation and lay down, dutifully putting the ear plugs in and began counting my breath. Except once I was in the machine, I could feel my jaw shaking. As in uncontrollably and I was so freaked out that my jaw was doing this weird thing that I seemed to have no control over, I became convinced that it was so bad it would make my head move and ruin the imaging, which only made it worse. It took everything in me to breathe in and out, count my breath and eventually my jaw calmed down.
The upshot of the whole thing is that I’m fine. Perfectly fine. My neurologist called yesterday evening to tell me all looks well, “for someone your age” which of course gave me pause. “What does that mean?” I asked a bit defensively. He explained that you expect to see a few tiny white dots in “someone my age” and that this is also common in those who experience migraines. Evidently I have a couple of those white dots and also a tiny cyst, which is not in my brain at all, and is about 4mm. So another MRI in about a year to make sure that doesn’t grow. All in all the news is excellent and blood work is all good too. Whew. I knew I was as healthy as a horse.
After I returned home the skies opened up and the rain came down like some sort of end of the world scenario. That was when I decided to do a livestream, which you can see here if you care to.
And then I had to do a lot of work on my website, so I spent the rest of the afternoon and evening writing copy, learning how to input new workshops into my workshop schedule and create images for the workshops.
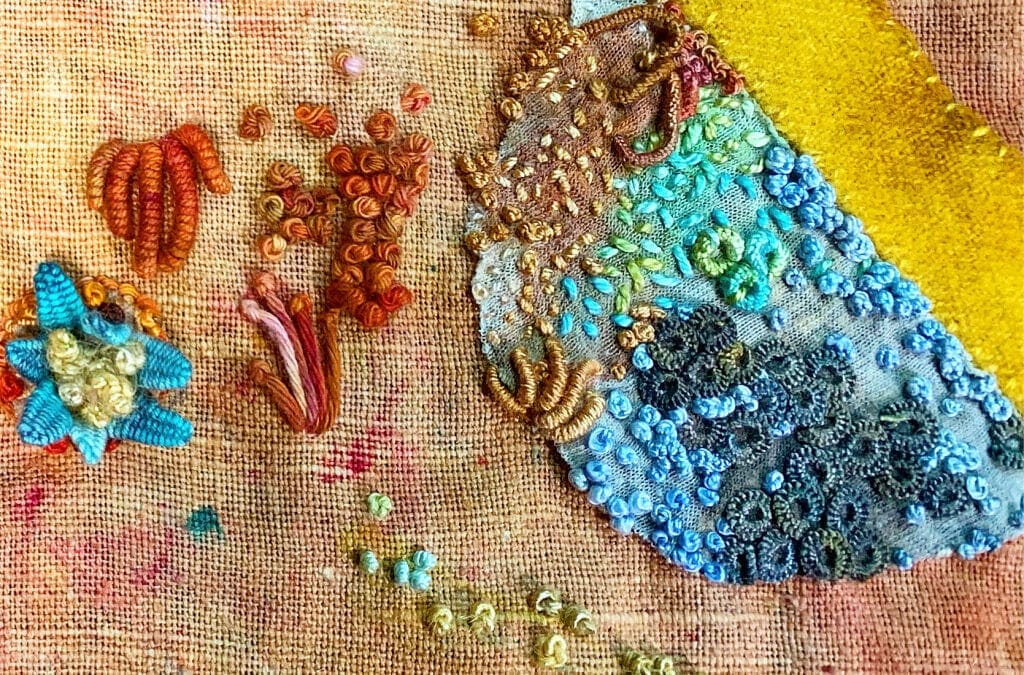
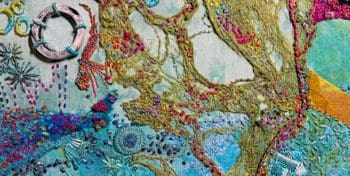
Every now and then when I needed a break I’d work on the piece below, which I’ve fallen in love with and that is inspired by plant and human cells. Pinterest is great for finding amazing images of organisms, cells and plant life that have been put under a microscope. I have a whole board where I’m saving such images.
This piece I’ve added some of my hand dyed t-shirting to and then stitched on top of it. It’s very relaxing.
My mother and two of my brothers are scientists: a chemist, an astro physicist and a bio-chemist. I was never very good at science, but I do love looking at the microscopic images of organisms and cells. They are things of such exquisite beauty.
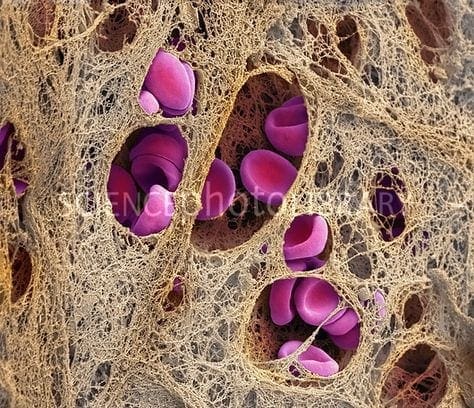
The photograph below is of a coronary blood clot, horrible, but if you remove what it IS and just view it as an image, it is incredible.
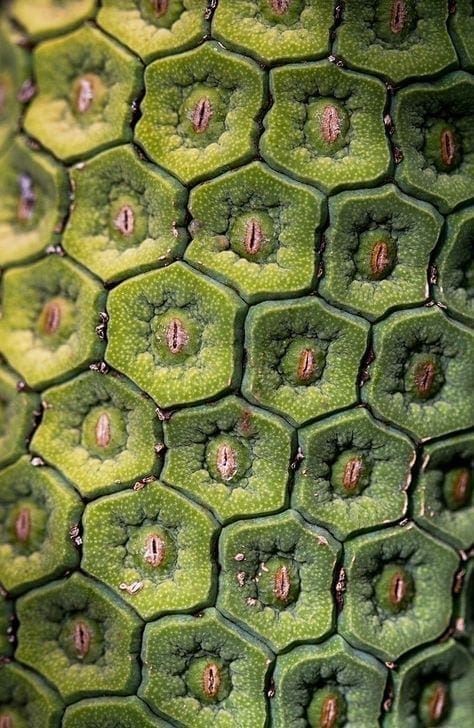
Coronary blood clot. Coloured scanning electron micrograph (SEM) of a blood clot (thrombus) in the coronary artery, showing red blood cells (purple) in a fibrin mesh (threads). Magnification: x2500, when printed 10cm wide.This is a microscopic image of a cactus (I think). Amazing.
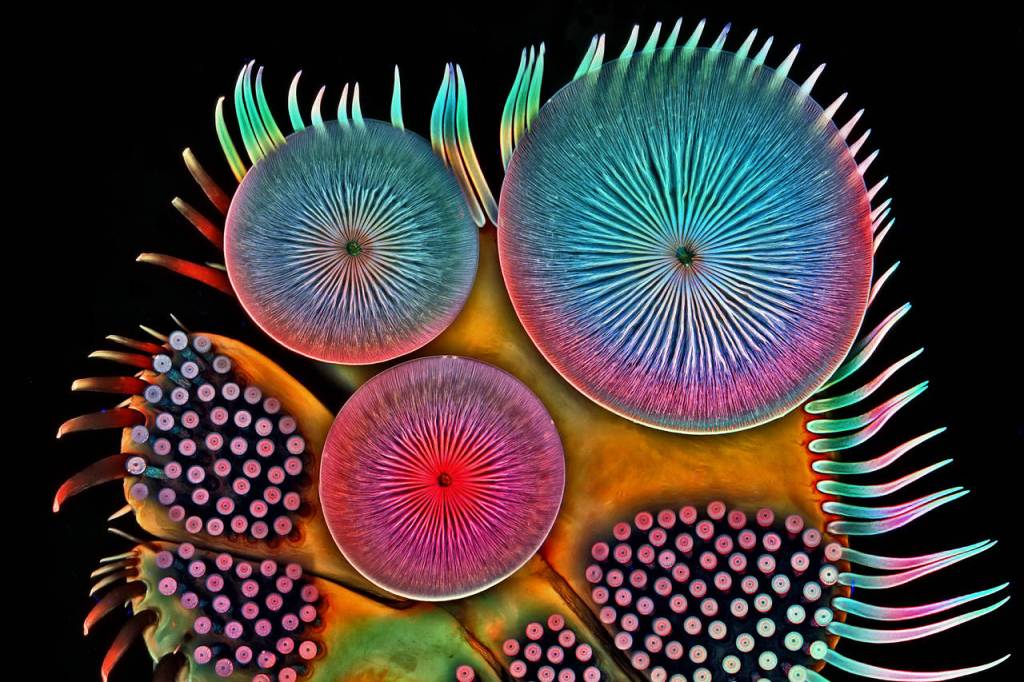
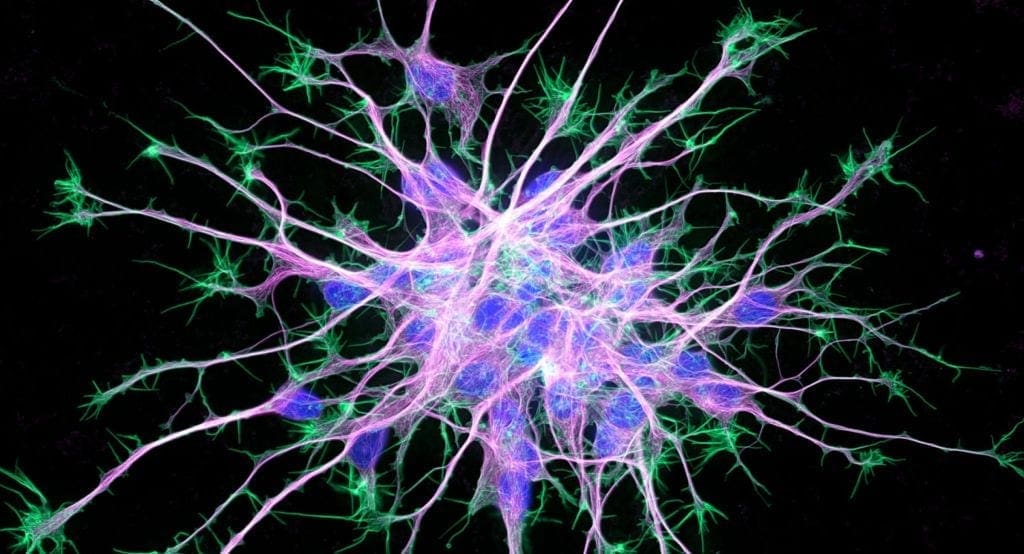
Which took me to viewing images of brain cells. Talk about inspiration!
Microscopic image of neuronsAmazing, right?!
There is beauty in just about anything if looked at through a different lens. ❤️
I almost didn’t post this today as it’s Election Day and figured many of us would be out voting or thinking about voting or waiting in anxiety for the presidential election’s outcome and then I thought – a perfect time for some levity while waiting in line to vote or for those reading this from elsewhere… okay not sure where I’m going with this, so here it is…
“Dyeing to Design” is the title of the terrific five week online class I’m taking given by the talented artist Elizabeth Barton through the Academy of Quilting. I wrote about the first week ‘here‘ and promised to write about the second.
I started the second week by pretty much dyeing every bit of white cotton fabric I had. Seriously. I went through the ten yards that was suppose to last us the entire five weeks of the class. Restraint is not a strong suit. In addition I went through so much dye that I realized I was not going to have enough to get me through the rest of the course, which meant I had to order both fabric and dye. Waiting was excruciating. I was going to work in a pun using the word “dyeing”, but restrained myself. See. I try where and when I can. While I waited however, I had all these beautiful fabrics to look at and consider for my next design.
The design I decided to do used shapes I come back to again and again, long ago when I was a fashion designer, now still designing jewelry and again this past week while using my hand dyed fabrics. Let’s not spend any time analyzing this, yes?
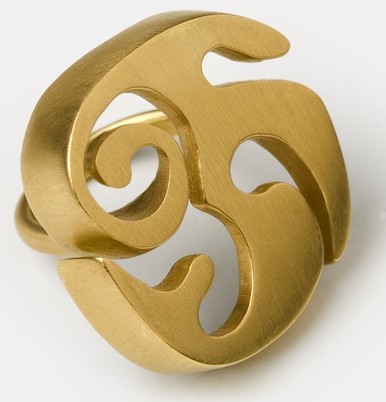
R17 – 18 Kt Brushed Gold
I chose two colors to work with, red and, with Elizabeth’s suggestion, an olive color. Elizabeth encouraged me to play with the olive color using it’s various gradations, which of course required more fabric that I didn’t have. Not easily thwarted, I pulled out some muslin and dyed that. It was at this point that the faucet in the kitchen sink suddenly stopped working. It was a drought. Nothing, but the slightest trickle of water, a whisper, really. However, we have a slop sink in the pantry. It was one of my brilliant ideas when we gutted the place; I envisioned our loft as a veritable greenhouse with furniture. Think Max’s bedroom when he falls asleep in Where the Wild Things Are. This vision of mine never came to fruition and so the slop sink became a receptacle for rags, cleaning supplies and other items no one knew what else to do with. And to add insult to injury underneath the sink we keep the kitty litter box. As we live in NYC our “pantry,” while sounding grand and spacious, is actually the size of a very, very small closet, combined with the kitty litter under foot, a stacked washer and dryer, the slop sink overflowing with assorted cleaning supplies… Let’s face it, it’s really really cramped.
I was determined to make it work, and while this made for some interesting maneuvering on my part, I did fall in love with my slop sink, but not so much that I didn’t call the plumber. He came a few days later and fixed the kitchen faucet, but in the meantime I washed all my dyed fabrics in my now beloved slop sink inside our closet, I mean pantry. It was all very Alice in Wonderlandish.
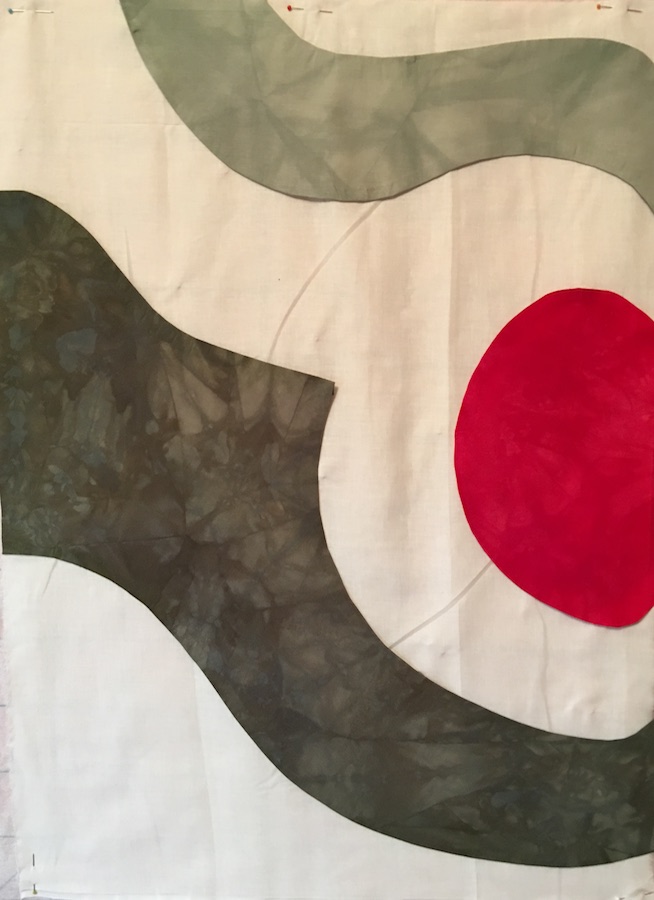
Two days later, after the sink was working again I came home to the smell of smoke and asked FH (fabulous husband) what happened. “Well,” FH said, and then after a lengthy pause and with a pained expression he finally added, “I think our washing machine blew up.” I would have suspected wild exaggeration on his part had it not been for the lingering evidence of noxious smoke wafting through our home. Evidently he was doing a load of laundry and heard a loud bang. He went over to investigate to find smoke billowing out of our front loader. You have no idea how happy I am that I was not there to witness. So for the next few weeks we are without a washing machine. But I digress… Here is the preliminary piece on my design wall.
Slowly it began to take shape and as everything seemed to be falling apart, exploding, going dry and whatever else, my sewing machine, not wanting to be left out of all the fun, decided it was no longer going to play nice with my walking foot, perhaps it was taking a cue from our presidential race, requiring me to spend more than five hours watching various you tube videos, reading the instructions over and over again to troubleshoot. There were a LOT of late, late nights. Eventually I was able to convince my sewing machine it was in its own best interest to get along and all is well. In actuality I realized that my walking foot was causing the automatic threader to jam. When I thread it manually everything works.
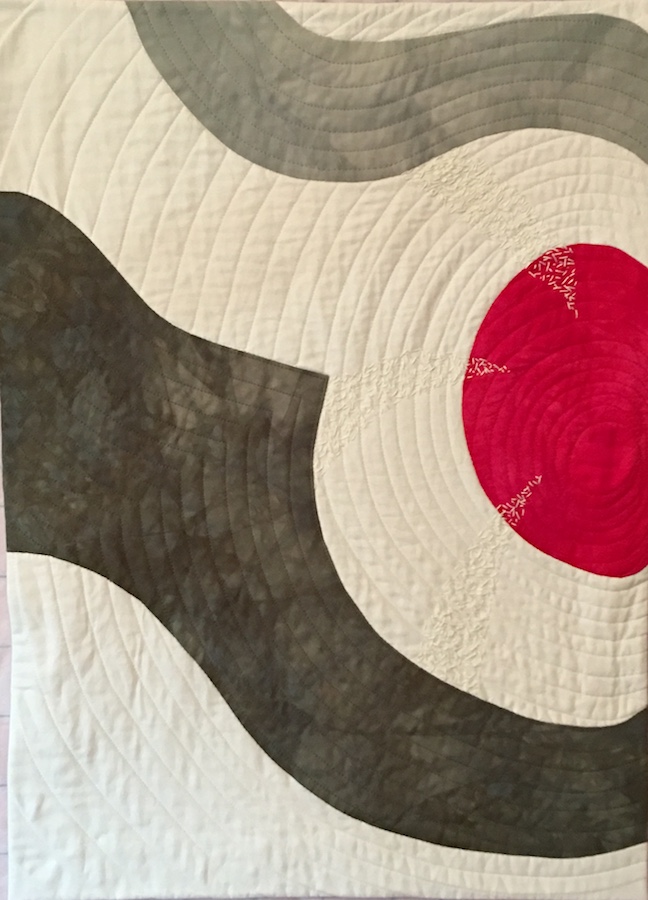
After I did the quilting I decided to add some hand stitching, but couldn’t decide whether to do more or take it all out. So what does one do when you’re not sure? Ask Elizabeth and others in the class for feedback, of course!
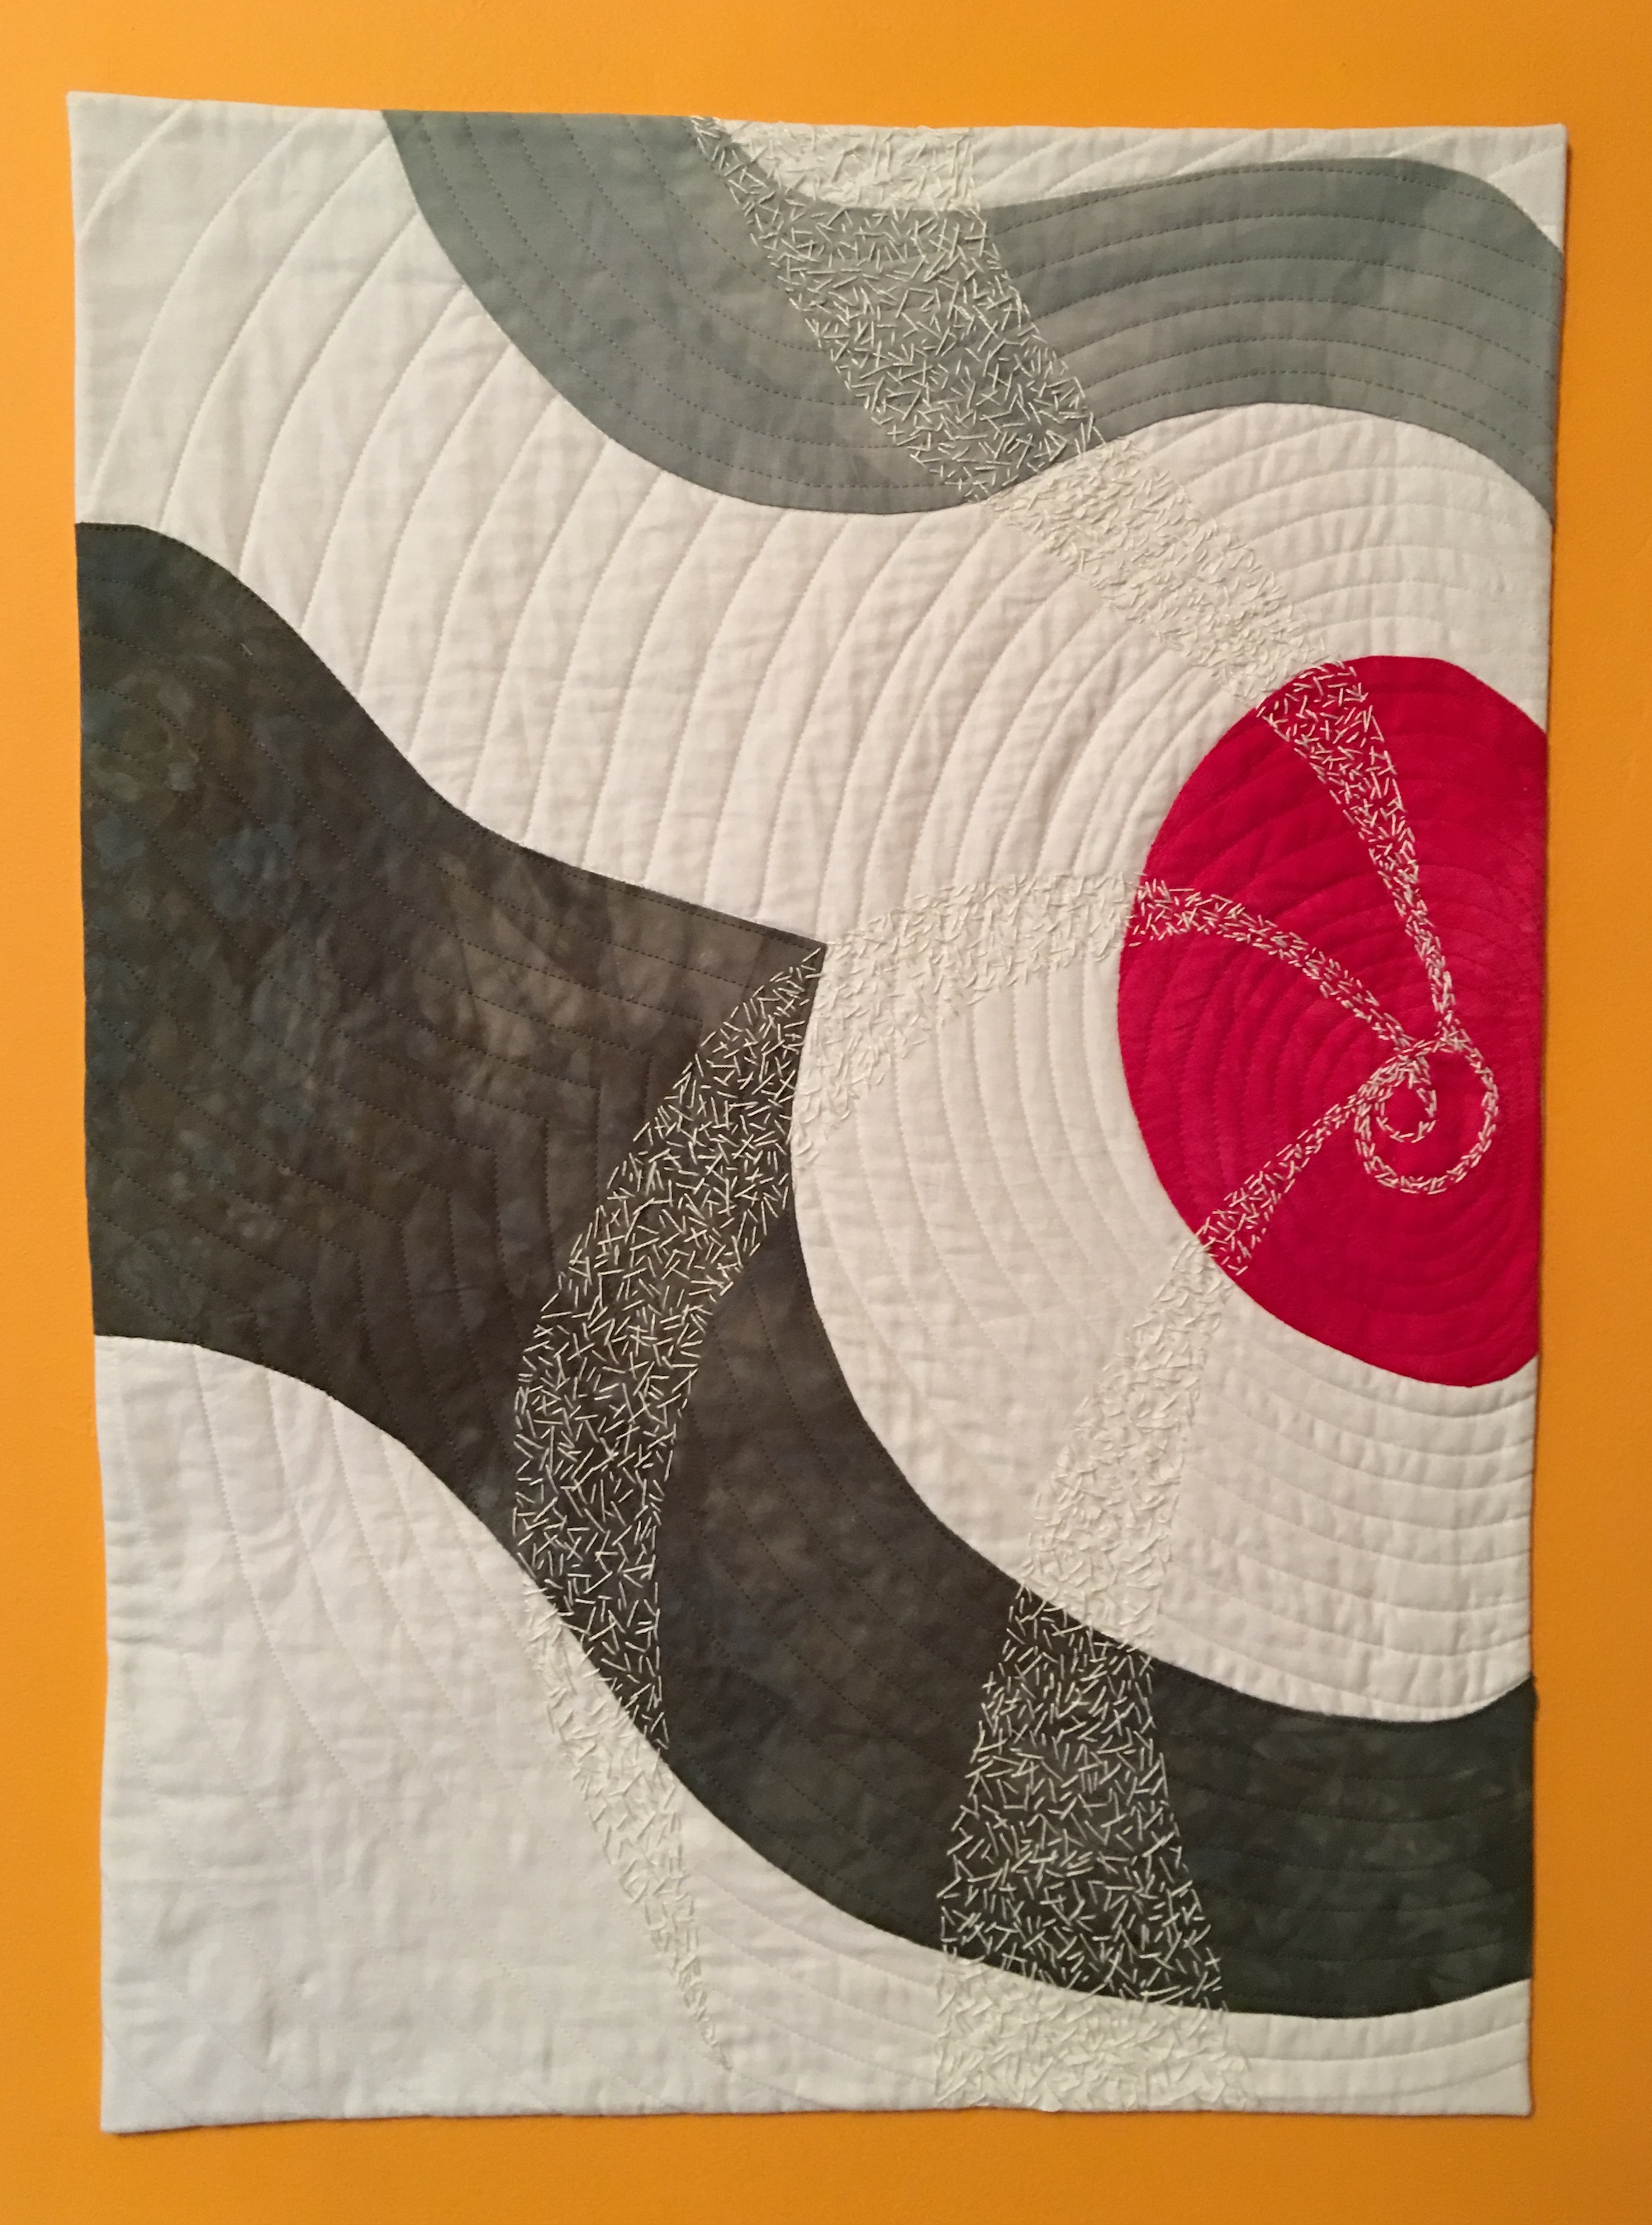
Which led to this…
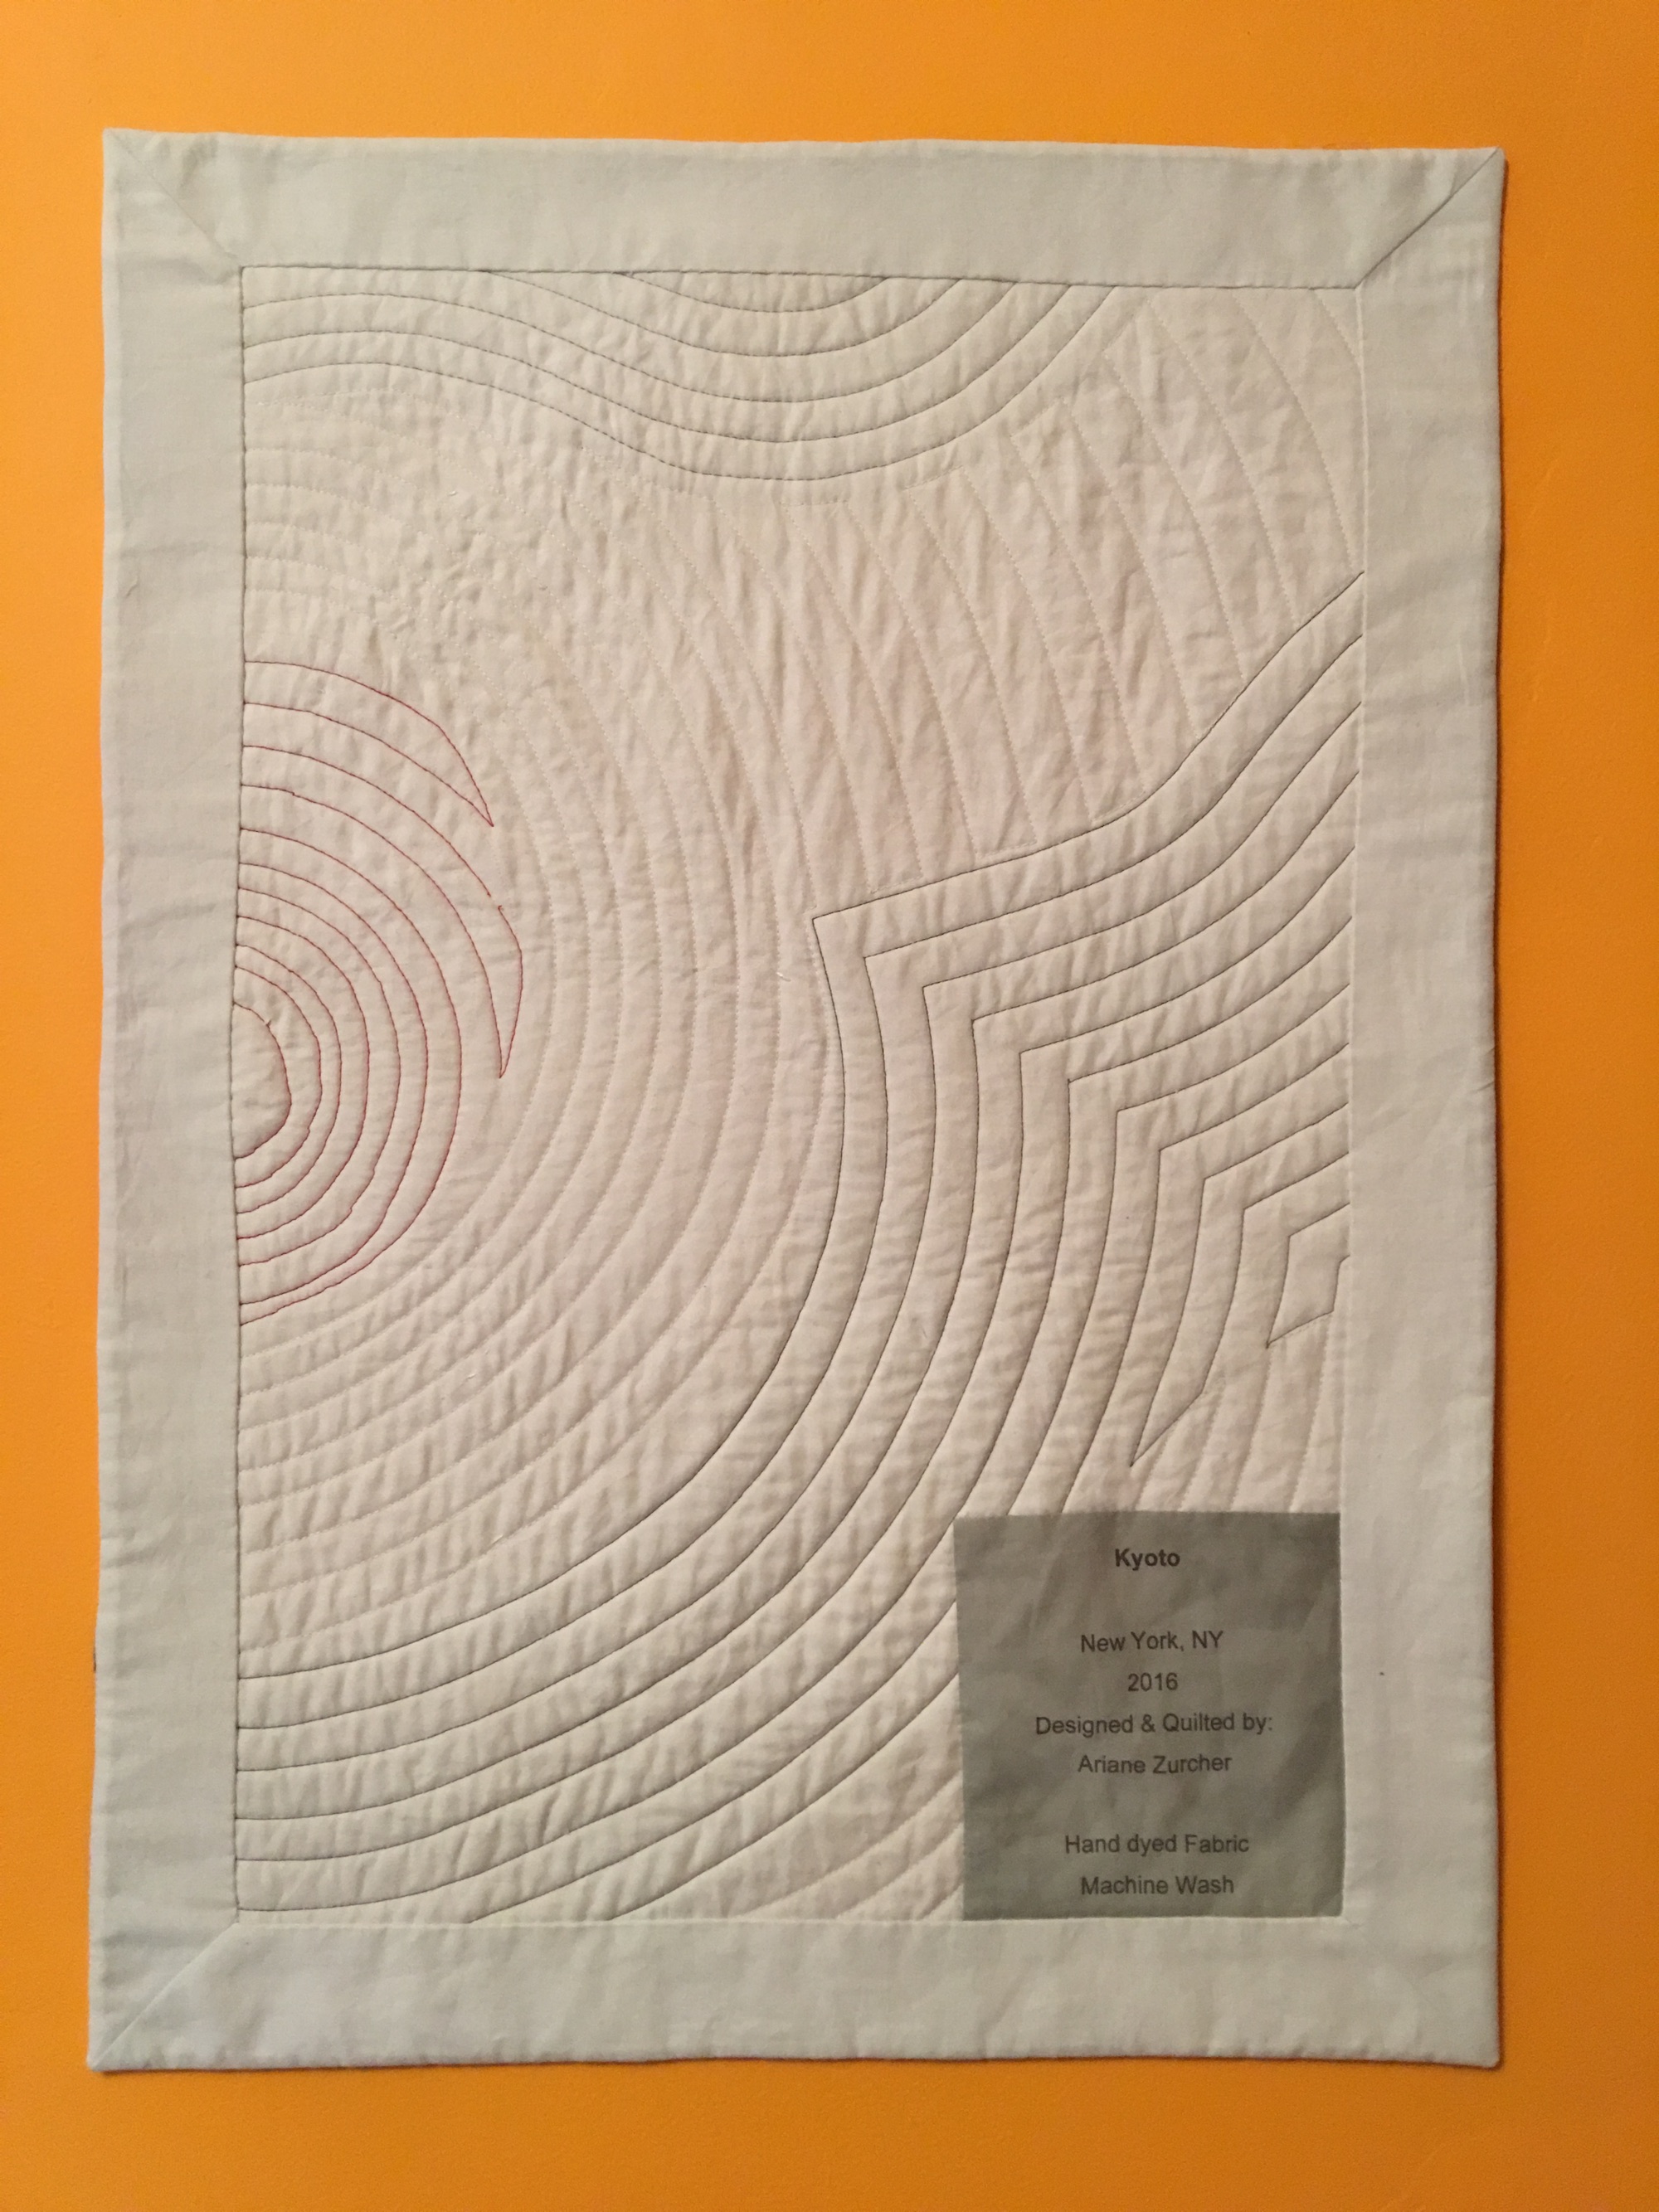
And here’s the back.
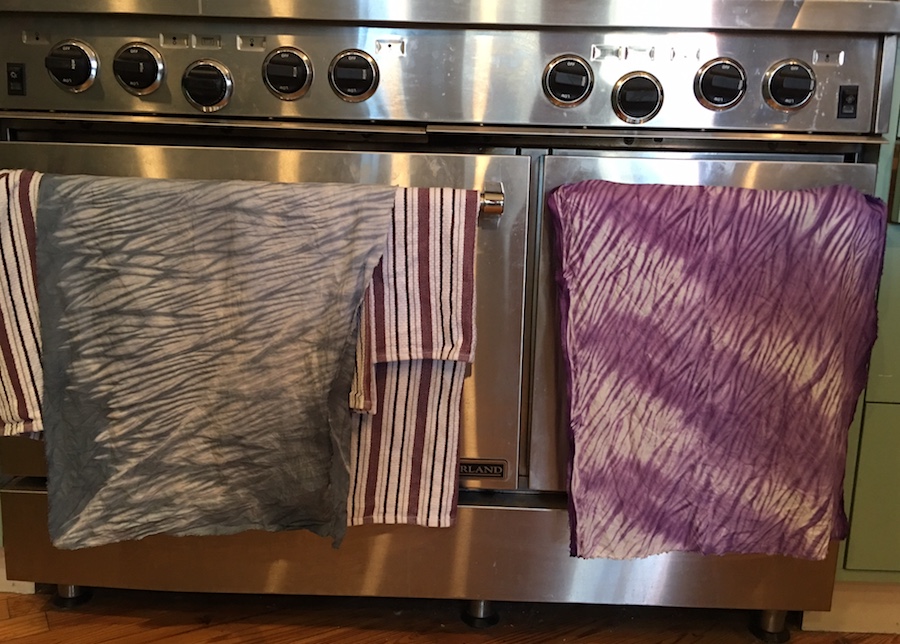
The third week of the class is well underway, my fabric arrived, the sink is running as is my walking foot (haha) and oh what fun I’m having! We are learning basic Shibori arashi dyeing. I still don’t have a washing machine, (and have two teenagers in the house) but these are luxury problems. I haven’t figured out what I’m doing with my beautiful dyed fabrics, but will come up with something in the next day or so. Here’s a sneak peak at this weeks dyeing and drying New York City style. And I didn’t make a single dye joke. The title doesn’t count because it’s Elizabeth’s name for her class. How can you not love that title? I may go back and edit a few in, just to amuse, or you can make a few in the comments!
Lest you, good readers, misread the above and think this is going to be about a metaphoric death resulting from an existential crisis, let me set you straight, it’s not. This is about dyes, dyeing fabric and design. Now if you’re like me, you might be thinking – oh who has time for all that? – but let me tell you, there’s so much more to dyeing than you think. Get it? Trying not to laugh, really, really trying… It’s impossible to write a post about dyeing and not keep thinking of all the puns one makes without even trying… This is just too easy. You might dye of laughing… hee-hee!
Ahem.
Okay.
Seriously.
I never thought I’d enjoy dyeing fabric. I always felt there’s so much great fabric out there, why would I want to dye my own? Well… it turns out, not only was I wrong, but what a beautiful world it is once you begin dyeing! Before I get ahead of myself, this all began because I was looking for blogs by quilters who are also artists. As I was looking around I found the extremely talented artist Elizabeth Barton, and her blog, Art and Quilts, Cogitations Thereon. What a find! I read this post, The Proliferation of Online Classes, which I then felt compelled to comment on, which in turn led me to investigate the classes Elizabeth teaches and in particular one that began a week ago Friday, which I promptly signed up for. Her five week online class, given through The Academy of Quilting, is titled – Dyeing to Design. Love that.
Dyeing has never called to me, but I enjoyed reading Elizabeth’s blog, really like her work, and this class had the most immediate starting date and I’m impatient, so I thought – Why not? This is one of the many wonderful things about being new to something, it never hurts to try something you’ve never done before and the worst that can happen is you discover it’s not for you and you move on. On the other hand, you might fall in love with whatever it is, become totally obsessed and that is a indescribable joy unlike any other. The latter pretty much describes my experience with quilting and fiber art. And so it was again, with dyeing and this class, now in its second week. What a fantastic class. I cannot recommend it, and Elizabeth Barton, more highly!!
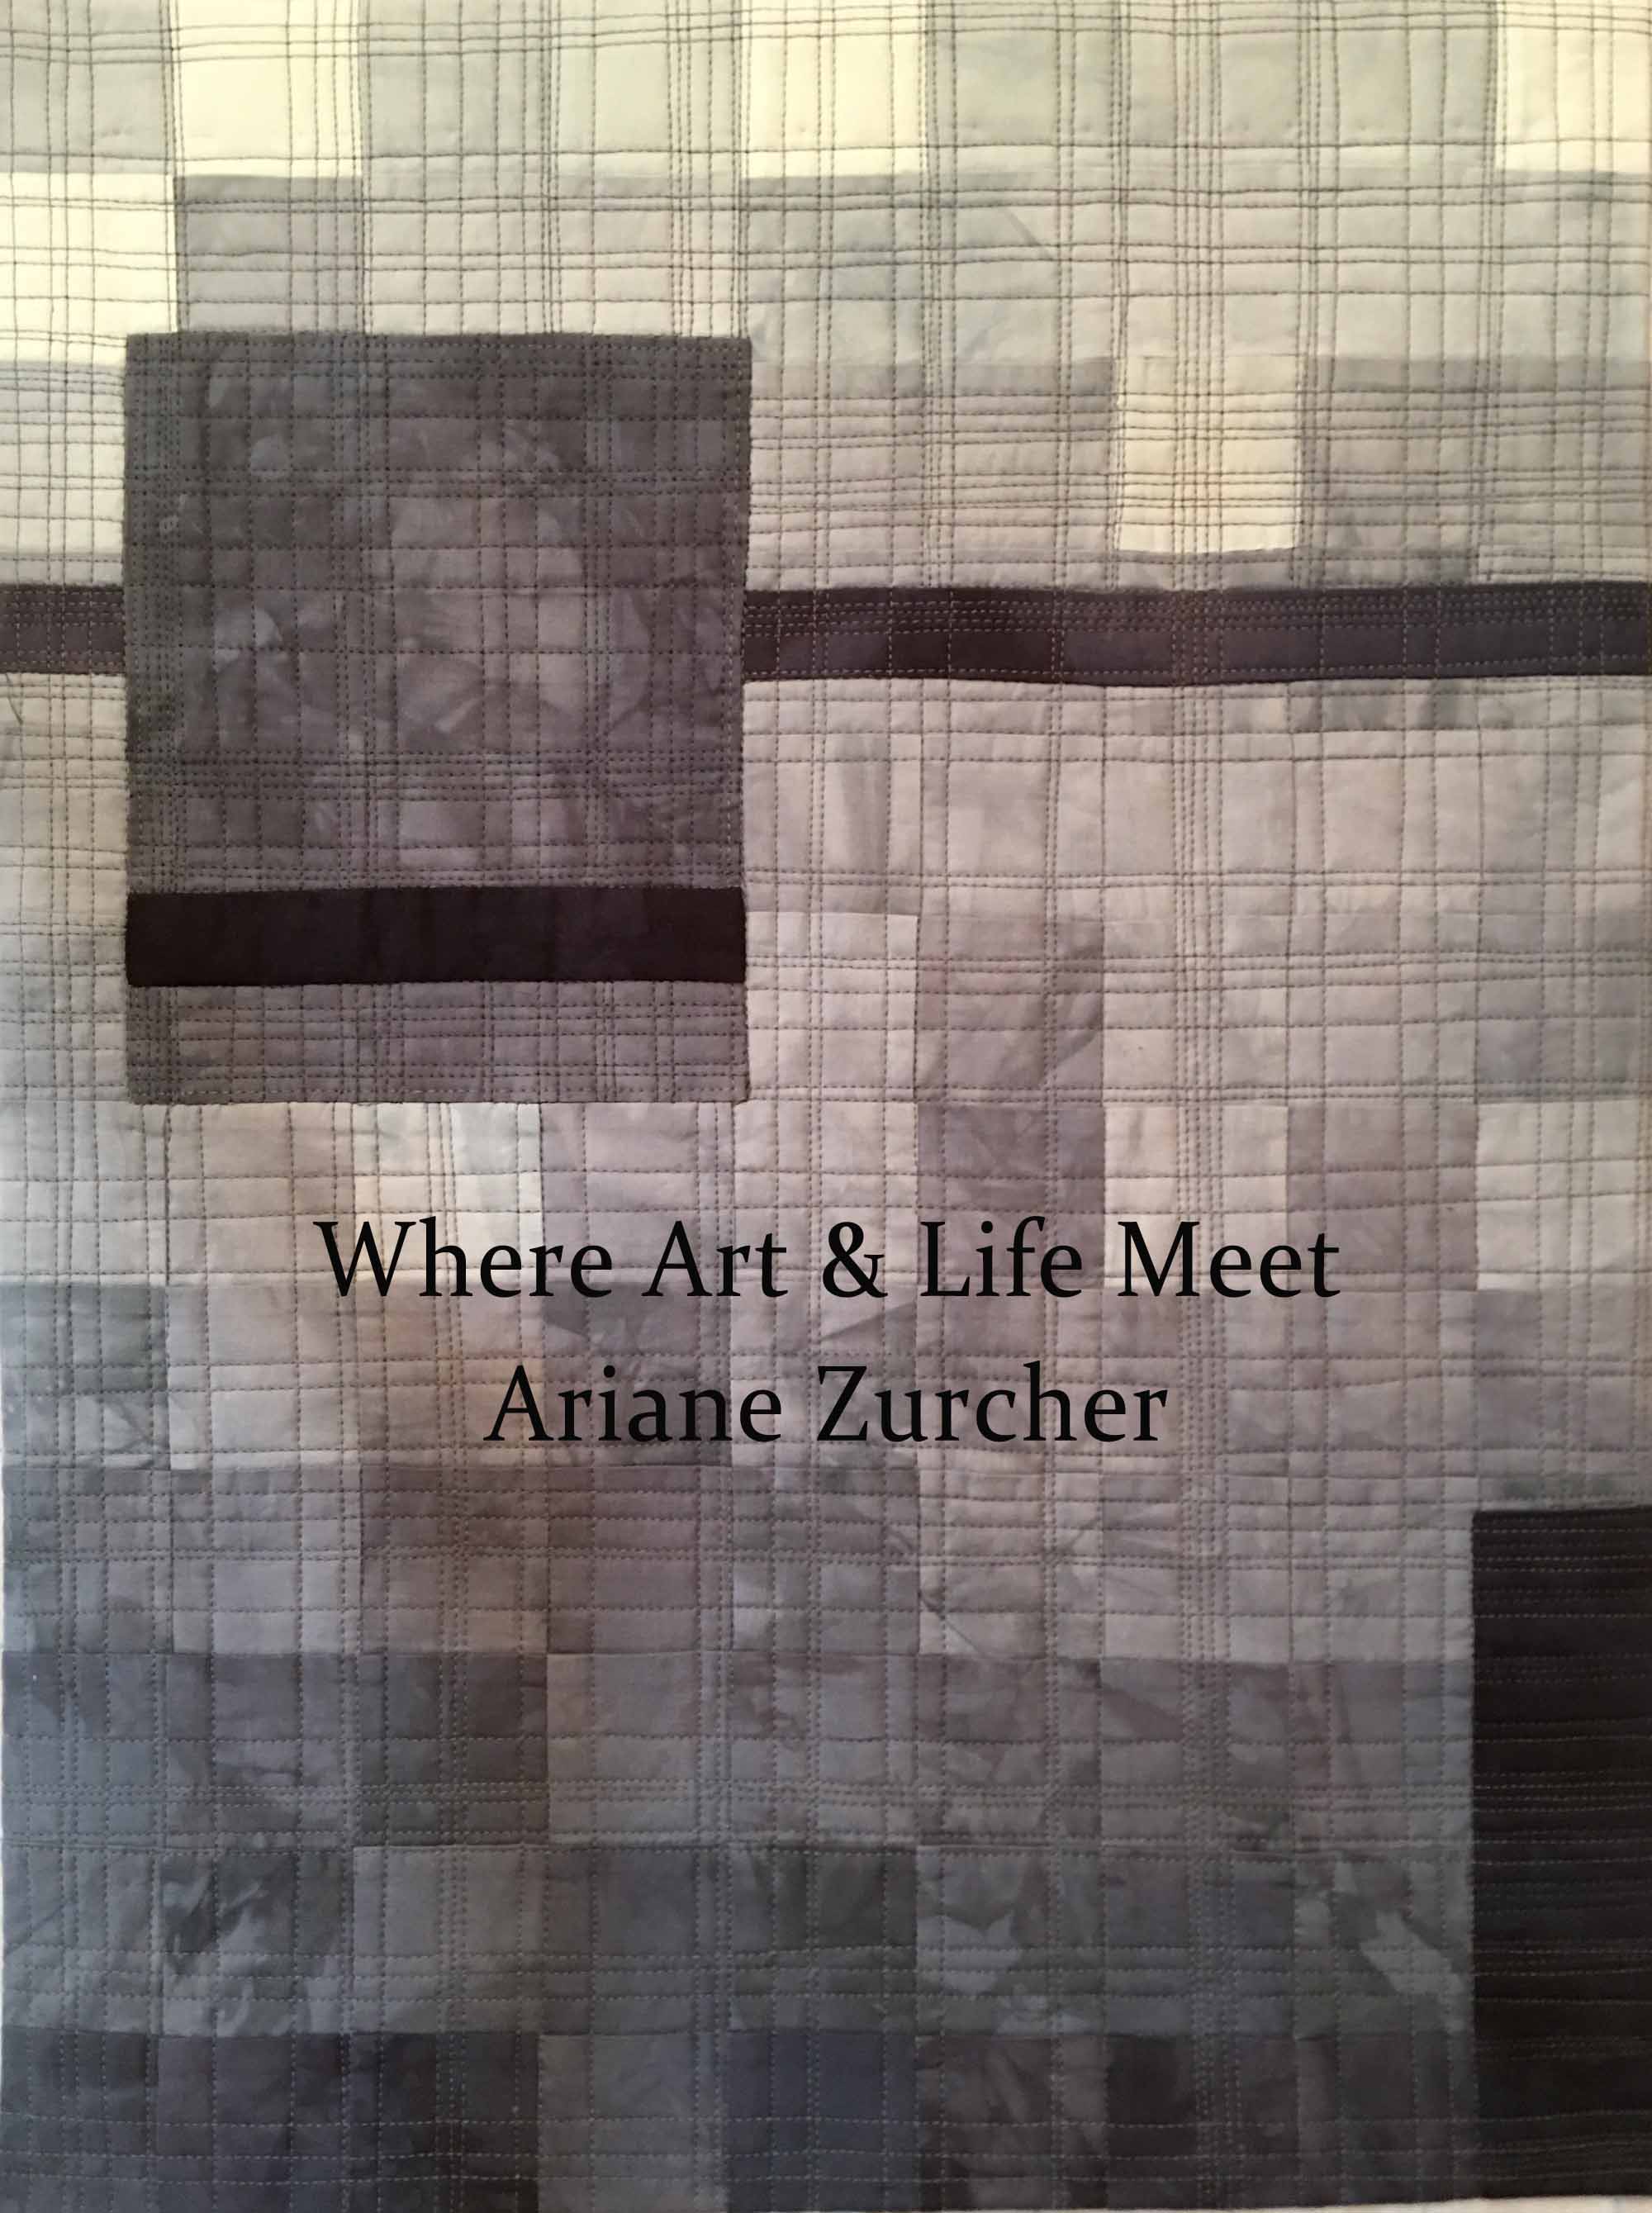
It helps that Elizabeth is a terrific instructor, very responsive and thorough, has a great eye, and gives excellent feedback. She writes extensive instructions with good explanations and examples of her own work to illustrate what she’s talking about. The first week we dove right in mixing all our various dyes for the next five weeks and did this – gradations of black (photograph below.) You’ll notice the mottled effect, which I think is so beautiful and striking. As we were working with black and since there’s no such thing, the blues, pinks and greens can be seen in different areas. The organic look to the fabric also appeals to my sense of design and so I was hooked. Totally fell in love. Completely. Dramatically. In. Love. Designing a piece using these gradations was next. I had a couple ideas and with Elizabeth’s encouragement settled on this one, which also happened to be the first idea I came up with.
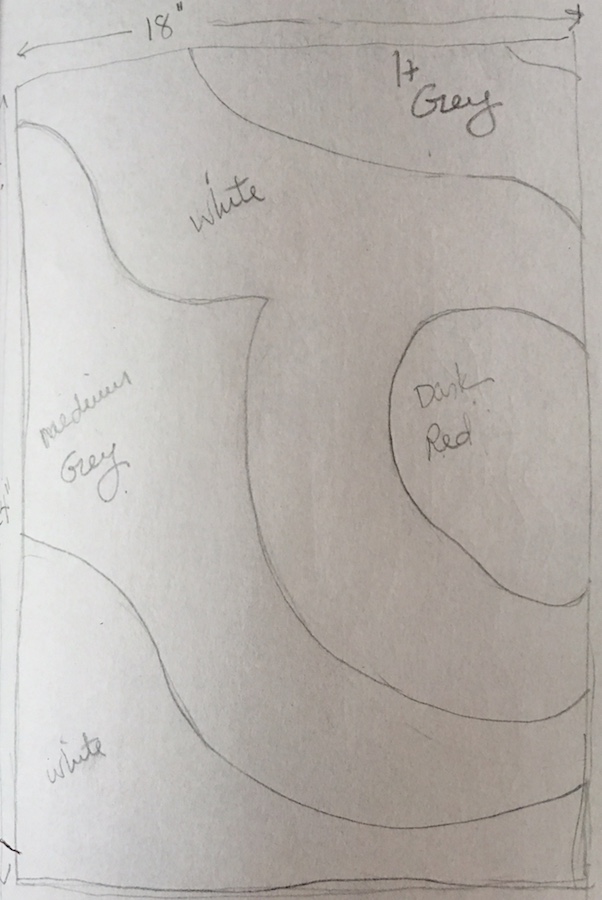
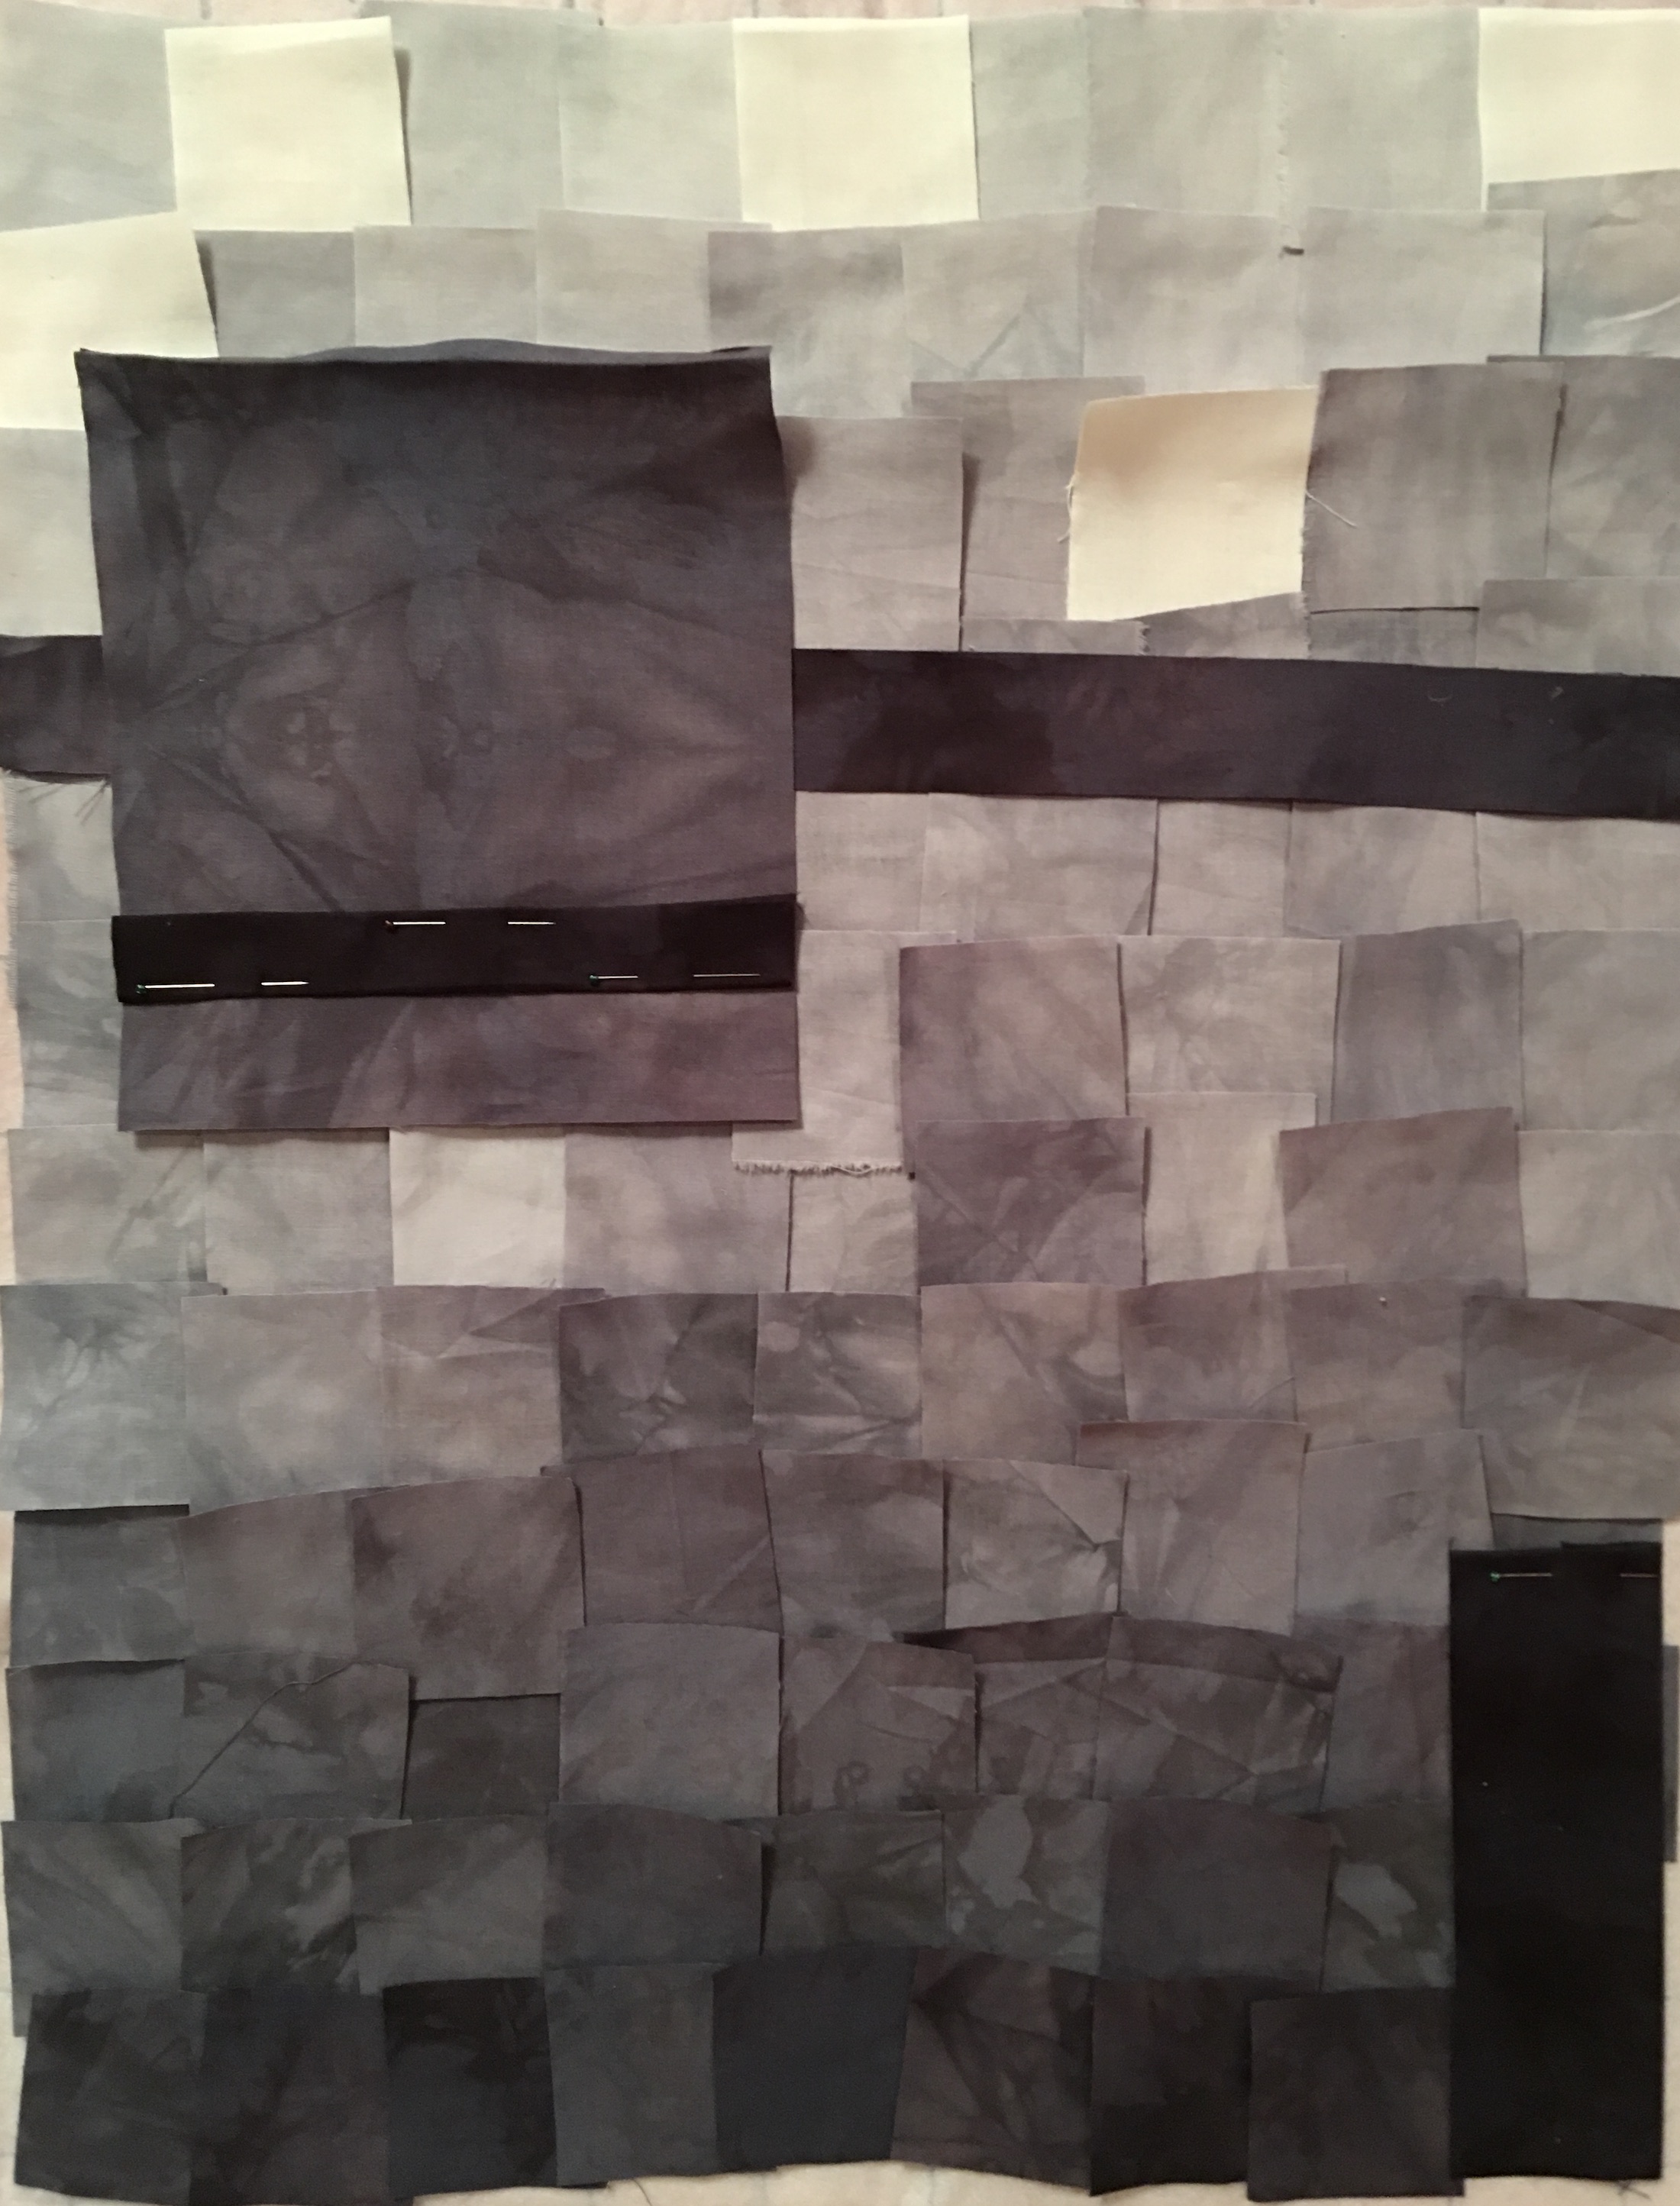
I decided I would cut the fabric into 2.5″ squares, which meant that after they’d been sewn together they would be 2″ squares, gradating from light to dark, but a little unevenly to keep things interesting. This is how it looked positioned on my design wall.
Emboldened by Elizabeth’s helpful suggestions, I made a few adjustments and began sewing all those squares together. That’s a whole lot of squares… After consulting Elizabeth (again), she suggested linear and horizontal stitching, I began quilting, but left the larger square alone as I wasn’t sure what to do with it. I wanted to do something, but couldn’t figure out what.
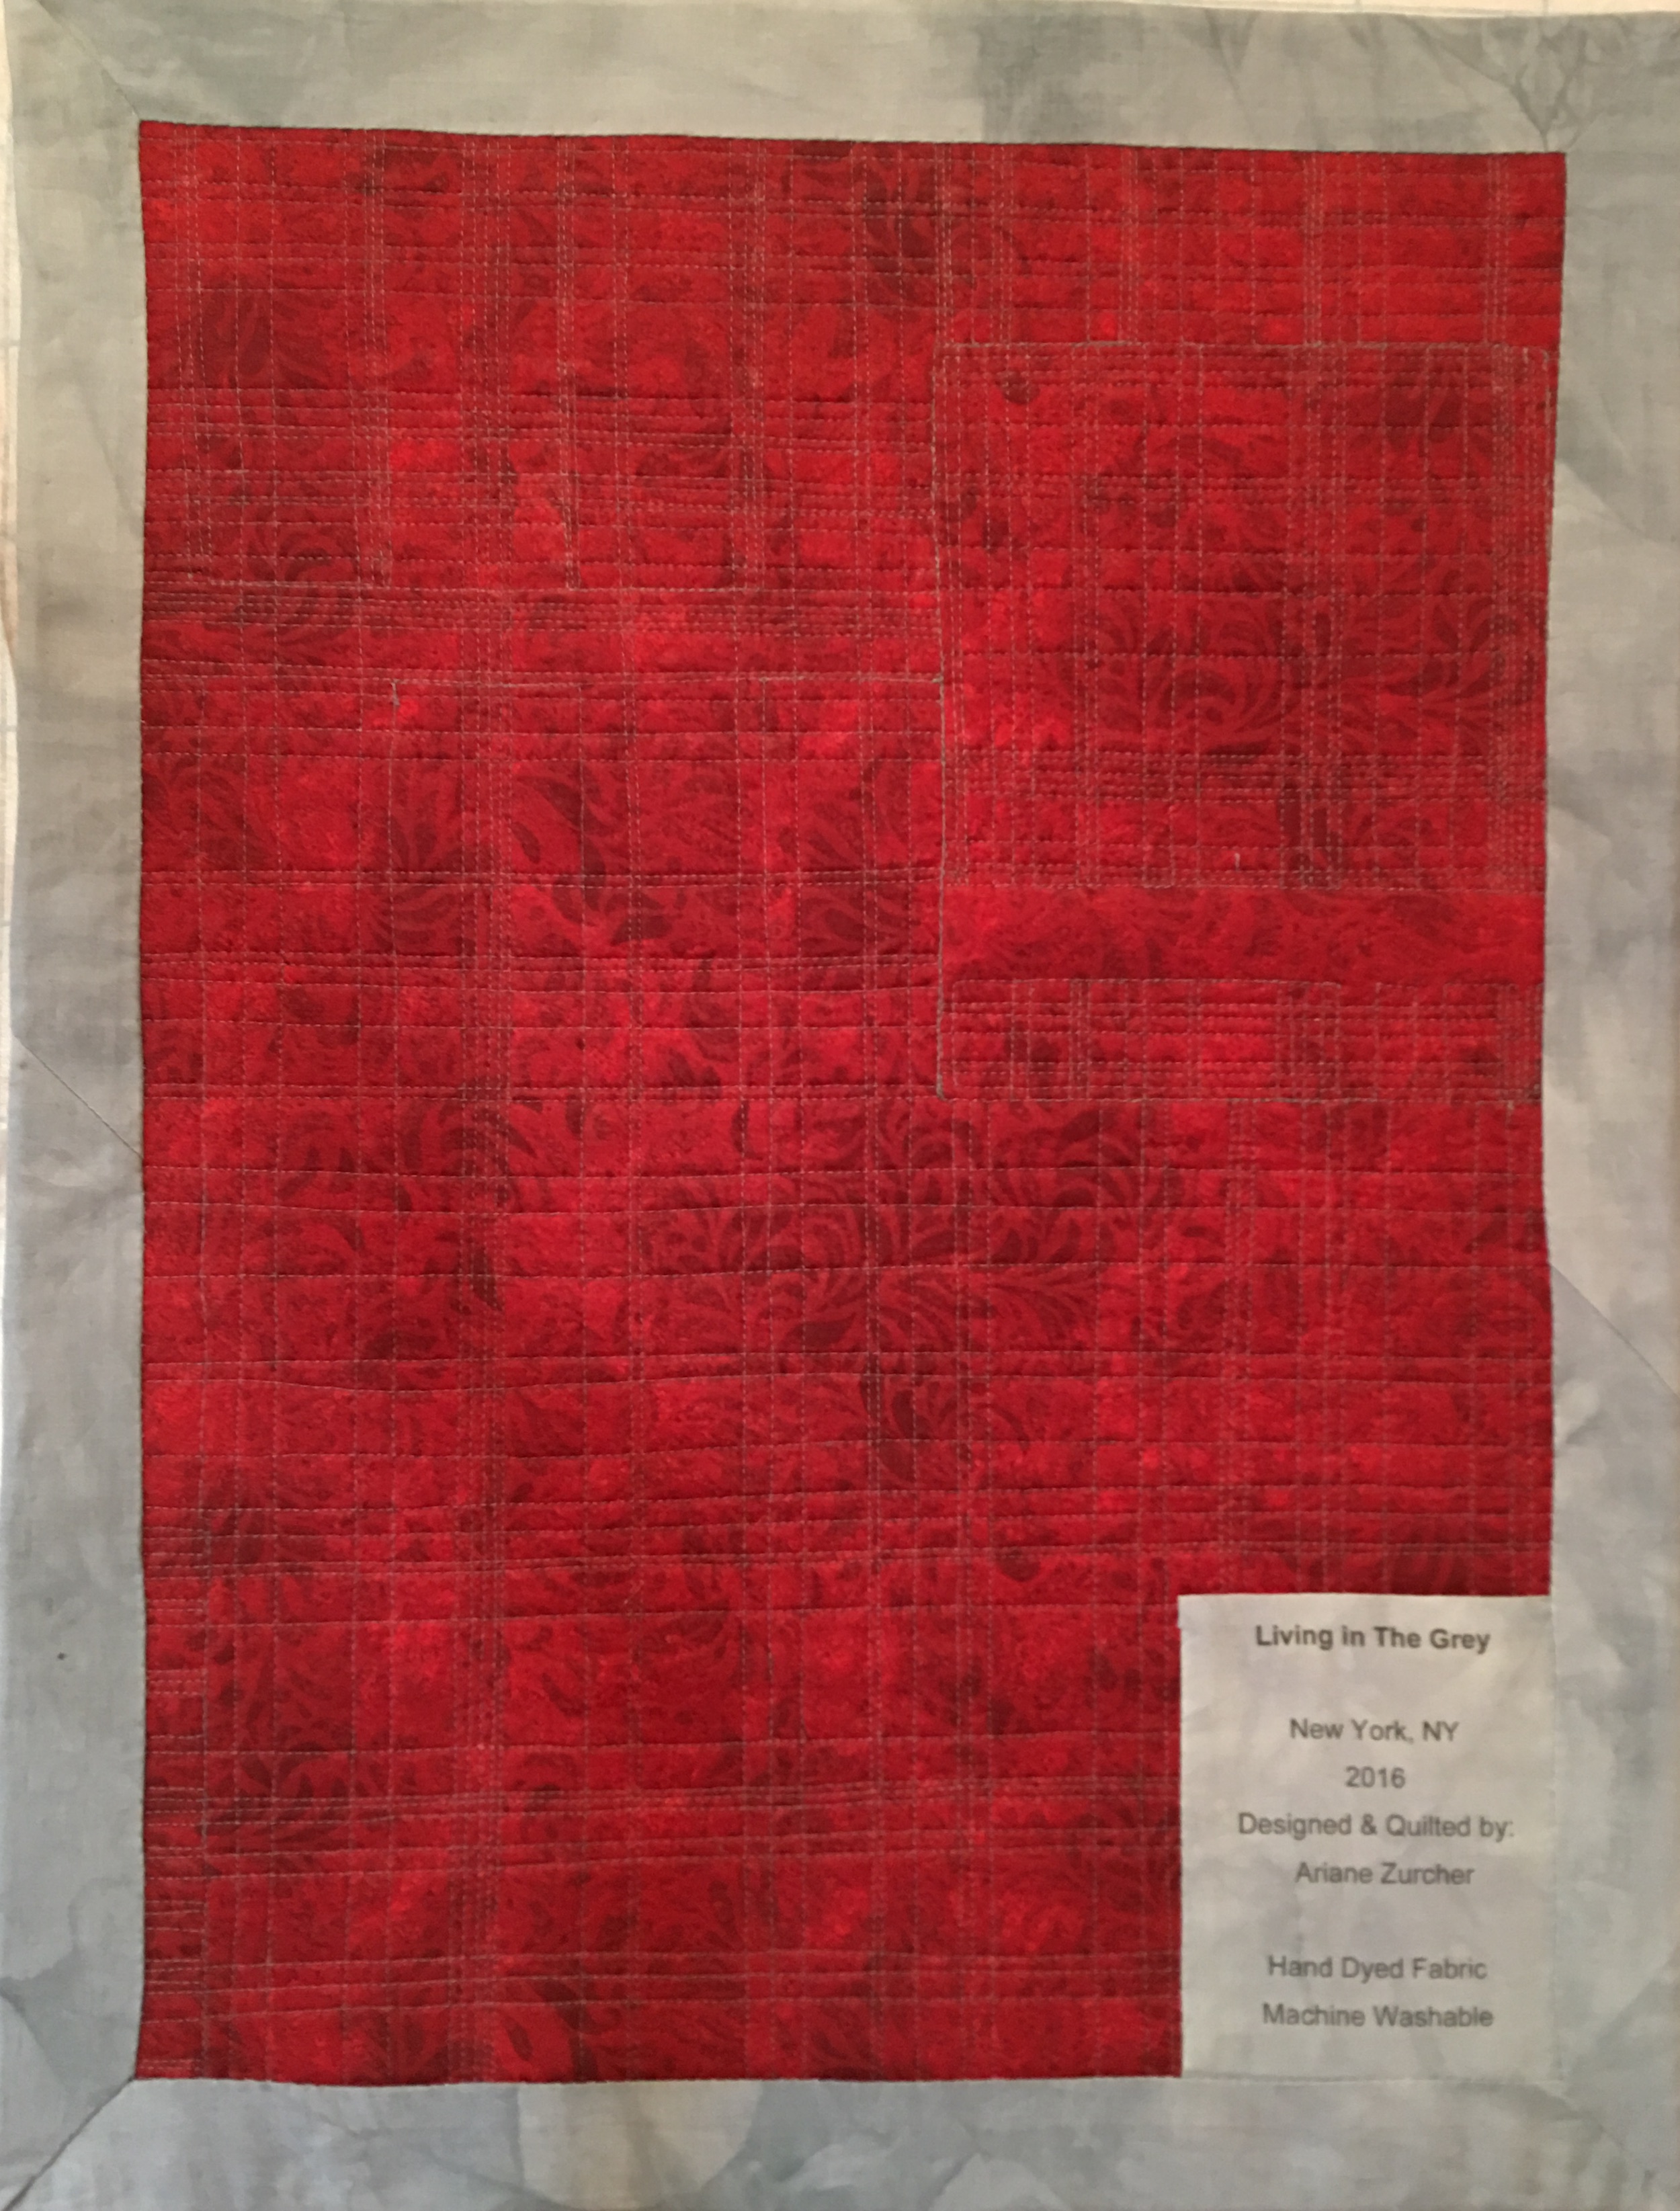
Back to Elizabeth who gave me more excellent feedback, suggesting a different color thread and syncopating the stitches so they didn’t meet with the other lines from the larger piece, and off I went to finish it. I decided against a binding, instead made a facing out of my lightest grey and backed it with a piece of red fabric I had. I made a label, again from one of the light greys and voila! This piece, entitled Living in the Grey, is 17″X 23.5″.
The thing about dyeing your own fabric is how utterly seductive it is. You can mix any color you want by tweaking the proportions of your primary colors. The mottled effect enhances the overall feel of the fabric, making it completely unique and like no other.
We are now in Week Two and are dyeing as many colors as we have the time, inclination and material for. Of course I went totally nuts with dyeing all the possibilities. I admit – I’ve now dyed every color including varying intensities and am eager to start experimenting with the subtler, more nuanced shades of each, but ran out of fabric, dye and other materials I need, so will have to wait until all the things I’ve ordered arrive. Here’s a sneak peak of a few of the colors I dyed over the weekend, (and stayed up until 3 or 4am, I can’t remember now, to do so!) getting ready for my next design using colors. Lots and lots of colors. You could even say… colors to dye for. Oh behave yourself!
I’m just dyeing to read your comments. Okay, okay, I’ll stop.
No, really.
I promise.
You have no idea how hard I’m restraining myself right now.
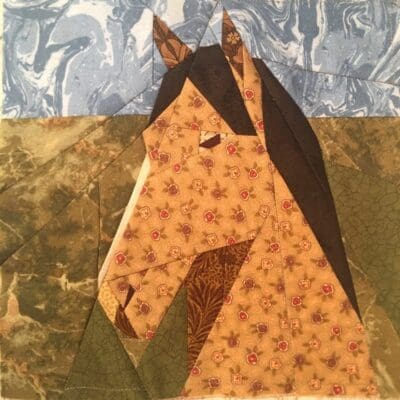
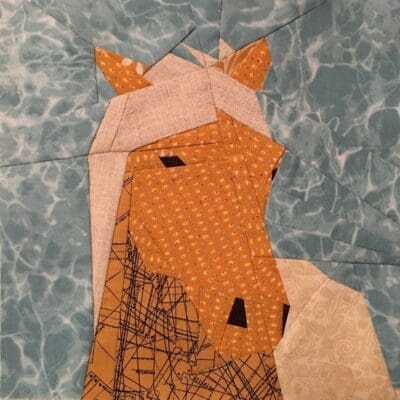
Welcome to my store!
Please browse and look at our patterns available. We also offer Workshops! ~Ariane


 And I didn’t make a single dye joke. The title doesn’t count because it’s Elizabeth’s name for her class. How can you not love that title? I may go back and edit a few in, just to amuse, or you can make a few in the comments!
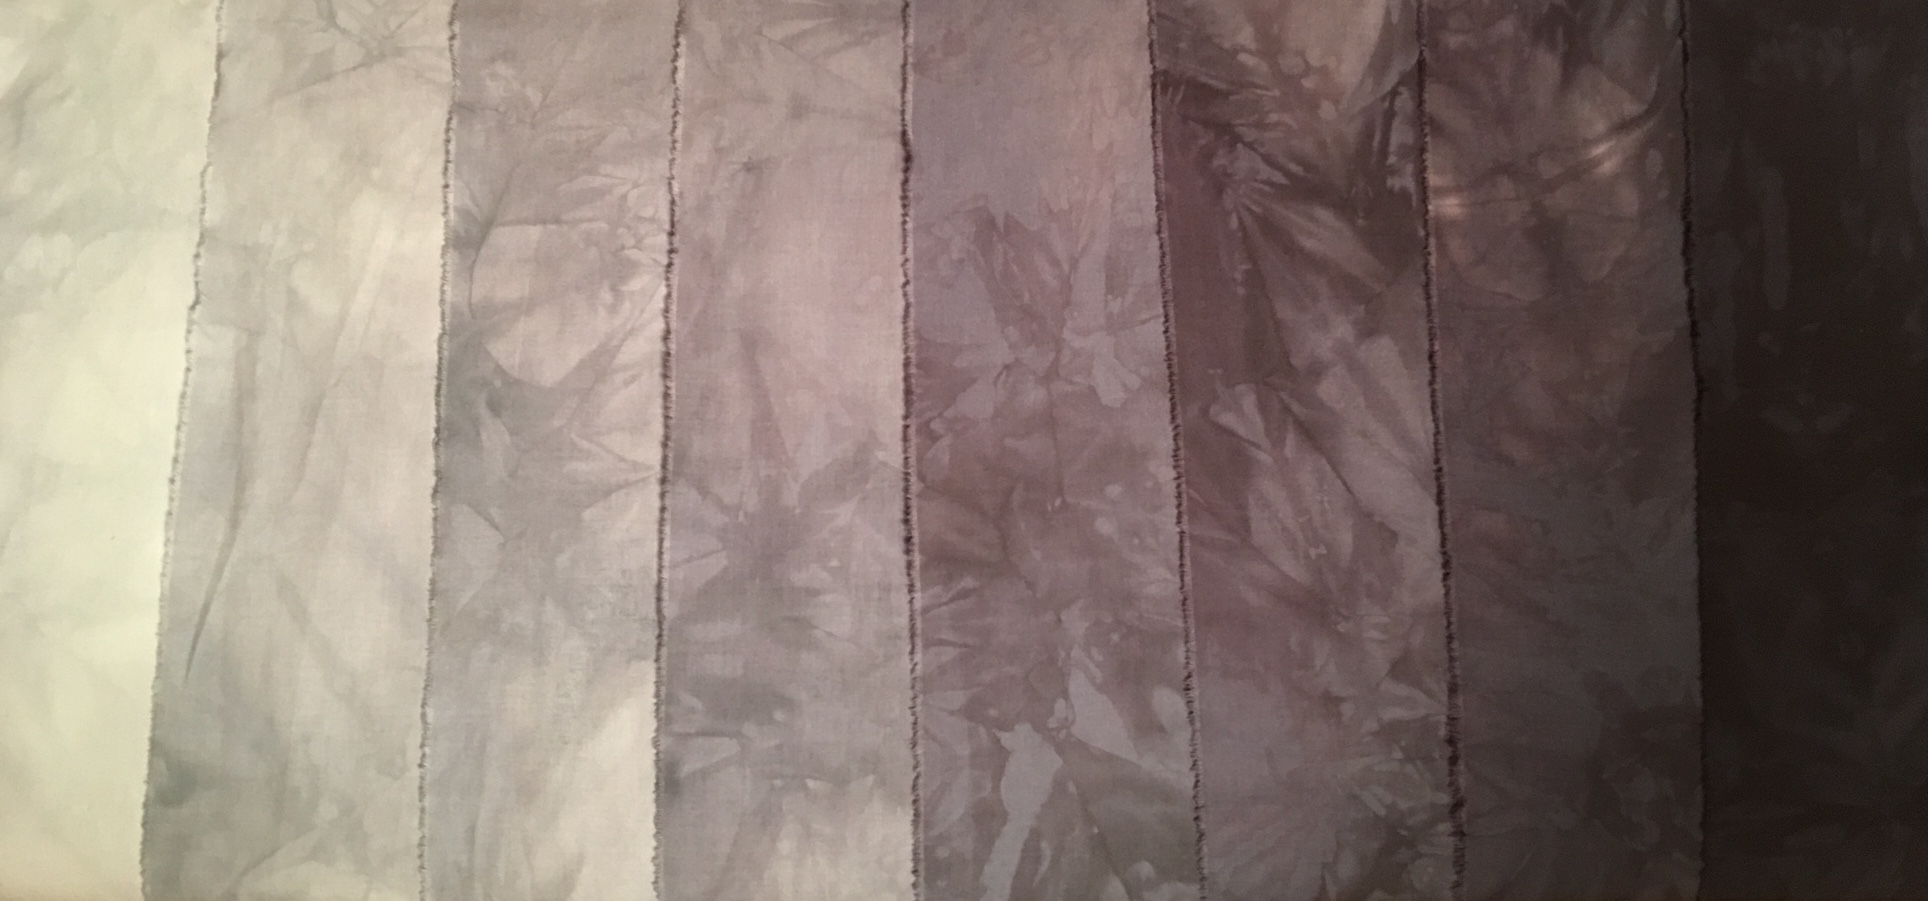 Designing a piece using these gradations was next. I had a couple ideas and with Elizabeth’s encouragement settled on this one, which also happened to be the first idea I came up with.
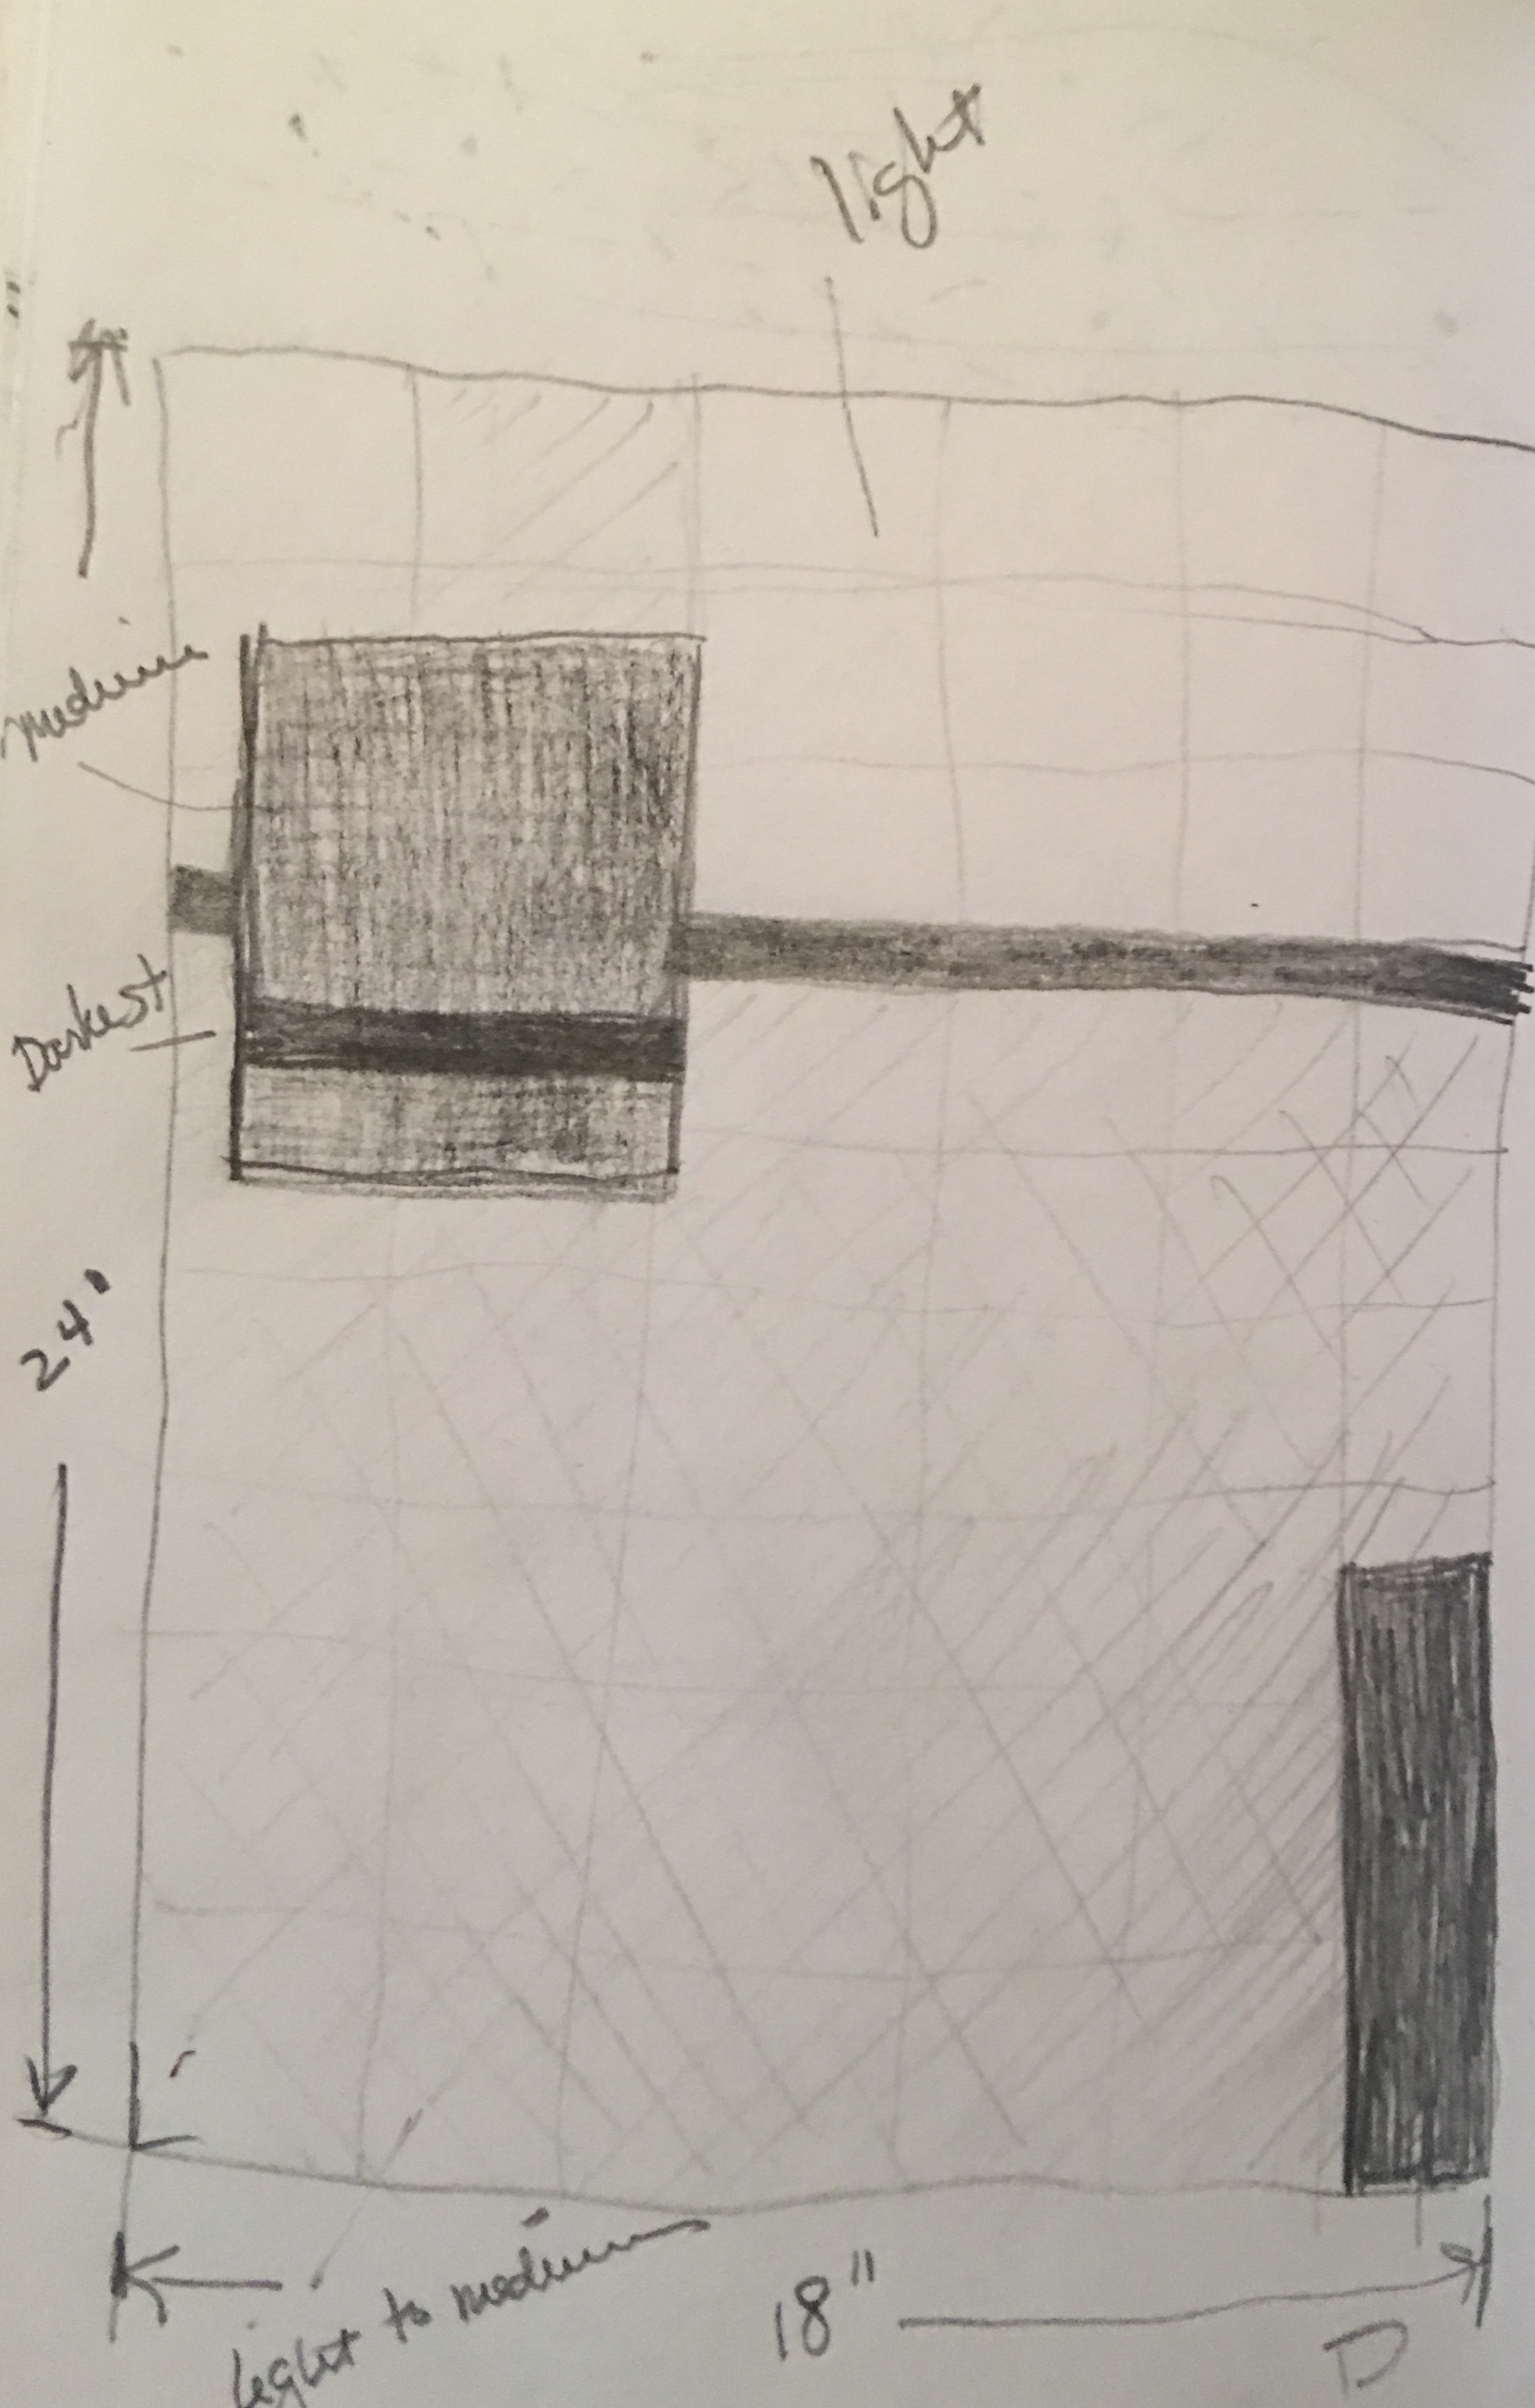
 After consulting Elizabeth (again), she suggested linear and horizontal stitching, I began quilting, but left the larger square alone as I wasn’t sure what to do with it. I wanted to do something, but couldn’t figure out what.
 The thing about dyeing your own fabric is how utterly seductive it is. You can mix any color you want by tweaking the proportions of your primary colors. The mottled effect enhances the overall feel of the fabric, making it completely unique and like no other.
Recent comments