![A Work Space of One’s Own]()
by Ariane Zurcher | Sep 26, 2016 | Art, creative process, Design |
At three in the morning, in a fit of frenzied sleeplessness I decided my work space was in desperate need of reorganization. And what great idea that comes to you in the wee hours of the morning isn’t a brilliant one?! However, upon further reflection, I decided reorganizing is not one of my strengths and so, I did what anyone would do. I solicited the help of someone who excels at reorganizing. Step into the limelight my fabulous husband (FH) and take a bow. He is extremely good at just this sort of thing. “Okay,” he said, all business-like, “talk me through this.” And then proceeded to ask me a series of questions.
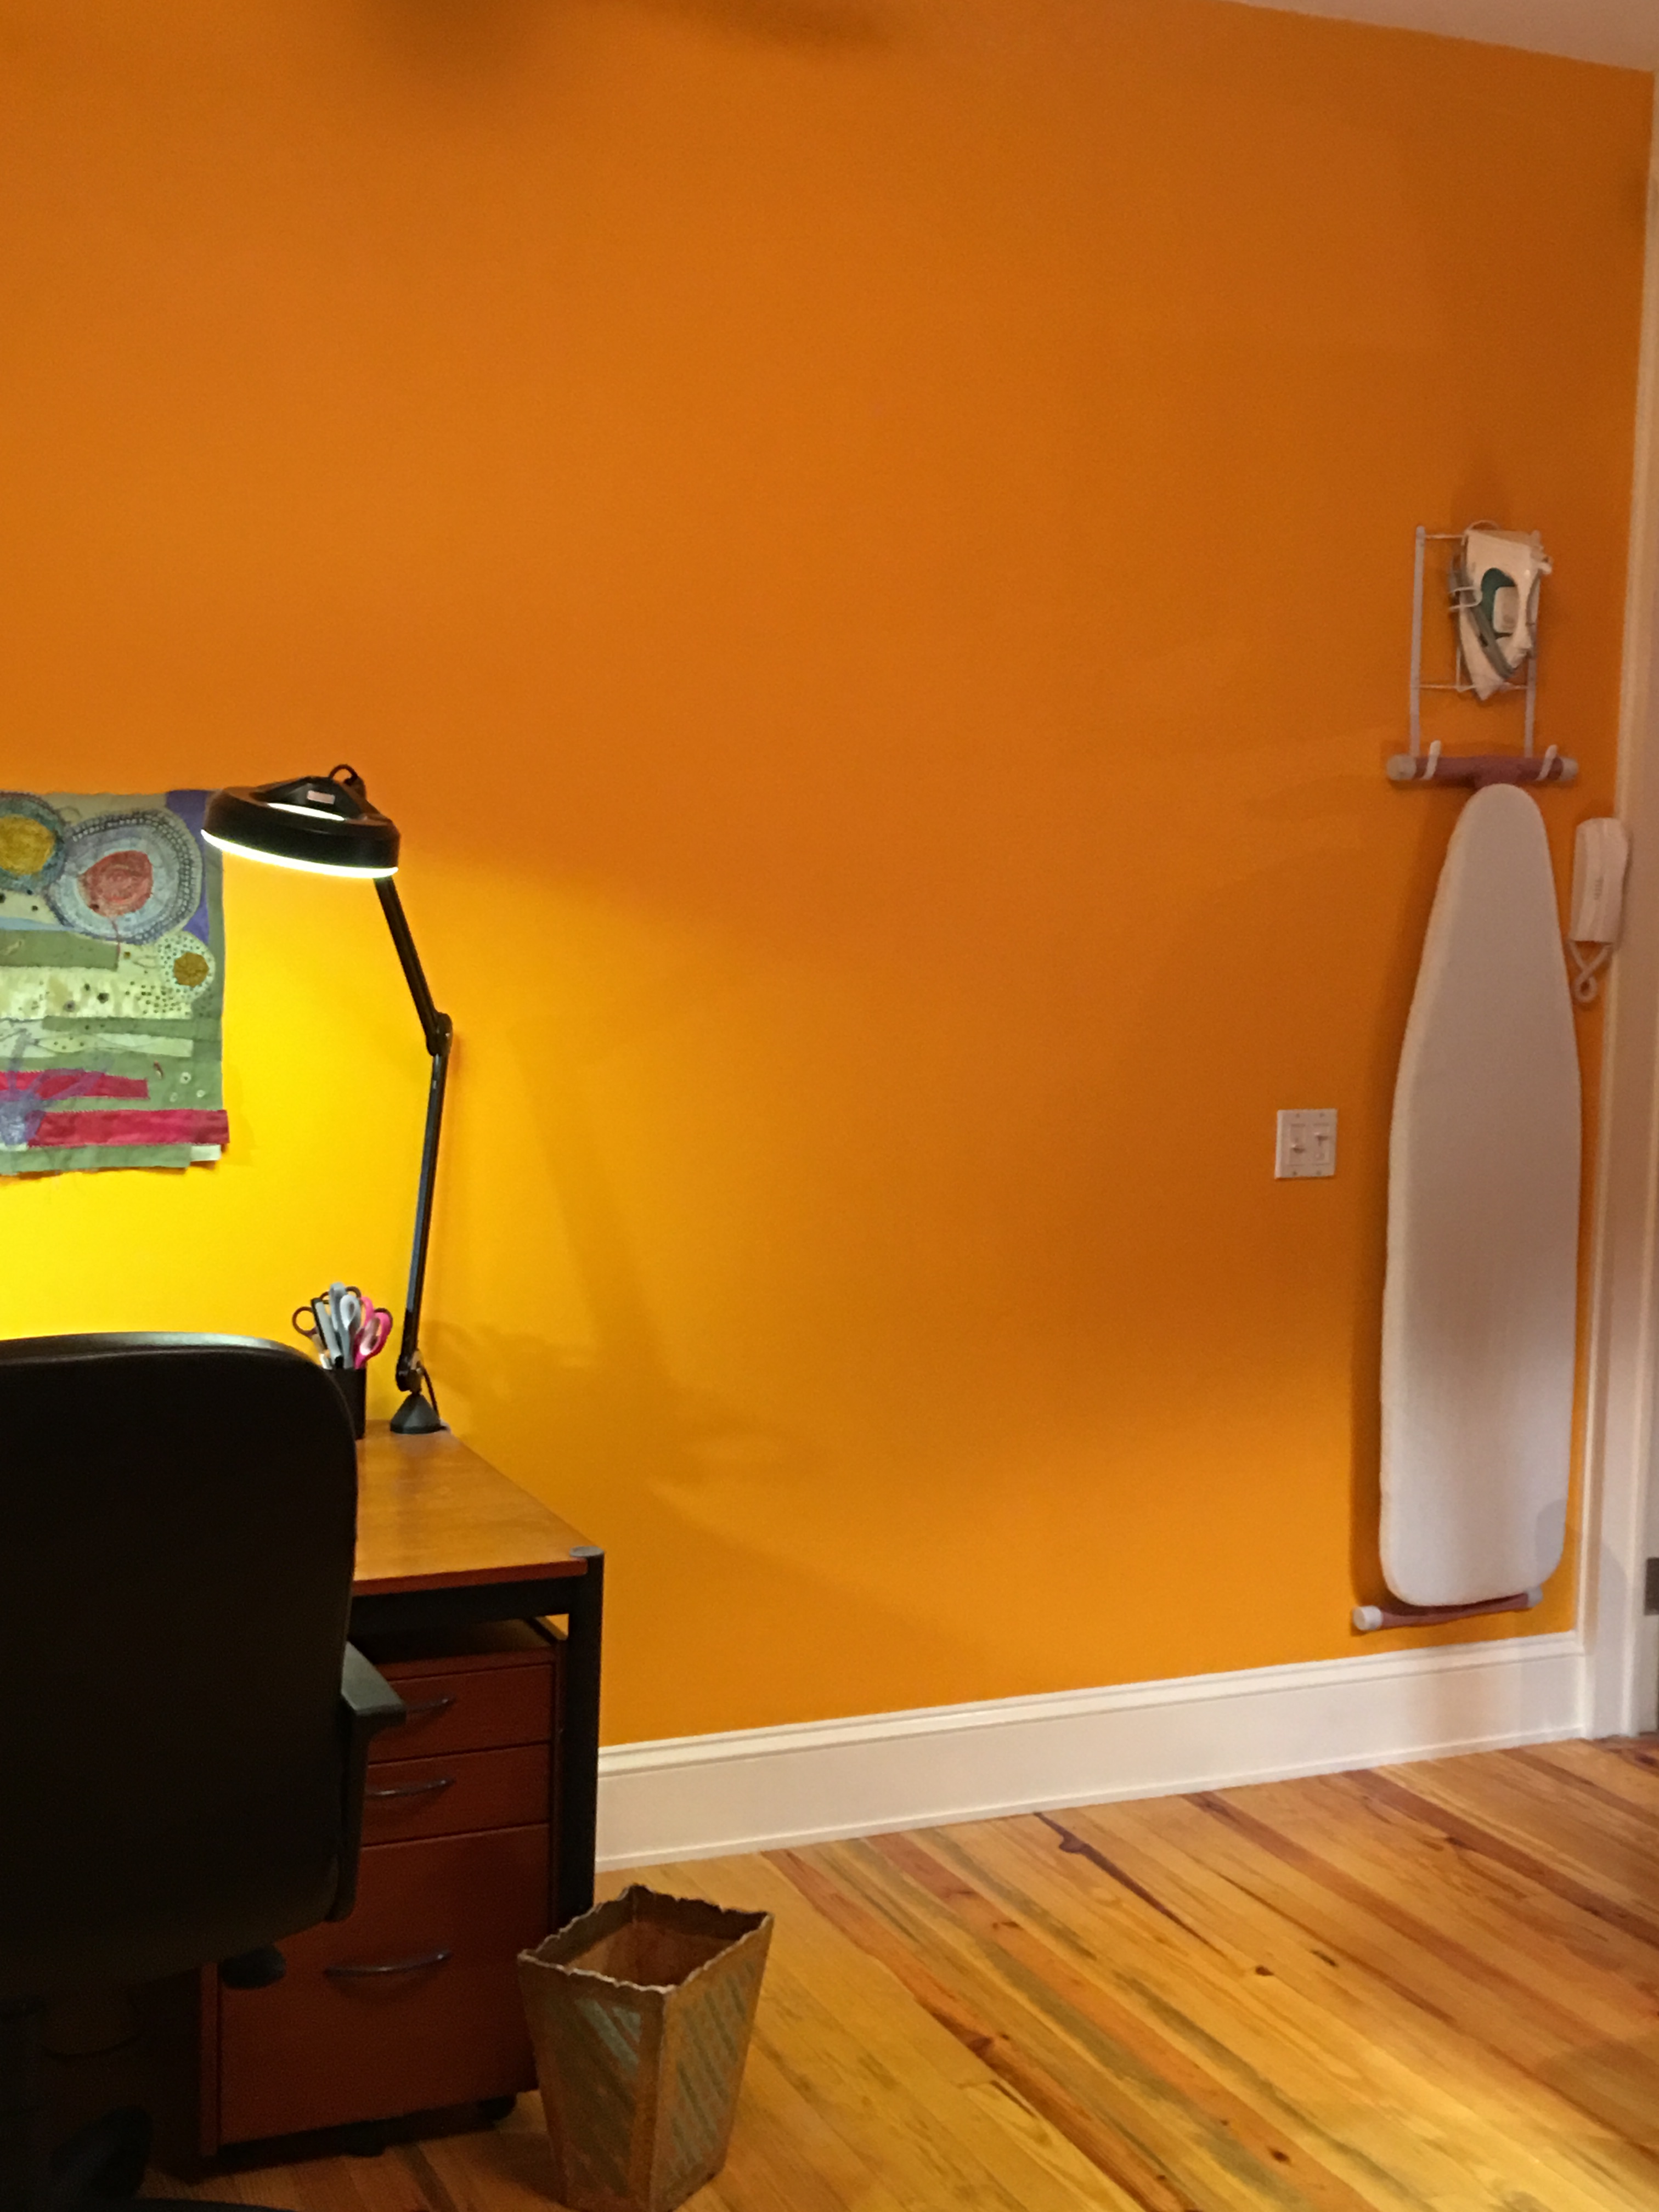
From this conversation he prioritized and broke down what I needed to do in manageable steps. I forgot to take a photograph of the disaster that was once my work space, but this is what it looked like at about the halfway point.
As I was trying to decide what color I should paint that great expanse of white wall (this was a tricky decision as it is a dark room, made even darker by the red carpet I bought decades ago in Turkey) I thought, “I need a design wall!” This is not essential, after all I have sketch books and a table where I can play with ideas, but a design wall would be really, really nice to have. So I googled design walls and found some wonderful ones. I decided I wanted one that is at least 62″ x 72.” In order to do this I needed to get rid of a great many things scattered all over the place.
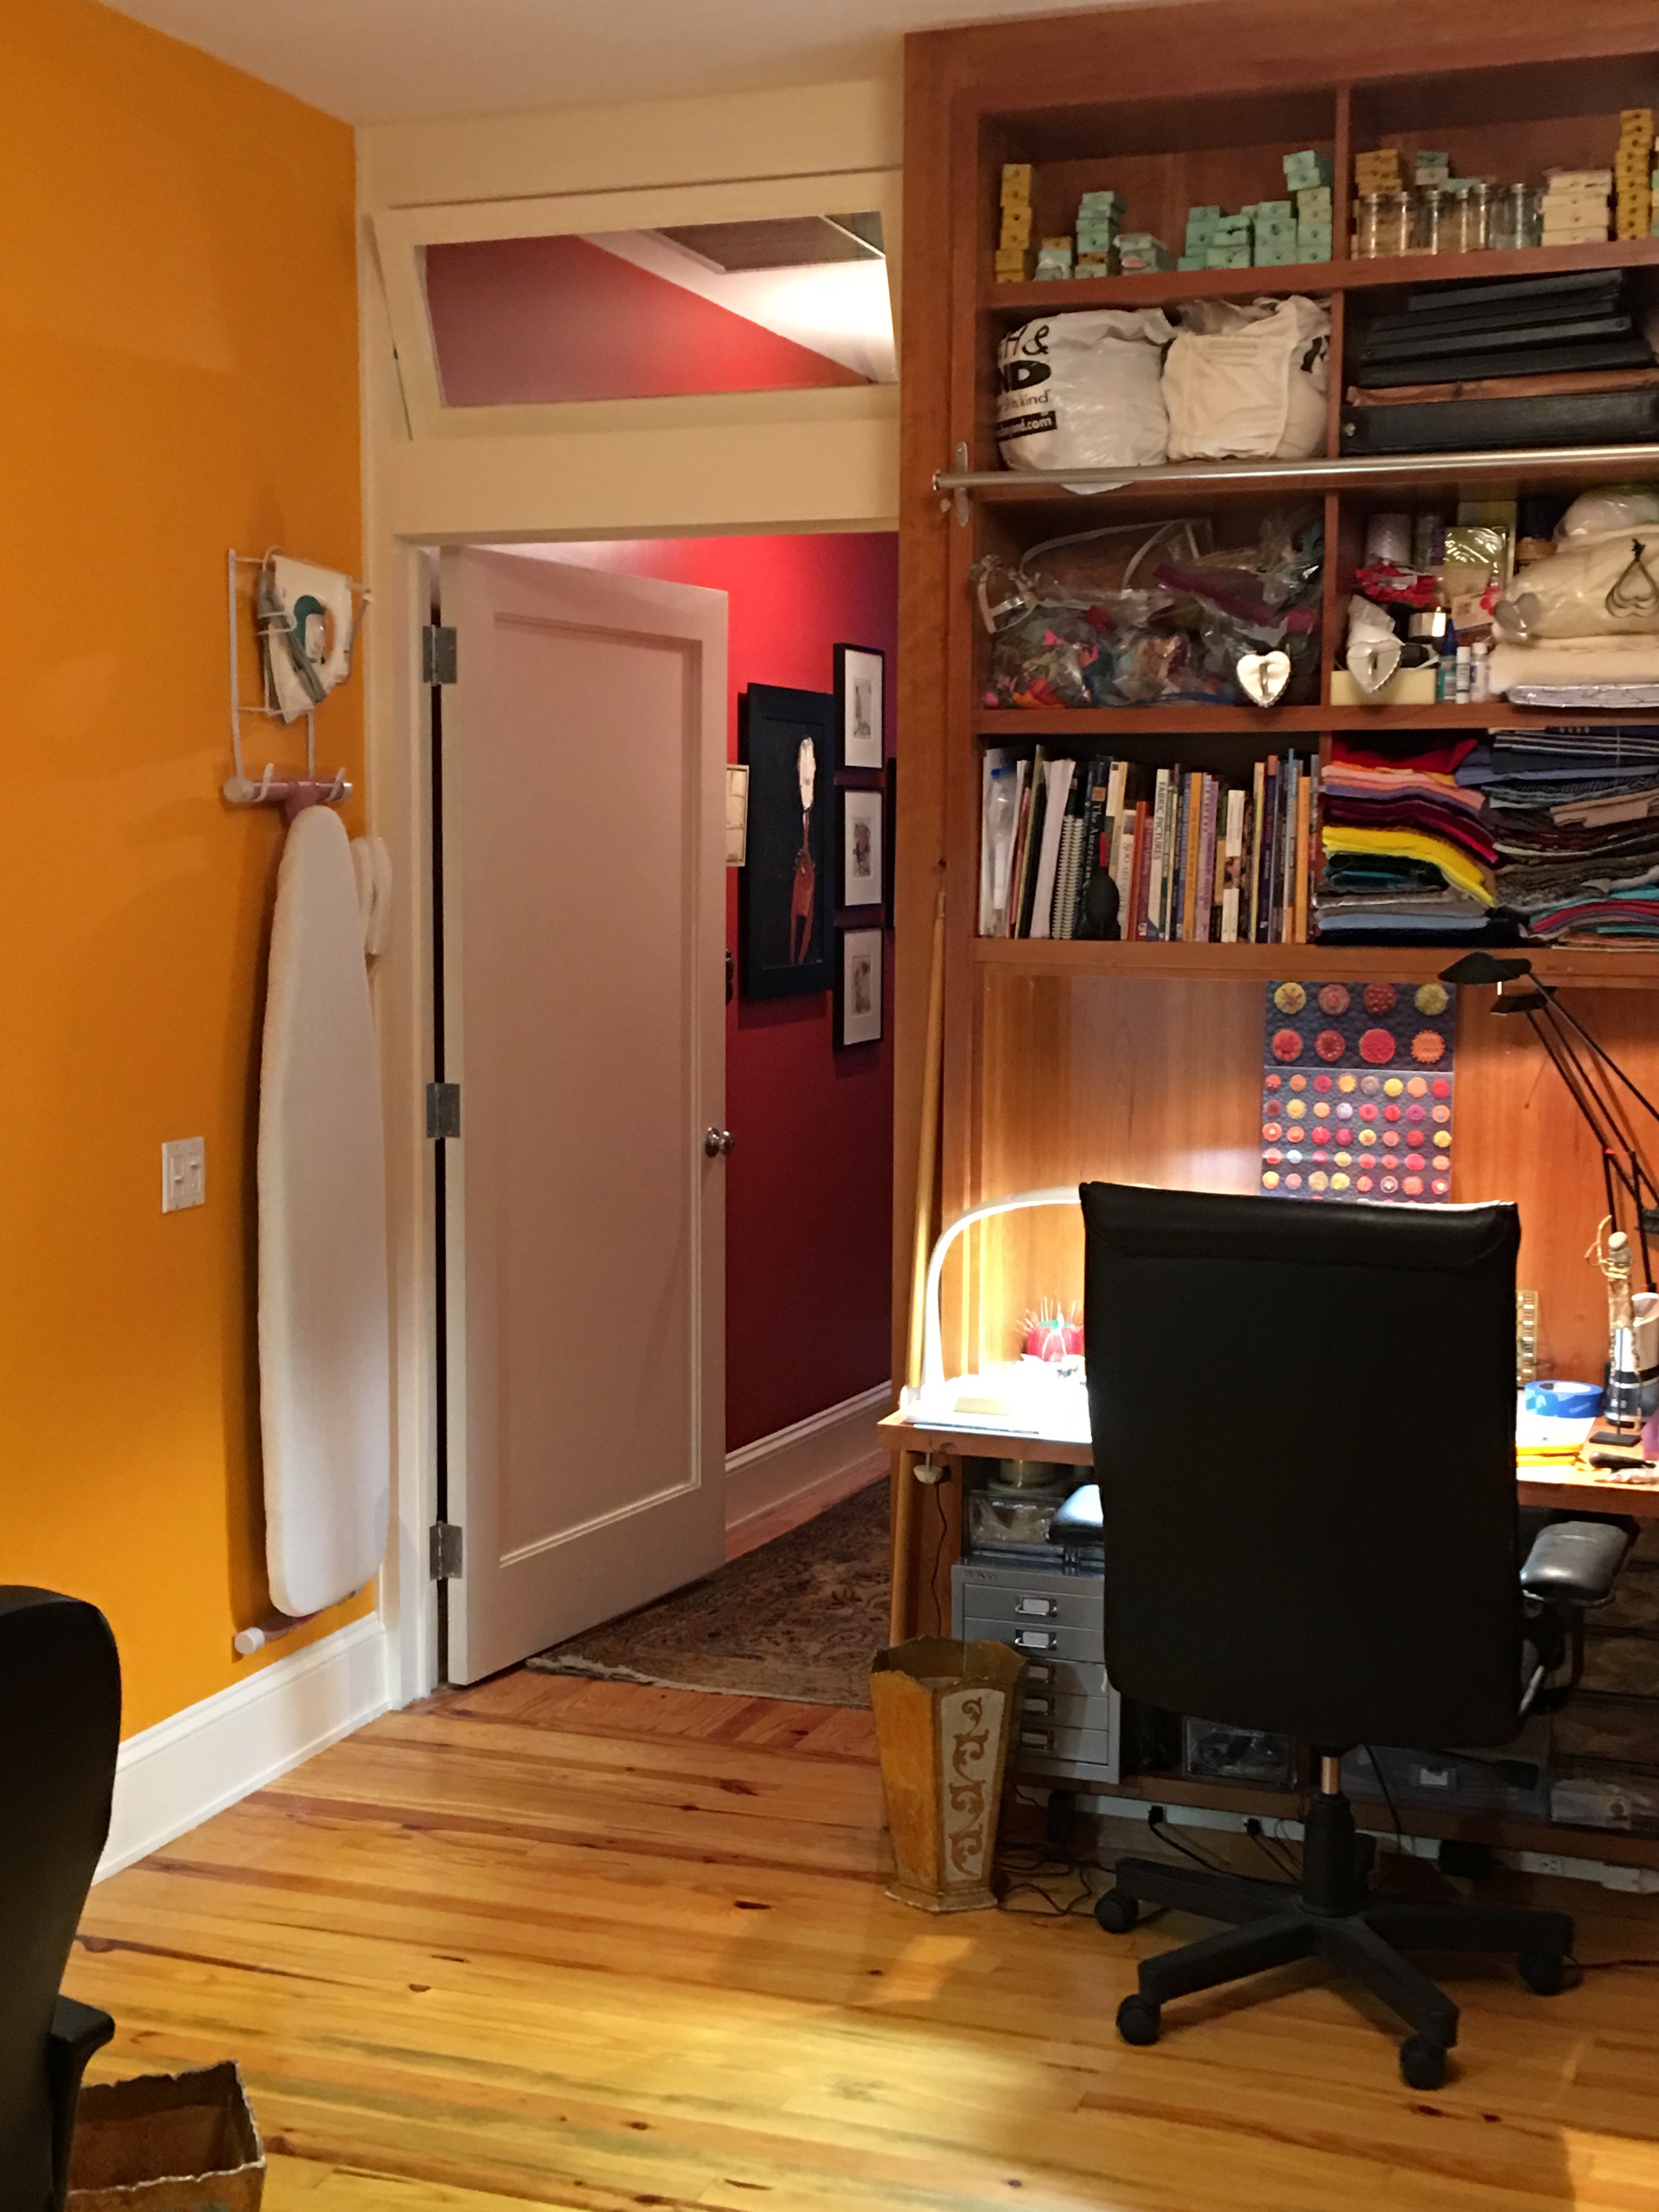
I decided on a bright mango color to brighten the room up. However, as with so many things in life, painting one wall proved more complicated than I anticipated. I ran into bubbles. Thousands and thousands of tiny bubbles appeared after the first coat of paint. I pricked one of them with a pin and, much to my horror, the bubble expanded exponentially, revealing all the coats of paint below the fresh coat I’d just painted, so that I was staring at dry board! I was so horrified I didn’t have the presence of mind to take photos, but my FH was witness. I ended up pulling off great sheets of bubbled up paint. After running to the hardware store for advice, making a couple of emergency phone calls to friends of mine who are far more experienced in painting walls than I am, I finally pulled up as much paint as I could, sanded, dusted, spackled, sanded some more, dusted some more and finally repainted and held my breath. What should have taken a few hours took more than a day and a half, BUT it came out pretty well, if I do say so myself! FH had the great idea of hanging my ironing board. Then there was the question of my design wall, which is removable.I needed to organize my fabrics and other materials that I use for my jewelry design, such as wax, files, metals, wire, etc. While I was doing all of this, I came across my old portfolio from my days in fashion design and got a little side tracked… Finally, after all of that, I got back on track.
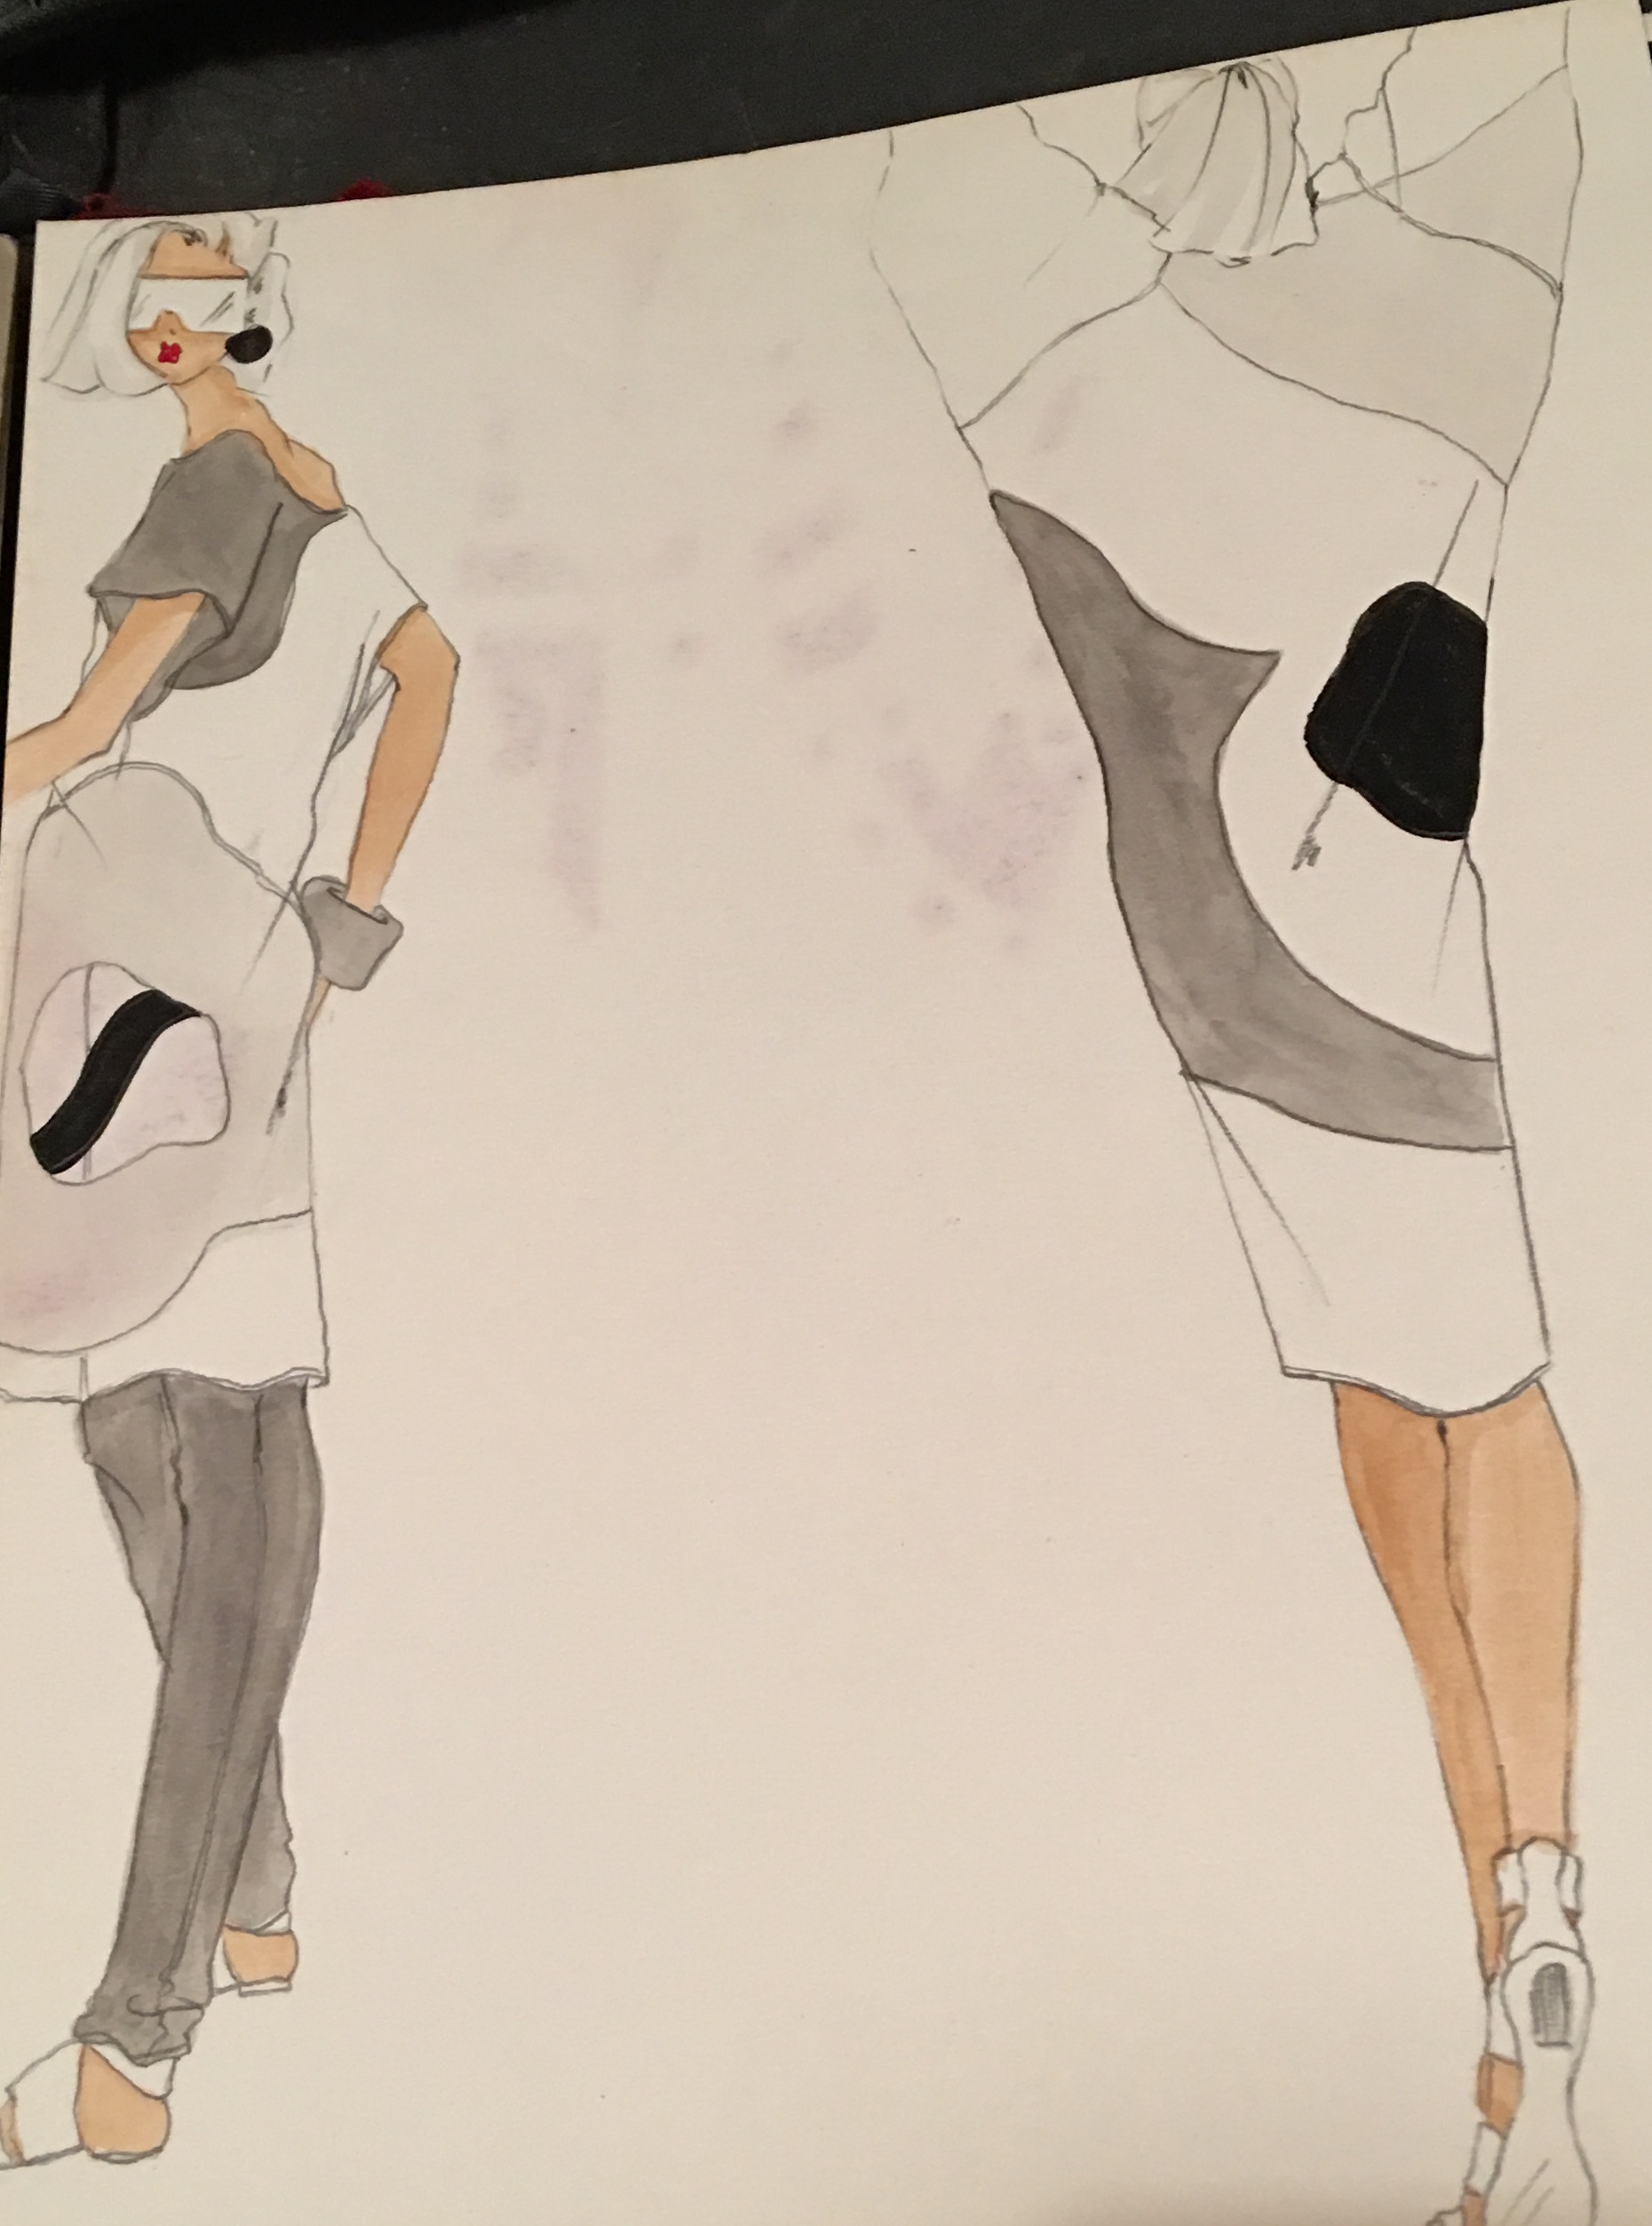
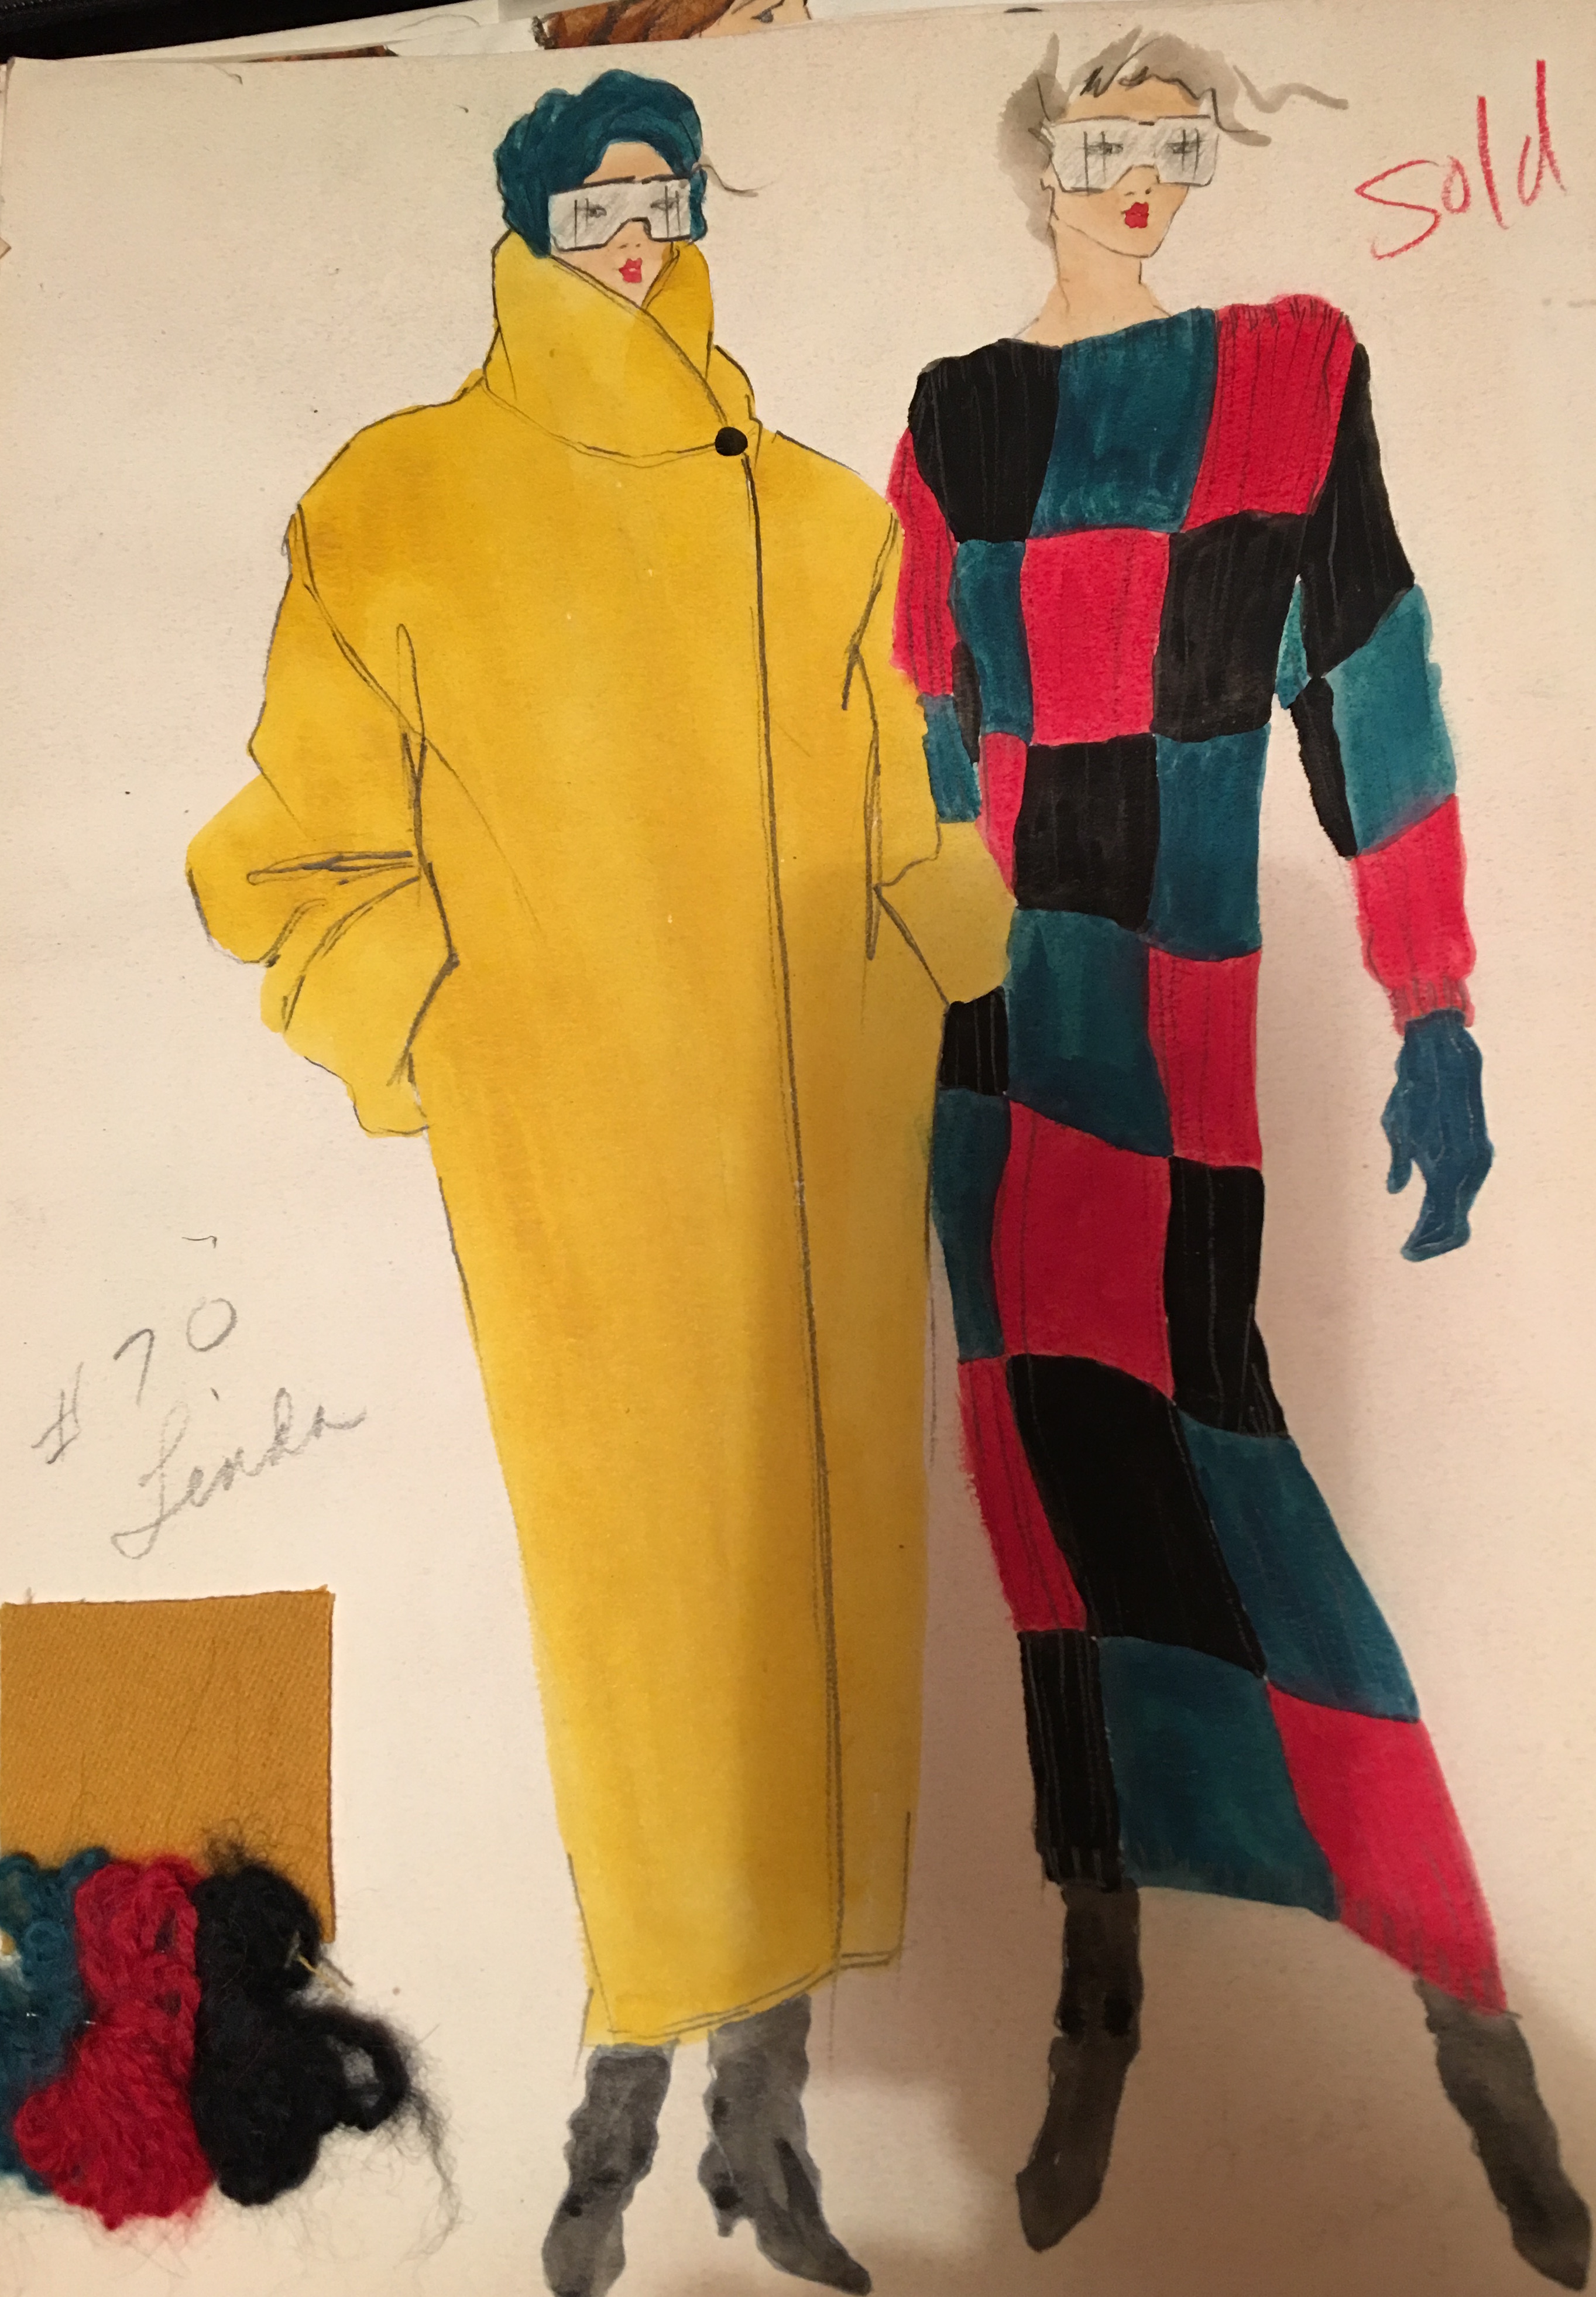
And here is the finished space!Now it’s time to get back to work – I have a queen-sized quilt to sandwich, baste and free motion quilt and then there are these little guys who keep calling to me.
A work in progress – Sharkey Dog
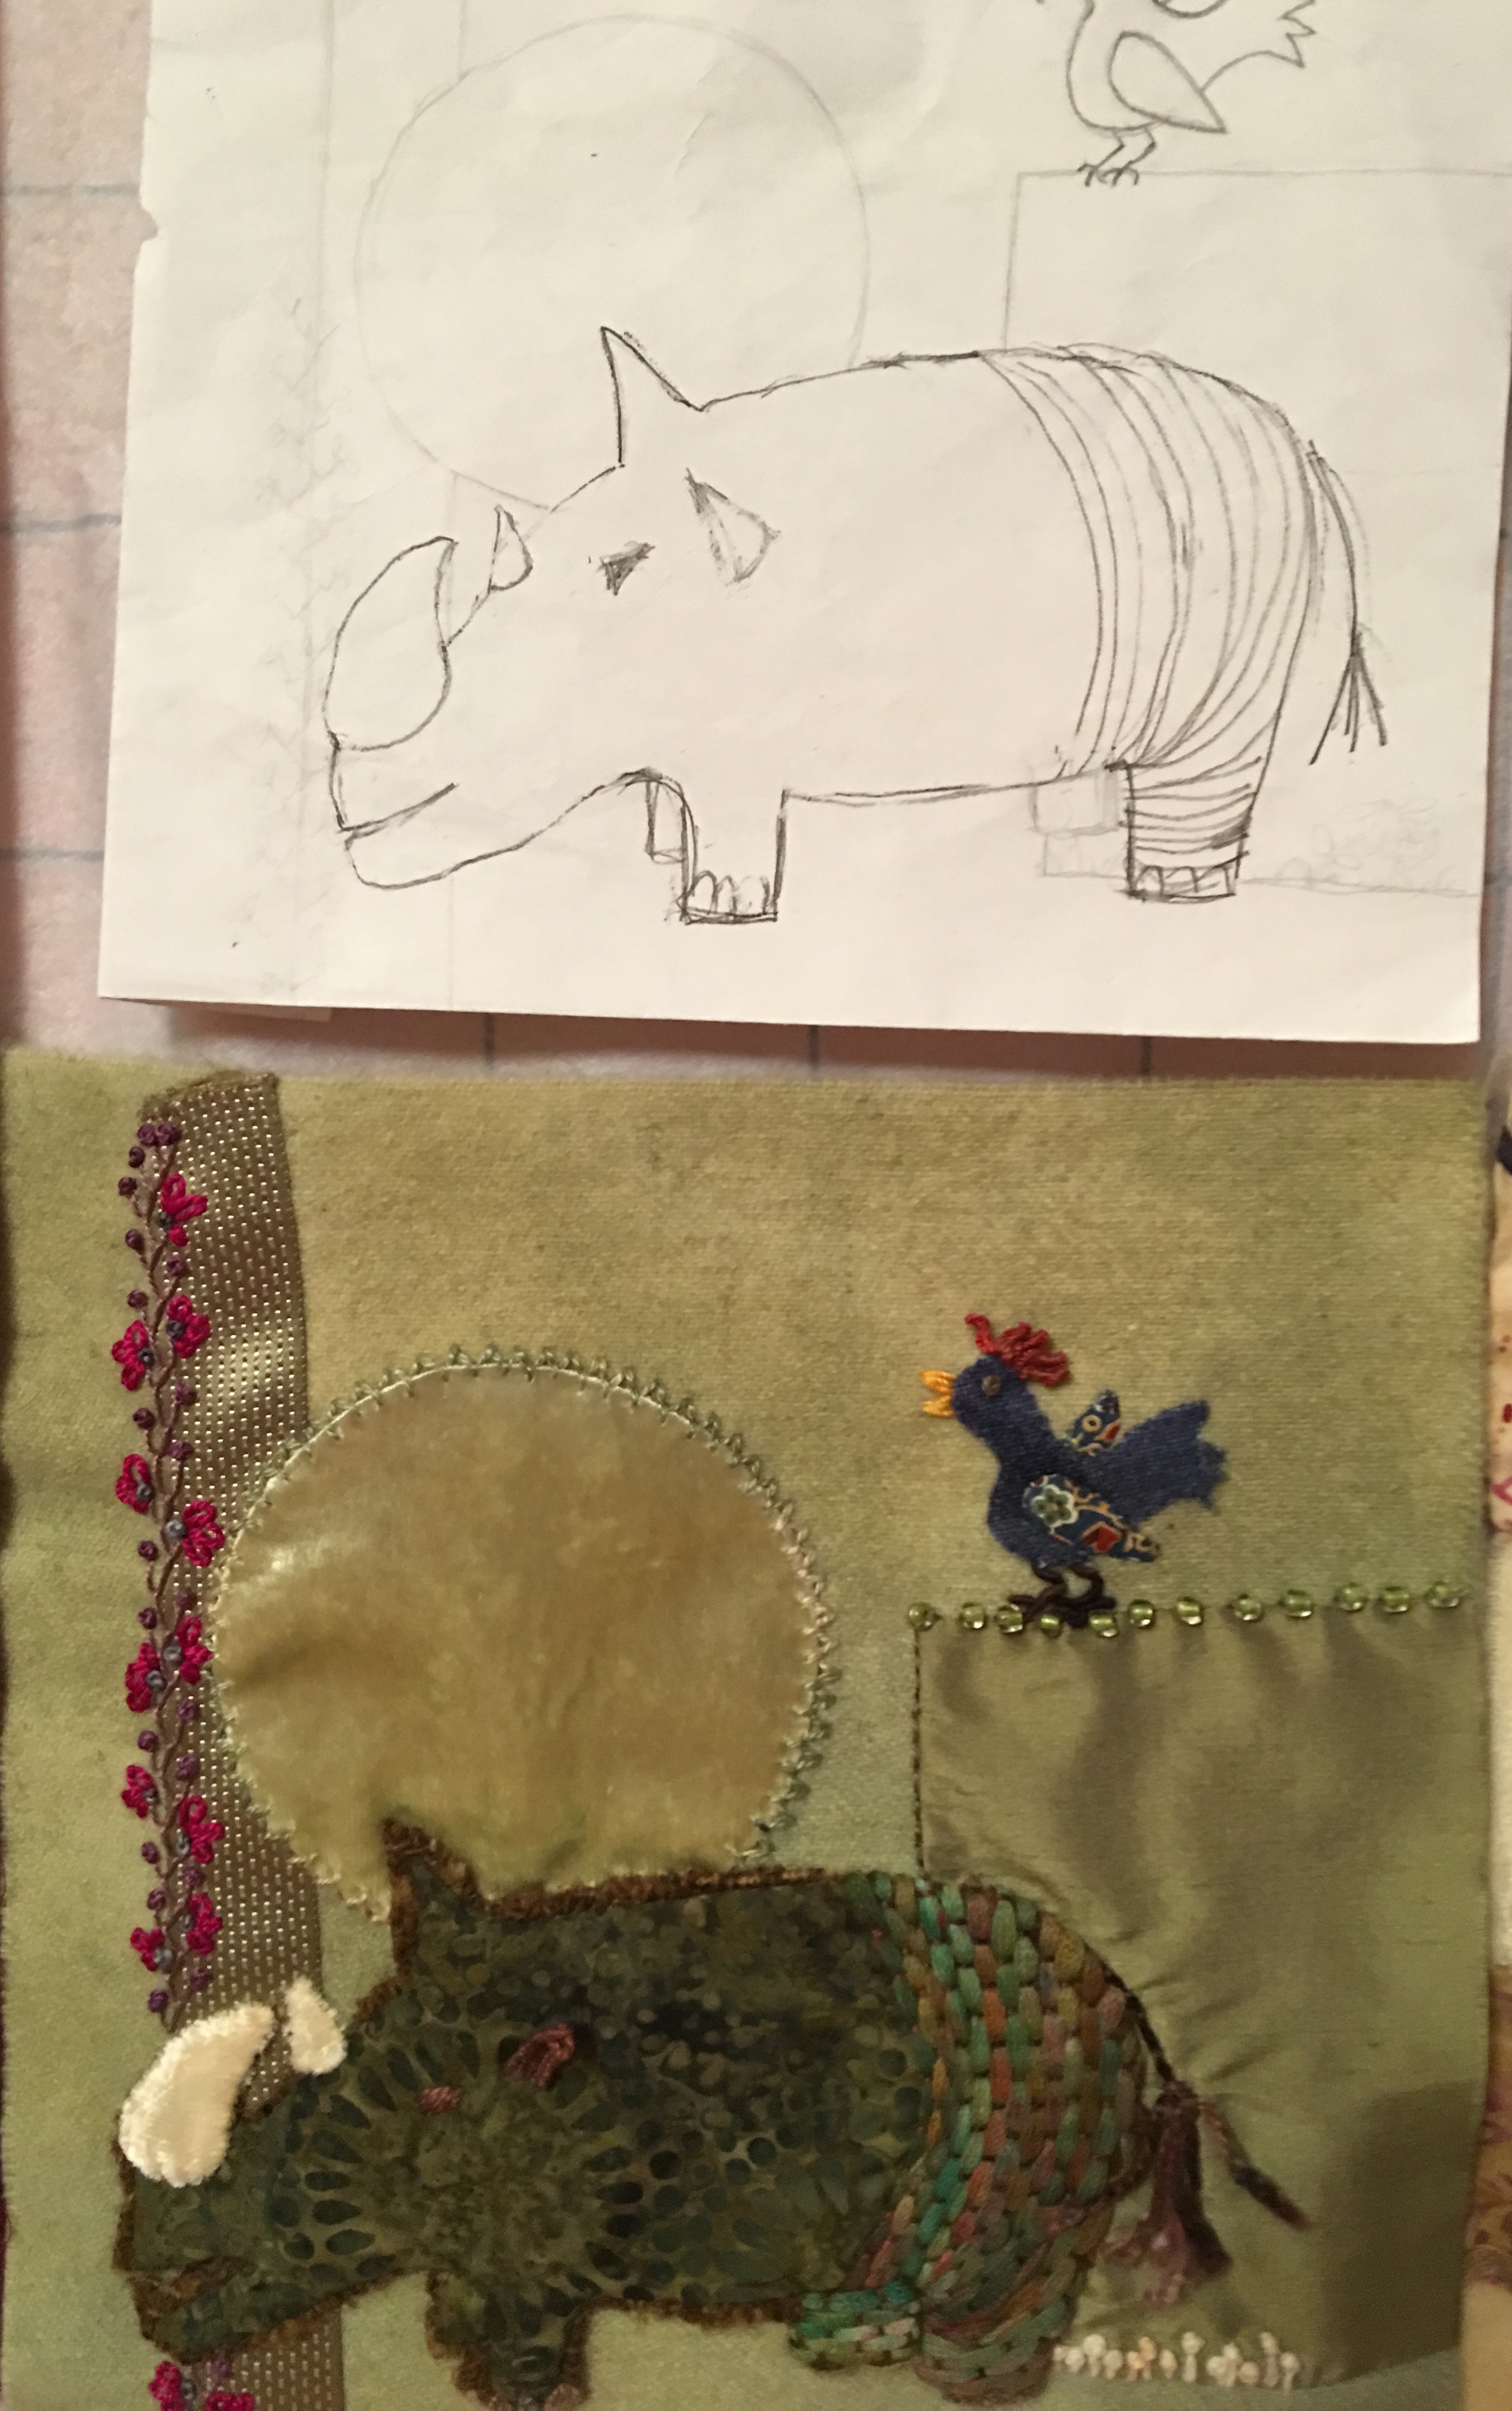
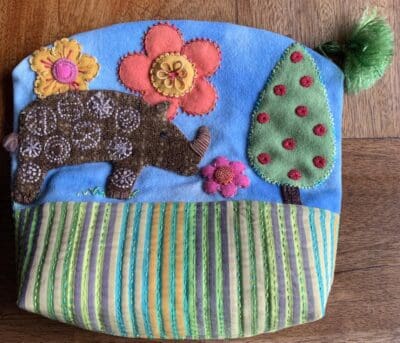
The African Rhino and his Friend – Blue Bird
![A Work Space of One’s Own]()
by Ariane Zurcher | Aug 15, 2016 | Art, ceramics, pottery |
When we began homeschooling (more on that here, here and here), one of the things Emma told us she wanted to do was take pottery classes. I found a pottery studio with a wonderful teacher who, upon seeing my obvious interest, suggested I join my daughter in learning. We began with pinch pots and working with slabs of clay that we learned to mold into various shapes.
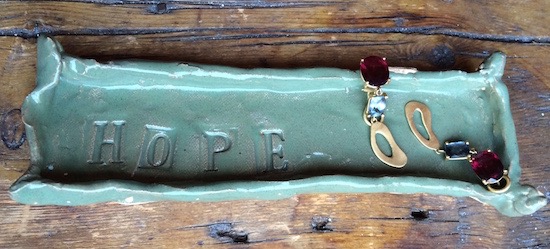
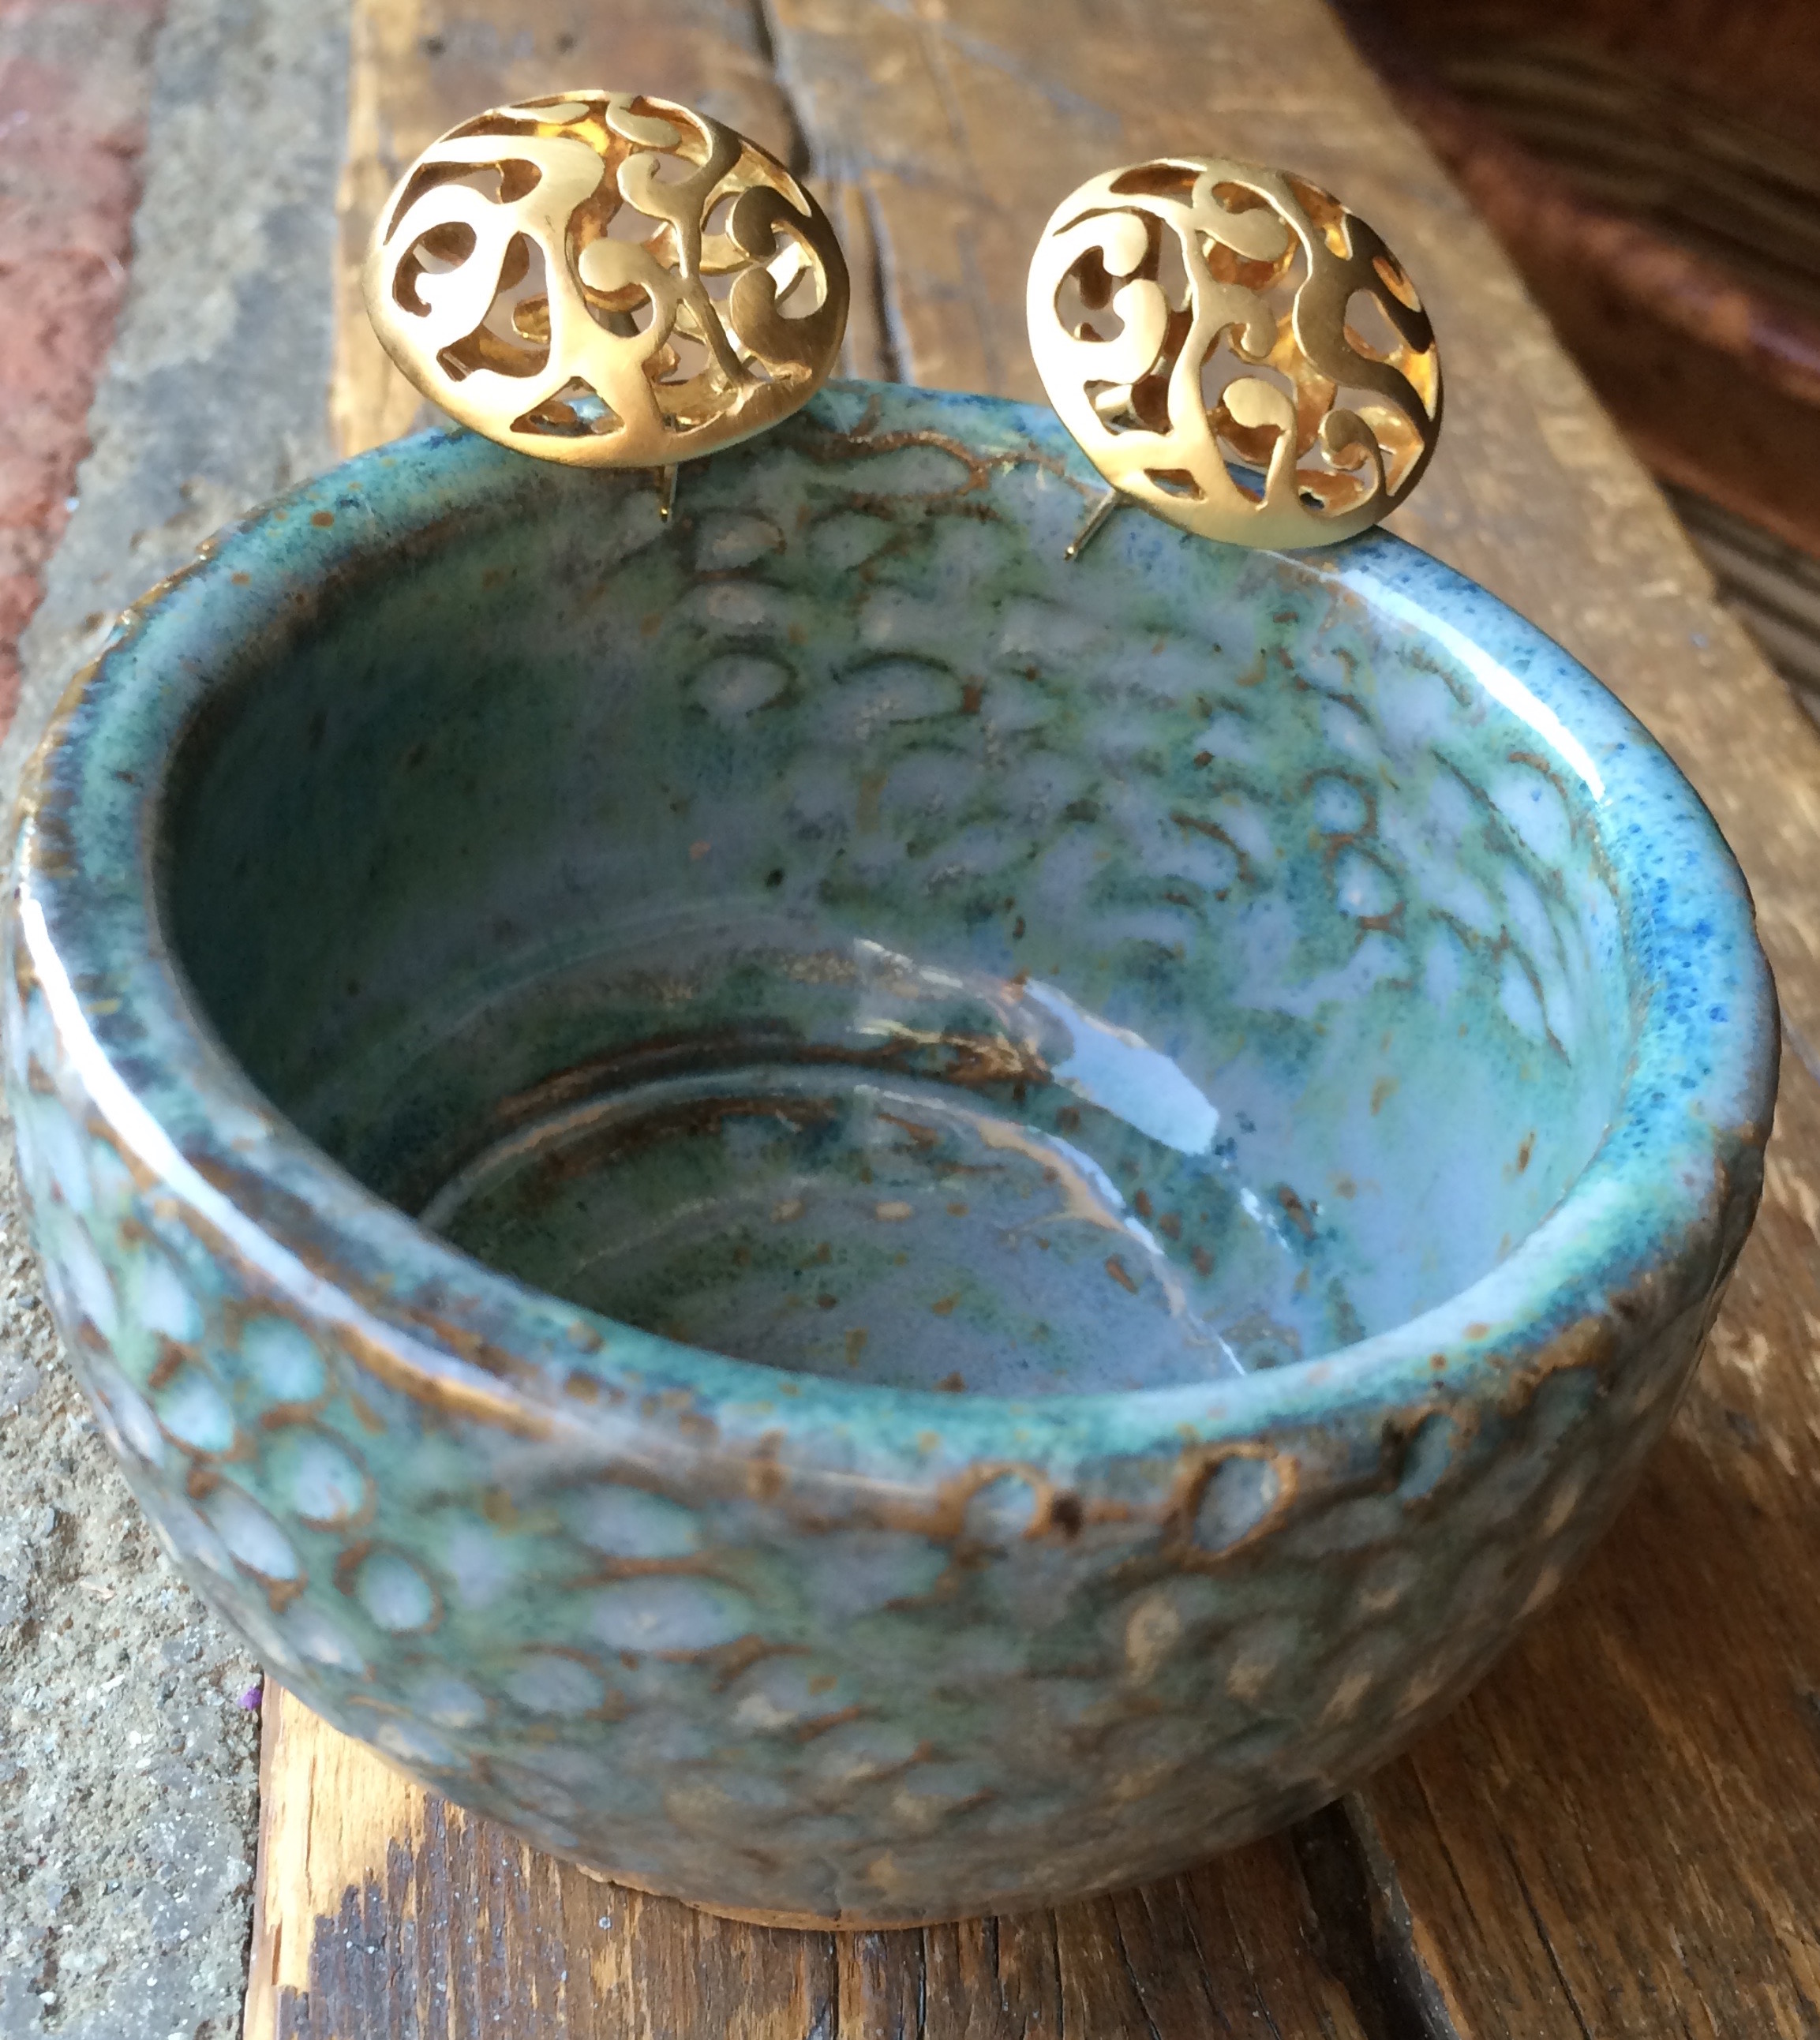
This is one of my favorite early dishes that my daughter made. It was screaming for a pair of my earrings. Okay, not literally, her hope dish is perfect all by itself…
Plate made from a slab
Eventually we were introduced to the wheel and the fun really began!
As with anything, gaining any degree of confidence and skill requires practice. So there were lots and lots of pots being made, many of them returned to the great clay graveyard to be recycled. I decided to begin painting on the pots I was throwing and started playing with underglazes, which is a whole art in and of itself.
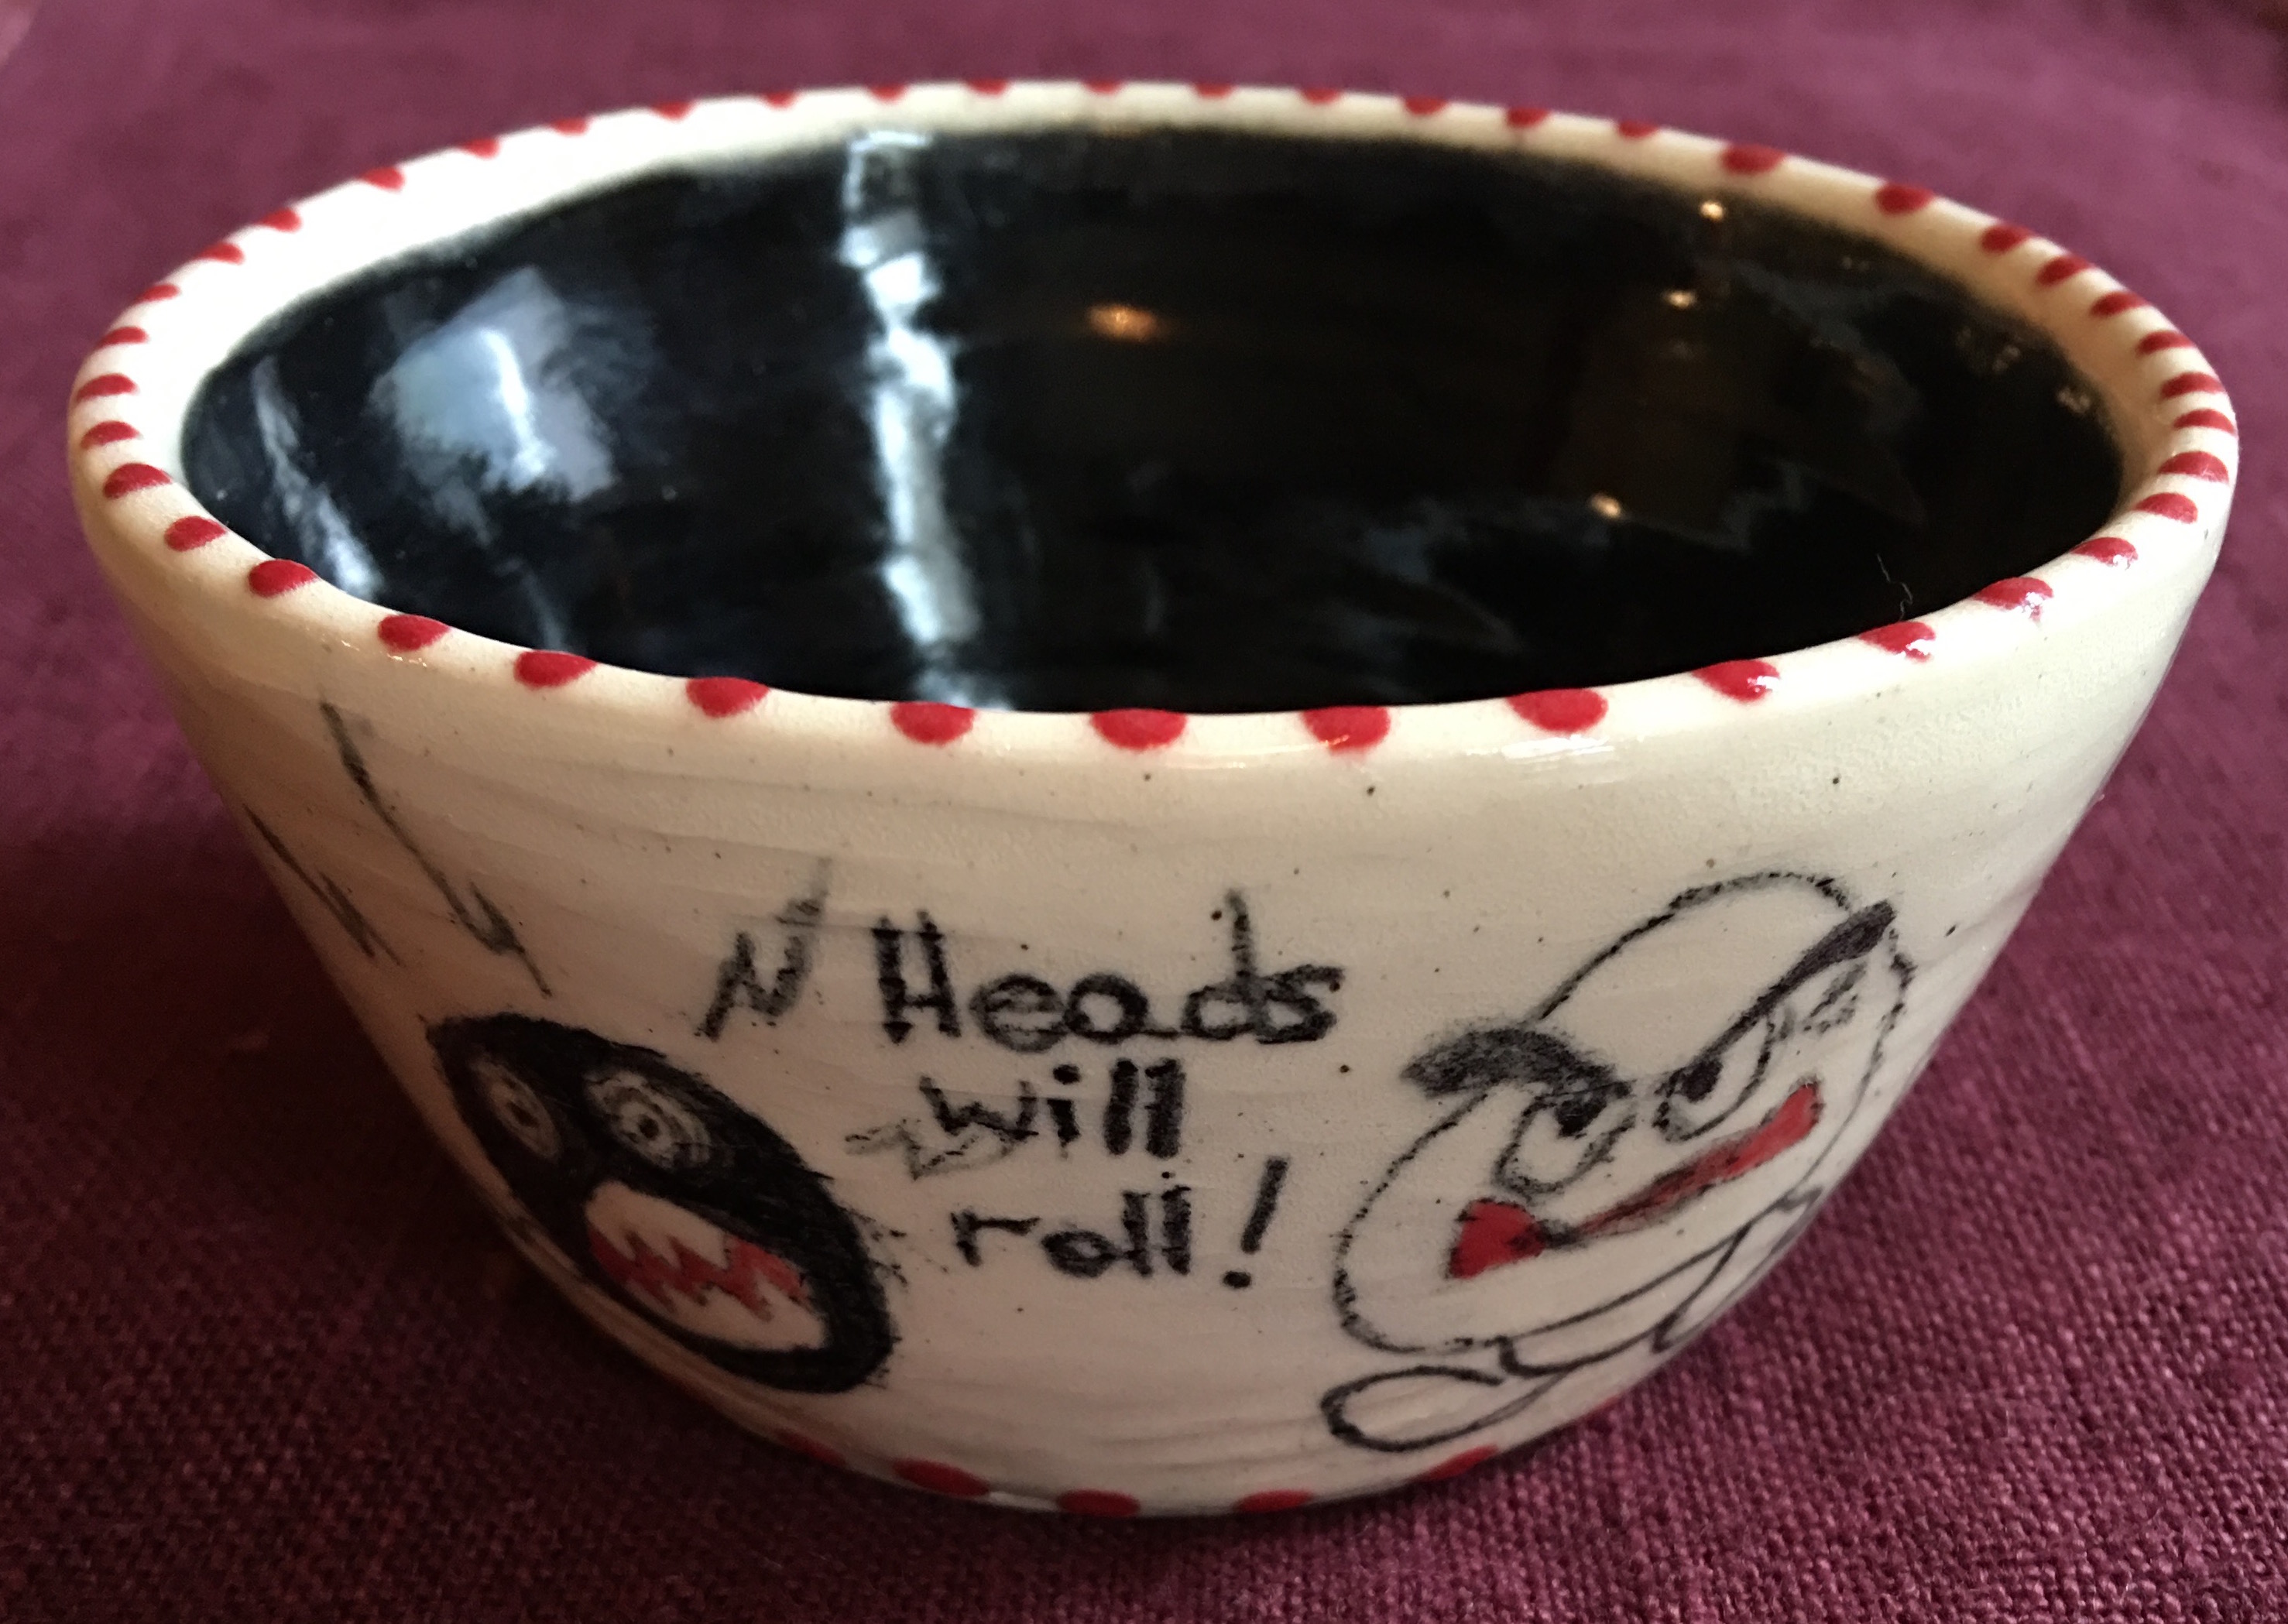
The first pot I painted was a collaborative effort with my talented son whose taste definitely nudges the macabre, much like his father!
As a child I was surrounded by art. My parents collected modern, pre-columbian and African art. I was used to seeing seemingly opposites side by side, so when I saw this piece, by Picasso in the Museum of Modern Art, I was particularly struck by it. It felt like home.
Picasso’s Les Demoiselles d’Avignon
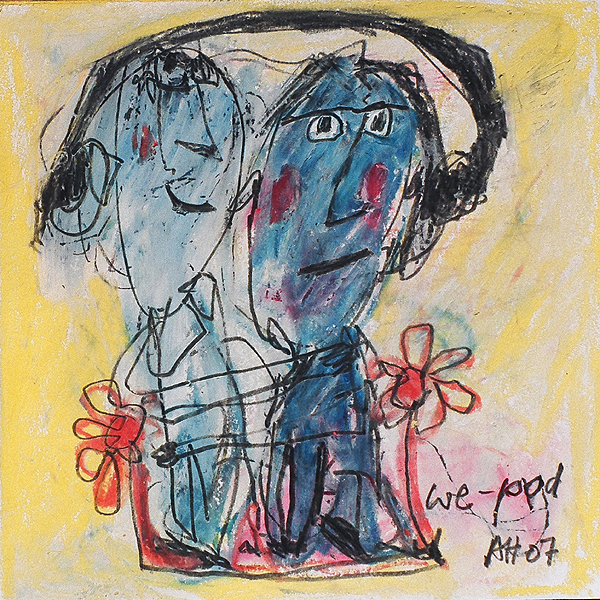
This piece reminded me of another artist my husband and I love, Alexandra Huber.
Alexandra Huber
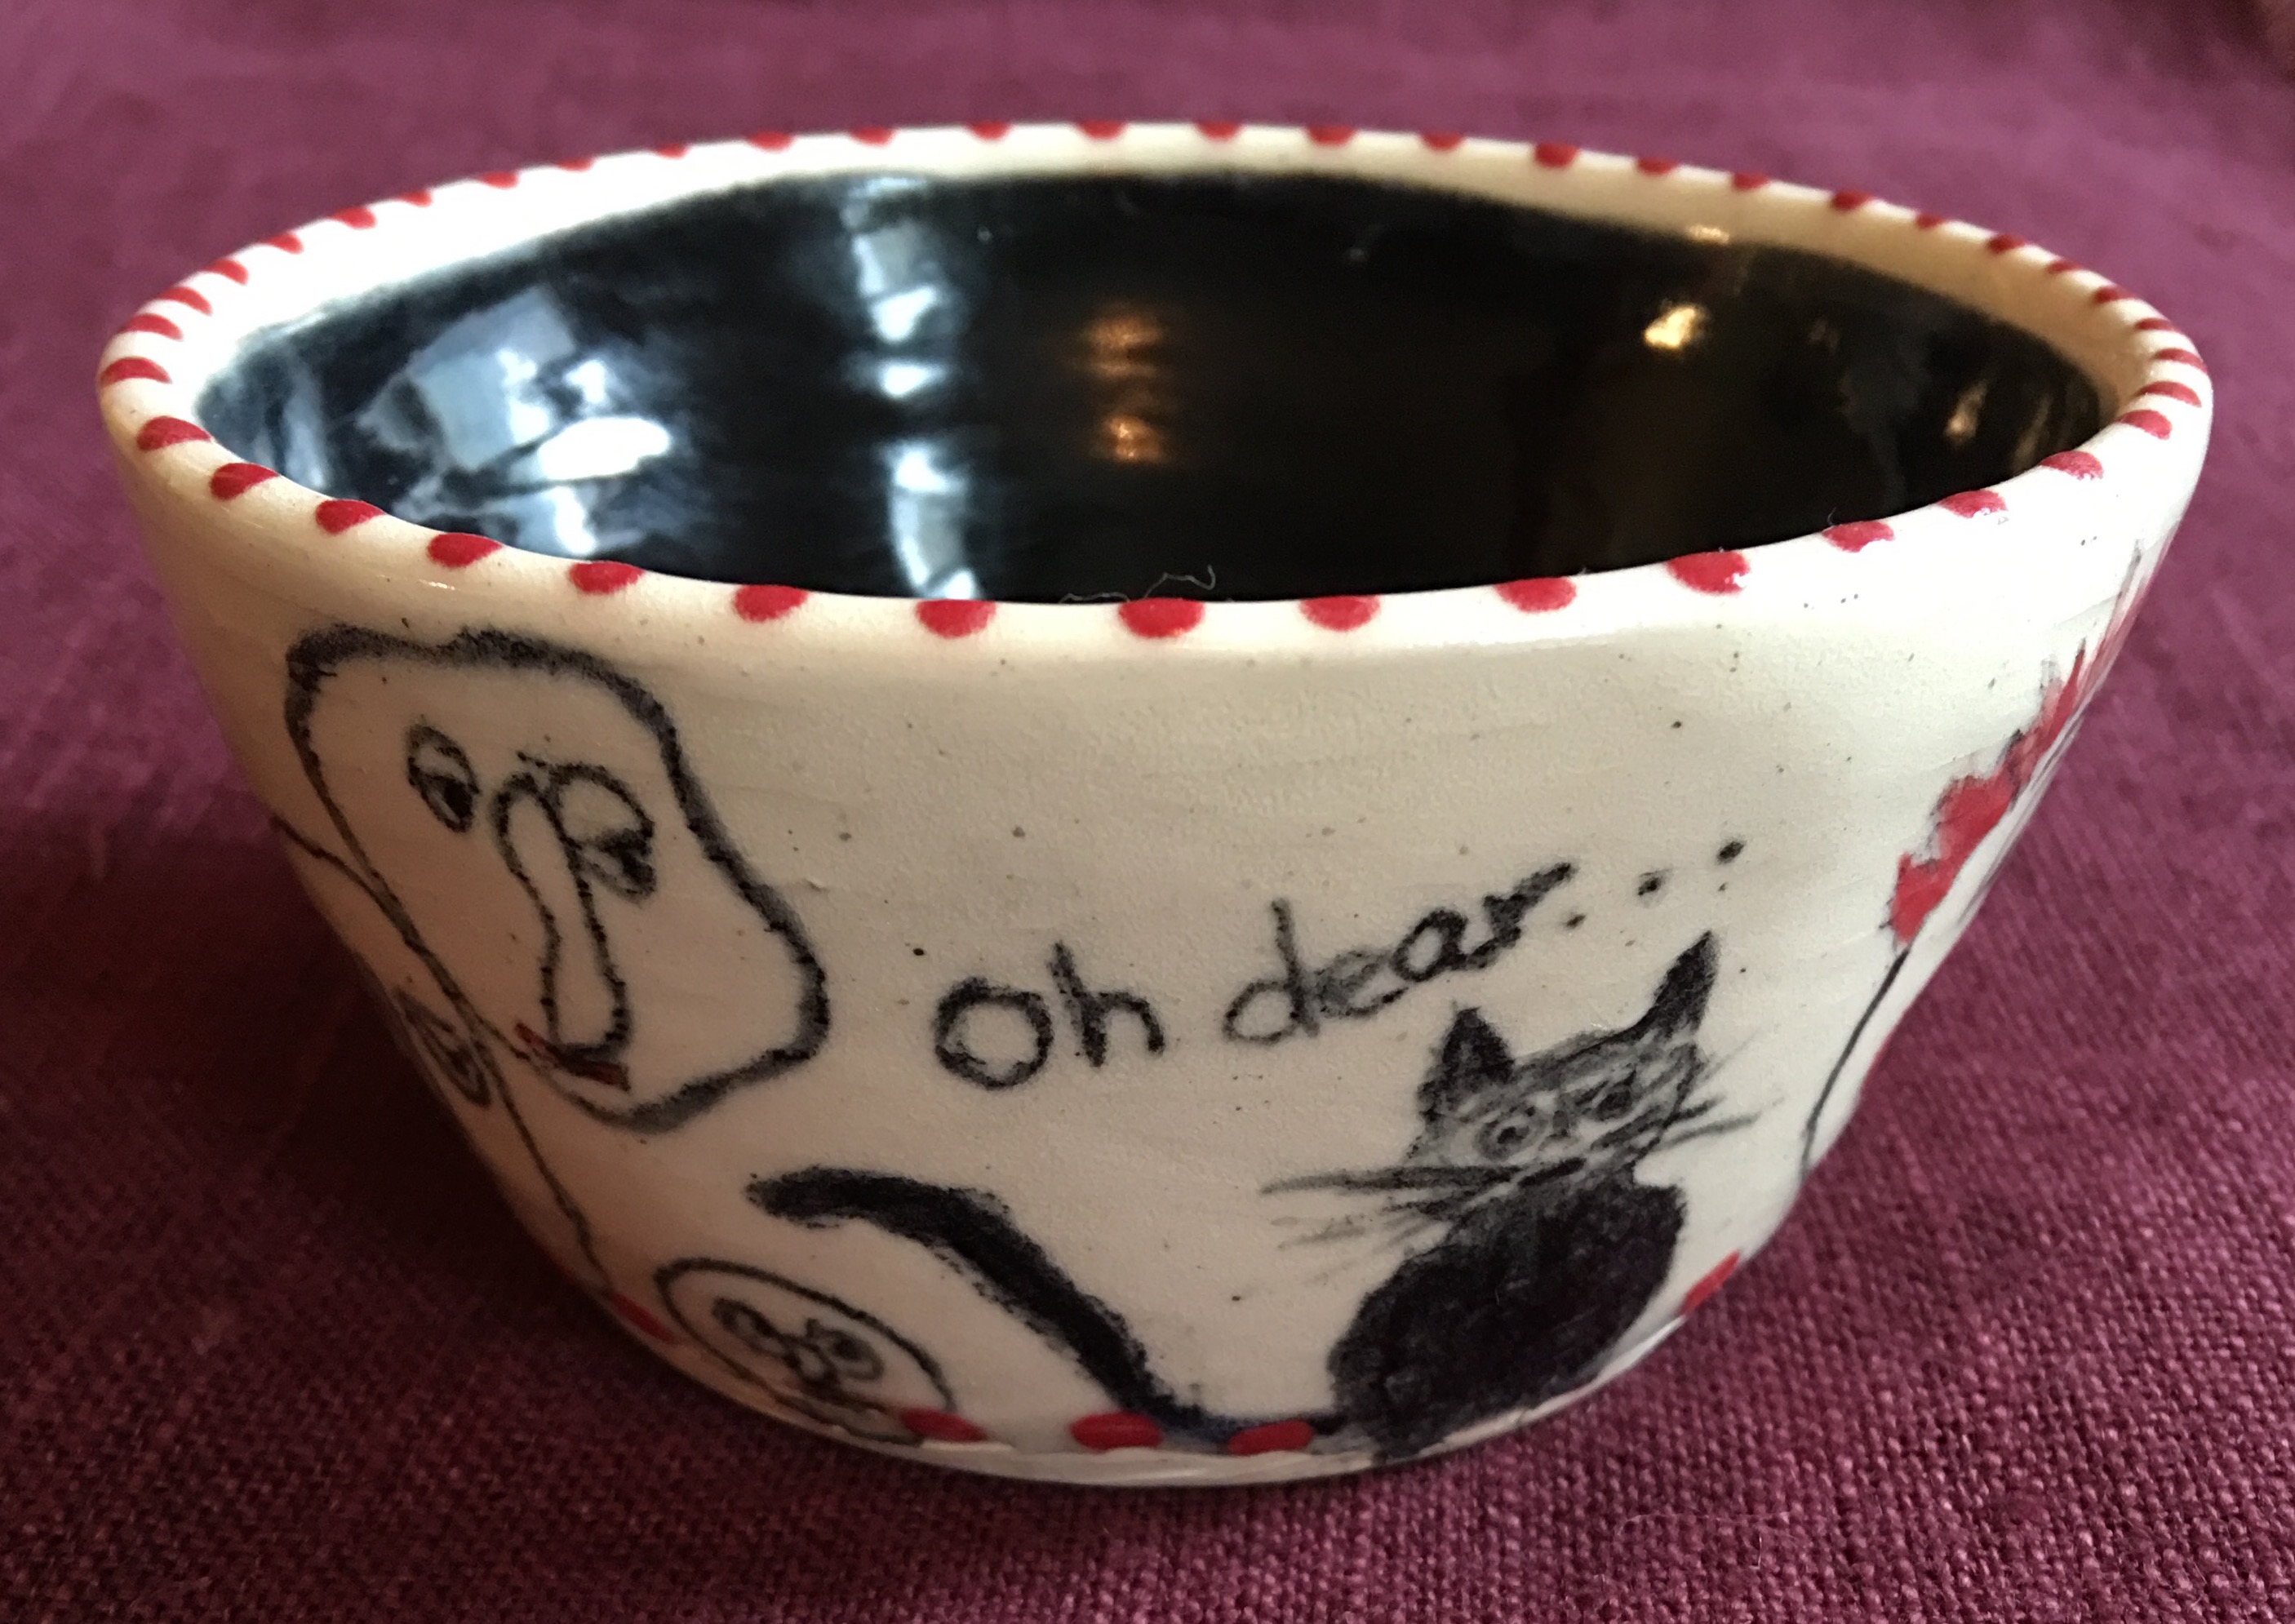
I began a series called “Faces.” As you can see, the underglaze can look quite different than the finished product! I found that by diluting the underglaze with water I could achieve a kind of water color look, which I like.
I love the Faces series…
While I was starting the Faces series I was also falling in love with all things quilted and began drawing little sketches of things I liked, which gave me the idea to draw them on my pots too.
And then I’d go back to my Faces…
My daughter even allowed me to paint on her pots.
A few more…
A few of these are already in My Etsy Shop and many more will be added as they come out of the kiln. However, at the moment, I’m here…
So all of this will have to wait until the end of the week!
![A Work Space of One’s Own]()
by Ariane Zurcher | Aug 7, 2016 | Art, crafts, creative process |
Remember those “If You Give a Mouse a Cookie” books?
This is my version of that…
If you show a girl a quilt, she’s going to wonder how it’s made. When she wonders how it’s made, she’s going to take a Block of the Month class to see how it’s done. Once she’s signed up for the class, she’s going to begin making a quilt herself.
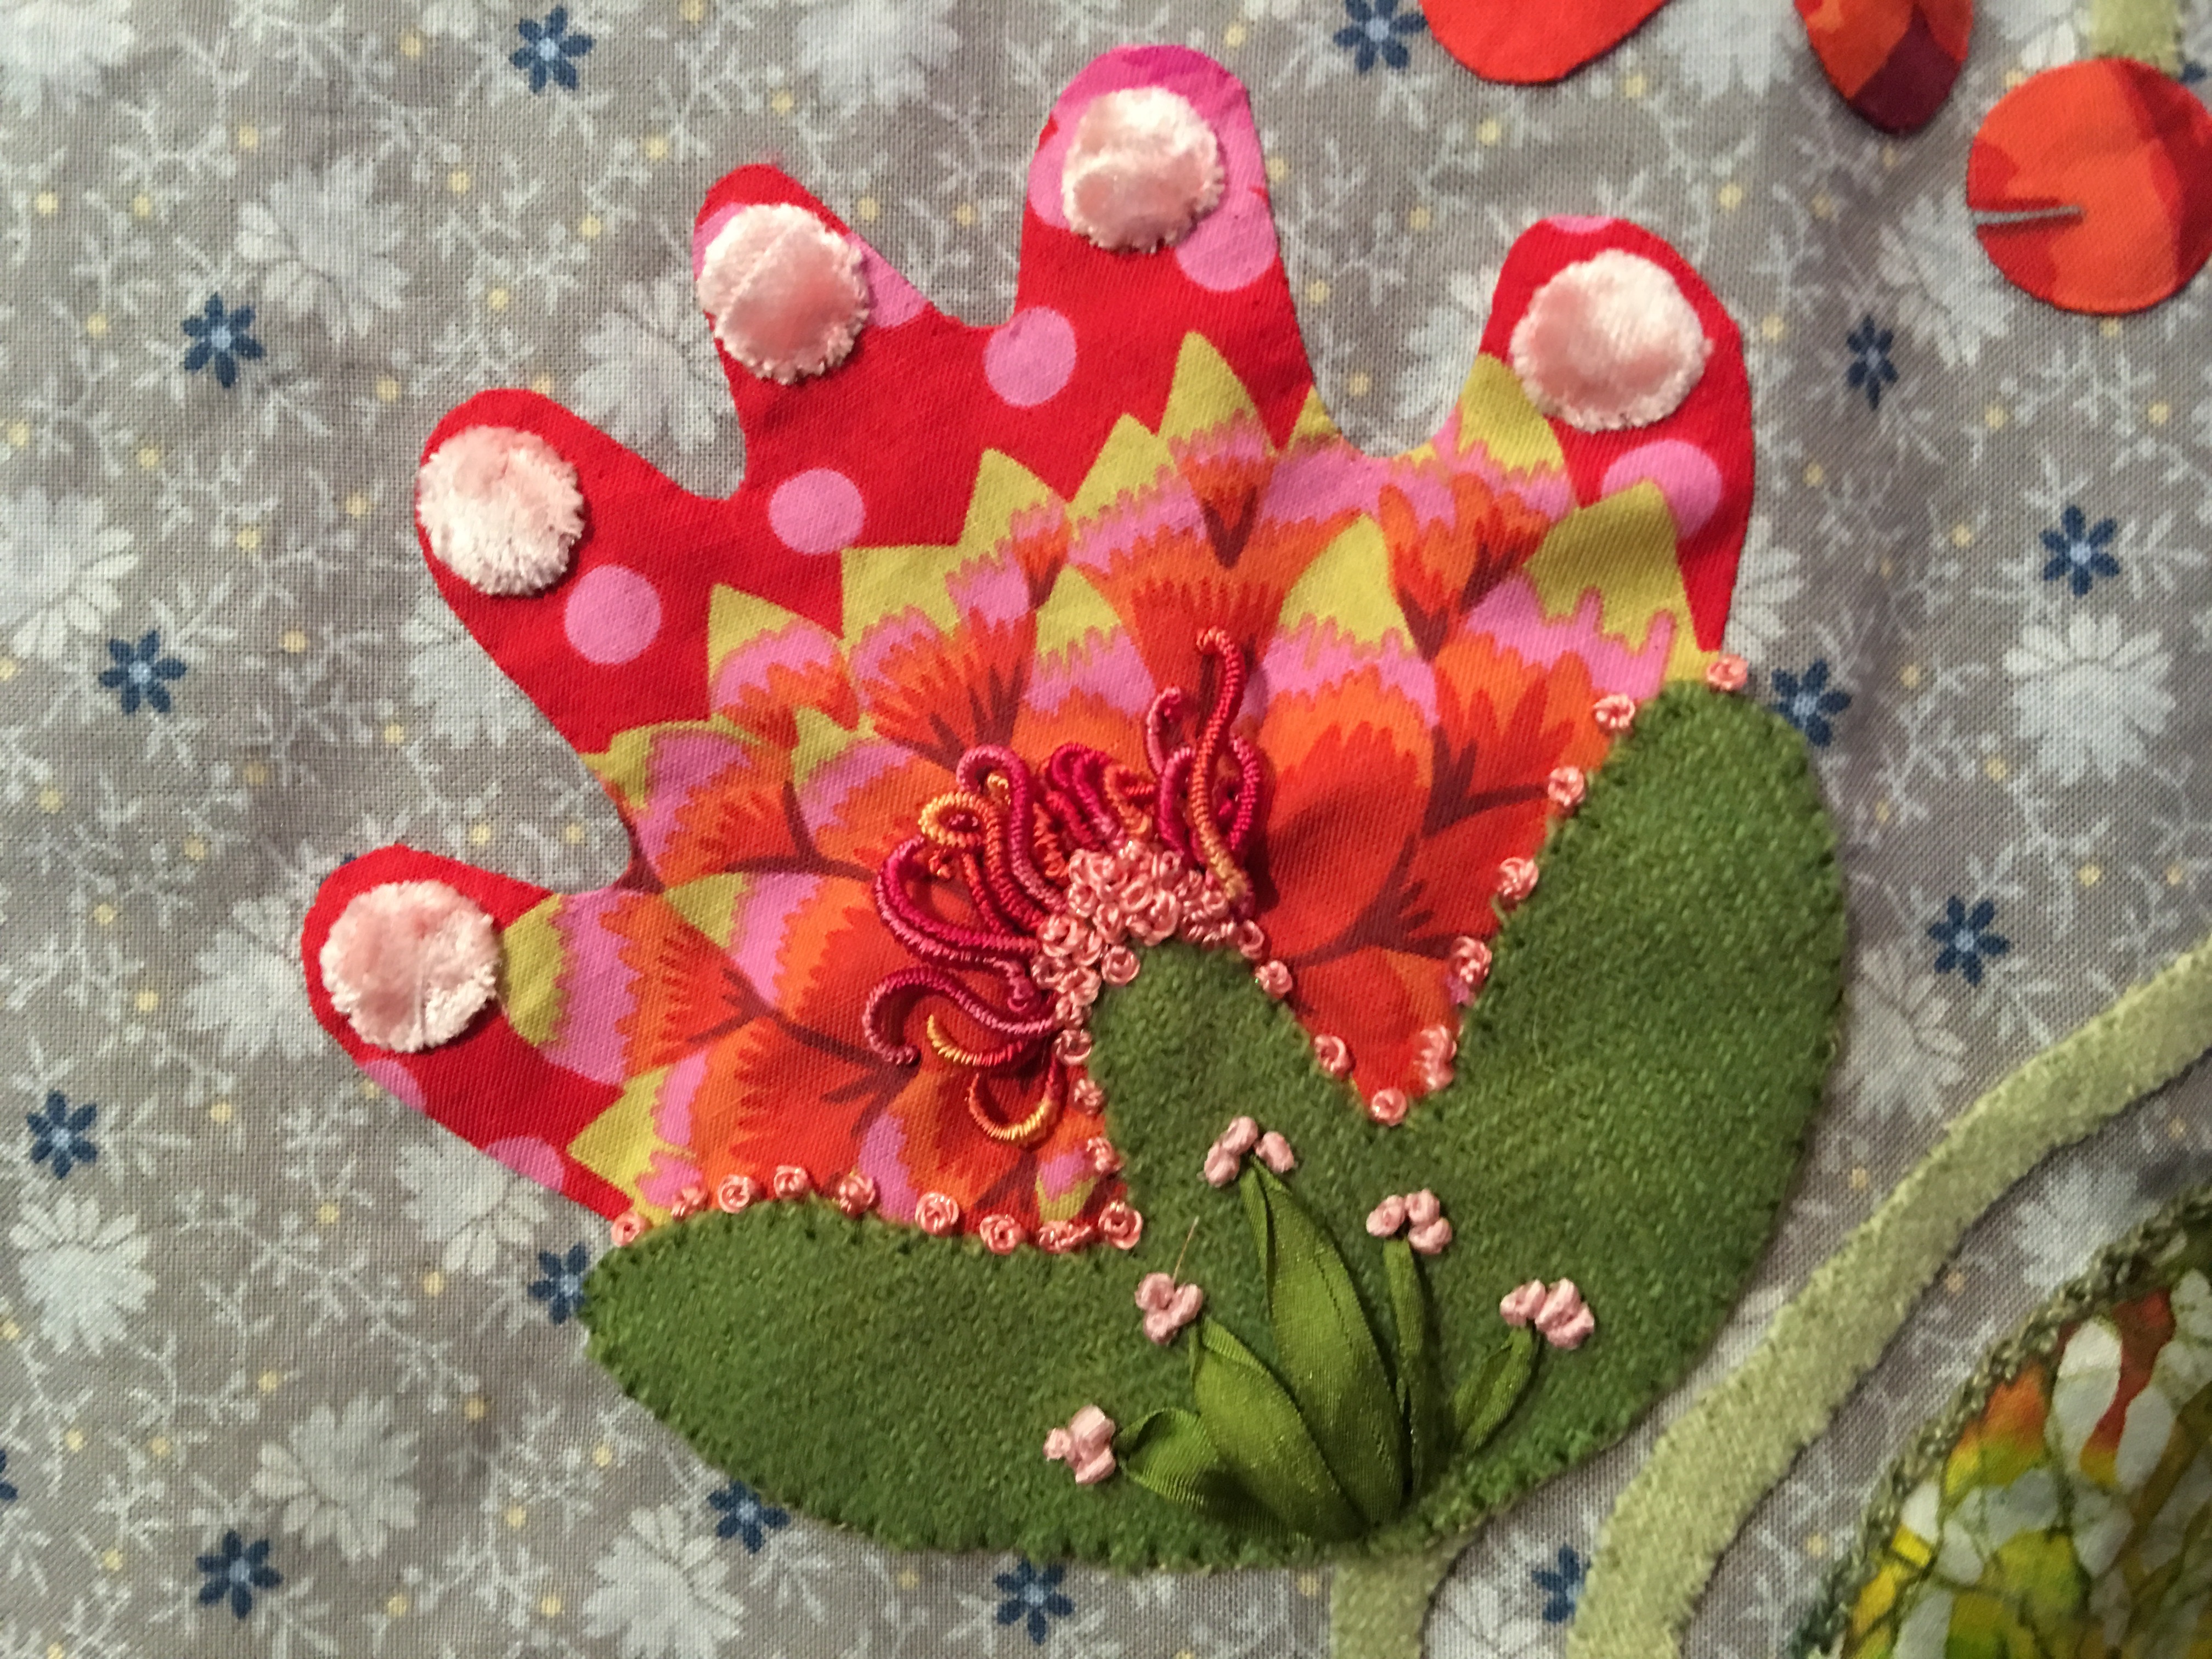
Center Block from the Flower Pots Quilt Designed By Kim McLean
When she starts to make a quilt herself, she’s going to think about how she can make it uniquely hers.
Detail of one of the Center Blocks
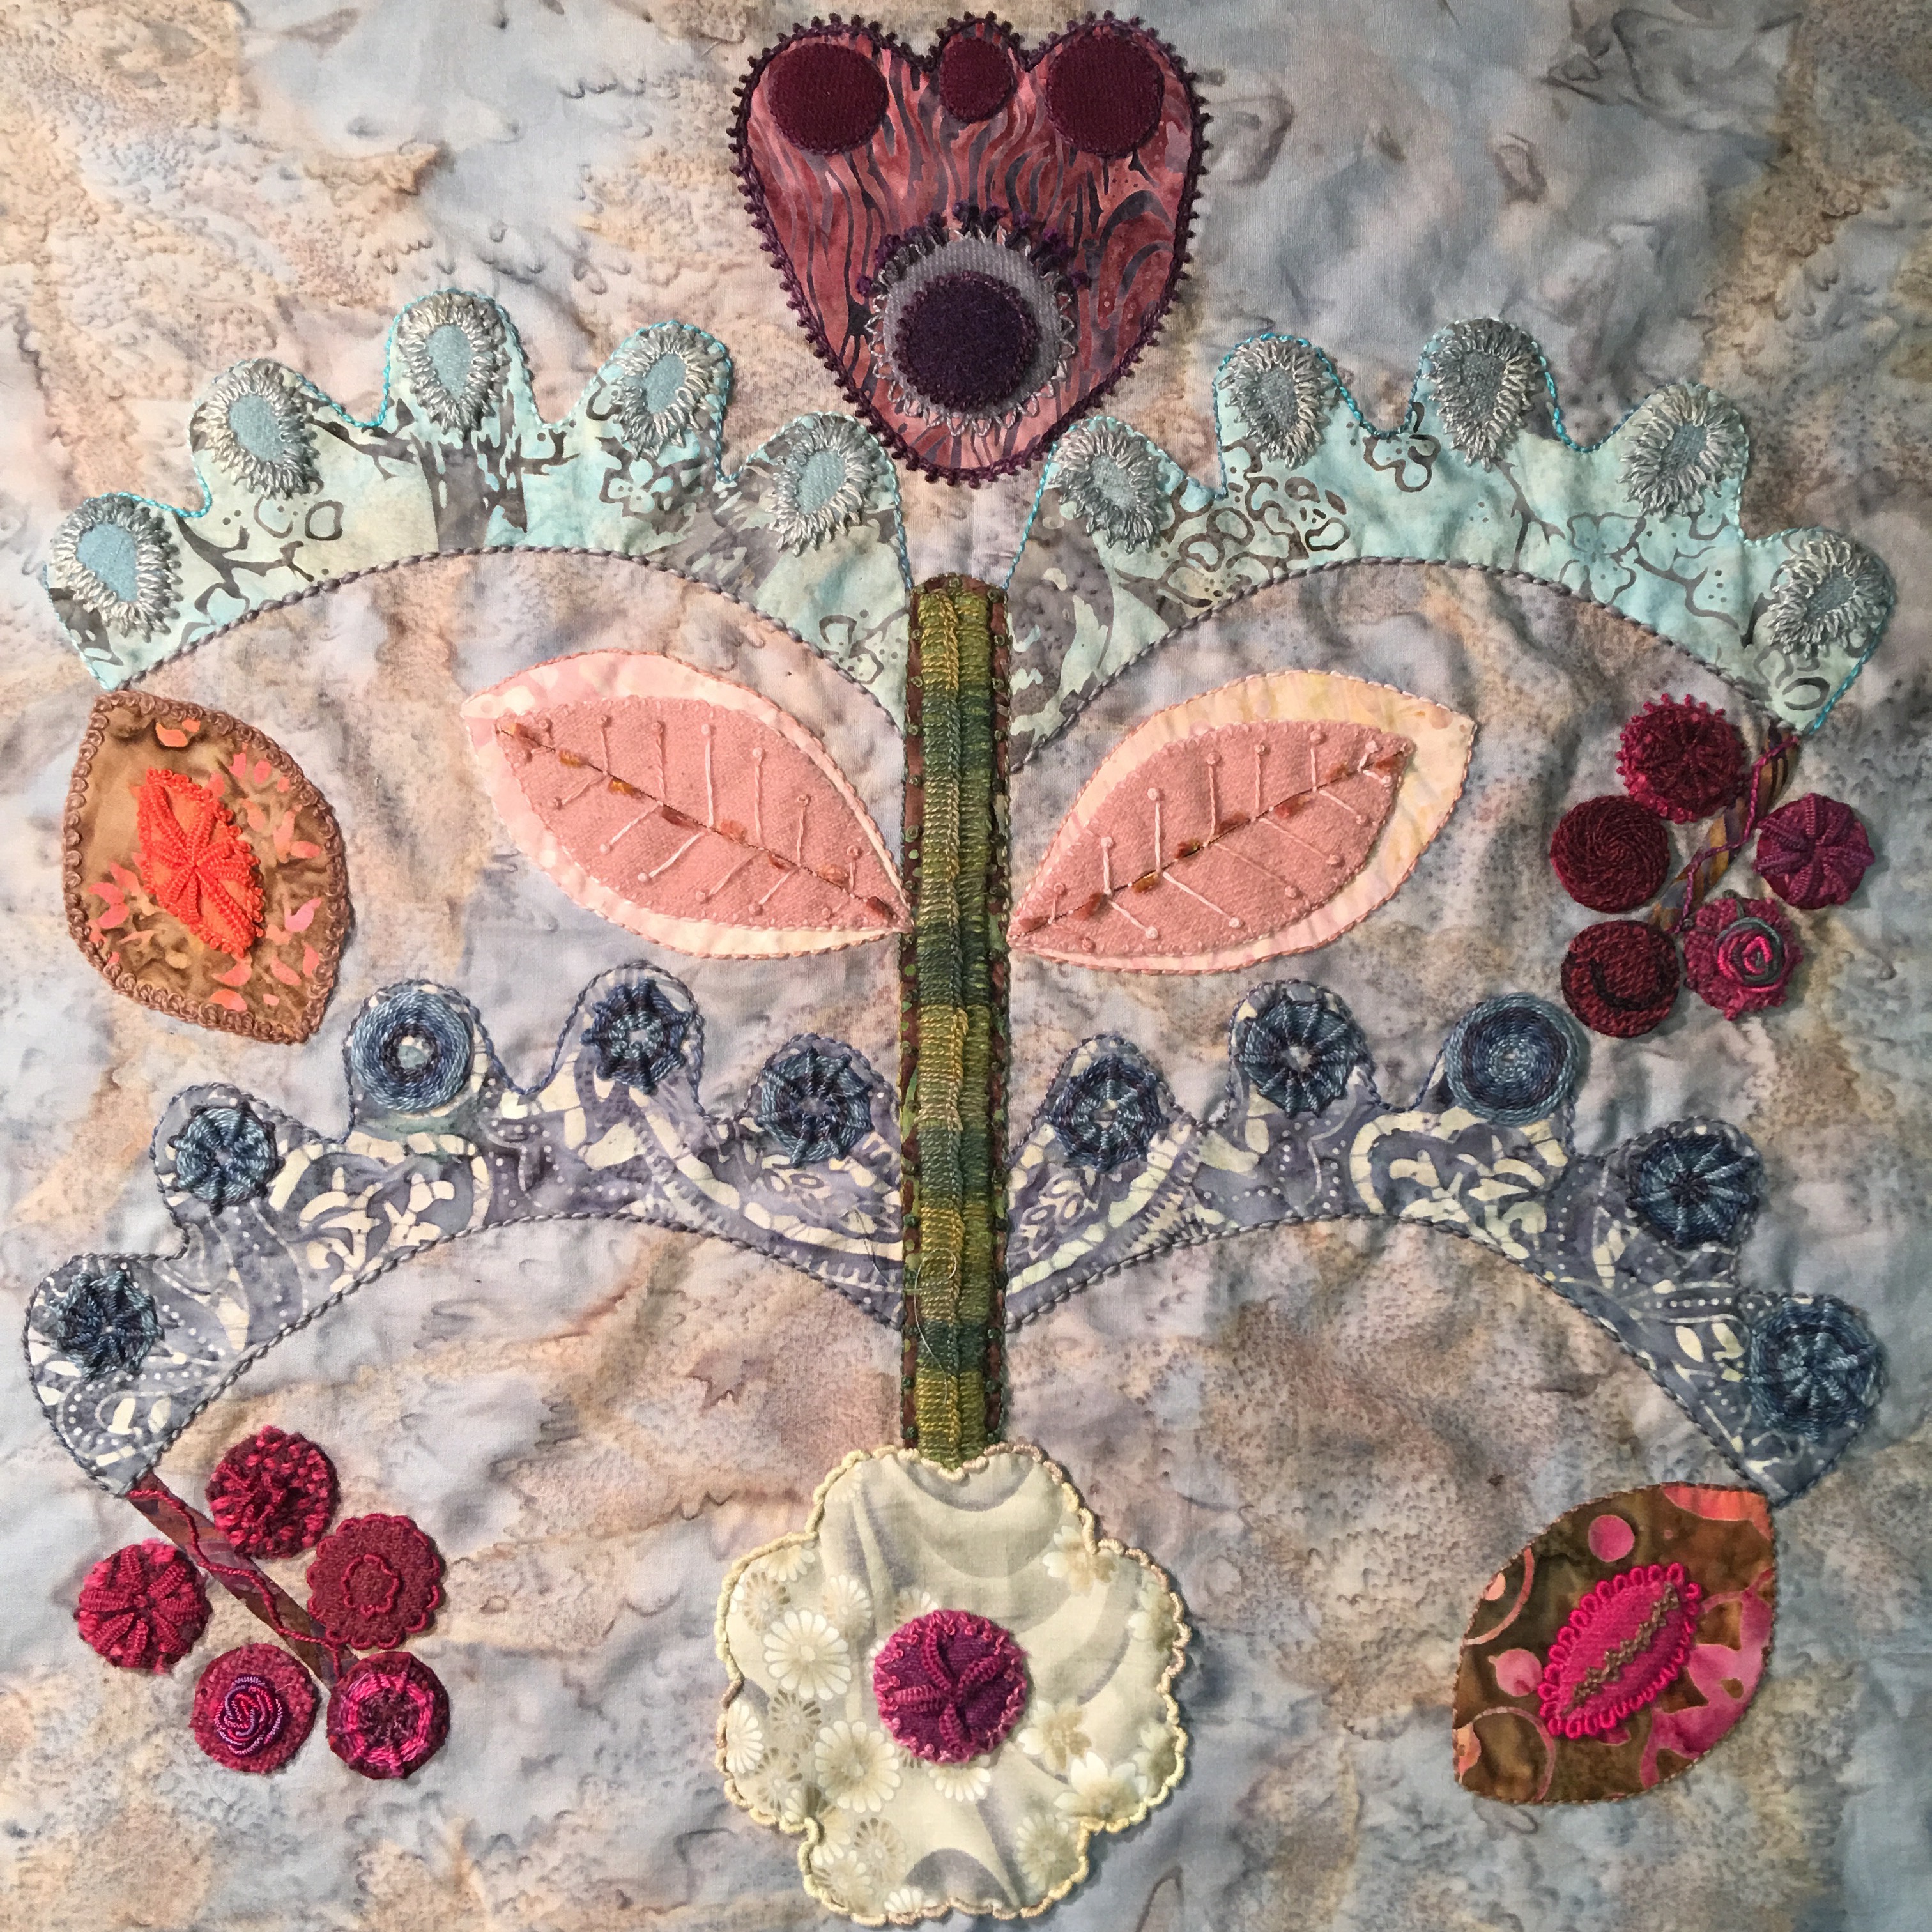
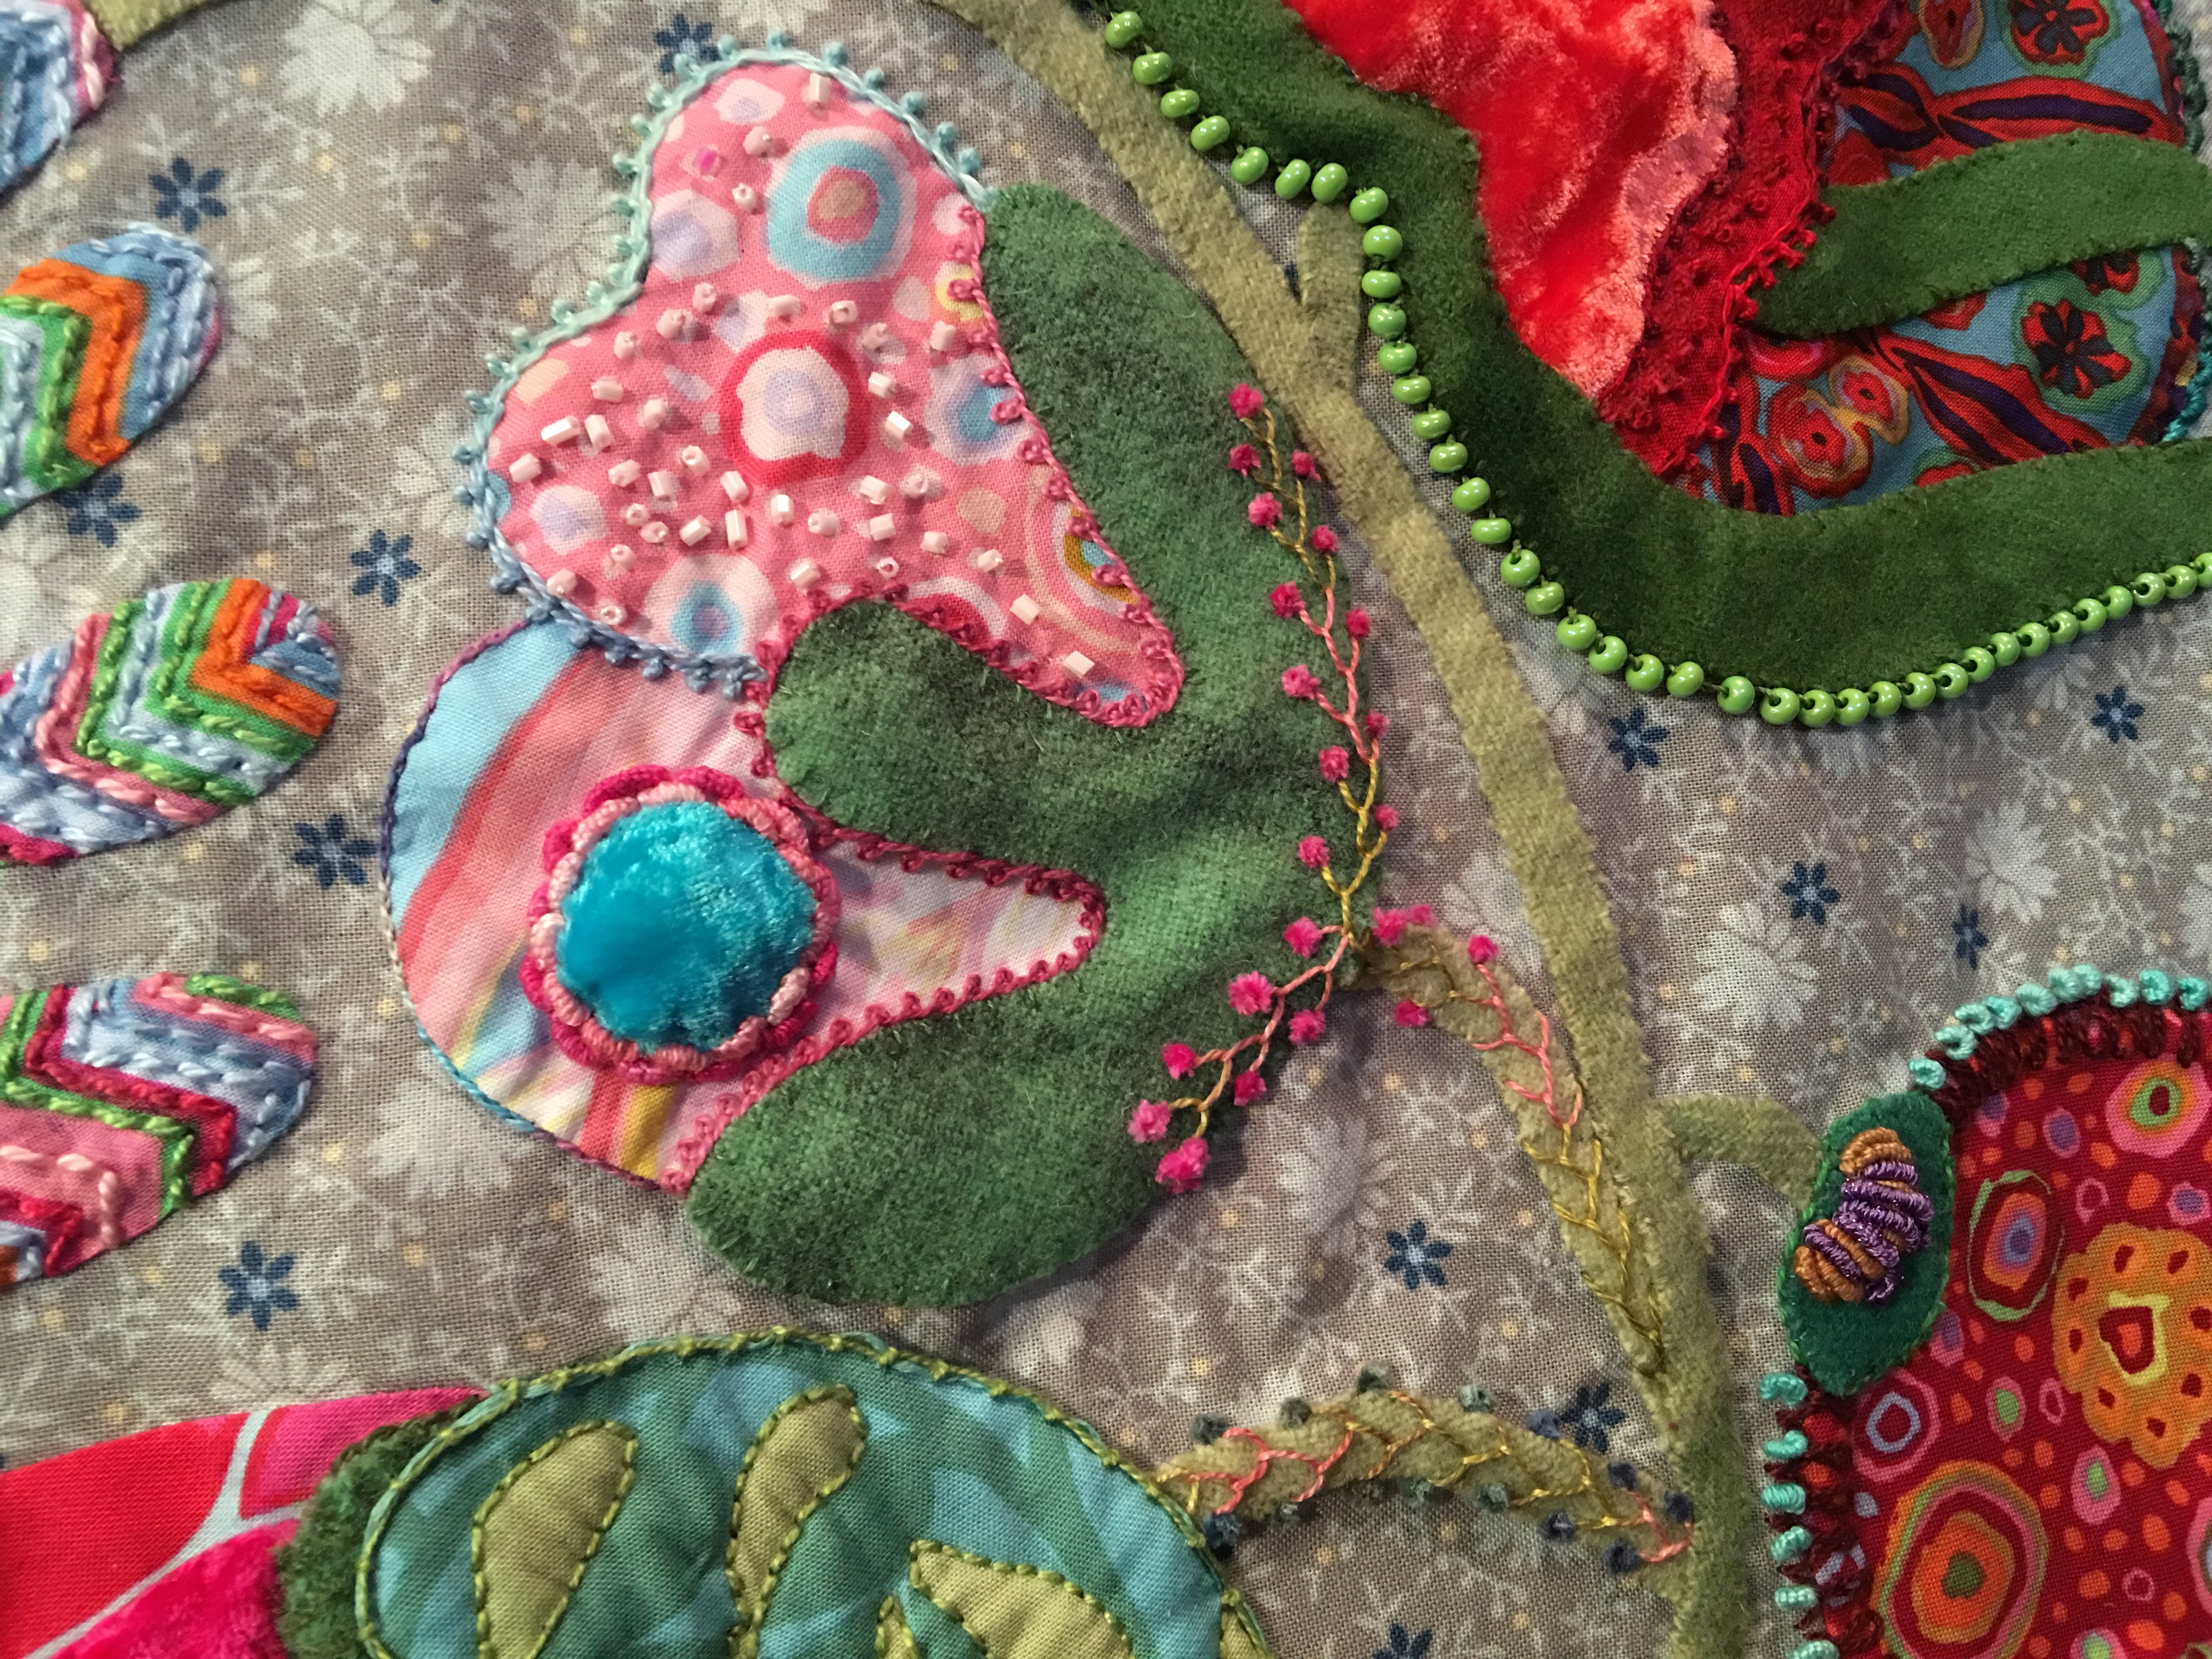
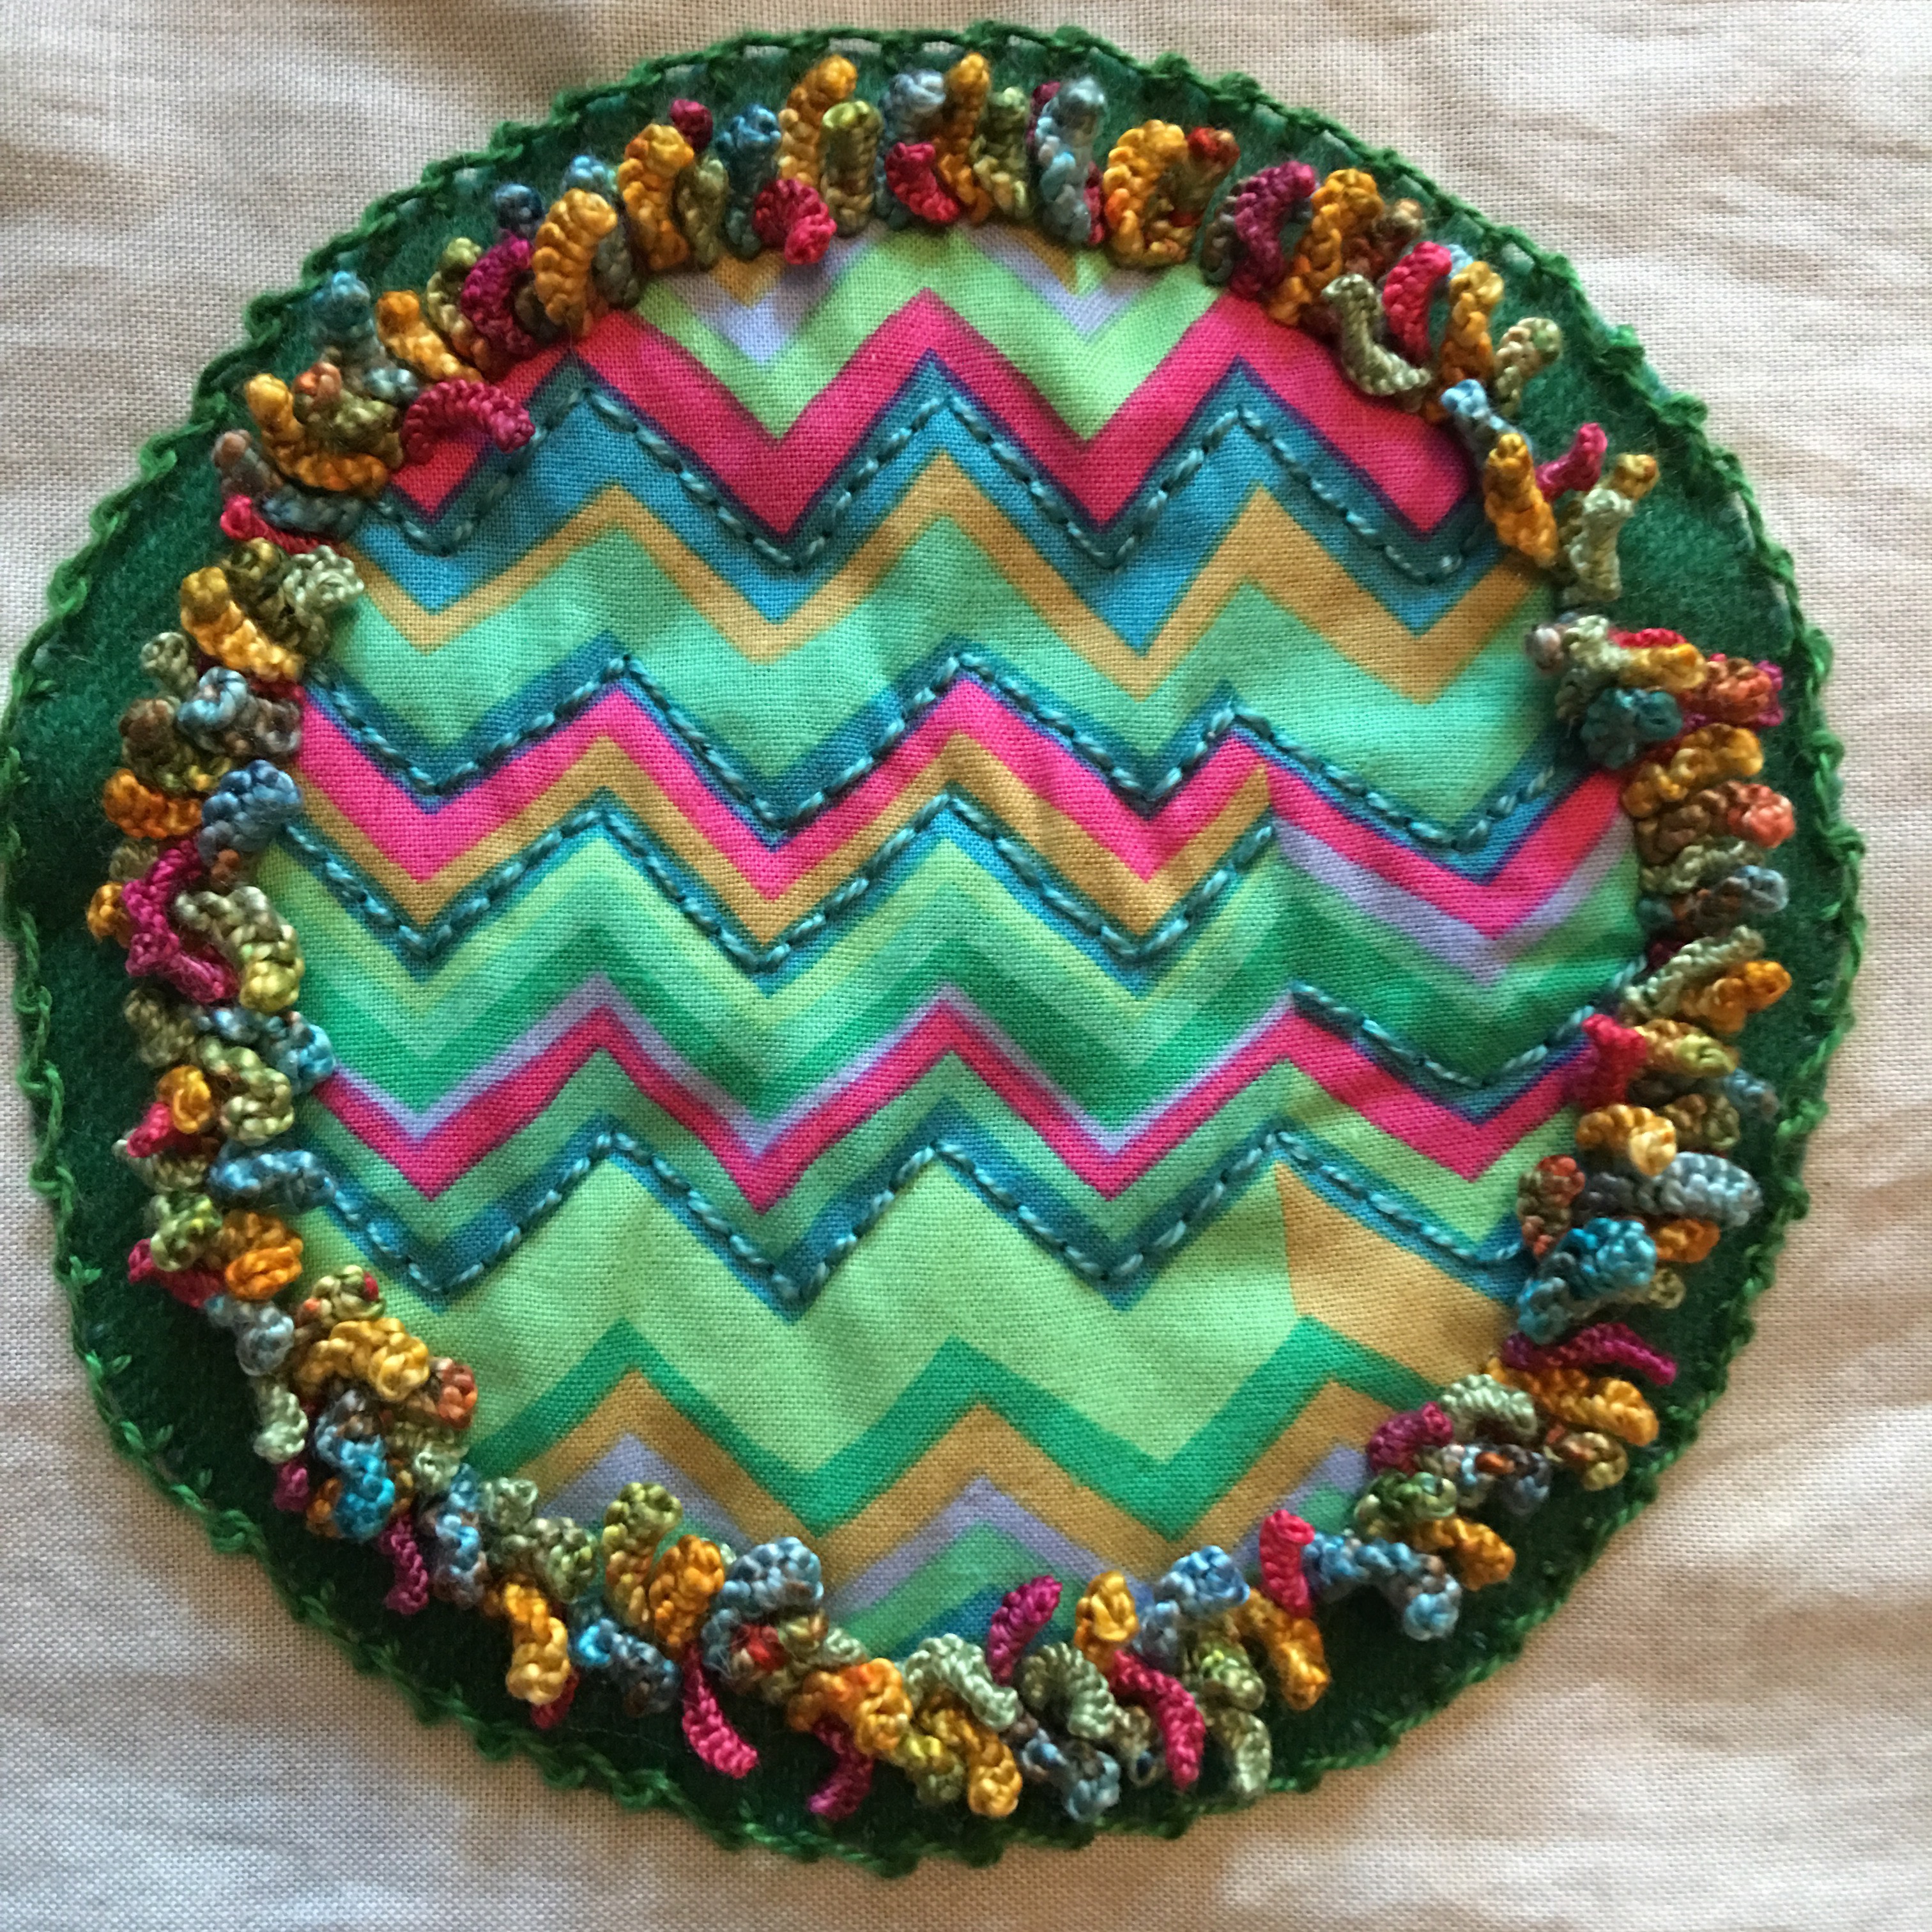
When she begins to make it uniquely hers, she’s going to incorporate all the stitches she learned in the Craftsy class given by Sue Spargo that she wrote about a few weeks ago on the post, Change.
Detail from Flower Pots side panel
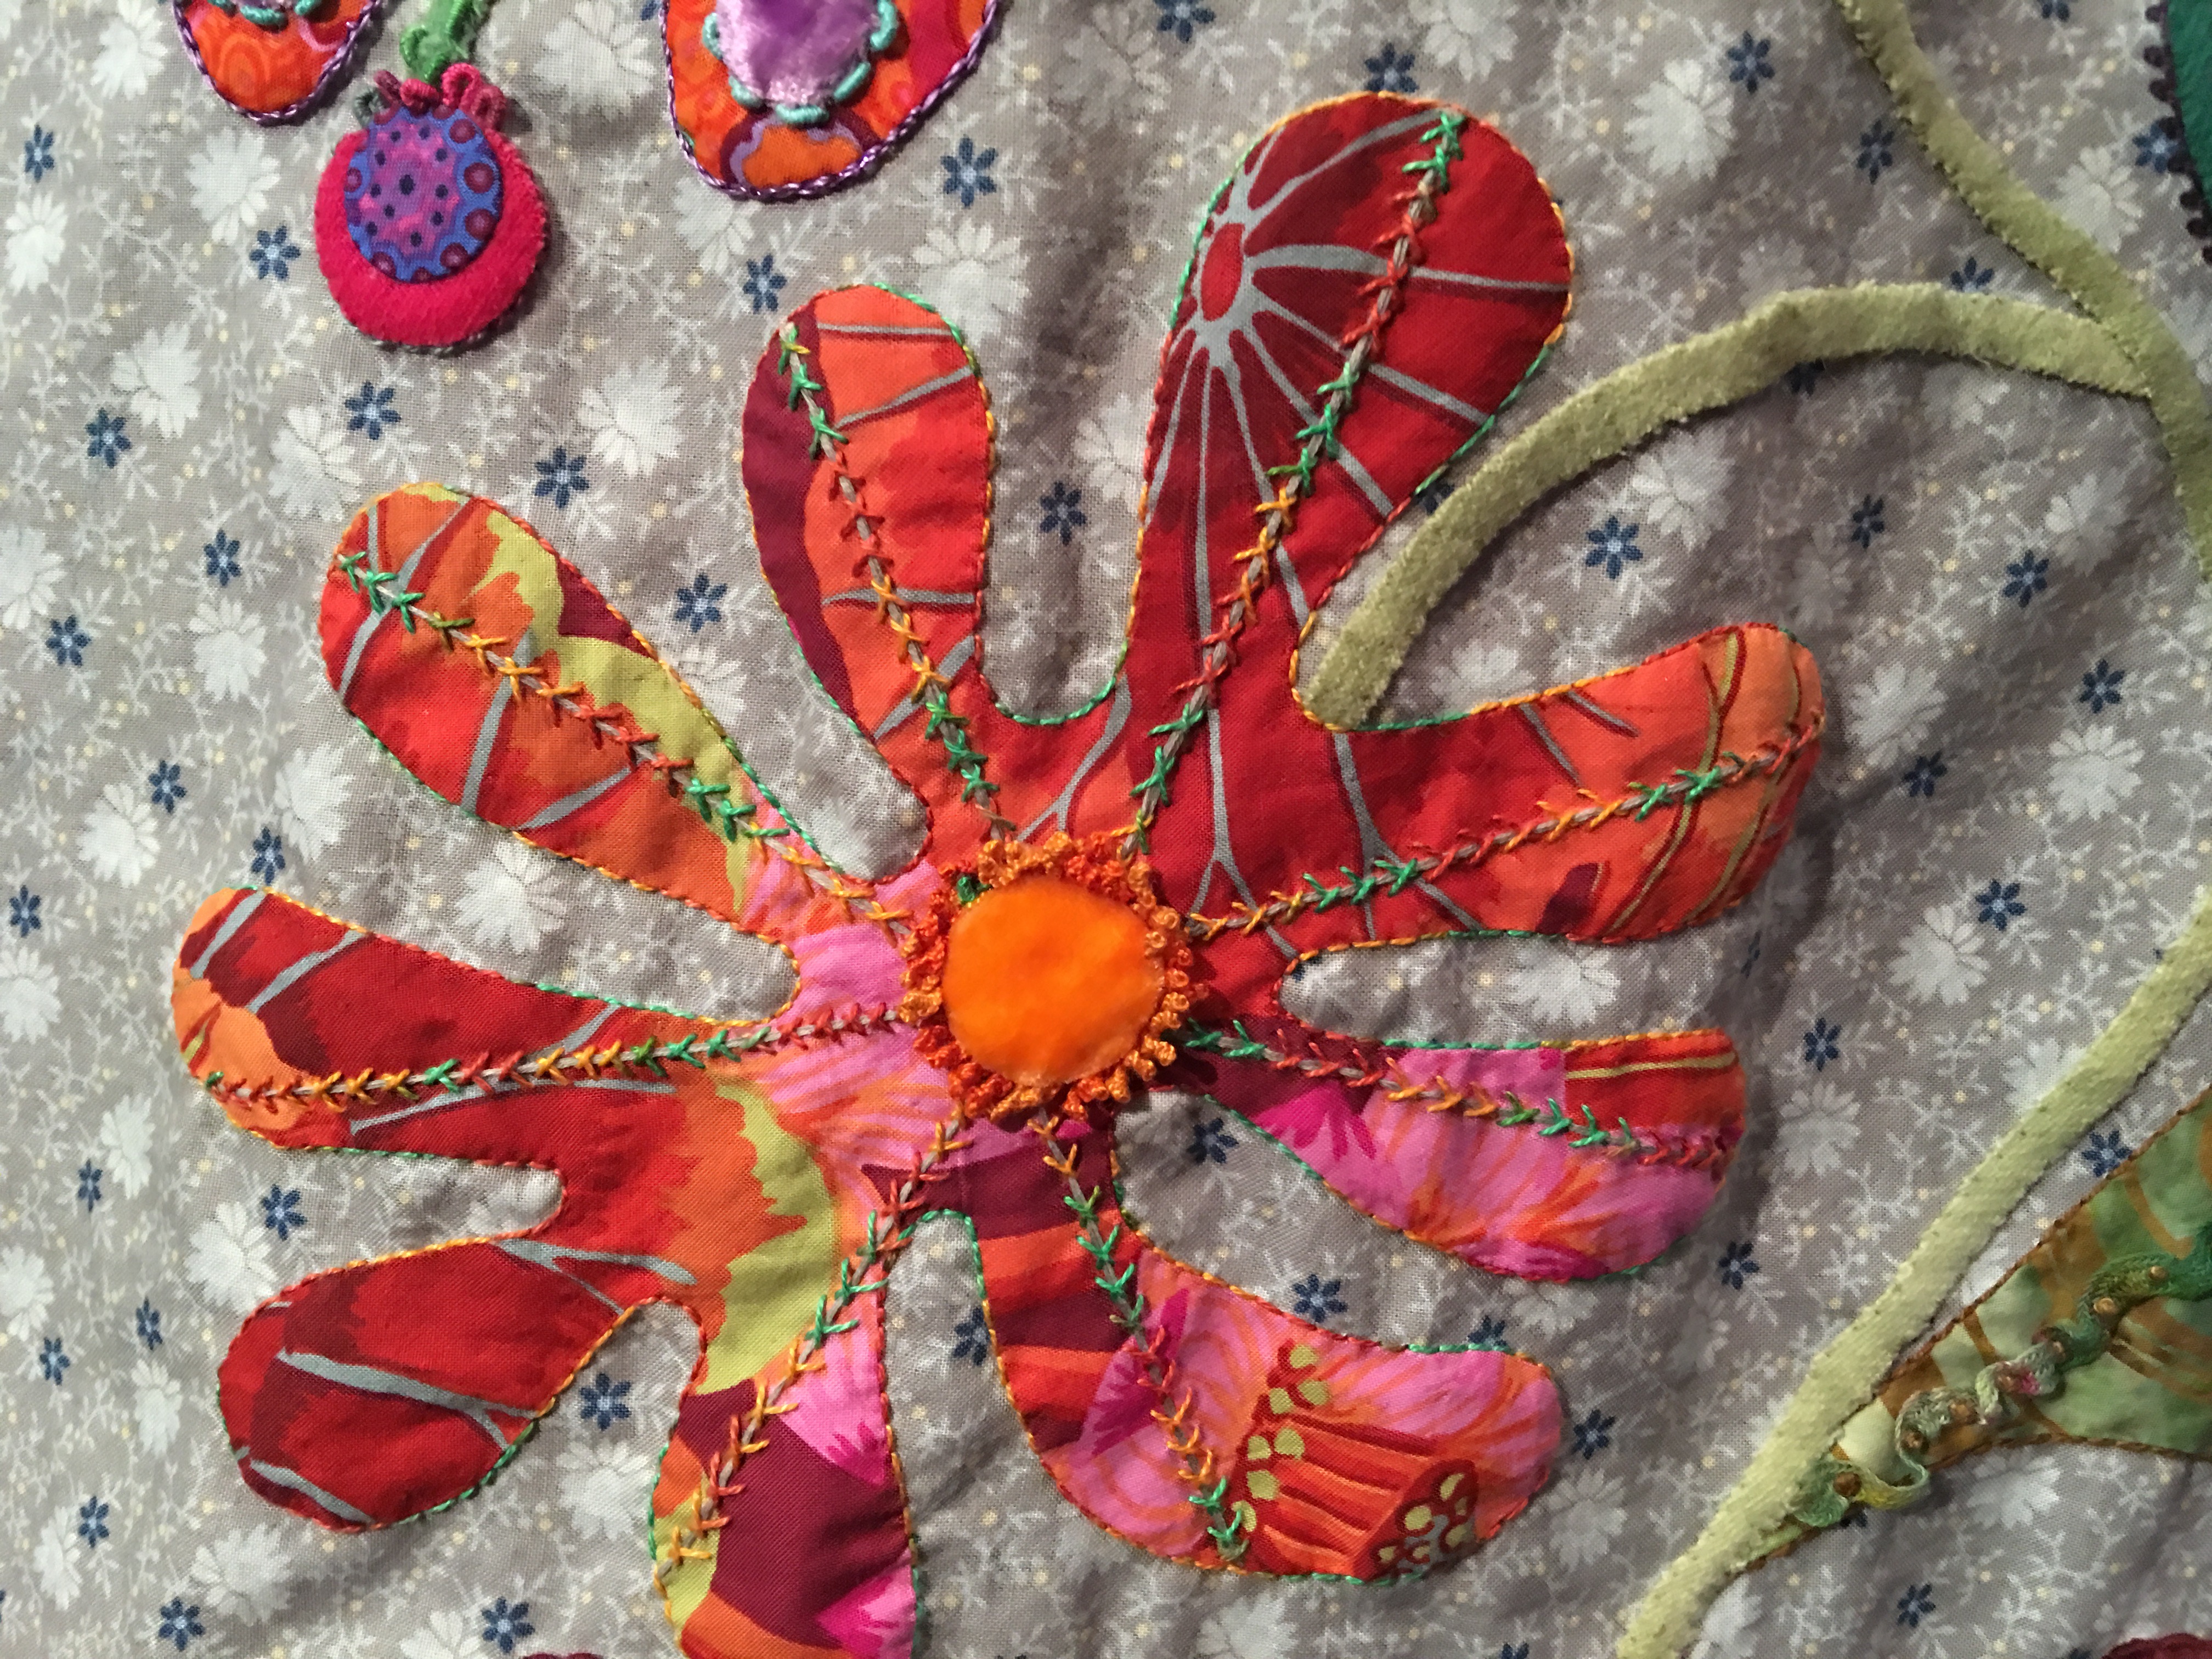
Once she begins adding all those stitches she learned…
Almost finished Flower Pots Quilt!
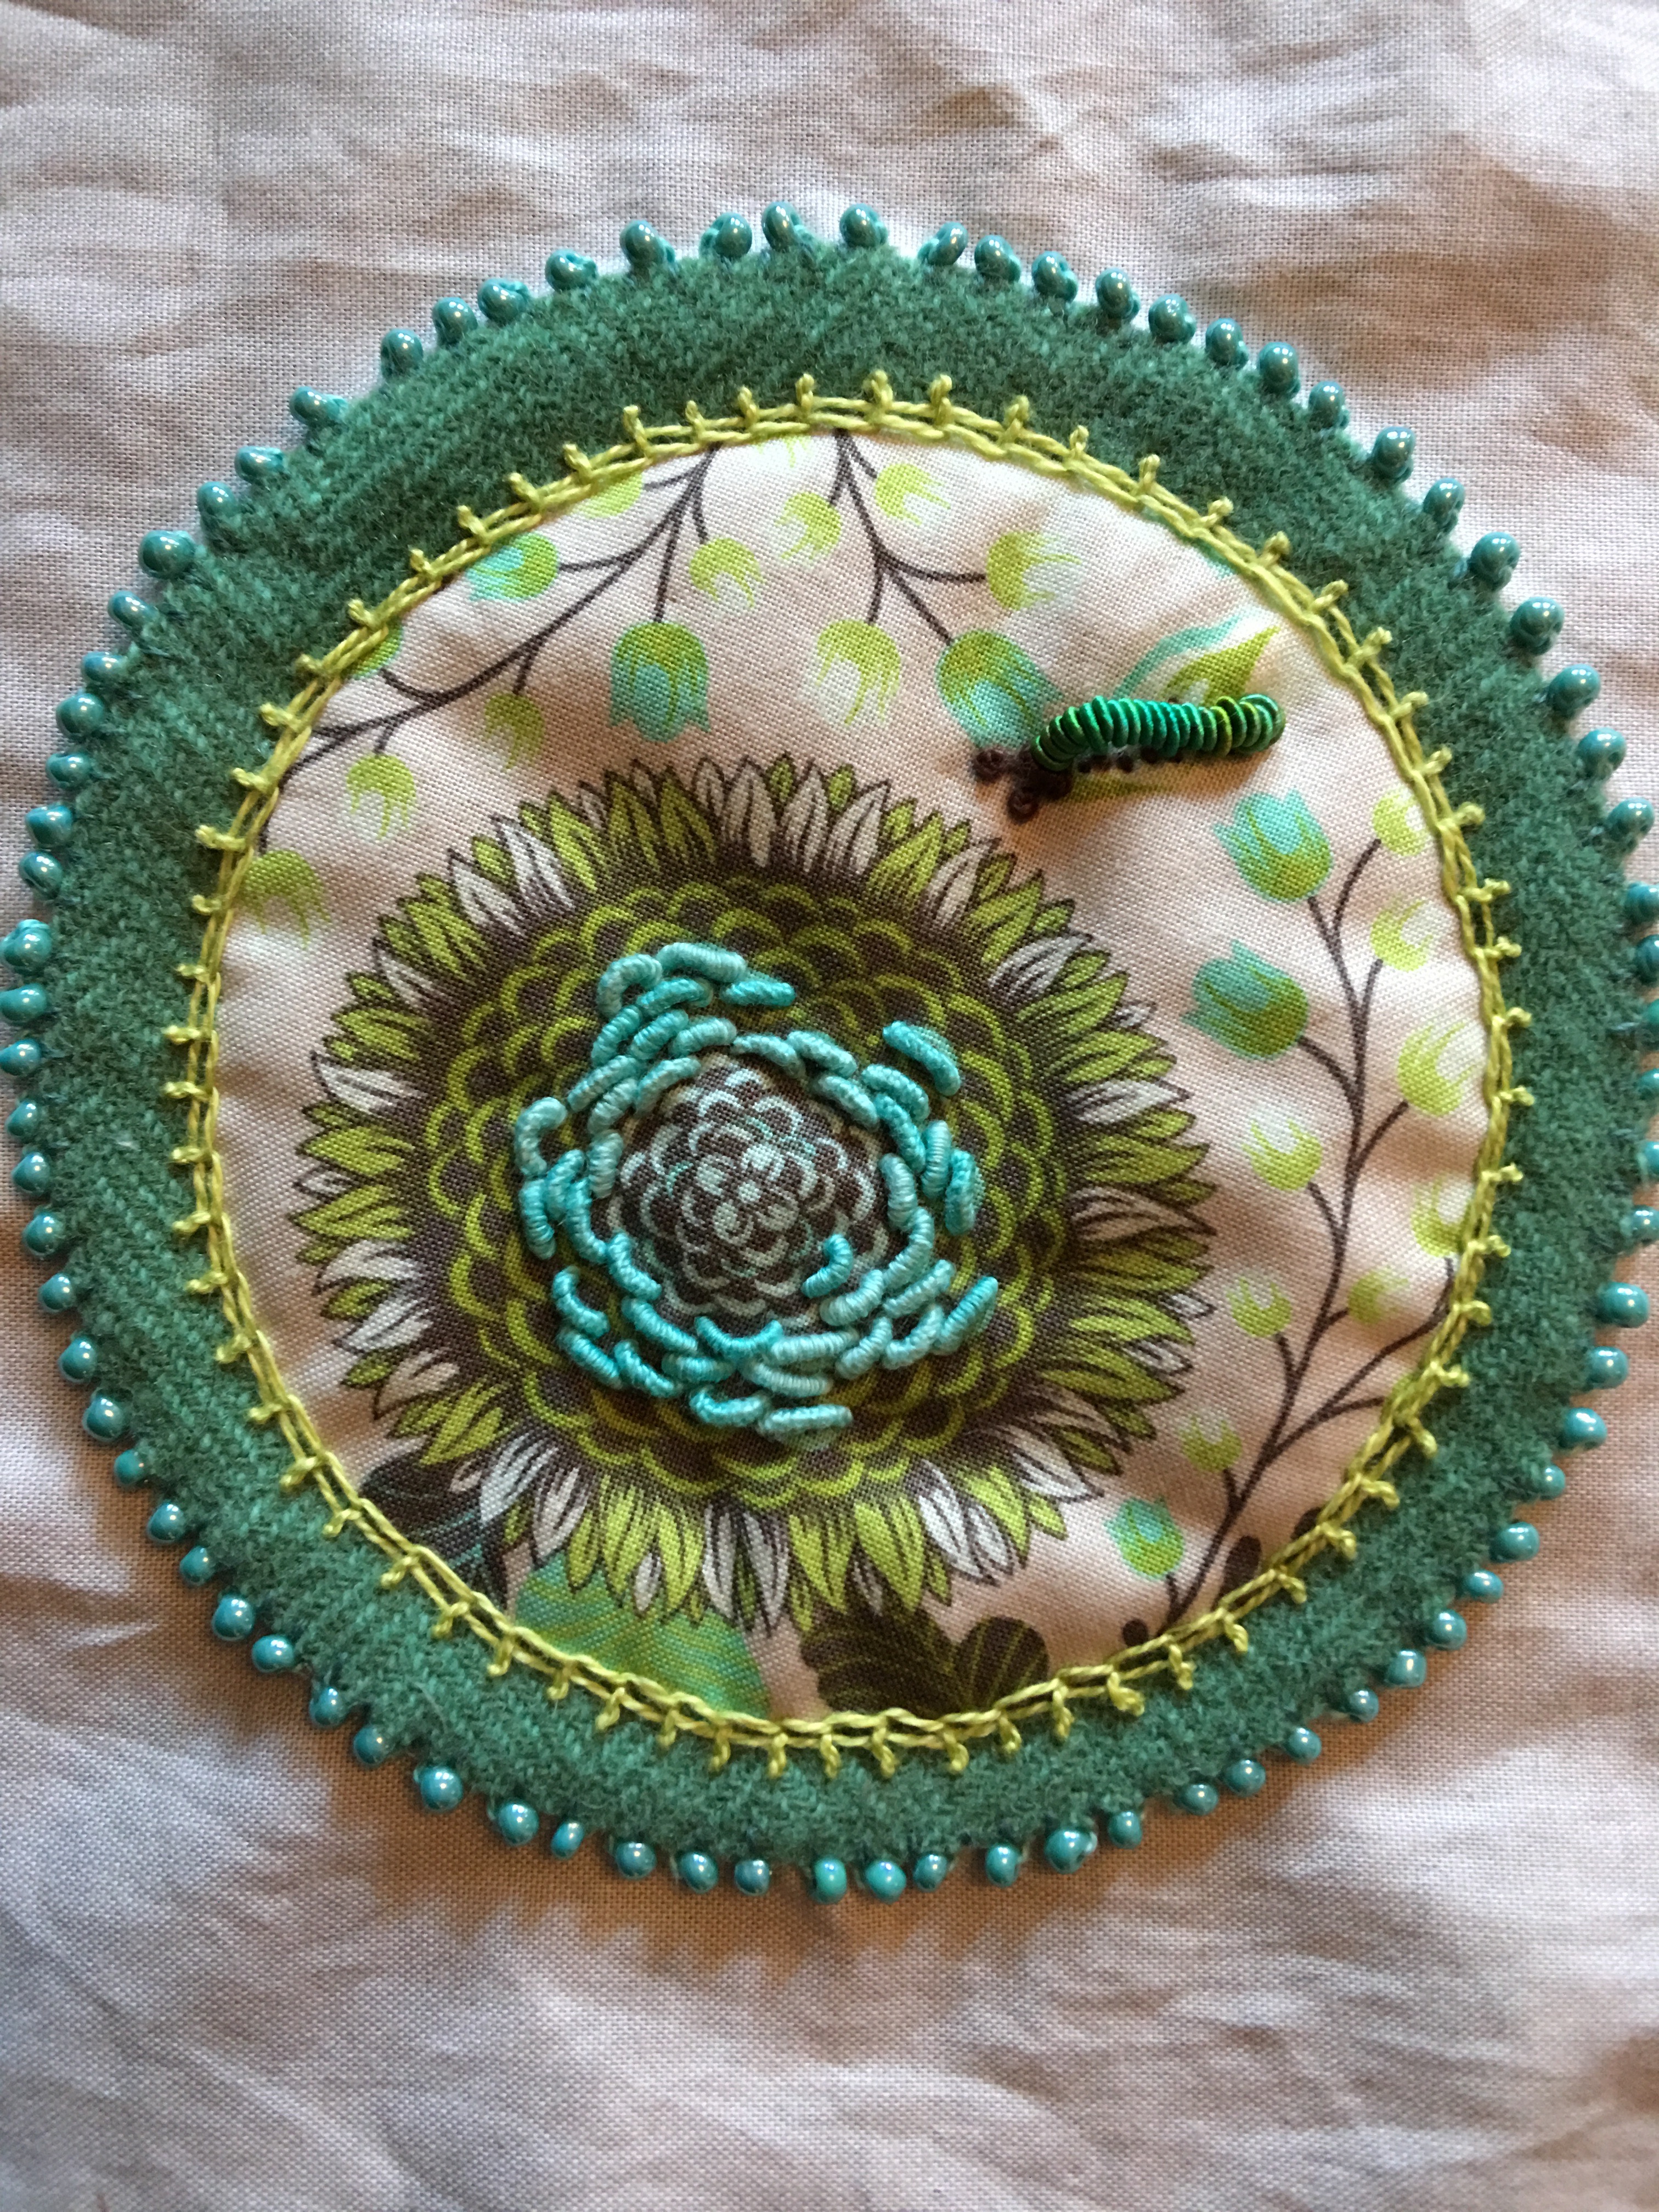
she’s going to want to start designing her own blocks…
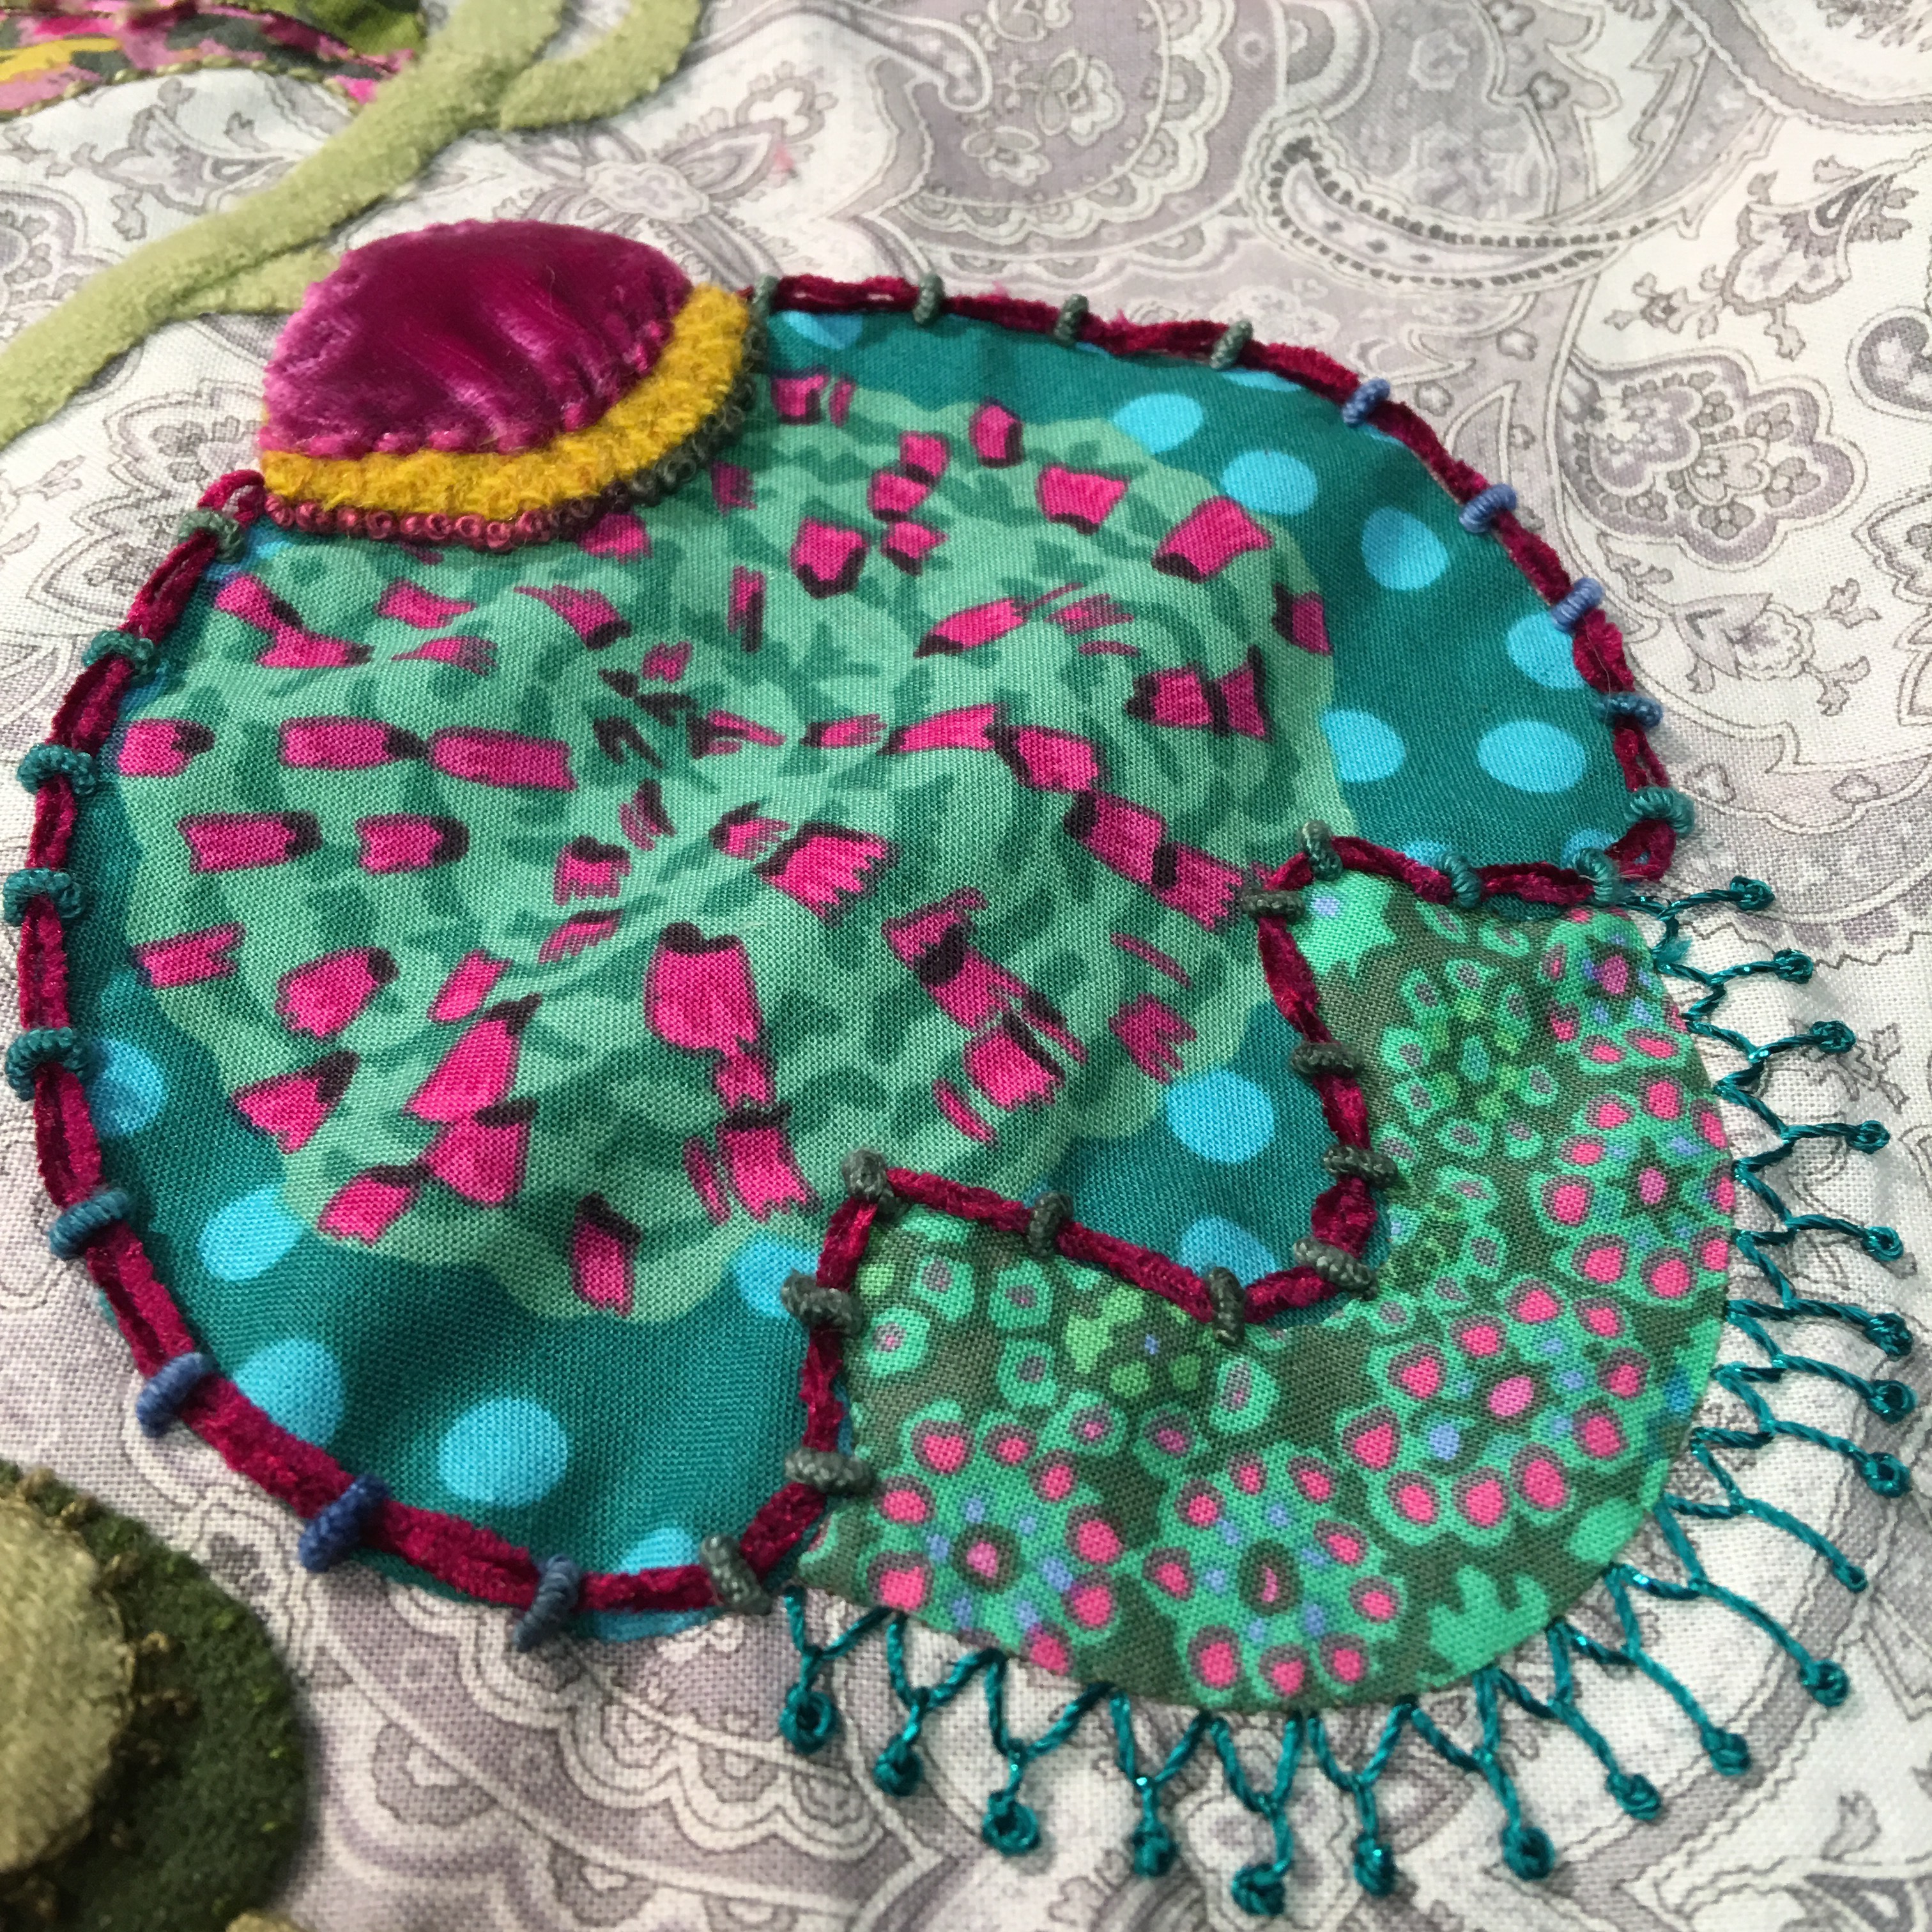
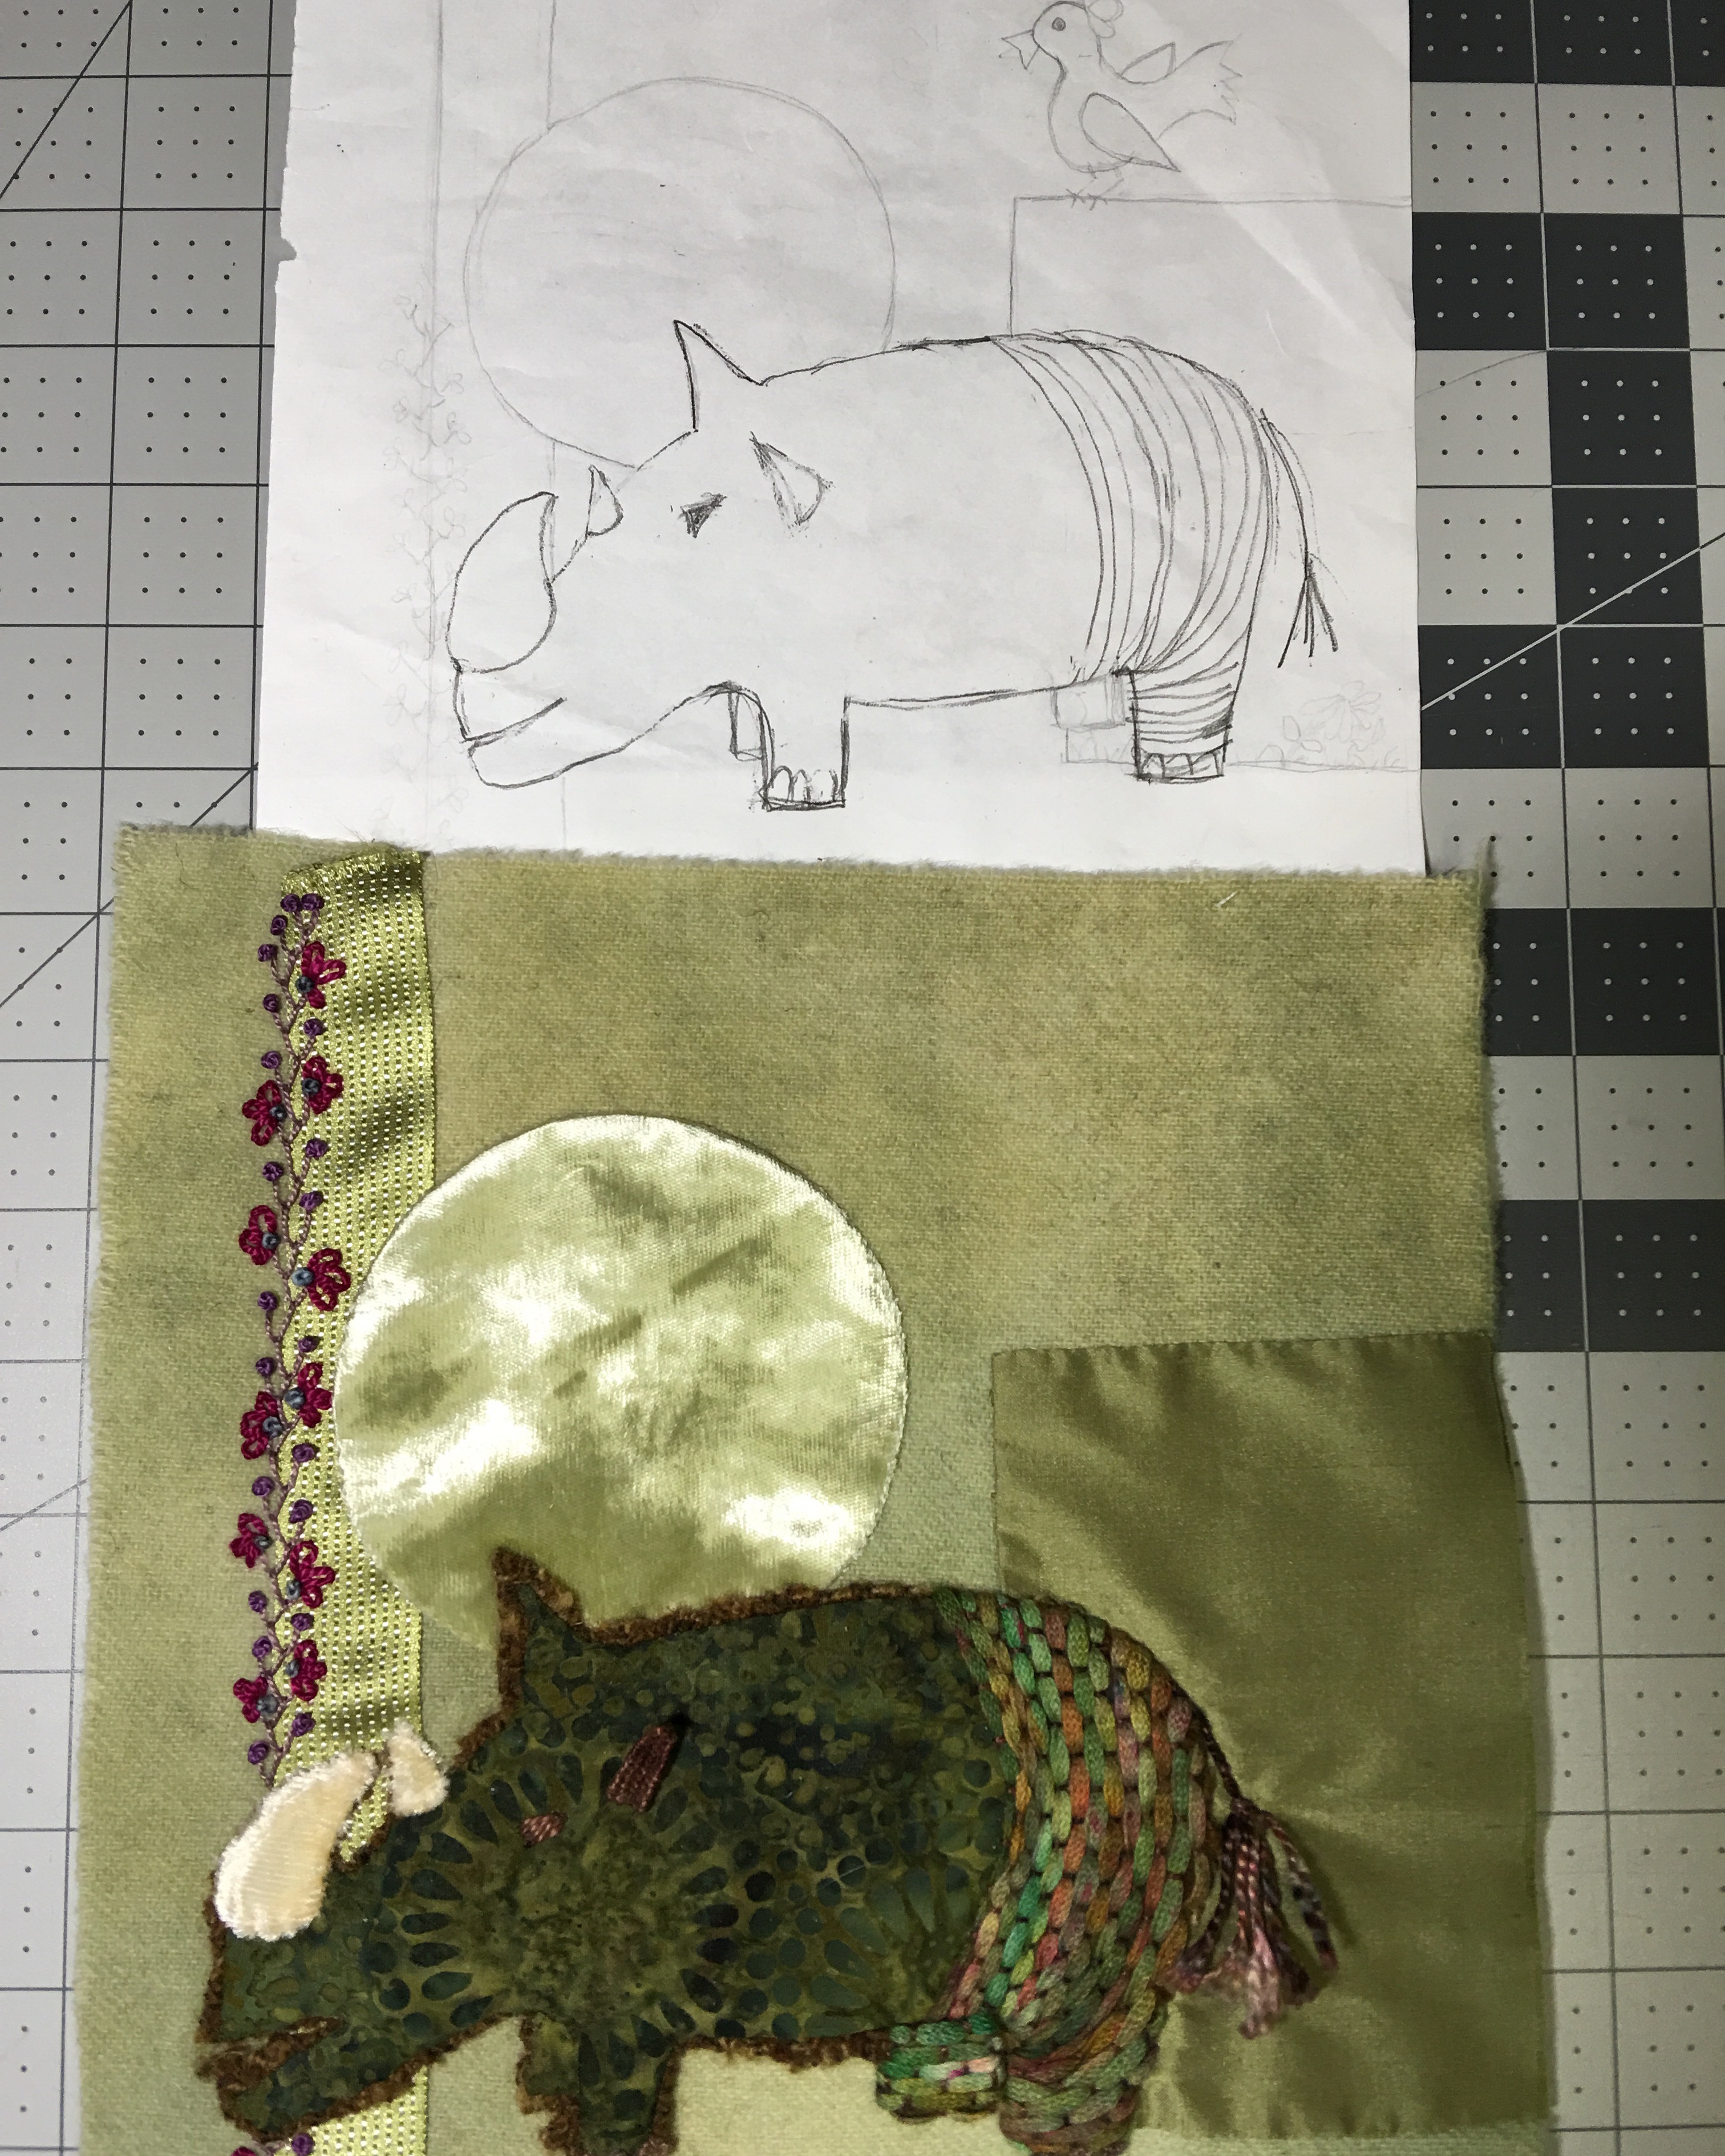
Rhino Block designed and stitched by Ariane Zurcher
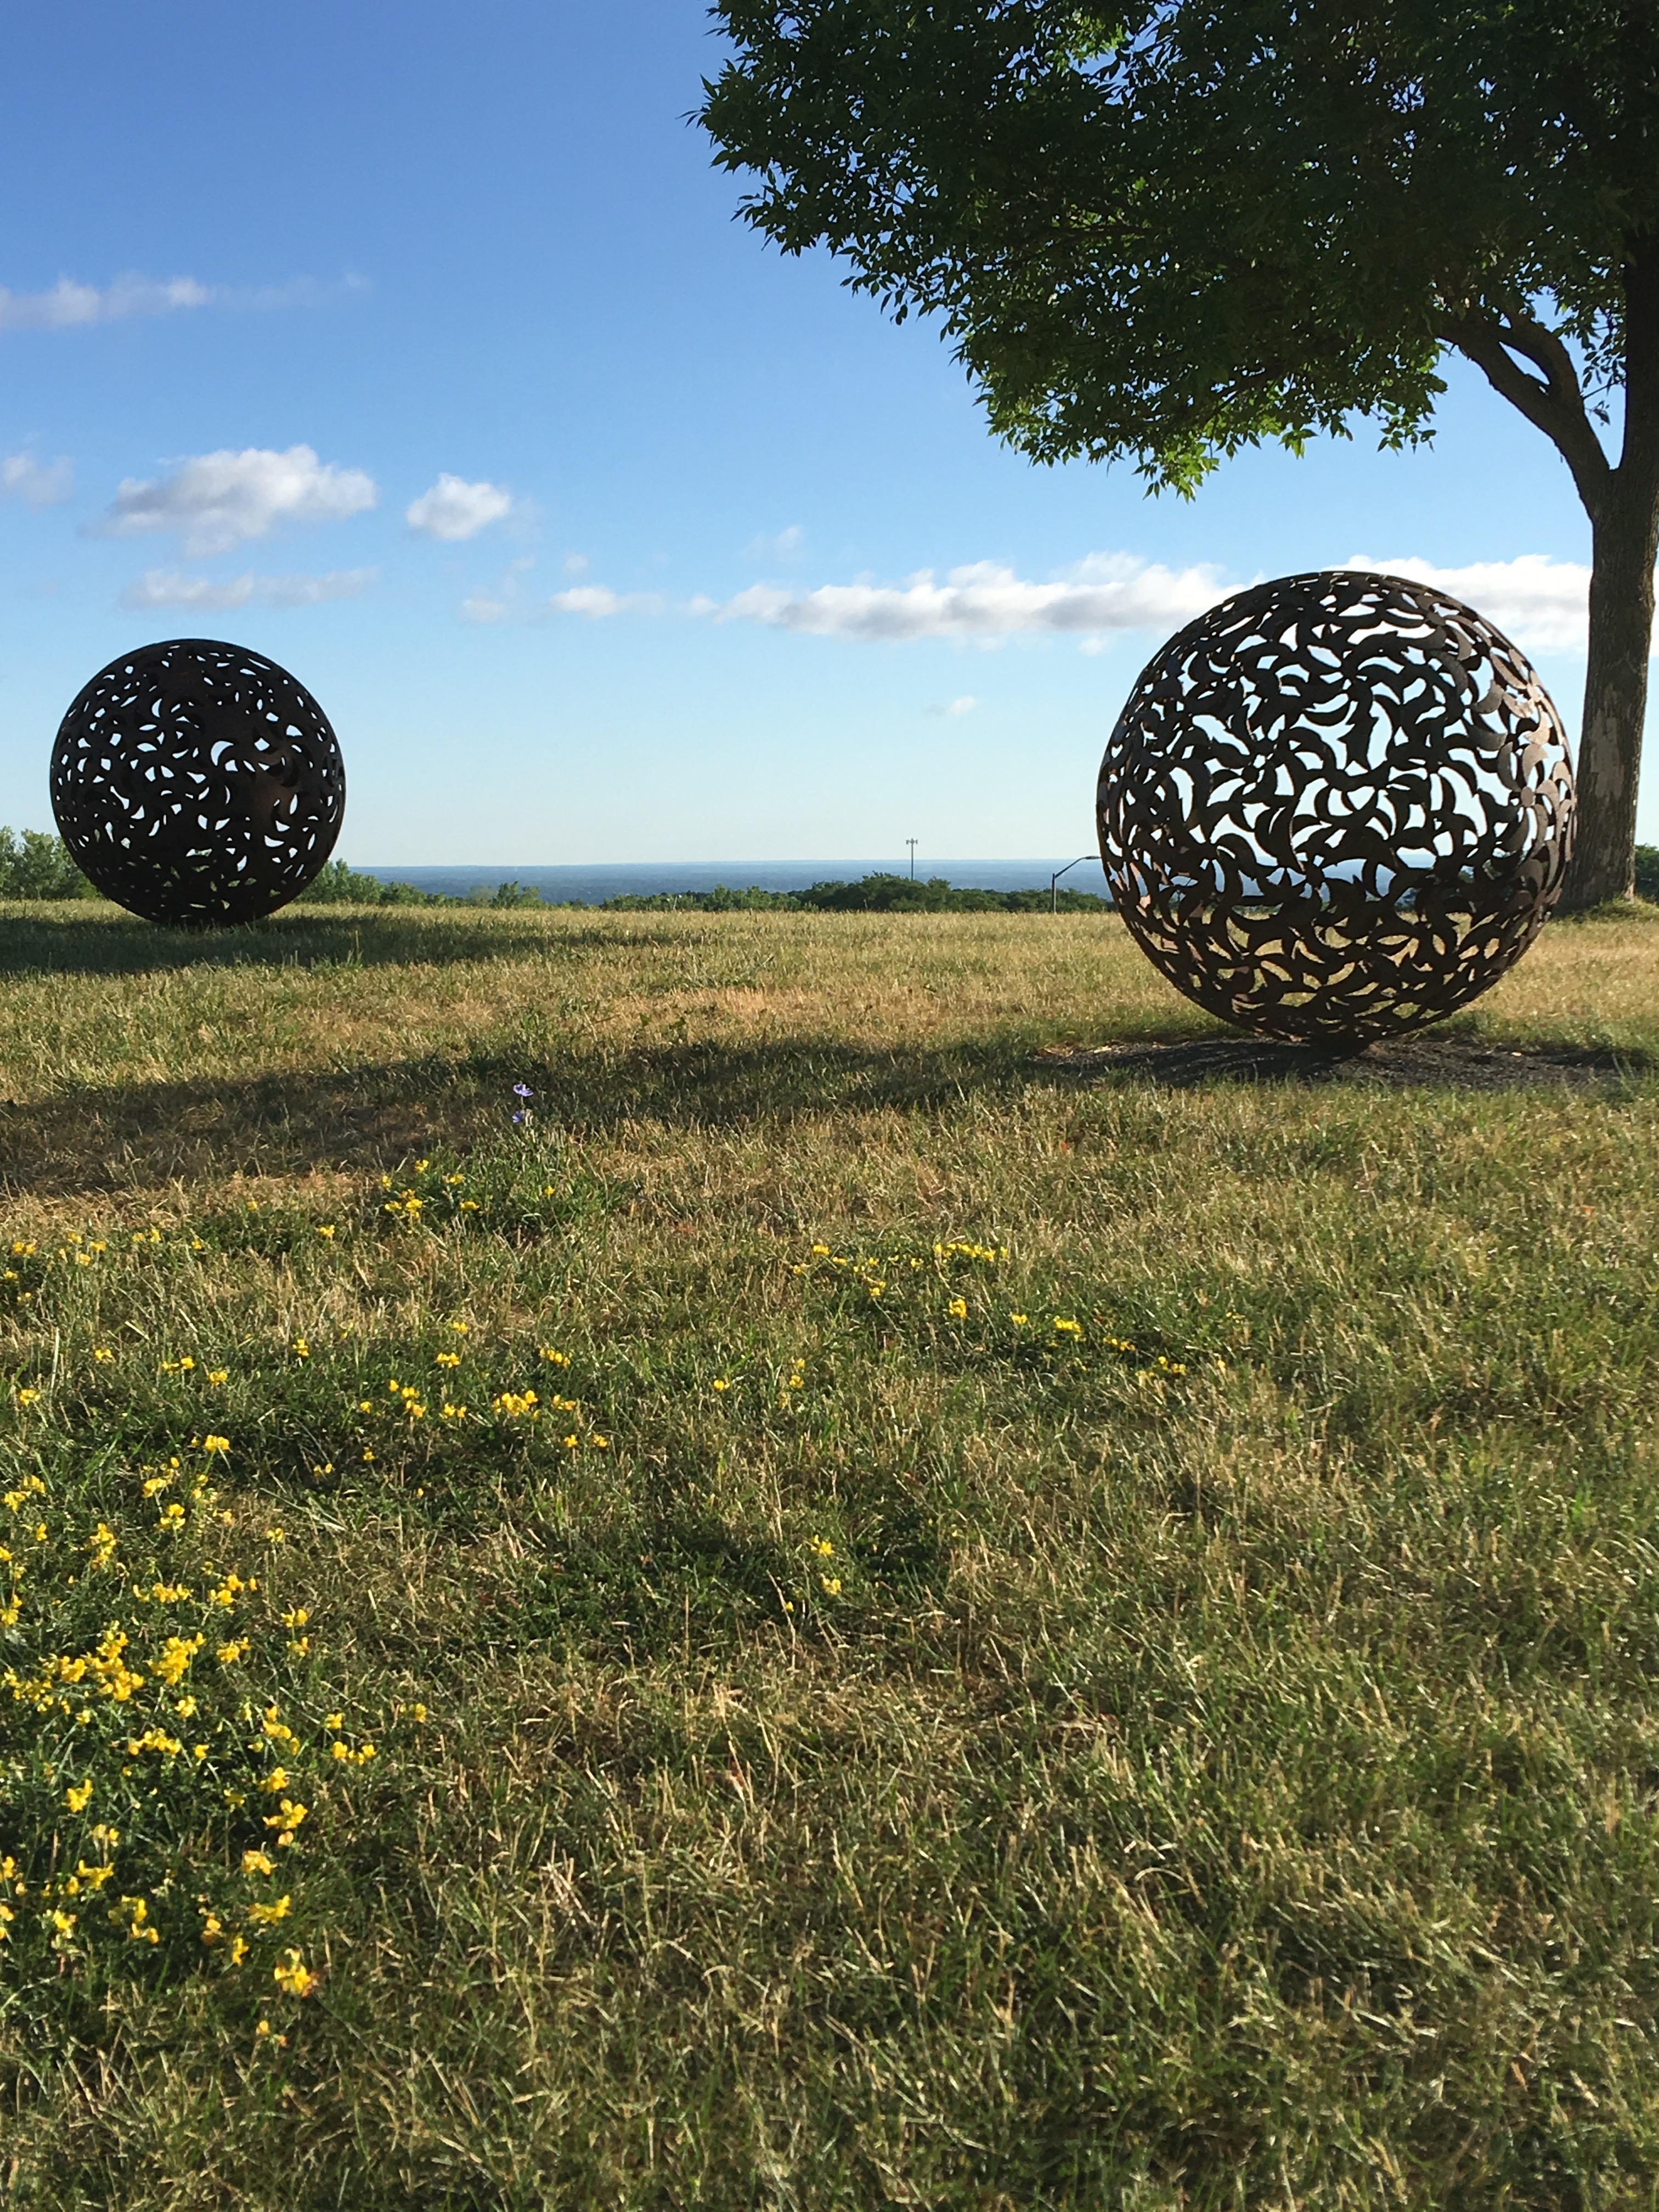
…which will lead her to a two-week Artist’s workshop retreat.
The artist’s retreat will be life transforming and will give her all kinds of ideas for new pieces that she wants to design and create…
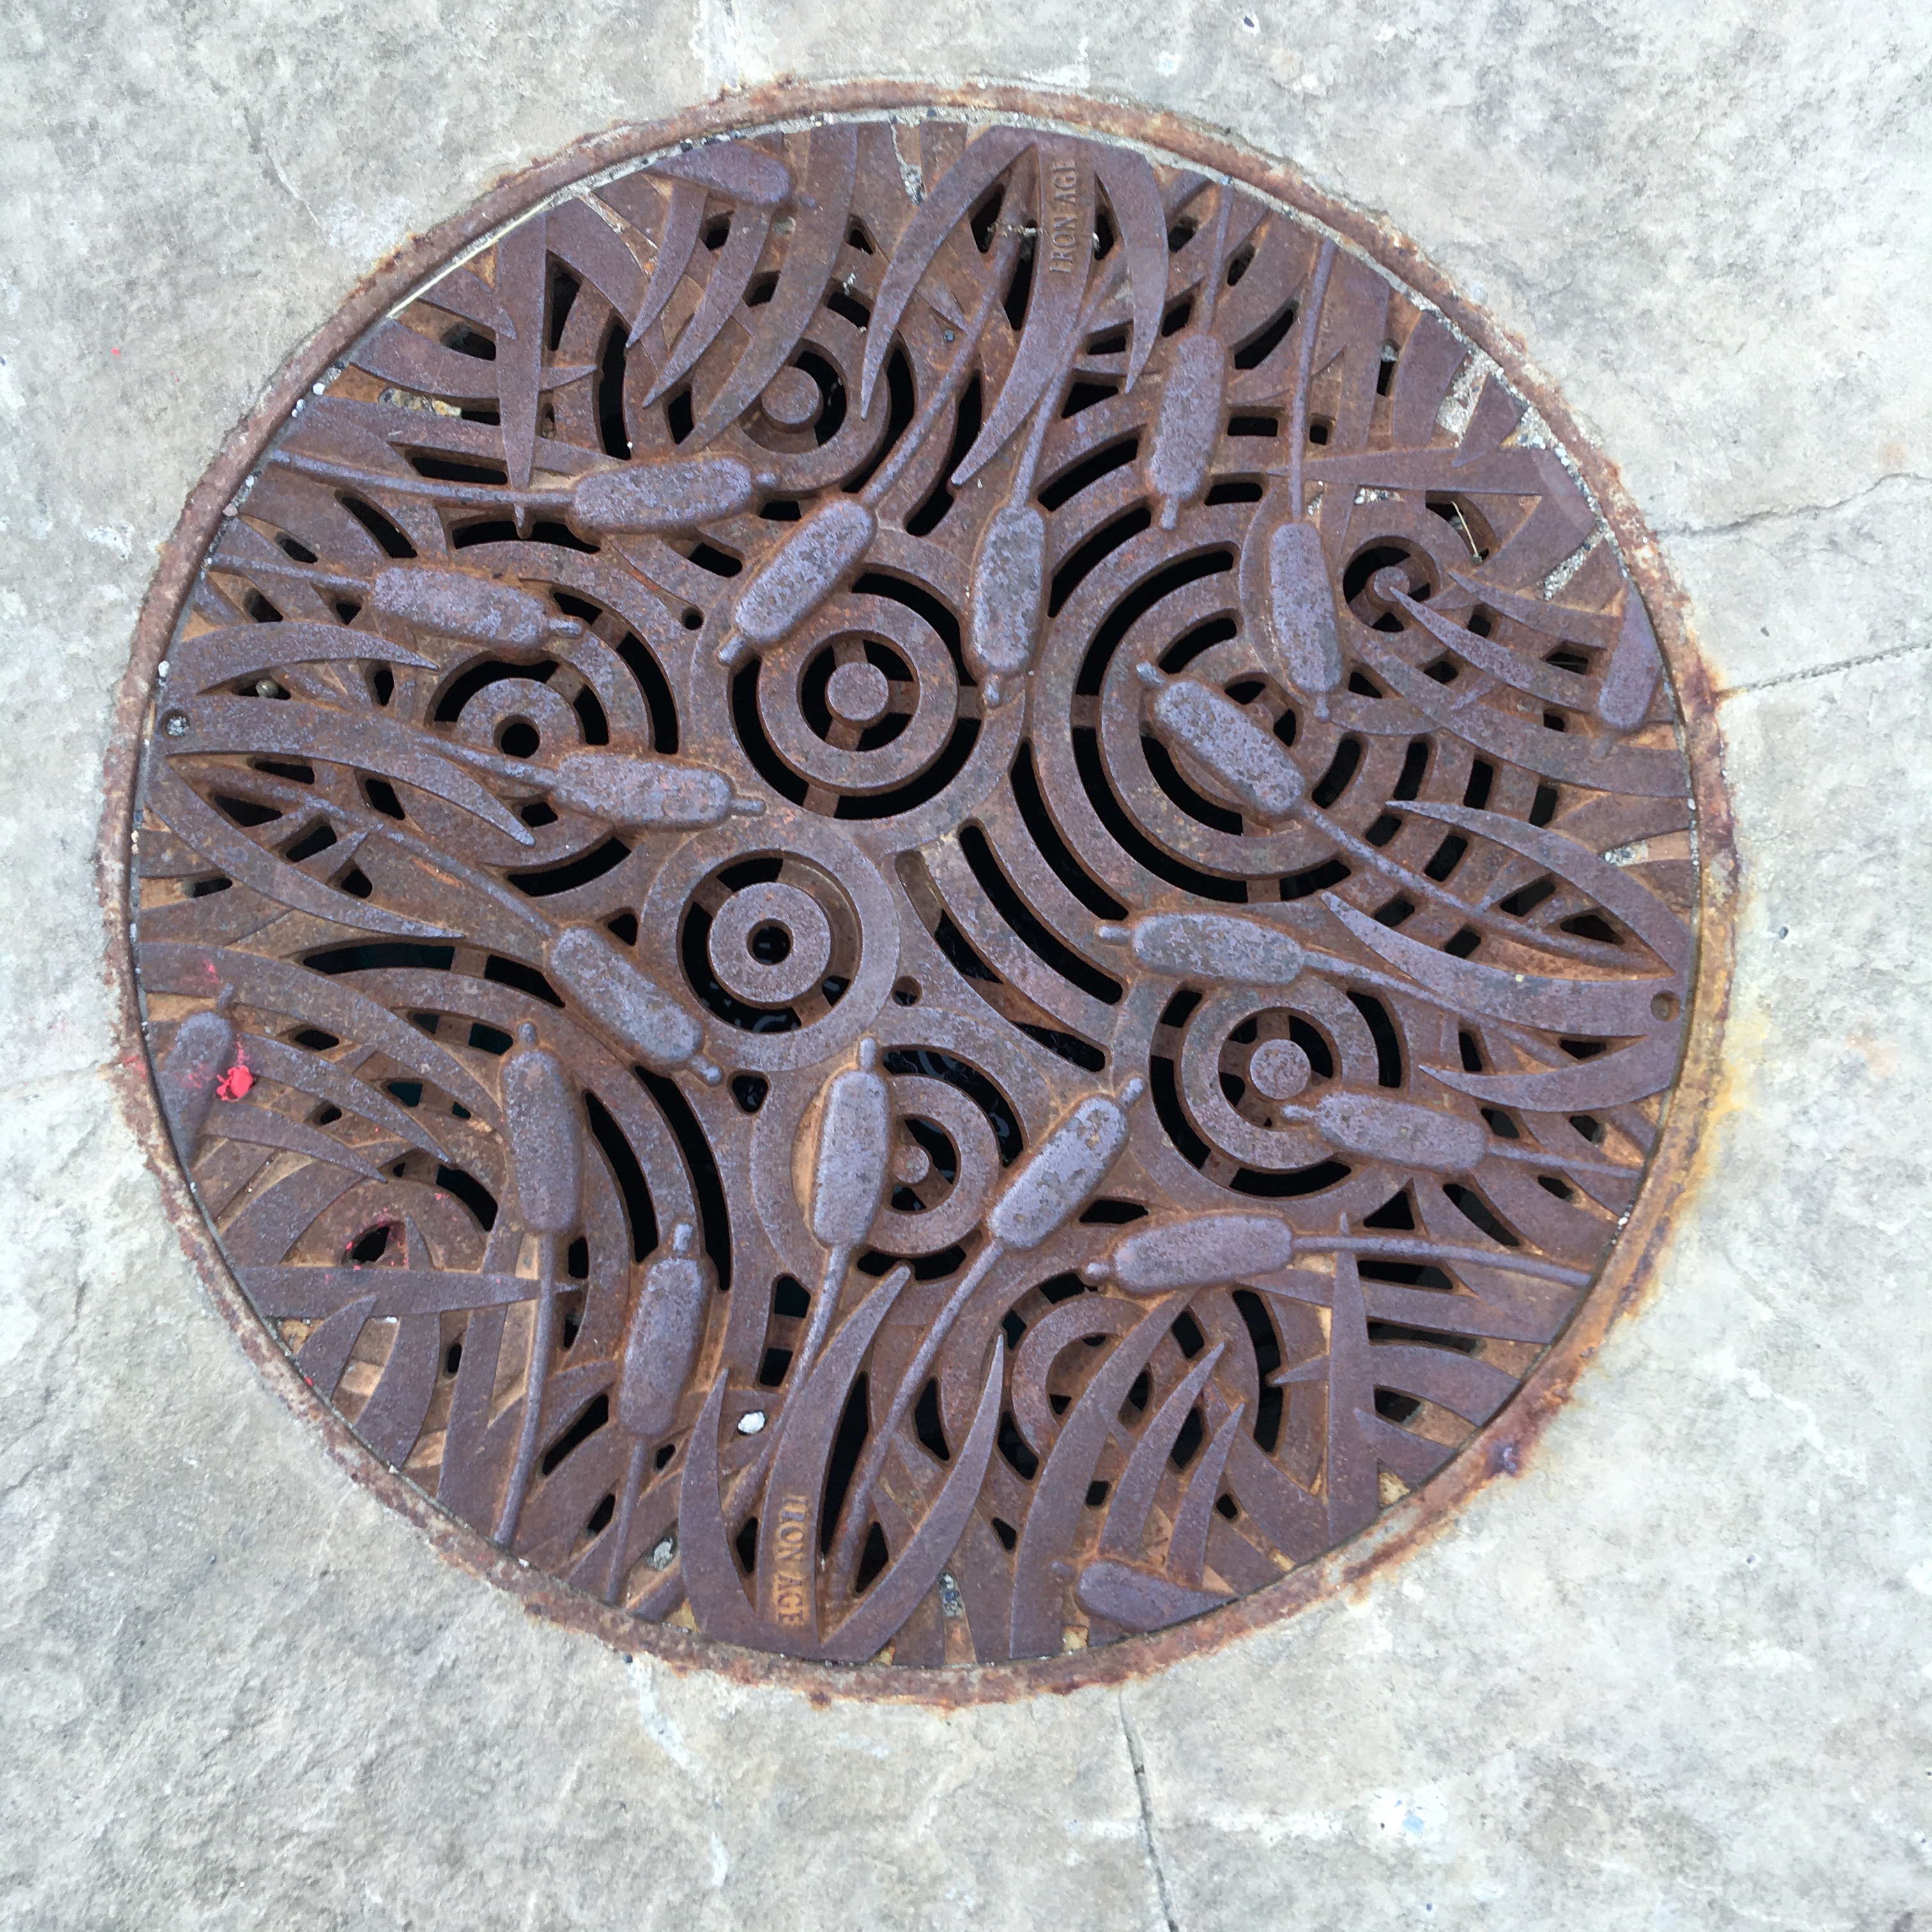
Manhole Cover at Onondaga Community College
While she marvels at all the things she’s seeing and learning she will be reminded of other things she’s already working on…
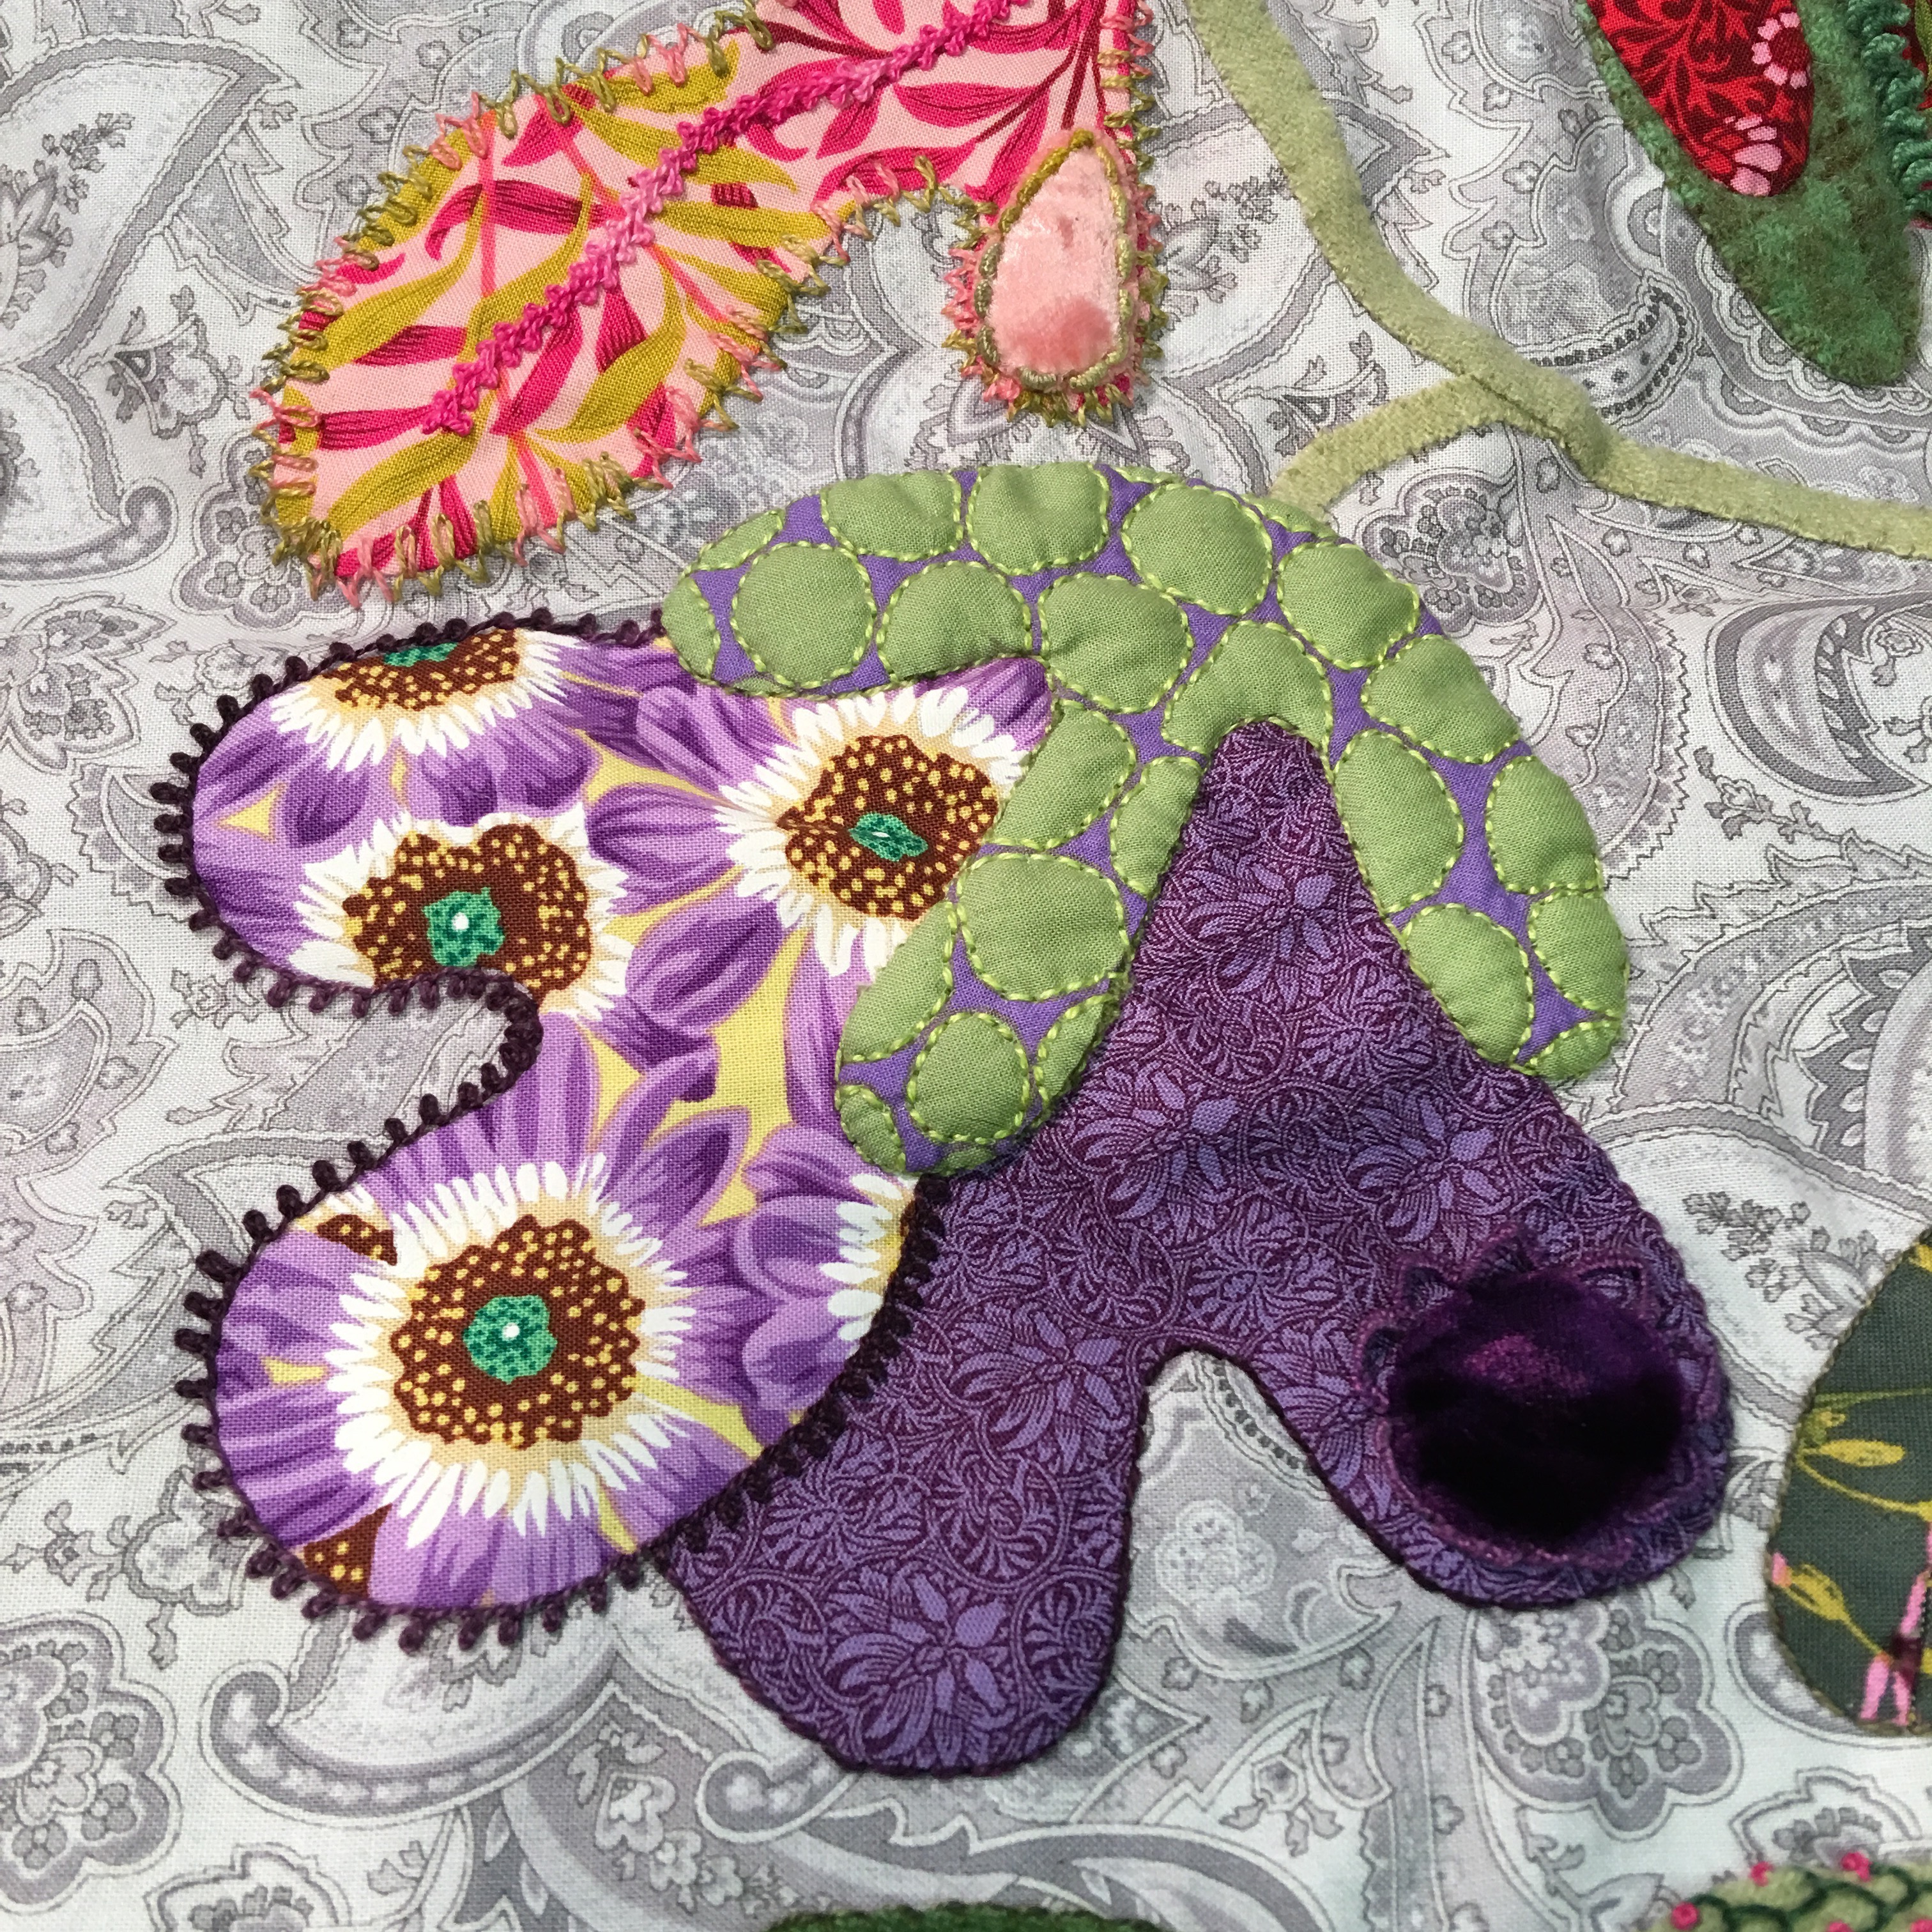
Detail from Flower Pot Quilt Border
One of those things will be manhole covers! Who doesn’t love manhole covers and if you love manhole covers, wouldn’t a quilt inspired by them be even more fabulous?!
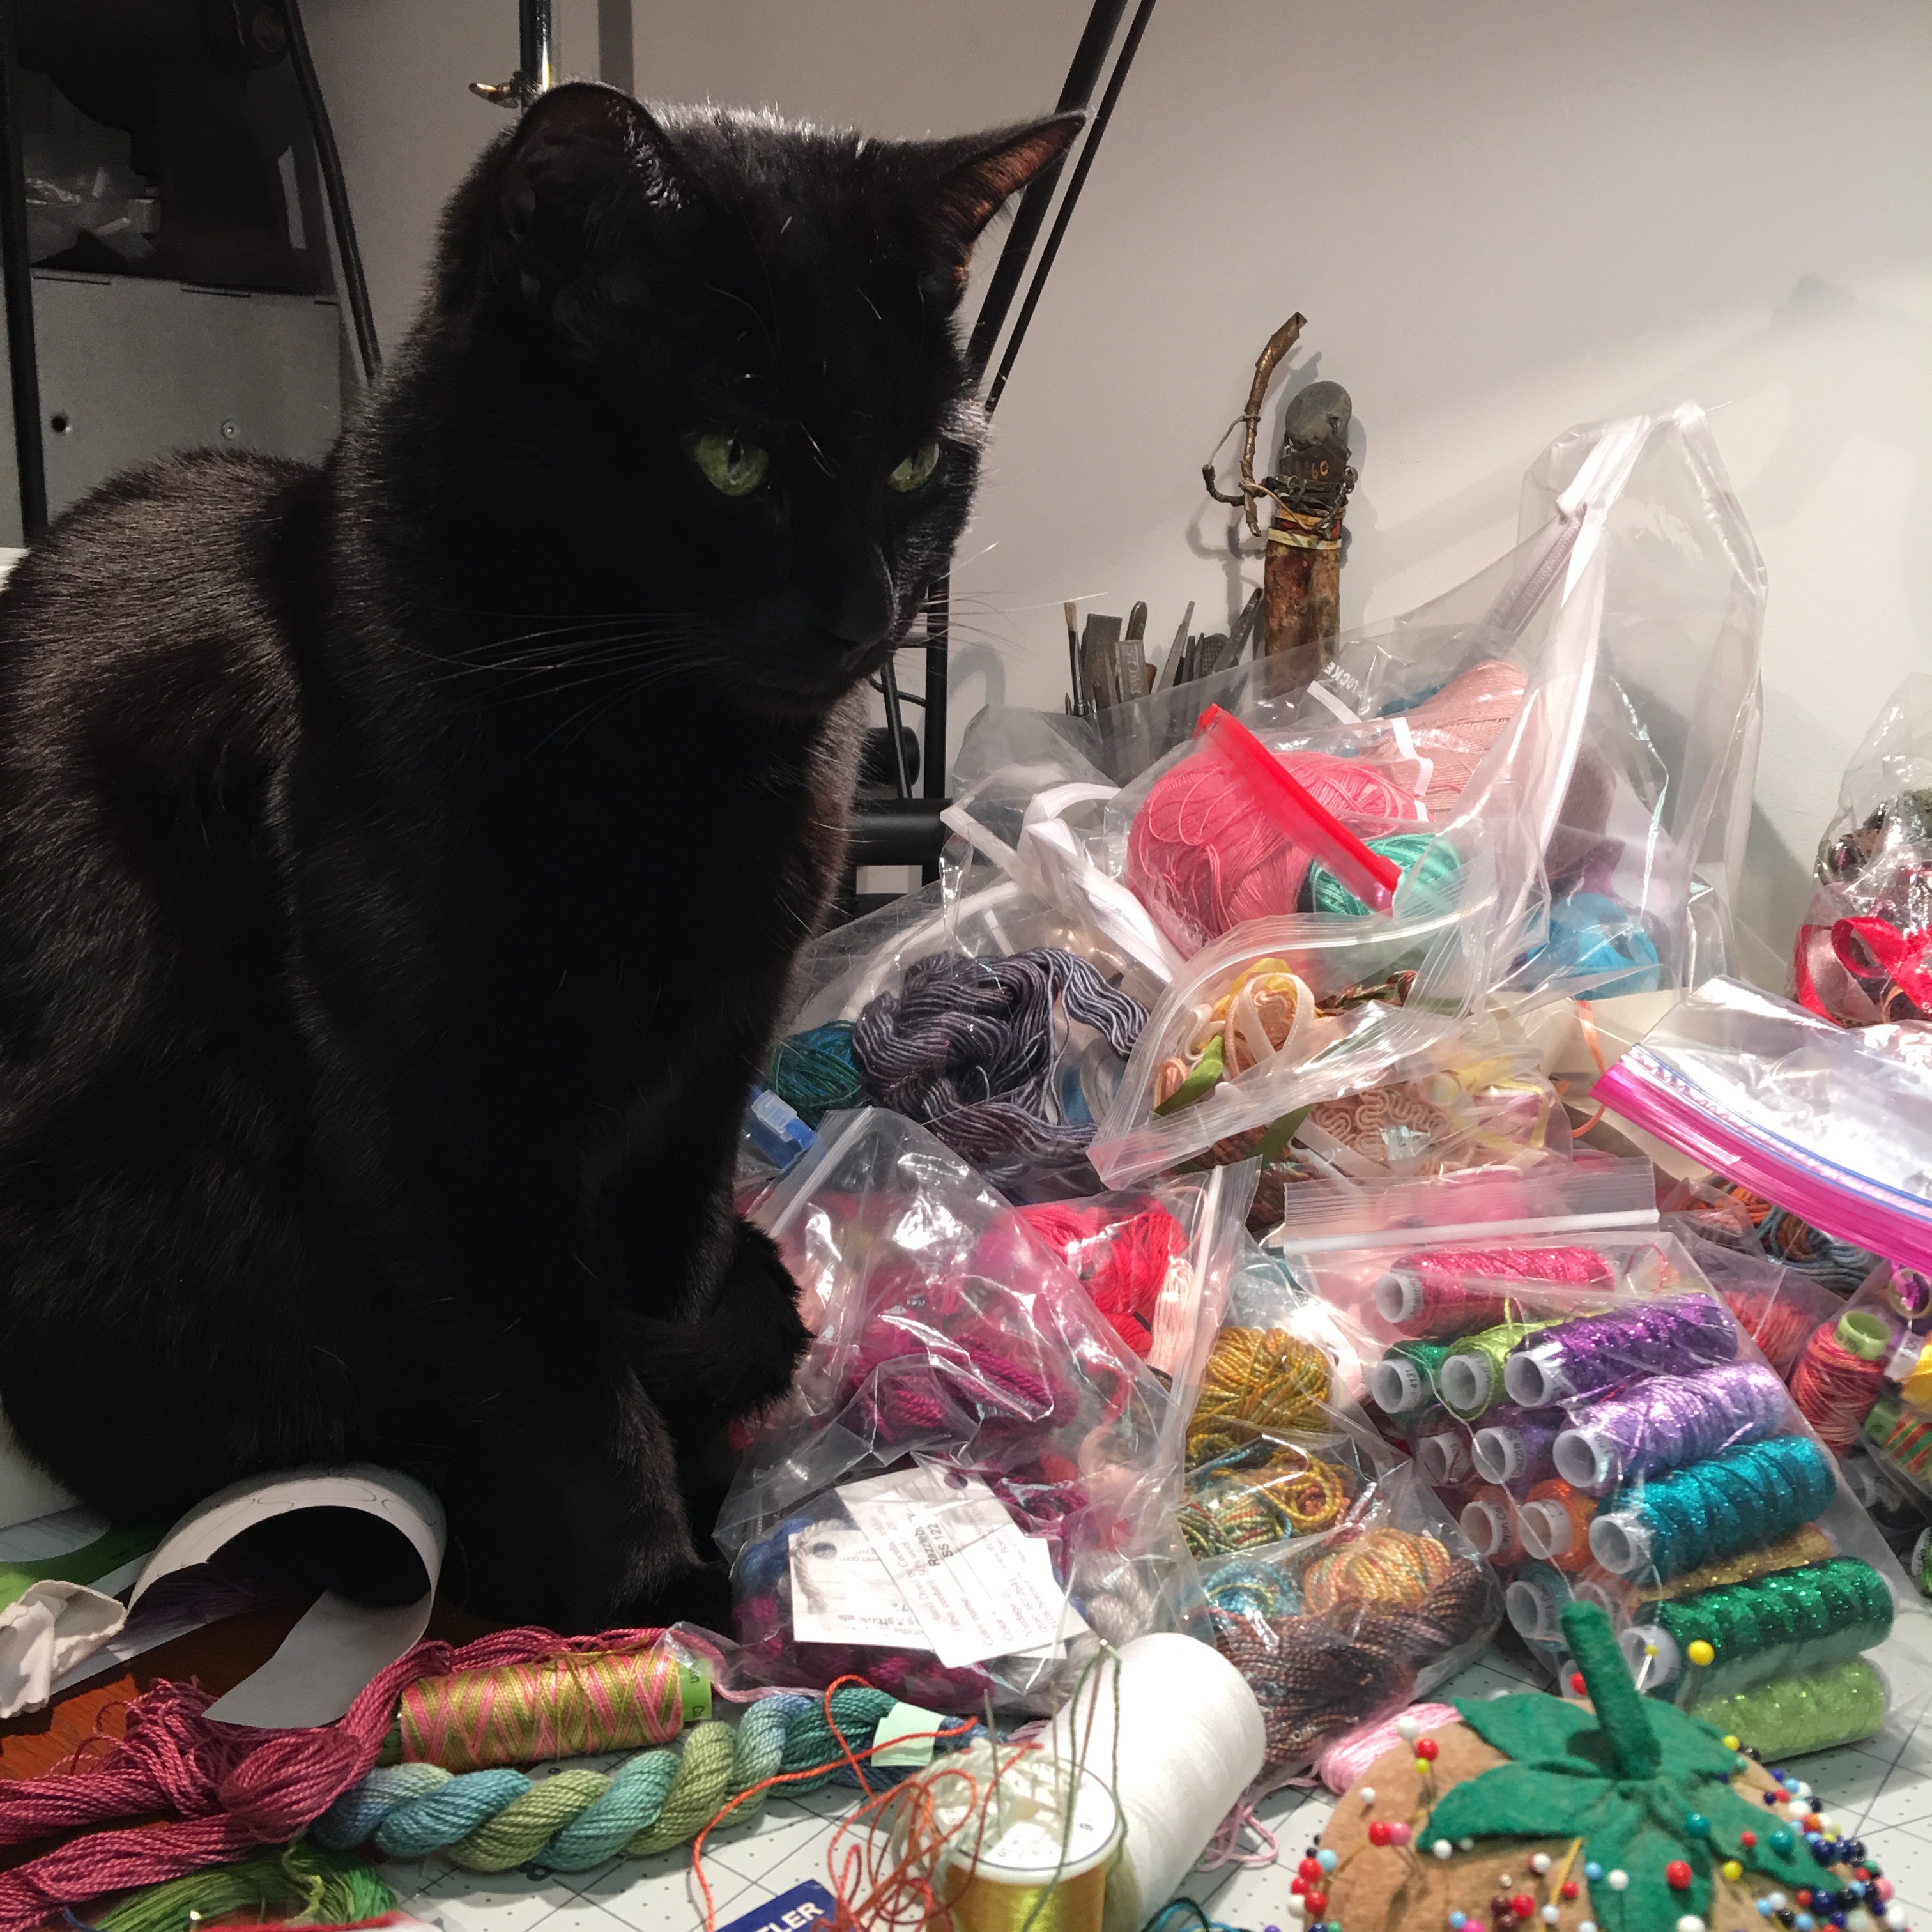
So it’s probably best to give a girl her first quilt while she’s still very young so she has plenty of time to learn and do all of this!
Merlin overseeing the work.
Coming next week: pots! Not flower pots as in the quilt, but real pots, thrown pots, hand painted pots… gotta love pots!
![A Work Space of One’s Own]()
by Ariane Zurcher | Jul 31, 2016 | Art, Design, Quilting by the Lake |
I just returned from a two week long artist’s workshop, where I studied with the fabulous and fabulously talented artist, Rosalie Dace for five days, followed by five days with another fabulous and extremely talented artist, Lorie McCown. The workshops are part of the Schweinfurth Art Center‘s yearly summer program – Quilting by the Lake, also known as QBL. Though there is now no lake, there was one at the place they first began doing these workshops more than thirty years ago, and not everything produced is quilted, though it depends on the workshop you signed up for.
Here’s a run down of my time at QBL.
Day 1 of Rosalie Dace’s Workshop entitled Skin Deep: Panic! and the realization that perfectionism is creativity’s executioner.
By the end of the first day I have a couple of ideas, but am definitely struggling.
Day 2: I begin repeating something Rosalie had written on one of the large boards propped up on one of two easels in front of the class. “DON’T PANIC!” This becomes my mantra for the rest of my time at QBL.
Day 3: I hate everything I’ve created thus far and have the rude awakening that my expectations are a killjoy. Around the middle of day 2 and into day 3 Rosalie encourages me to use machine stitching, which definitely pushes me out of my comfort zone. I proudly show Rosalie the machine stitching I’ve done (and am devising ways I will hide it after showing her) she applauds my efforts and then drops a bomb by suggesting I add two more lines of machine stitching so for every one line there are now THREE and a little part of me dies inside.
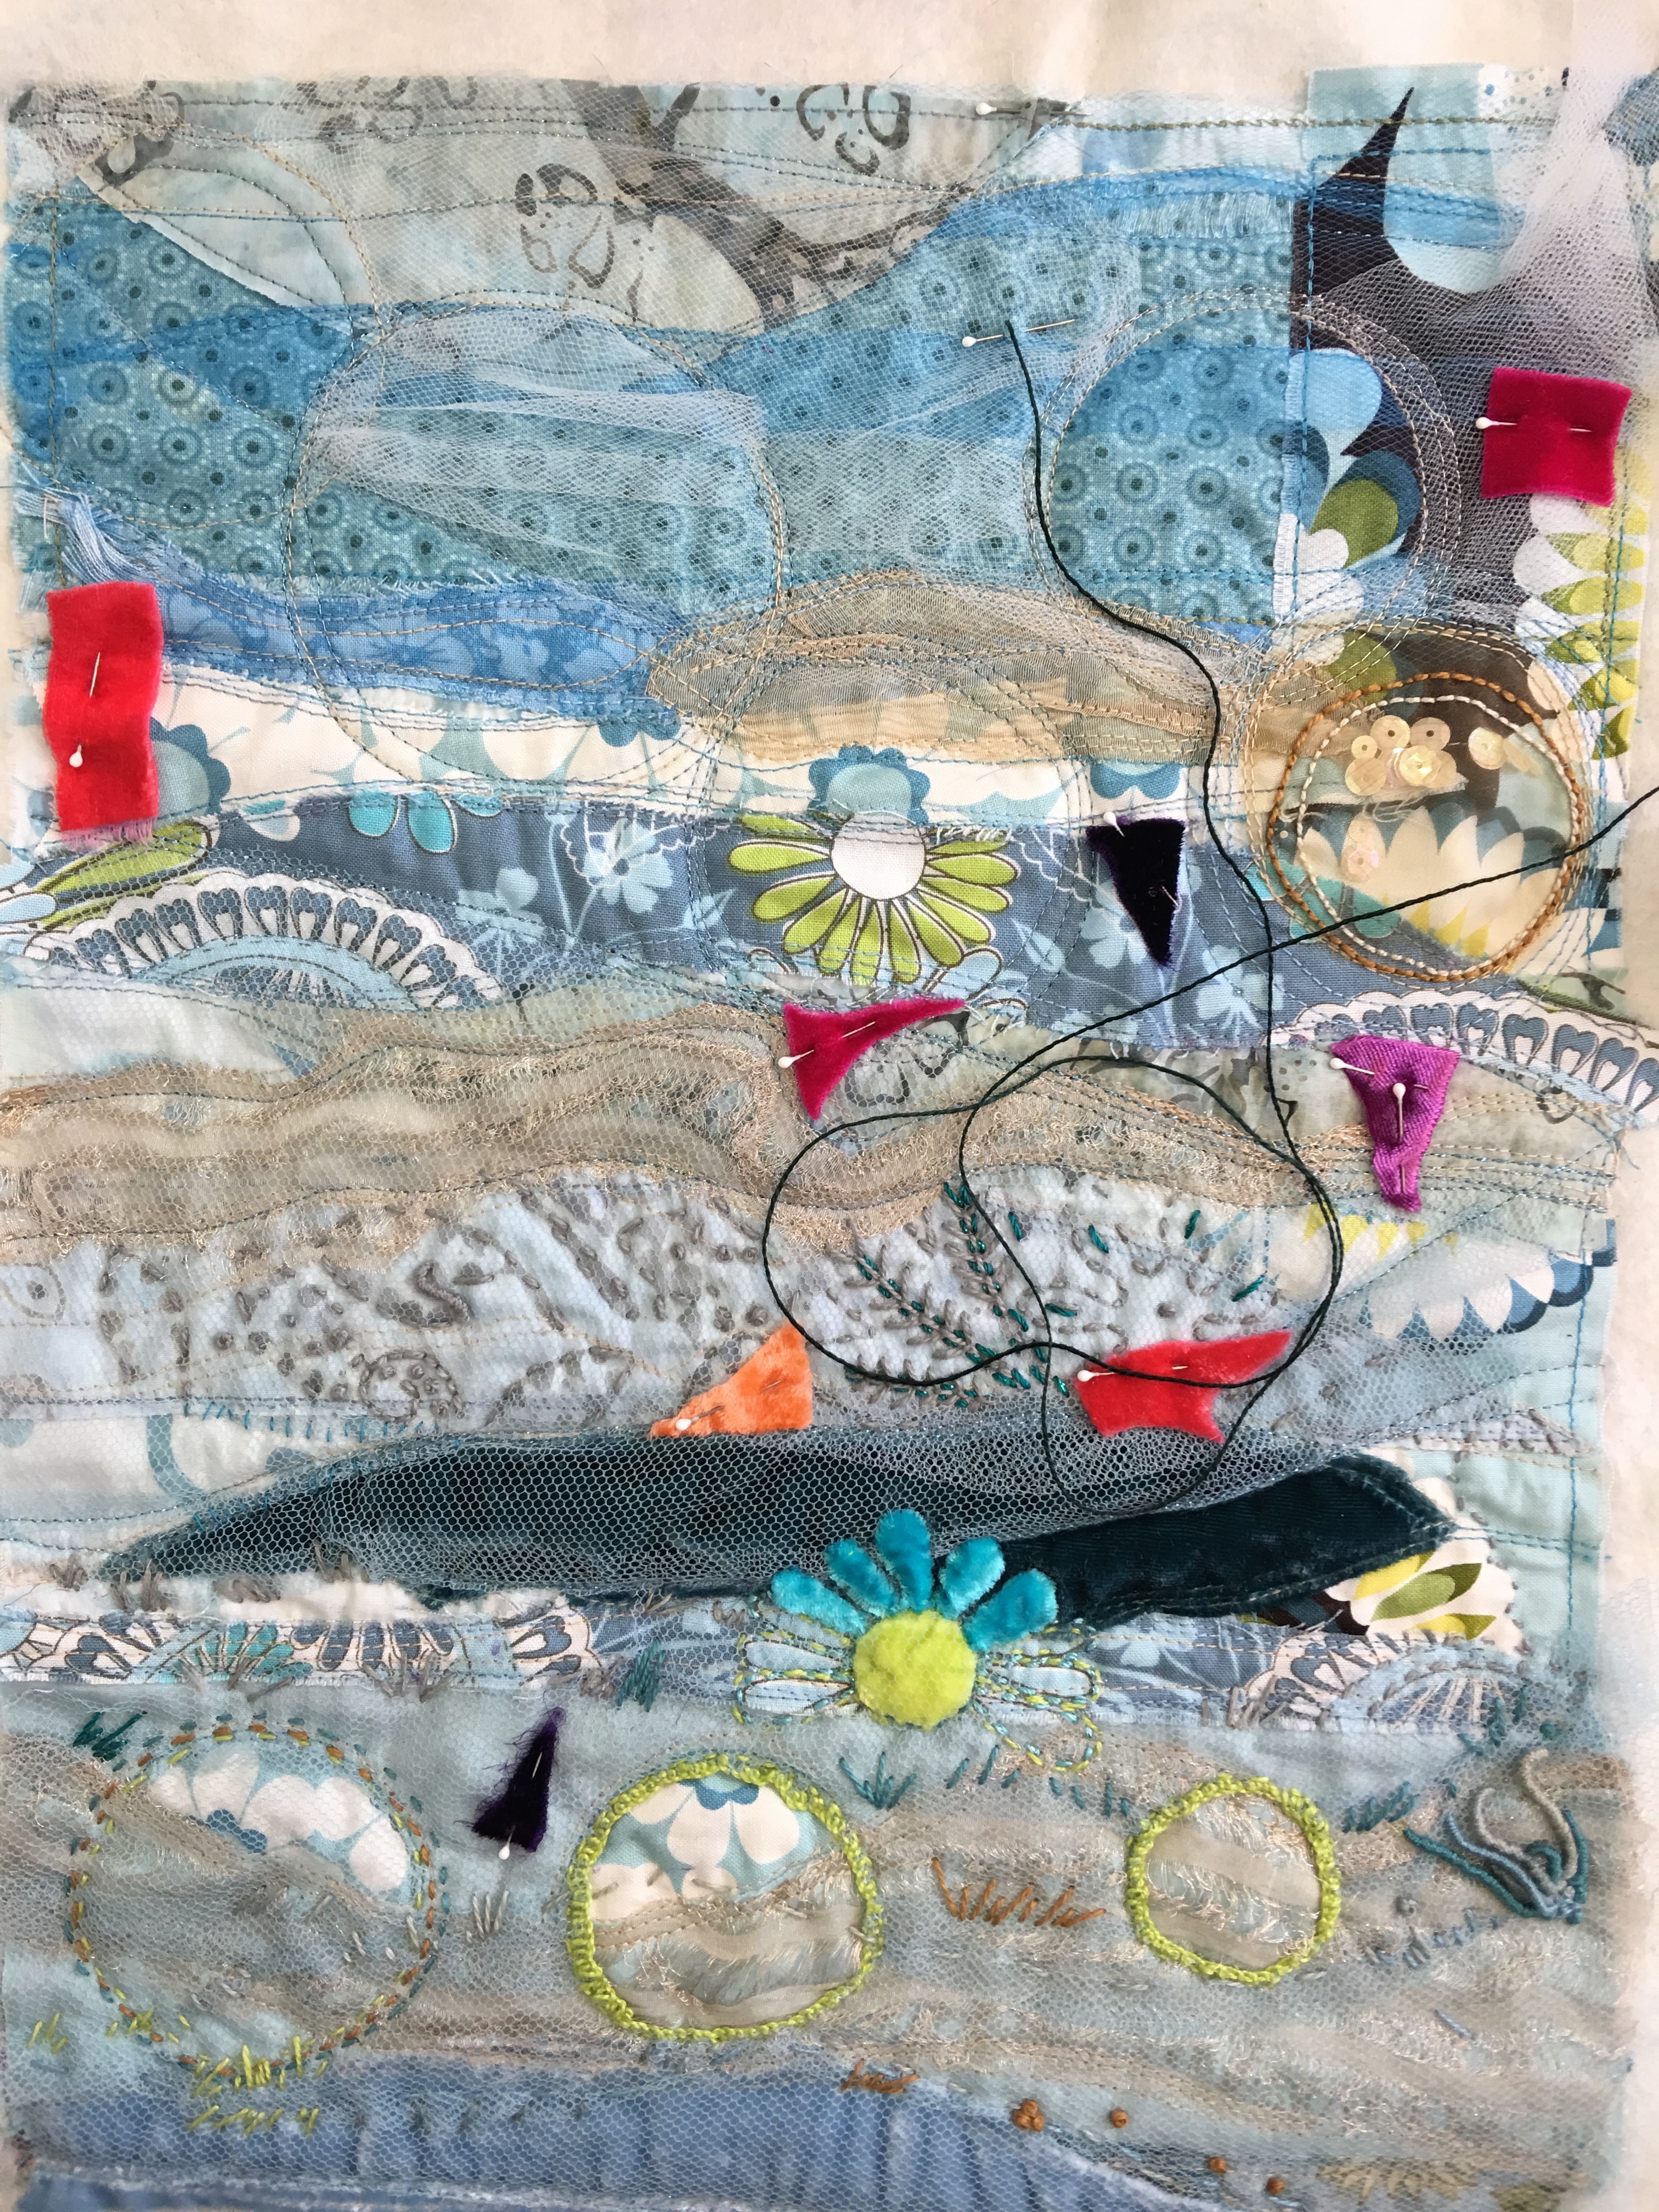
This was what I had done by the end of Day 3, beginning of Day 4. People would wander by and remark, “Ohh, pretty” or “oh the beach! I love the beach” or just, “water!” It was around this time that I came up with the title: “It’s deeper than you think” and then proceeded to muddy those serene waters by incorporating many of Rosalie’s great suggestions.
Day 4: Go with the flow. I’m a fiend and machine stitch everything I can get my hands on. I am one with my Bernina and life is good.
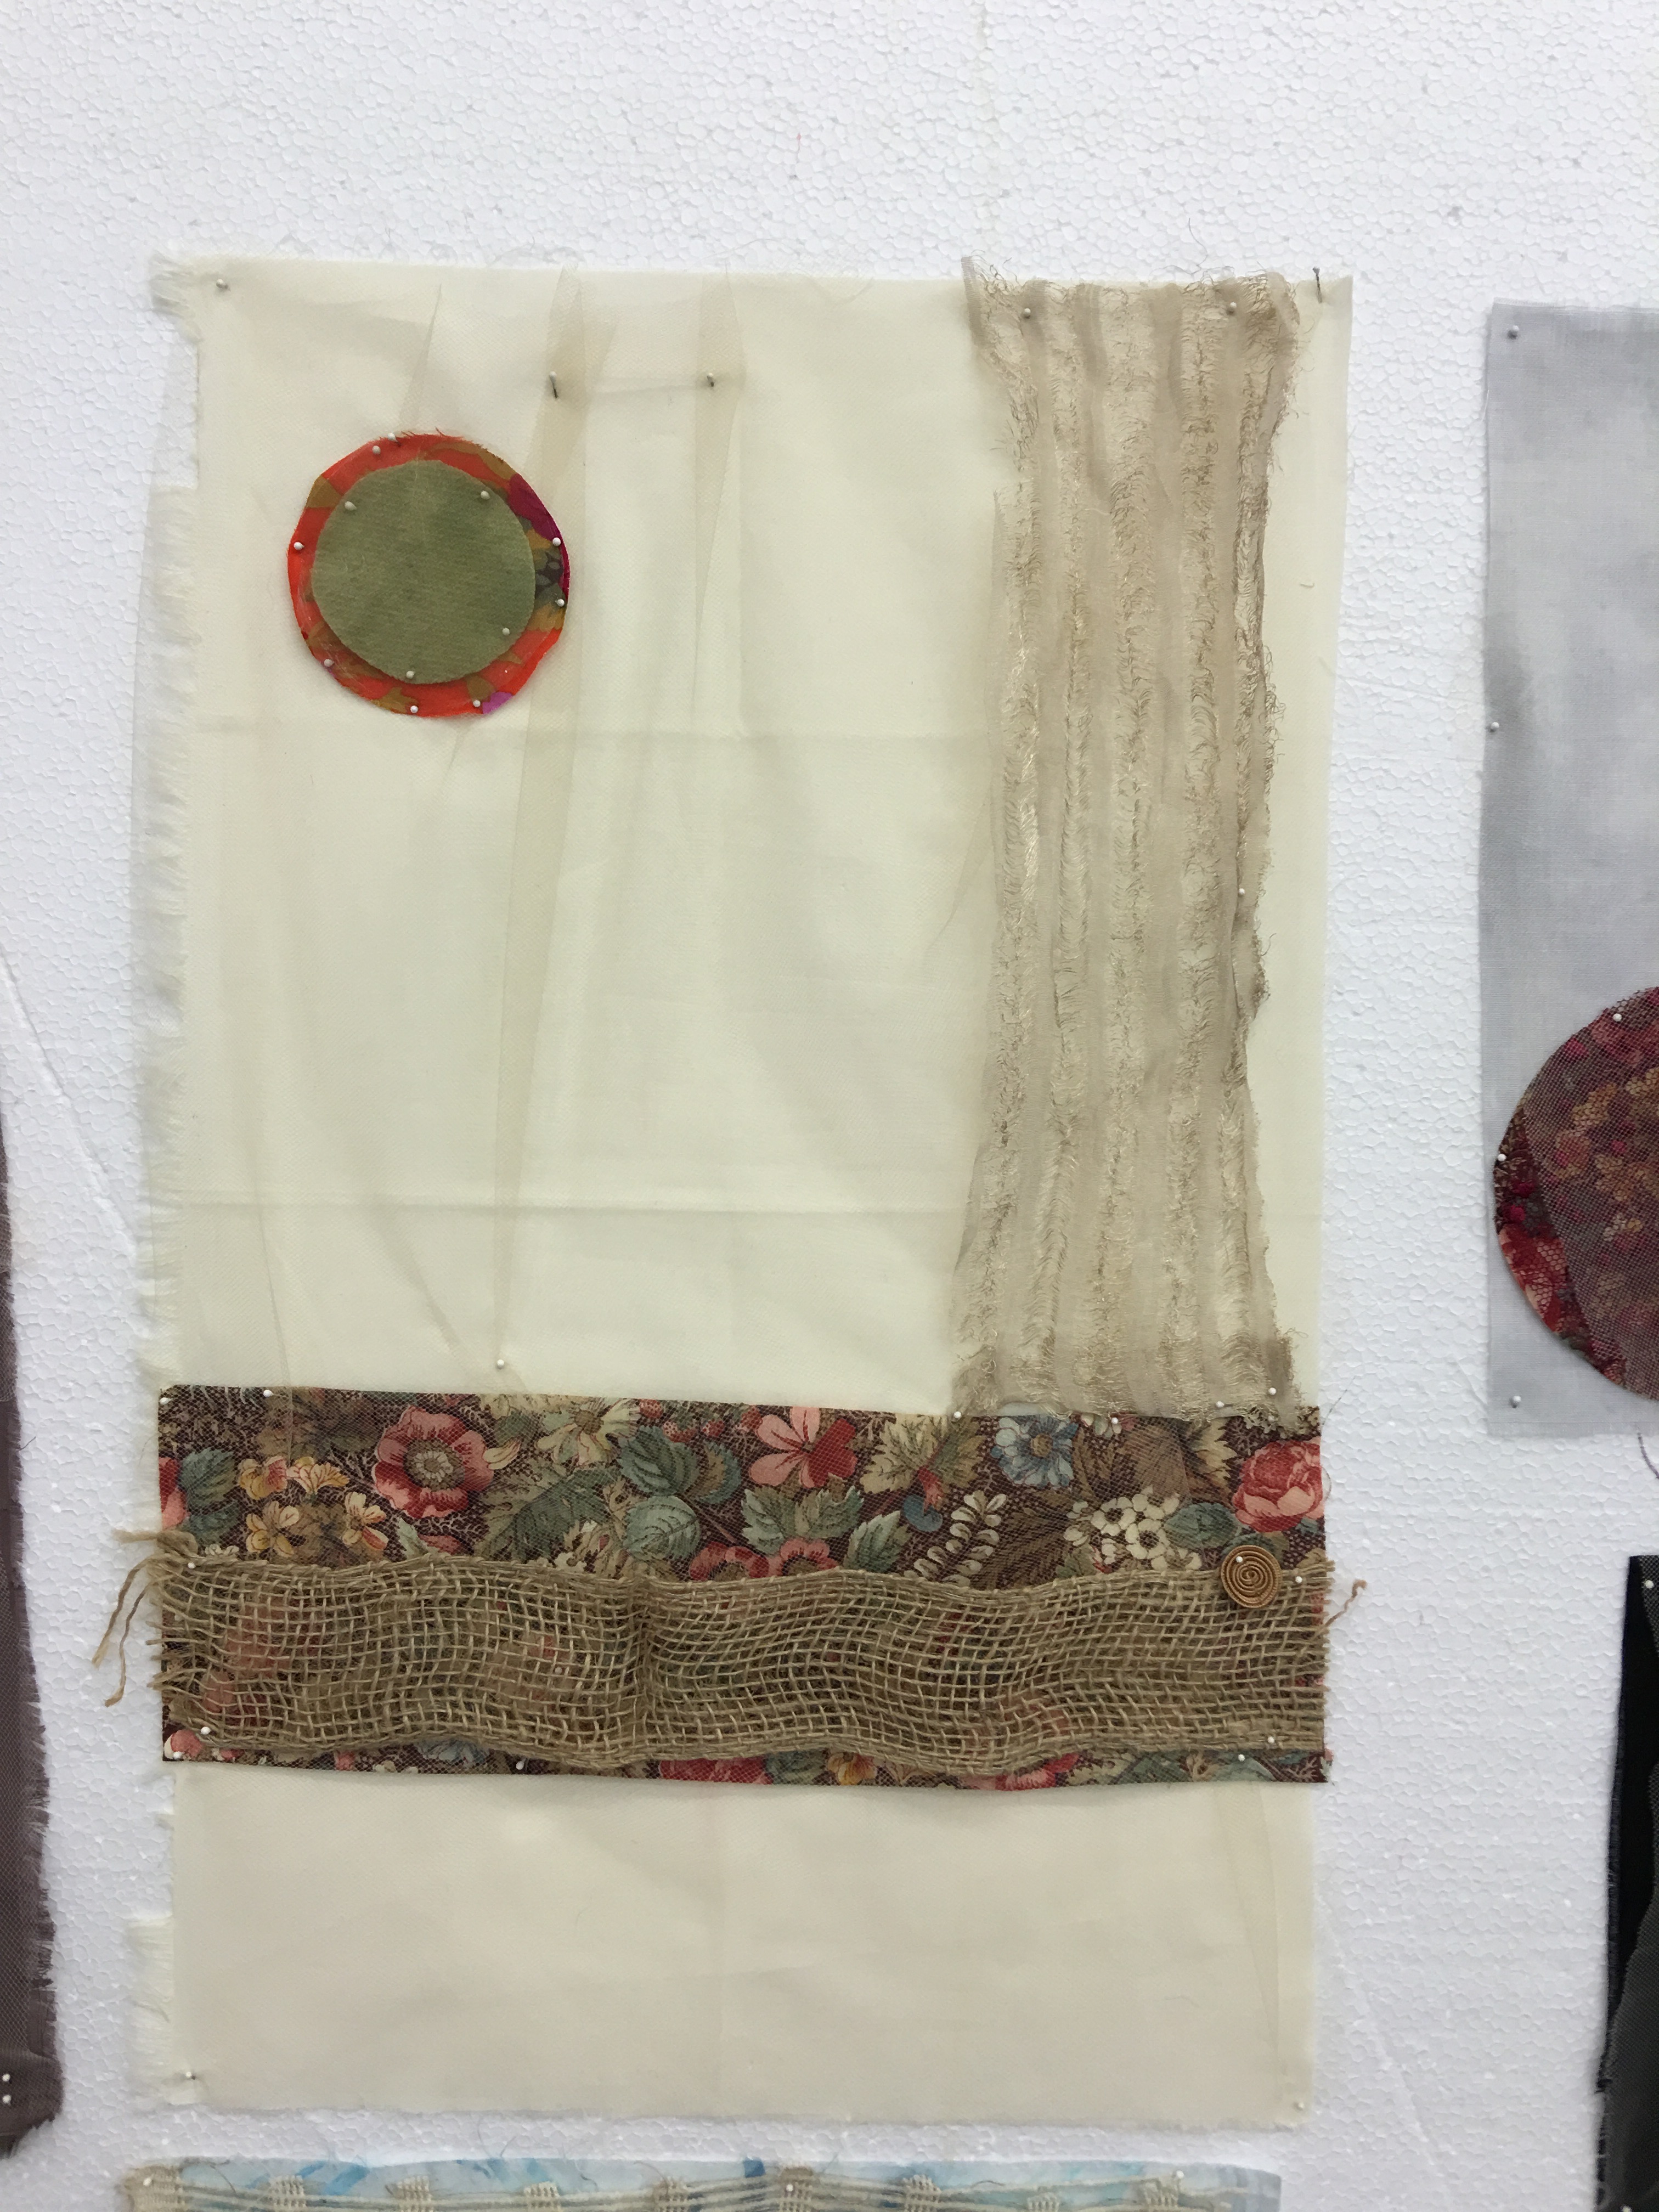
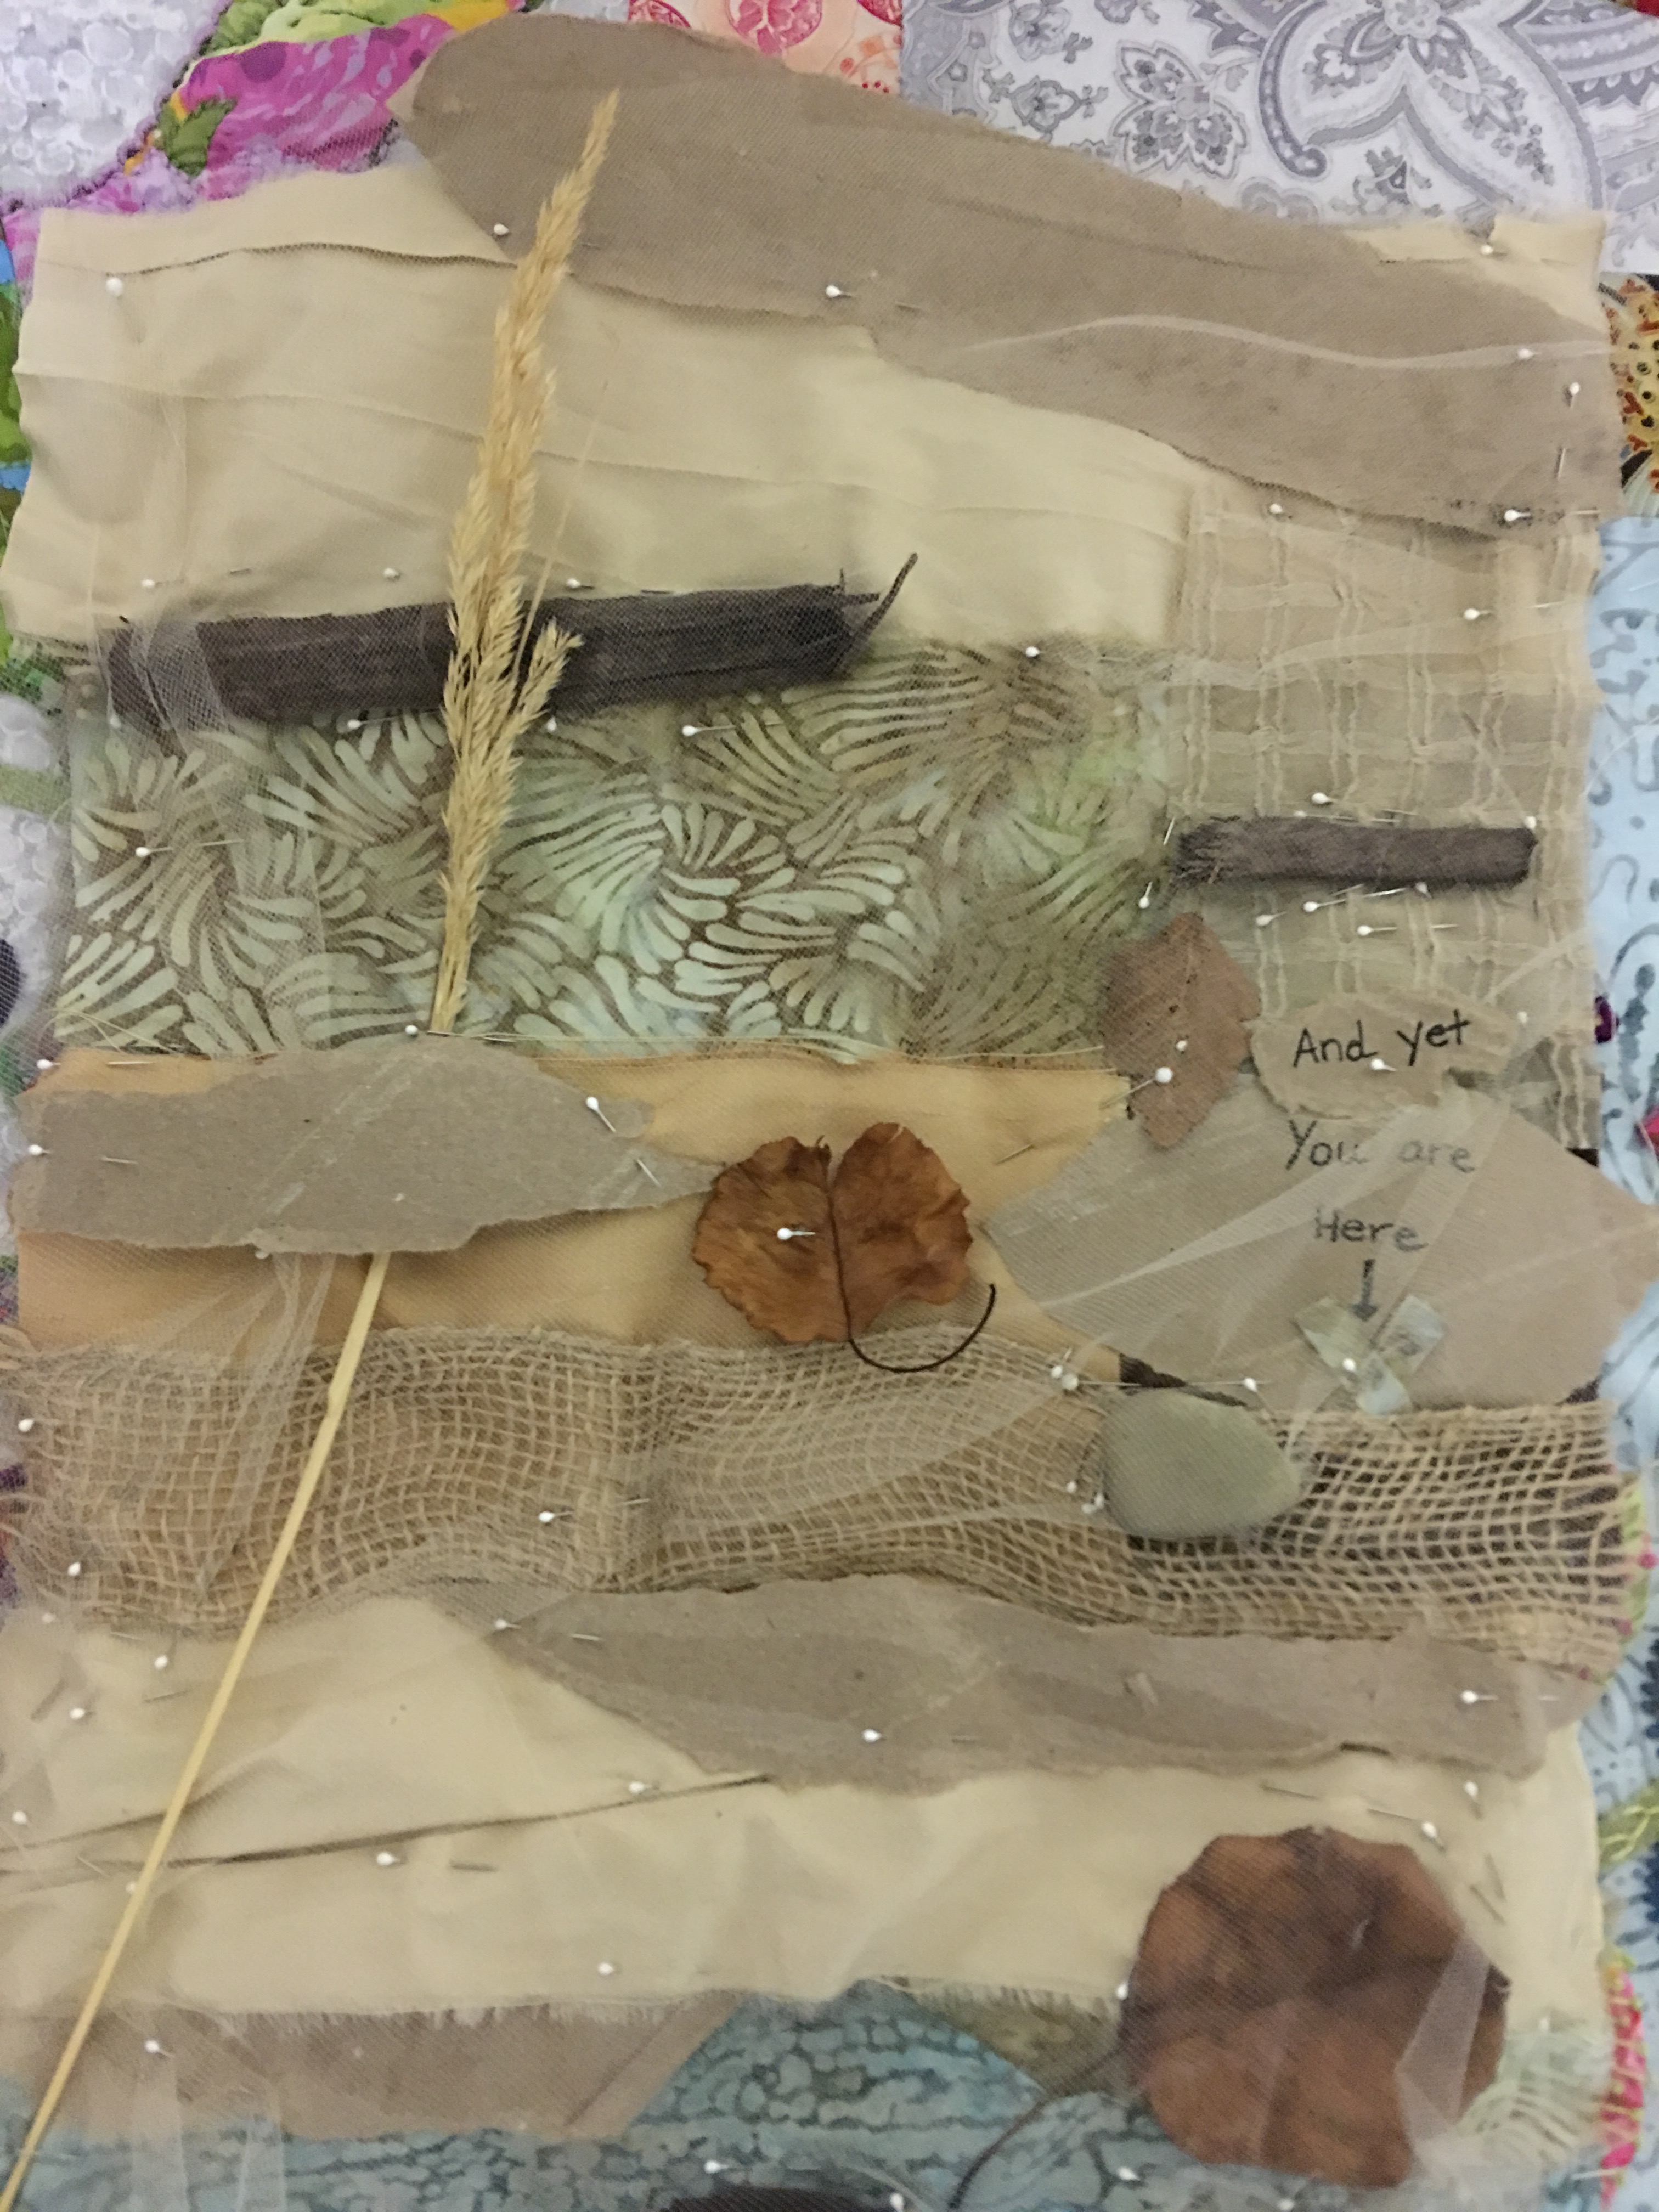
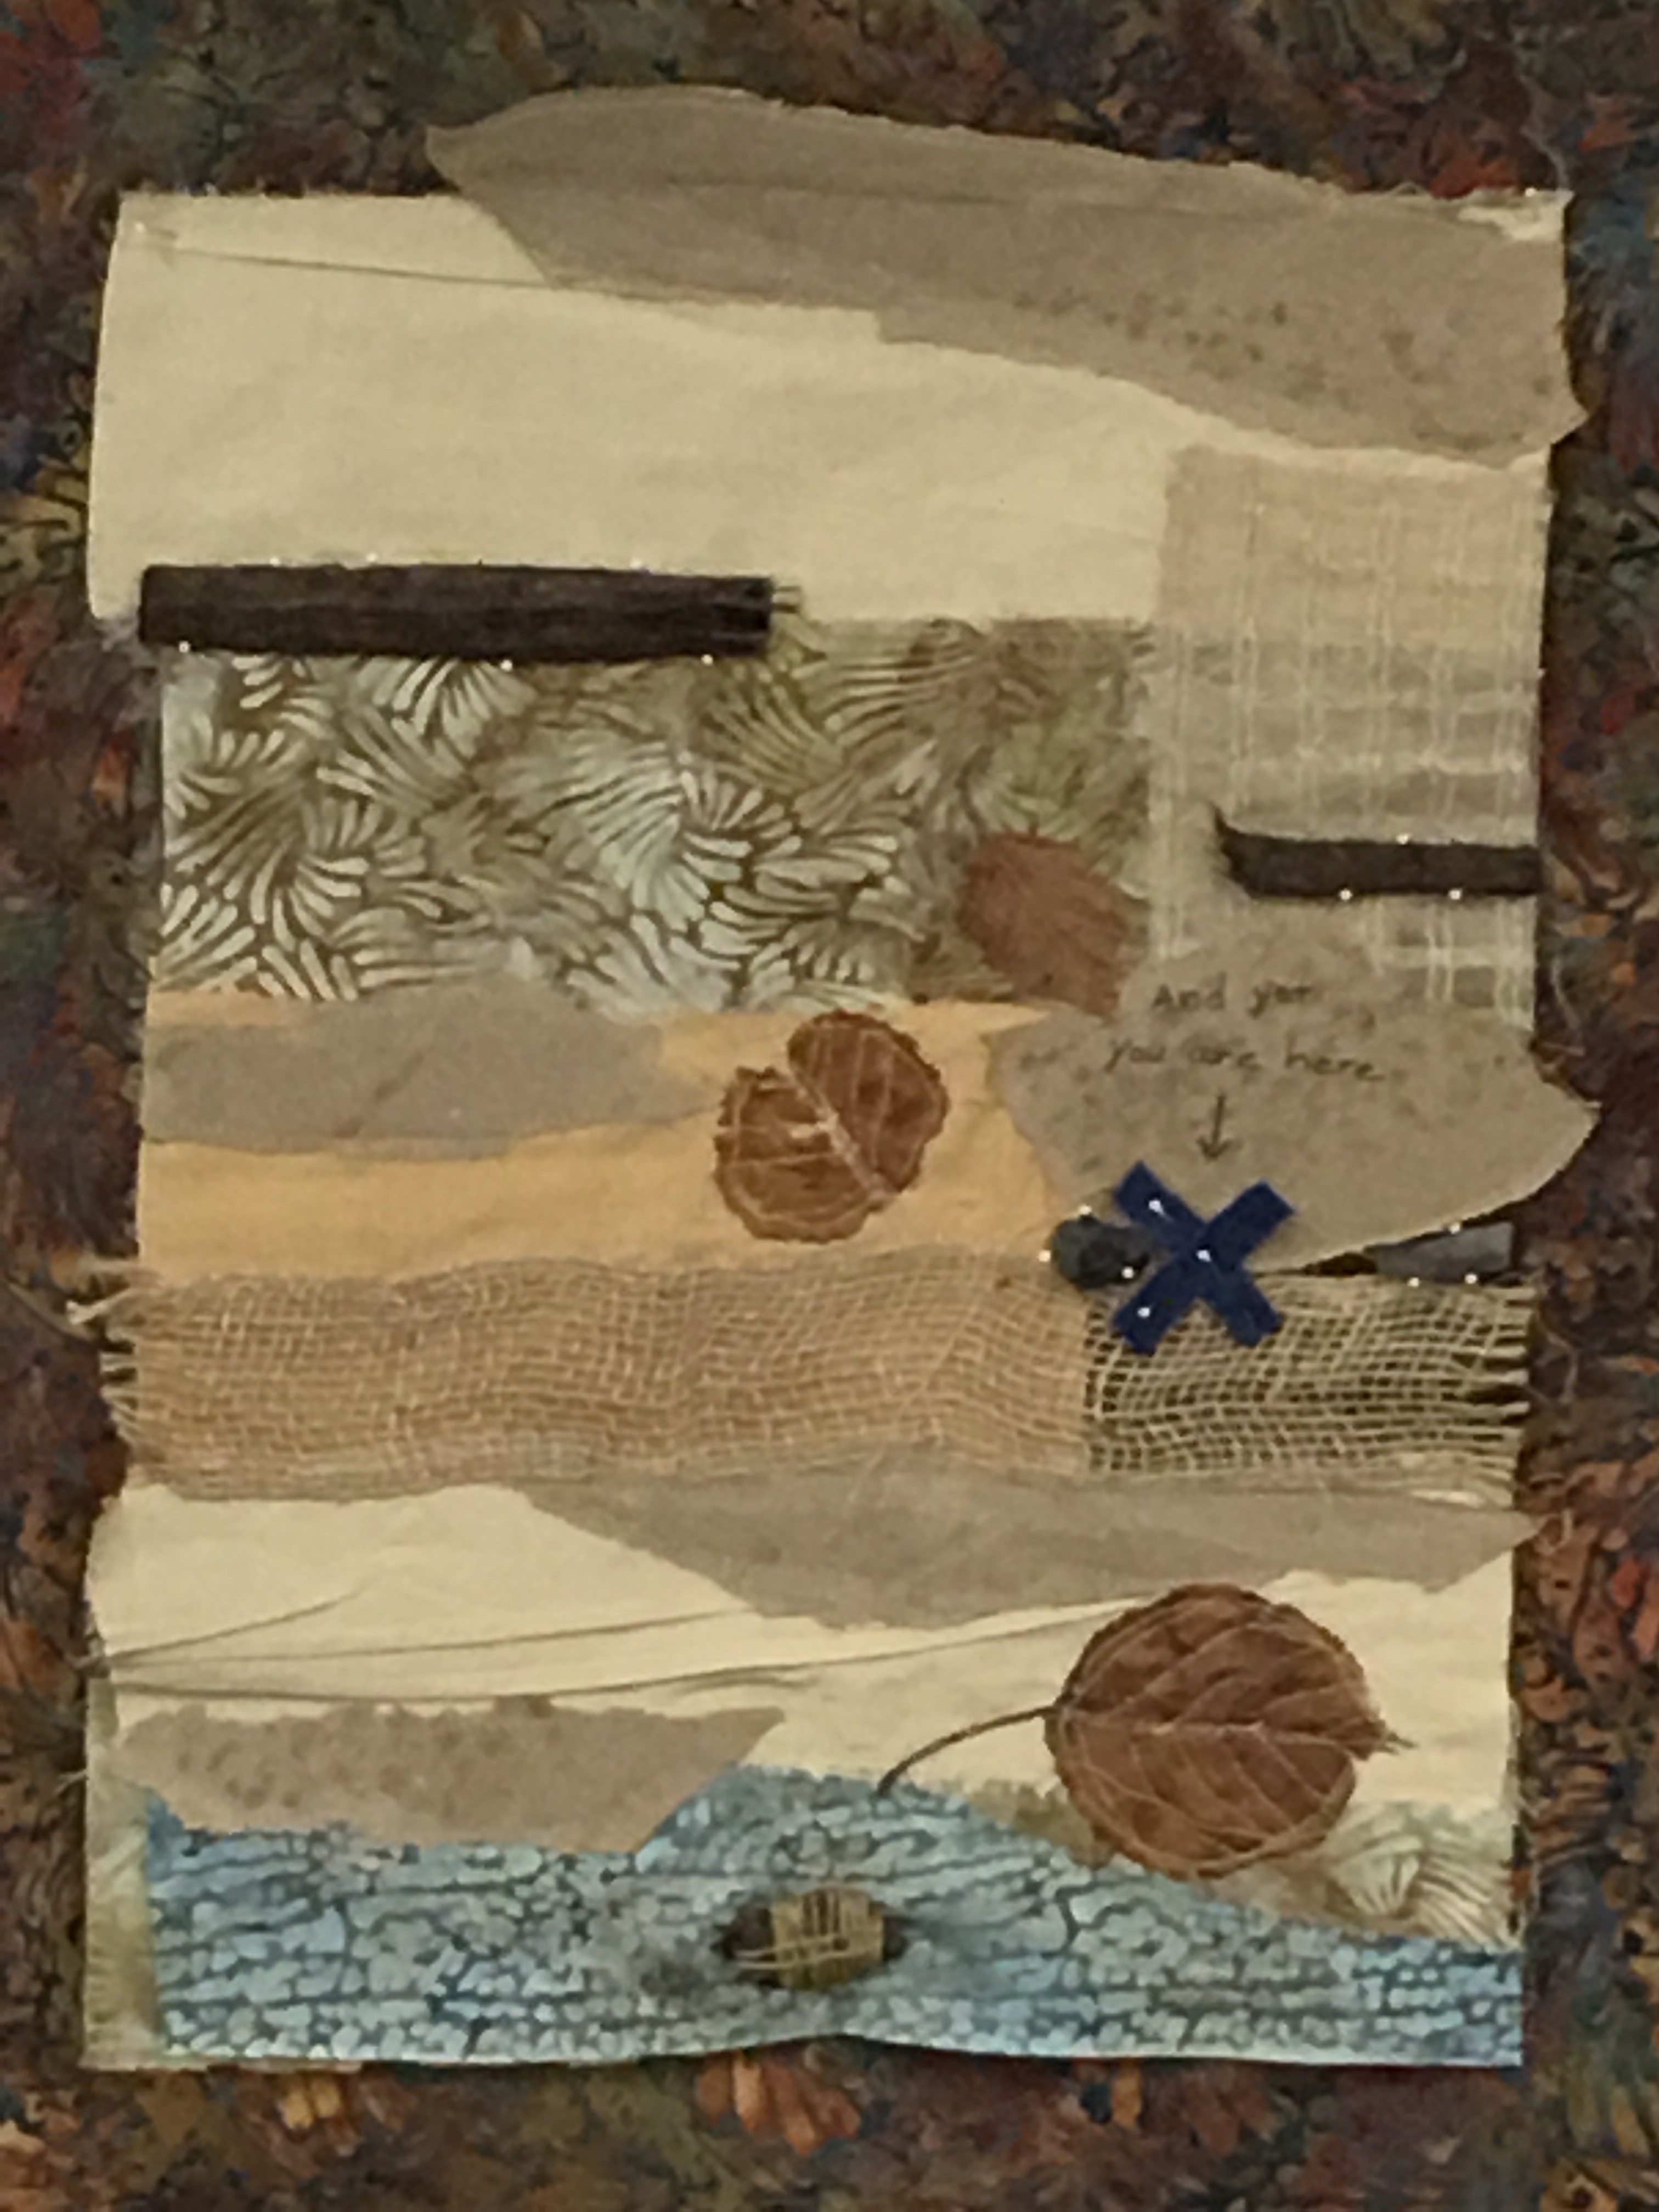
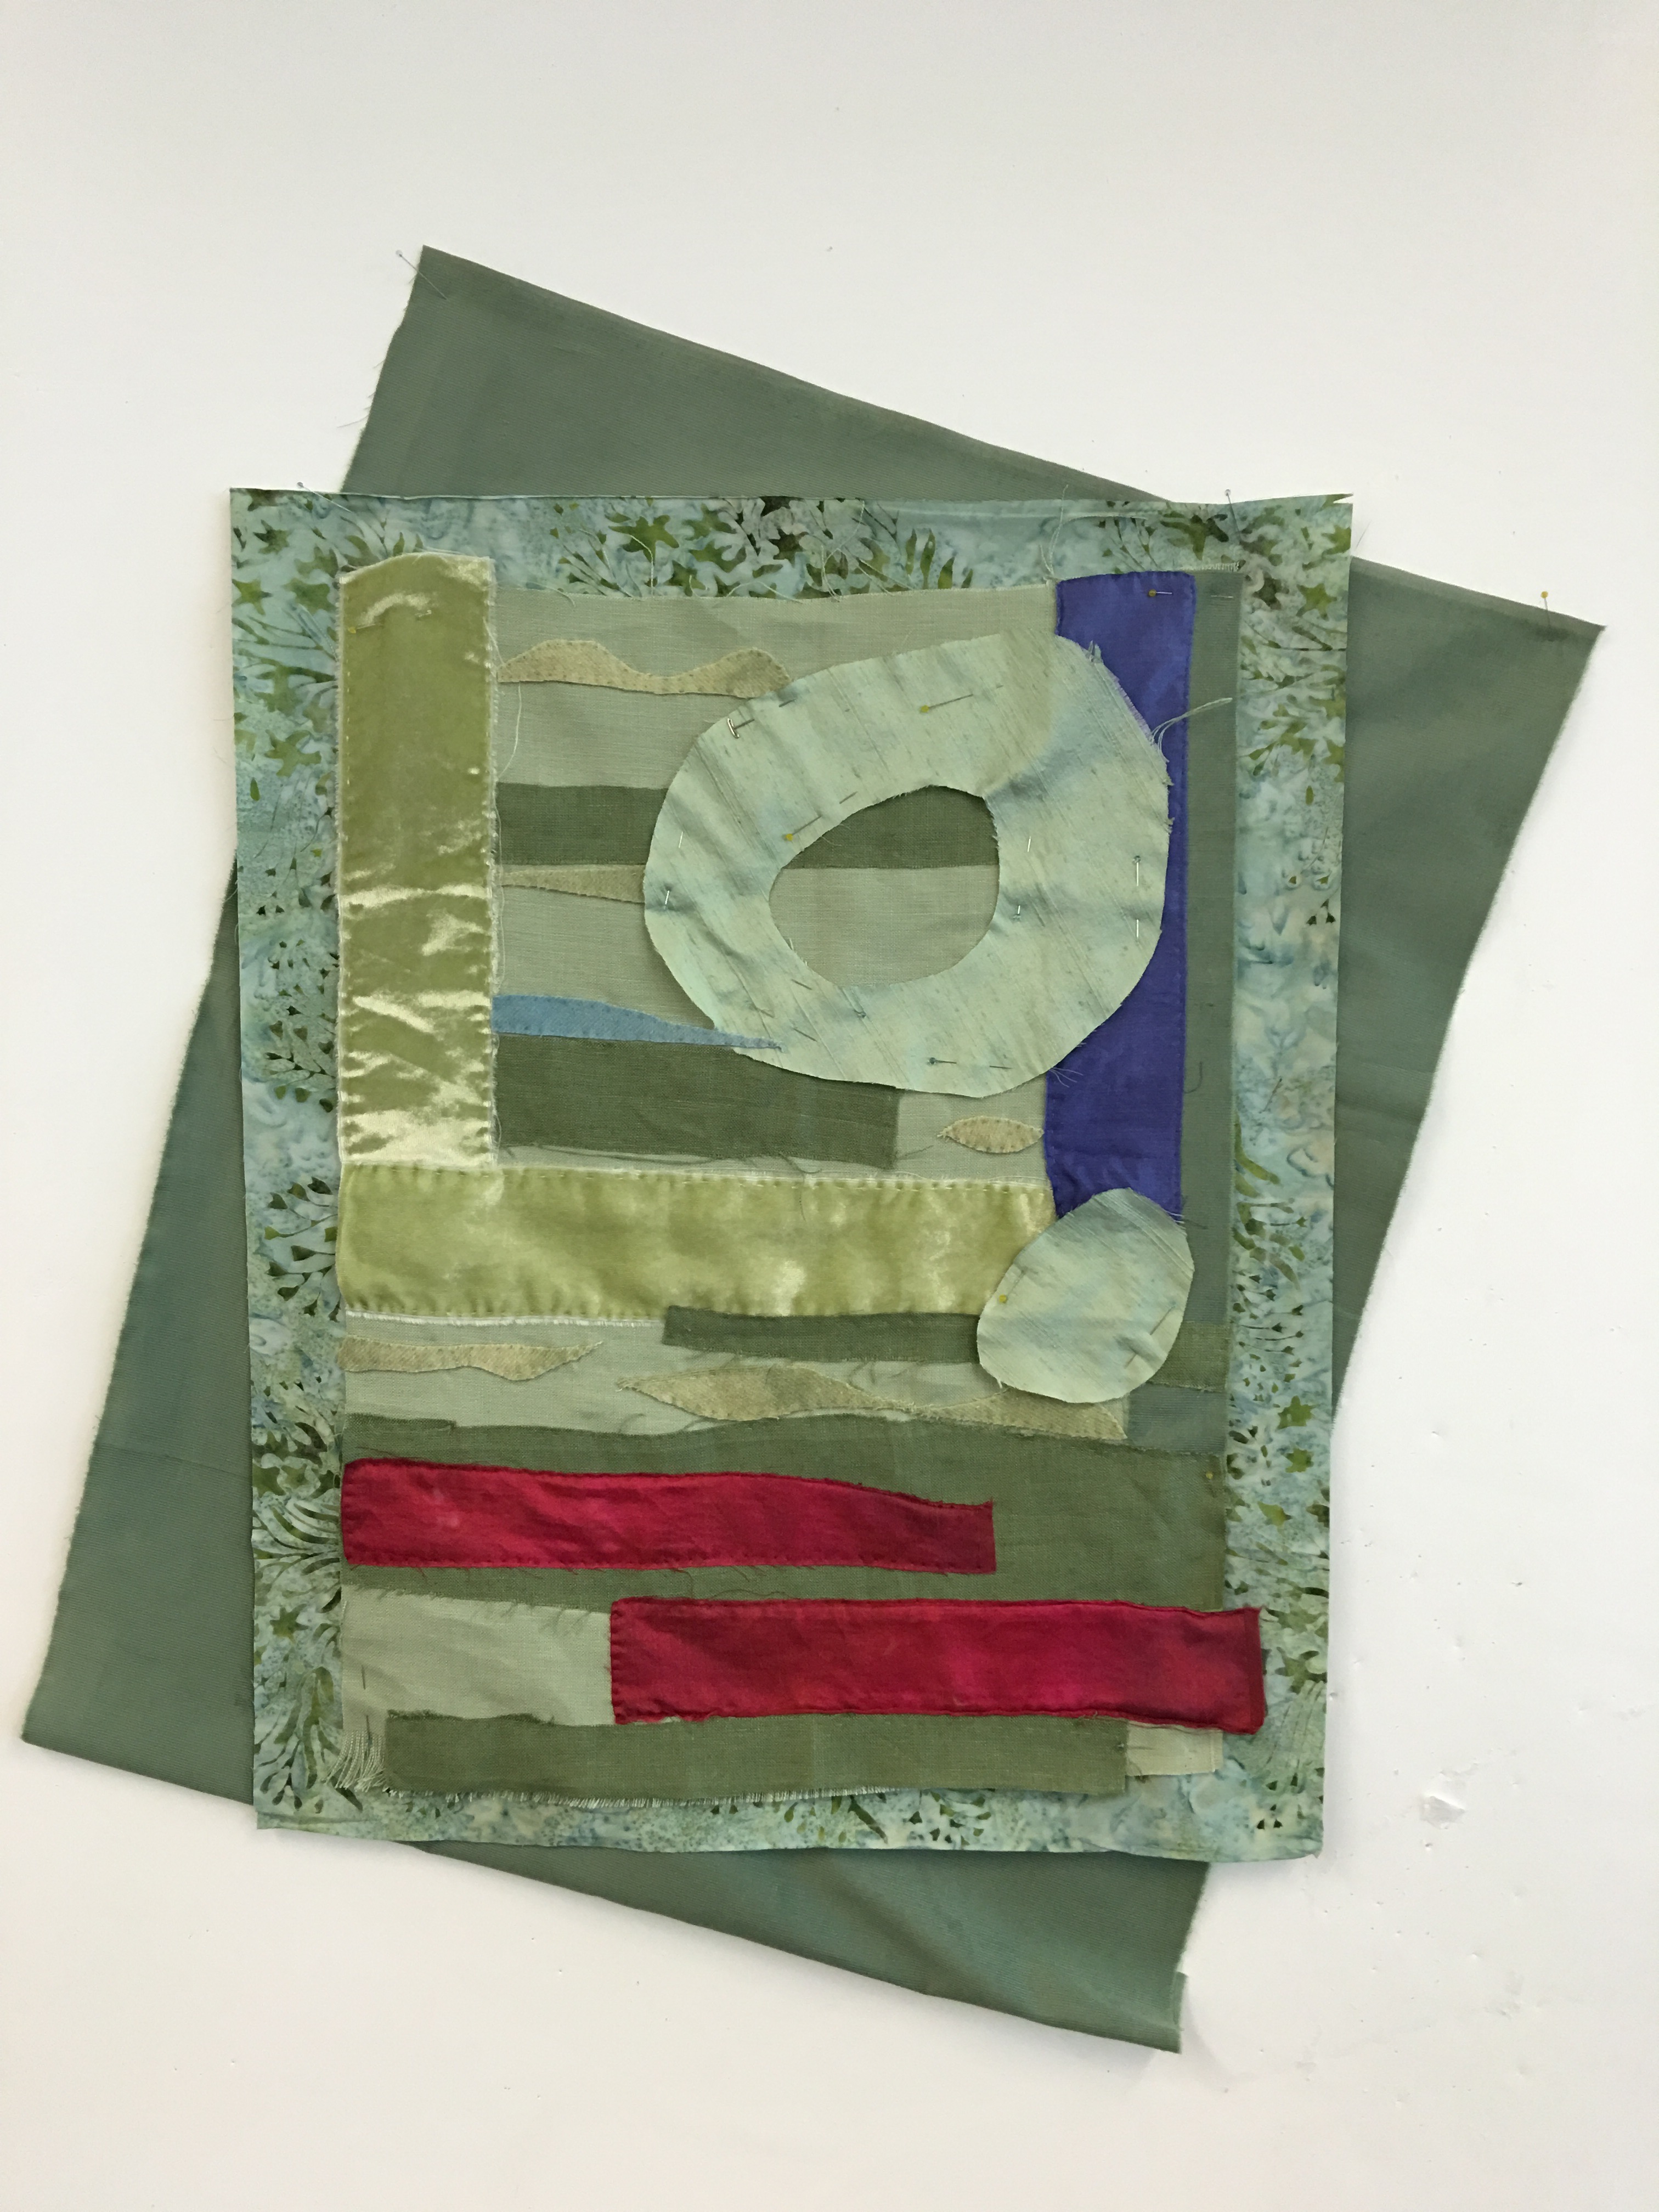
While working on the “It’s Deeper than You Think” piece I begin playing with the other study, which began with a cream colored background. I decide I have to lose the brown fabric, it’s a sink hole and is bringing everything down, including me. It morphs into this, with sticks and stones and leaves that I found on my way to class that morning. I entitle it, “And Yet, You Are Here” (I will refrain from explaining the title as I trust all of you to come up with your own interpretations!)
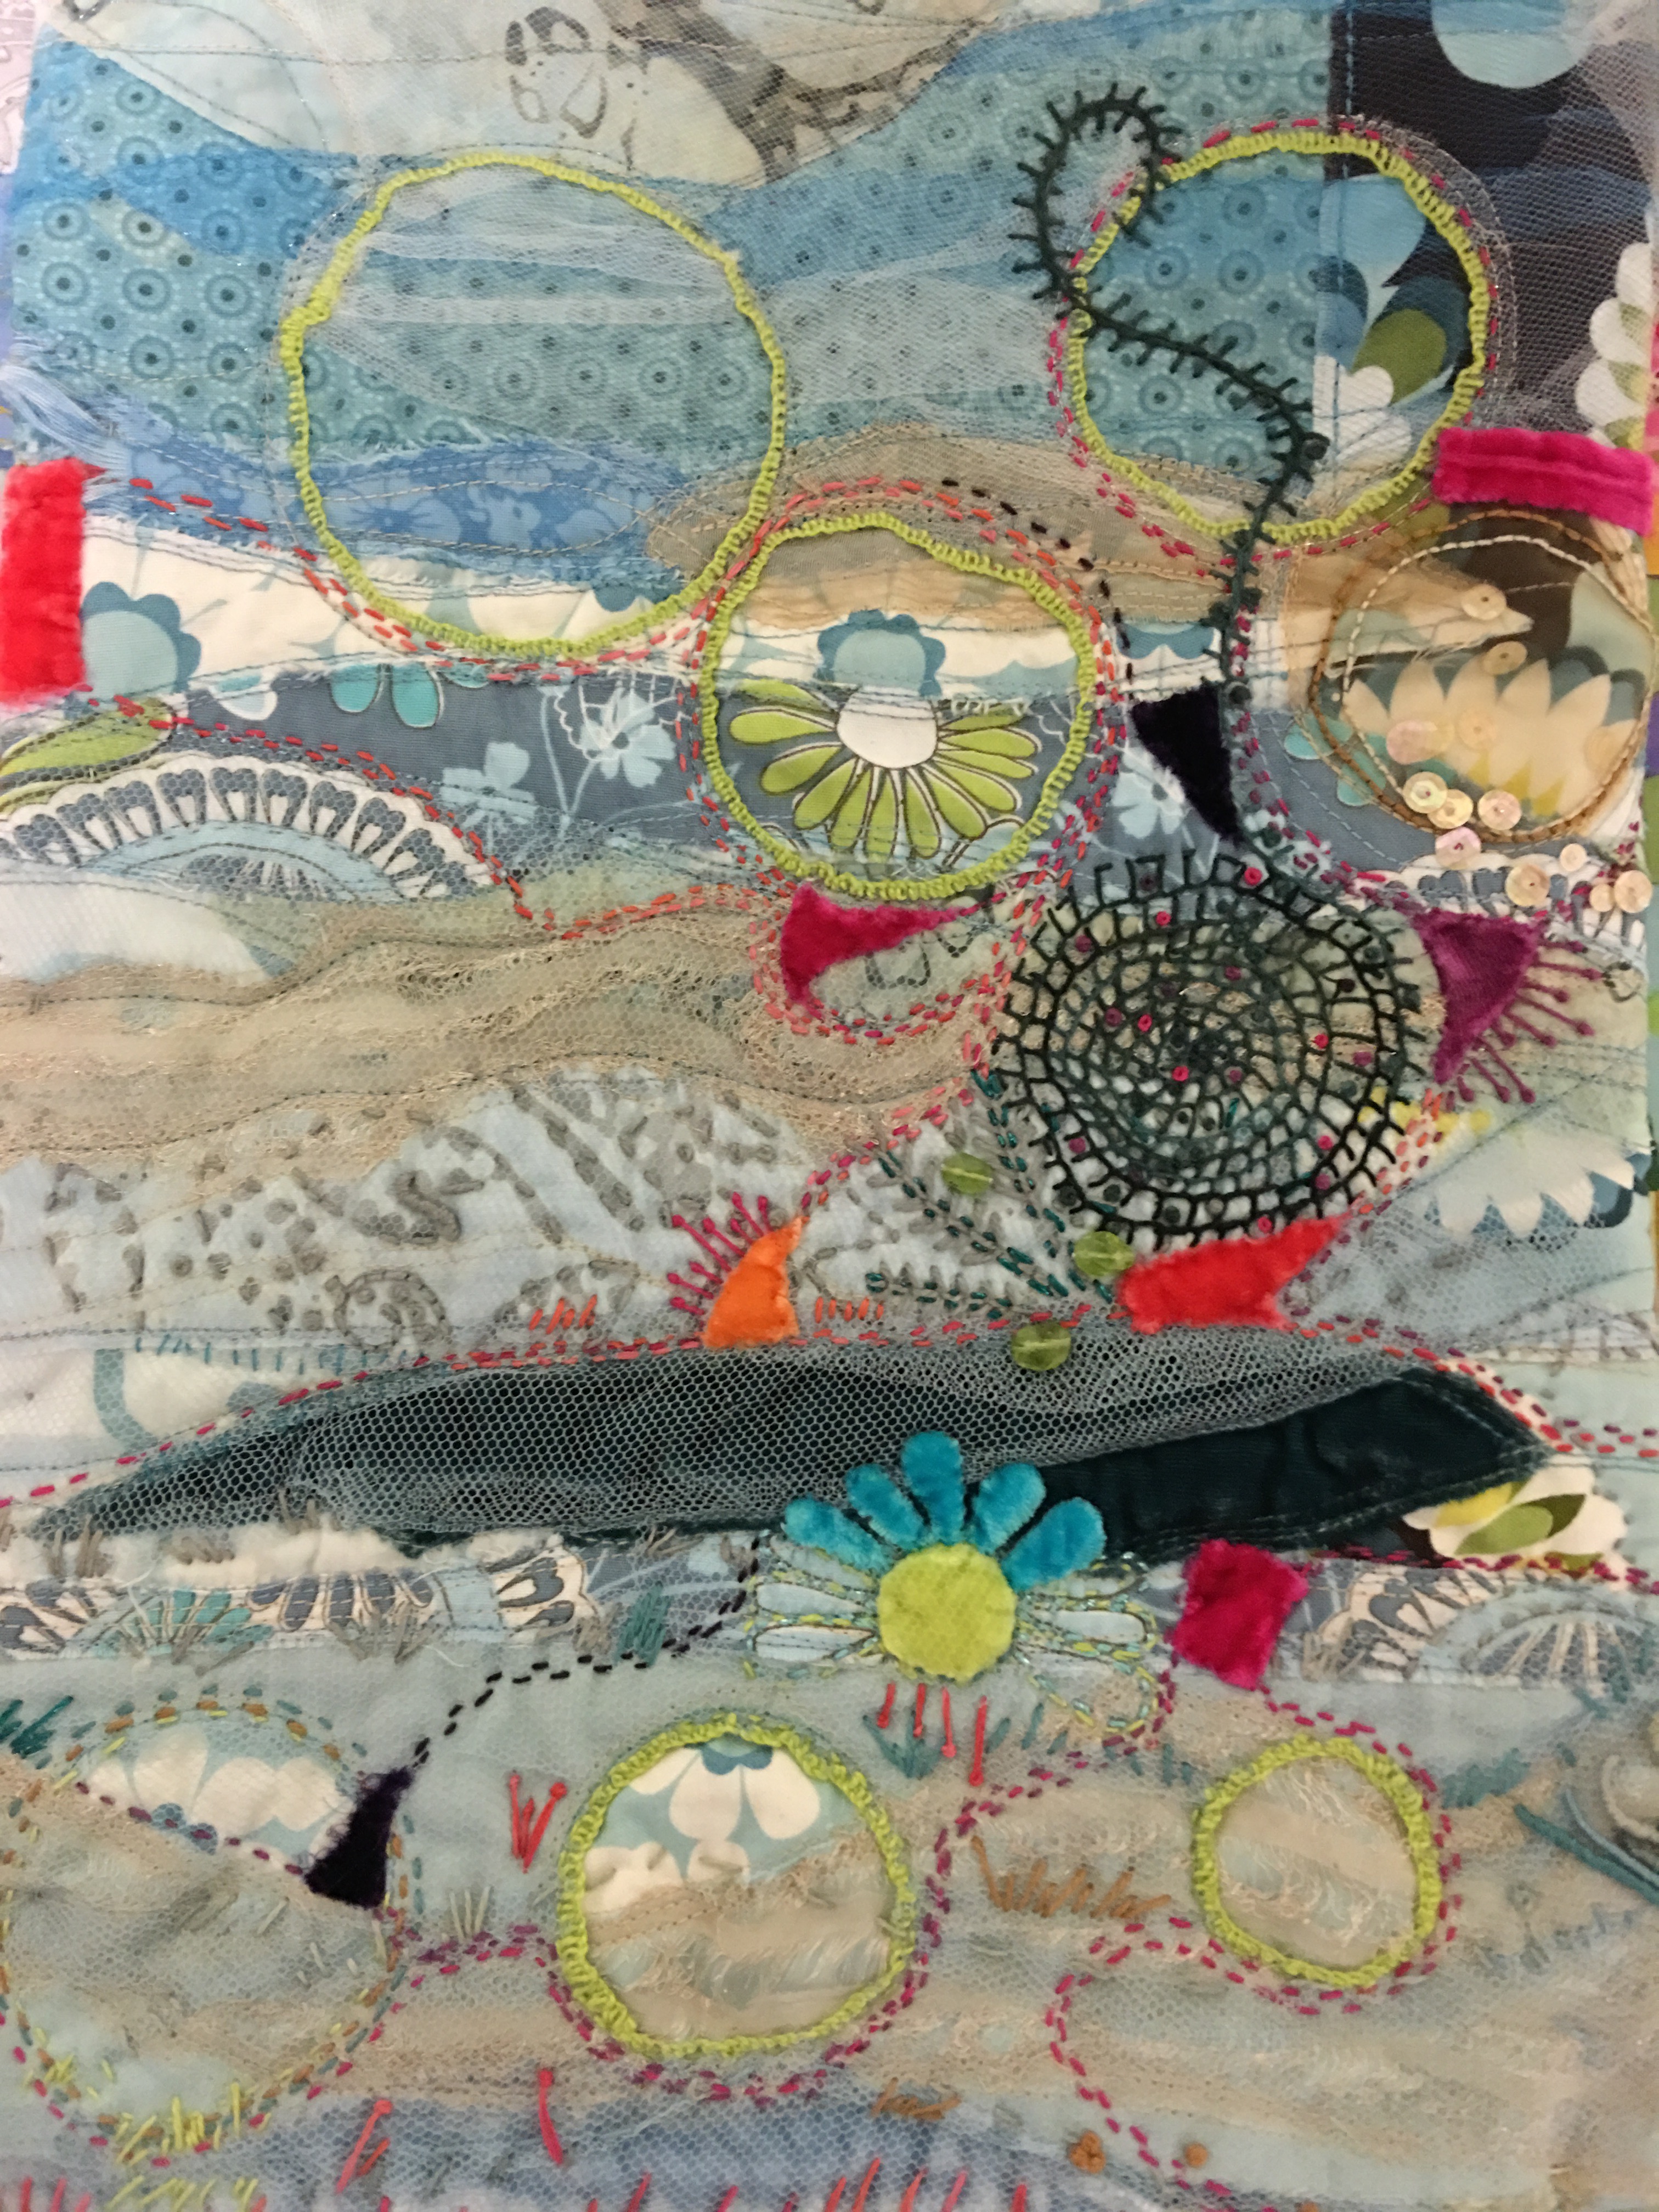
Day 5: I finish the “It’s Deeper Than You Think” piece and reflect on all that I learned, not just technique, but about art and the making of it, and was reminded of the often painful process and cycle of creating. Whatever genius idea I have, usually showing up in my mind at some absurd hour in the middle of the night, loses it’s luster by daylight. By afternoon I’ve decided it’s the worst idea I ever had and by evening I’m questioning the meaning of everything. Needless to say this usually spirals down into a kind of personal horror, like a set list with all the songs you’ve ever hated that randomly play loudly on a loop. Relief comes in the middle of the night with yet another stroke of genius and the cycle begins again. But, as Rosalie reminded me more than once, “It’s okay. Don’t panic.” And with that mantra in mind, I can sit with the discomfort and “keep swimming.”
It’s Deeper Than You Think
Rosalie is a force, brilliant, funny, kind, welcoming, encouraging and oh so very talented. It was an honor to be in her class.
I had the weekend to play before I began Lorie McCown’s class called “Connections.”
A brief summary of Lorie’s fantastic 5-day workshop.
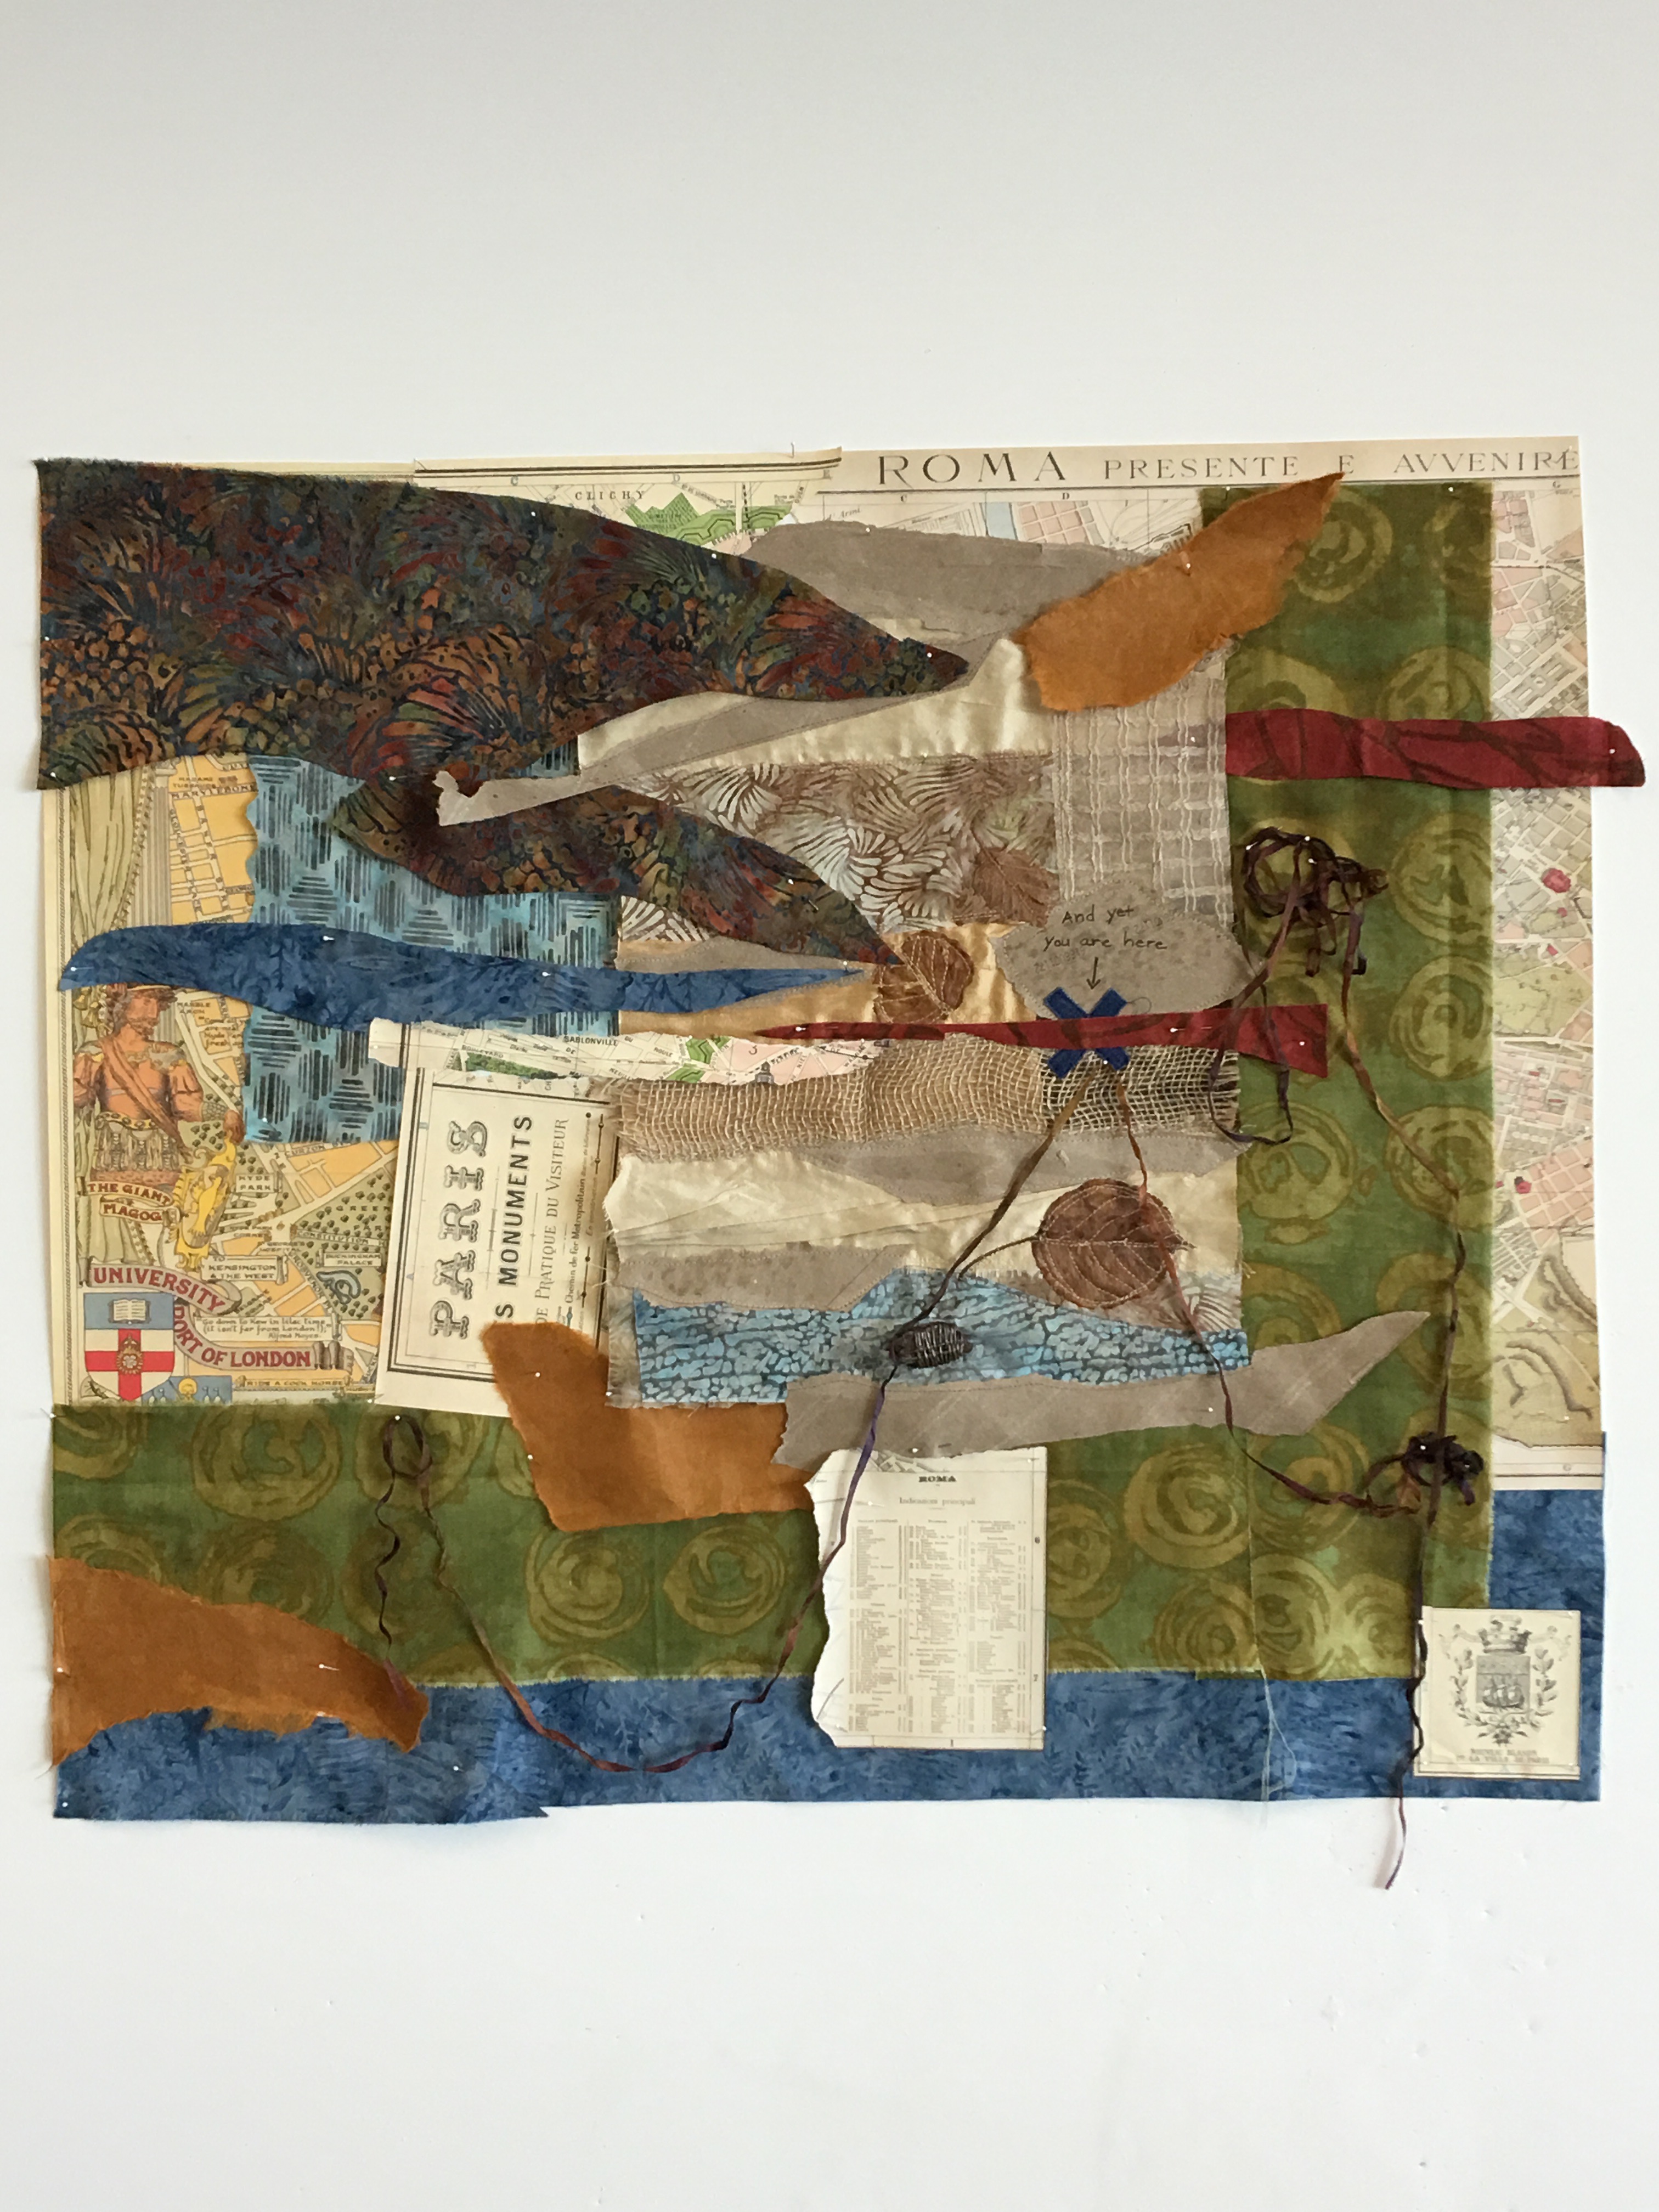
Day 1: I got this. I’m an old pro at this point and nothing is going to phase me. Lorie mentions that machines are optional and encourages us to use hand stitching (I promptly ignore her), immediately decide I’m going to resurrect (with Lorie’s okay) the other piece I started in Rosalie’s class, “And Yet, You are Here” and machine stitch the whole thing. Lorie encourages us to think out of the box, explore materials we otherwise might not have thought of. I’m open to this idea, particularly as I’ve already given my inner rebel some freedom. She shows us examples of her work that are powerful, emotionally laden and visually compelling. I decide I’m going to use paper and maps and whatever else I can get my hands on that evoke the title – “And yet, you are here.” Remember I am now one with my Bernina. All is well.
Day 2: I’m not going through the angst I experienced the week before, so things are coming along nicely. Lorie is terrific, gives lots of encouragement and suggestions and wonders aloud whether I might “go bigger” and then asks, “What do you think?” I’m totally on to her, but do “go bigger,” because, well, why NOT go bigger? and anyway I’ve already demonstrated my anarchistic streak by ignoring her whole hand stitching thing.
Day 3: I announce that I’m thinking of using silk ribbon and Lorie suggests I use it as a way to tie in the idea of “And yet, you are here” by tacking it down in various places and then bringing all the various ribbons to the “X” so they converge. I love this idea and dive into my silk ribbon stash.
Lorie discusses various backing options. I decide, since I don’t have the canvas I’d prefer, I’ll back my piece in wool, which I have a great deal of. Still very little hand stitching, almost everything is machine stitched because I’m clinging to my whole – I’m a rebel – schtick.
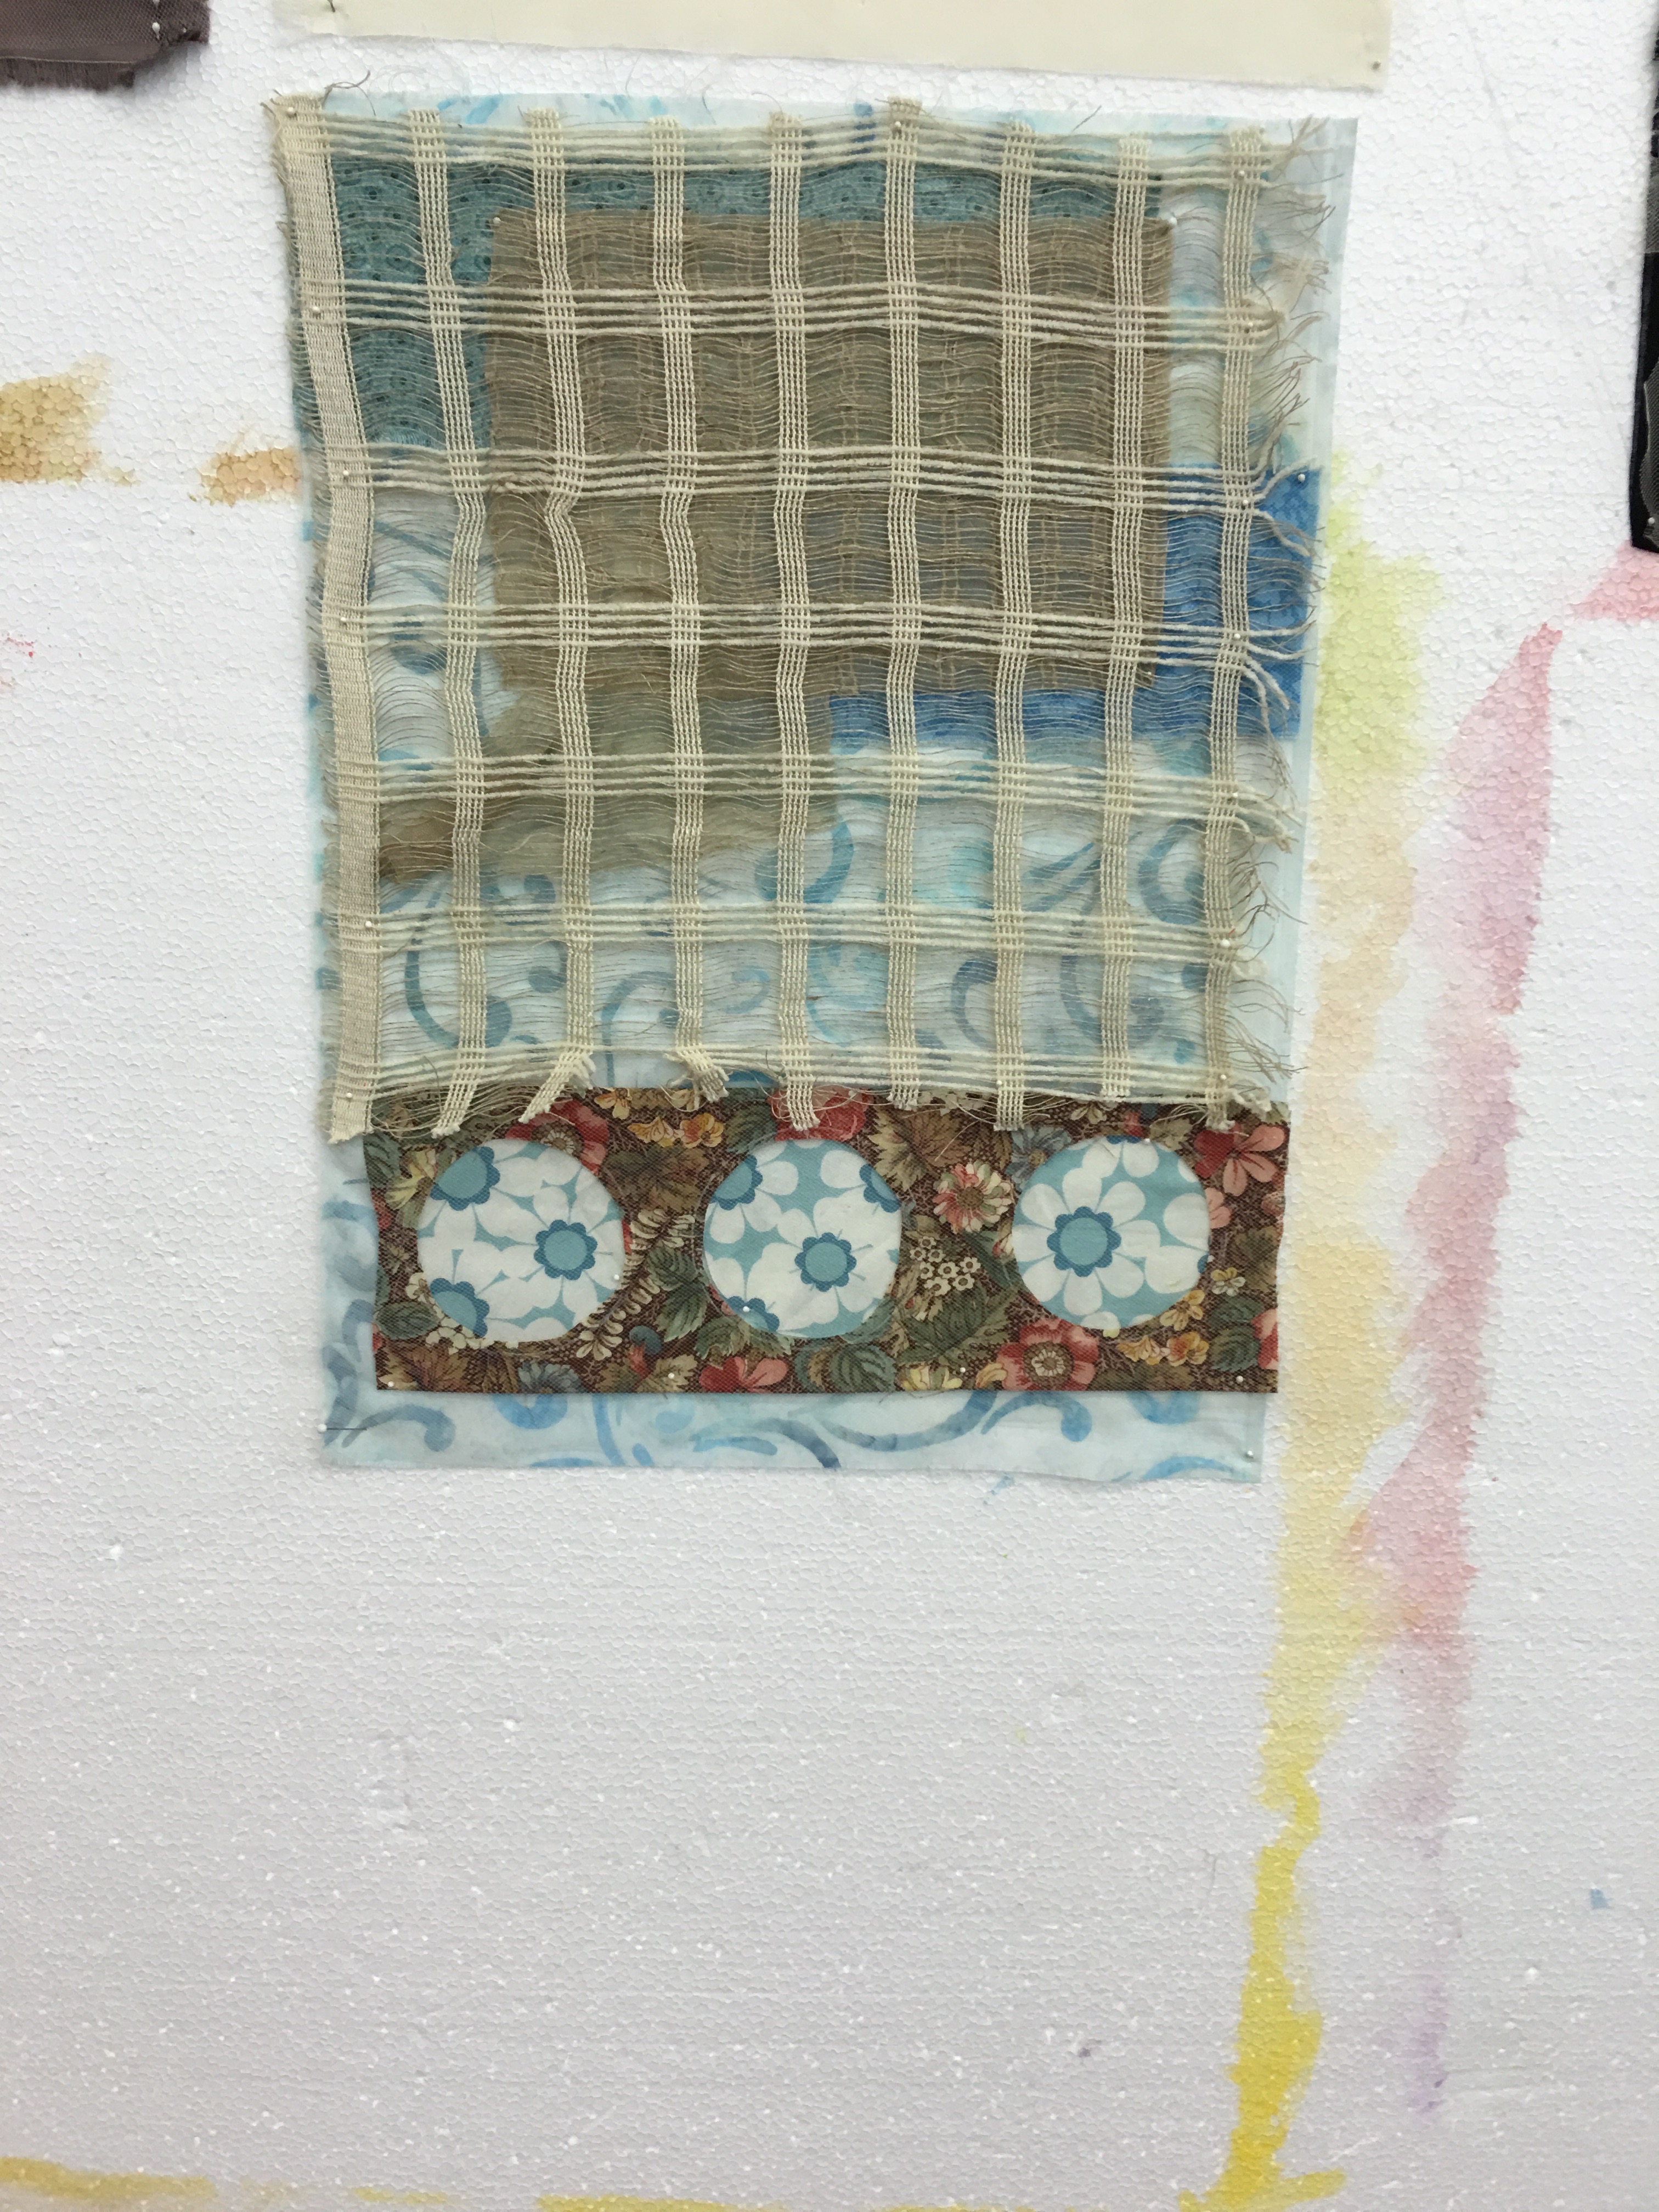
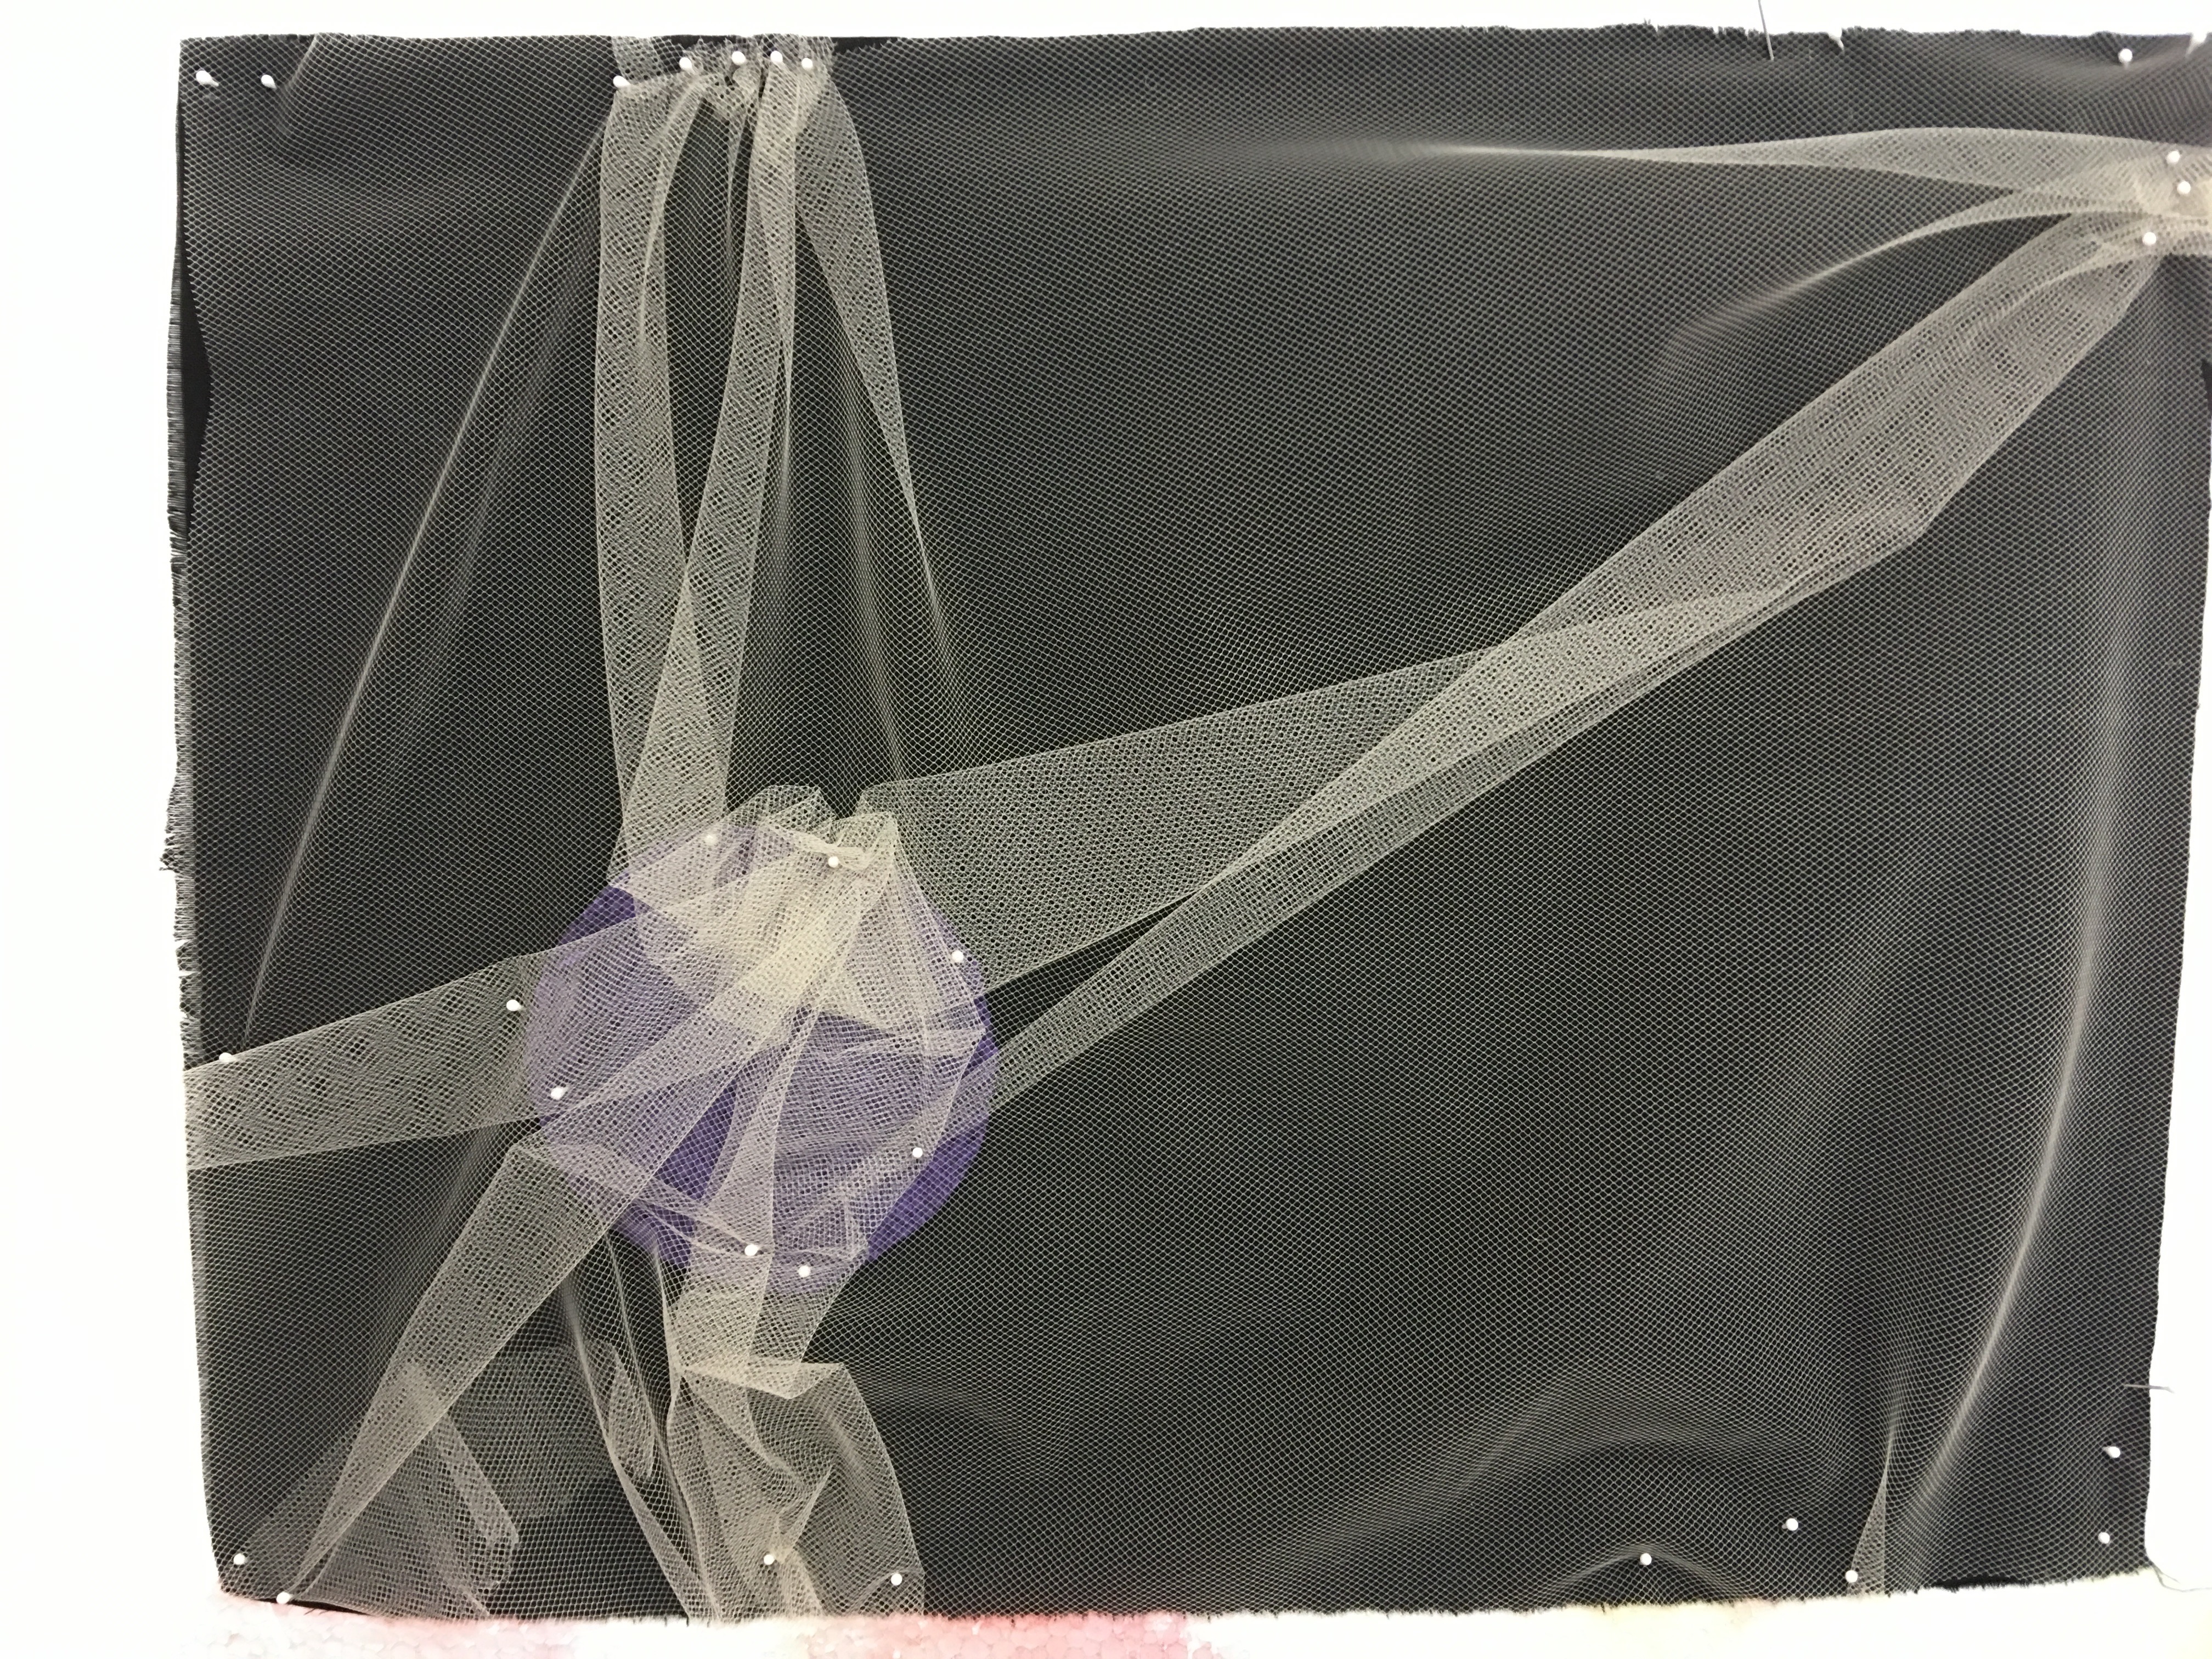
Day 4: I’m letting “And Yet You Are Here” simmer for a few days and decide to begin working on a version of another idea I had in Rosalie’s class.
This is what it looked like in Rosalie’s class.
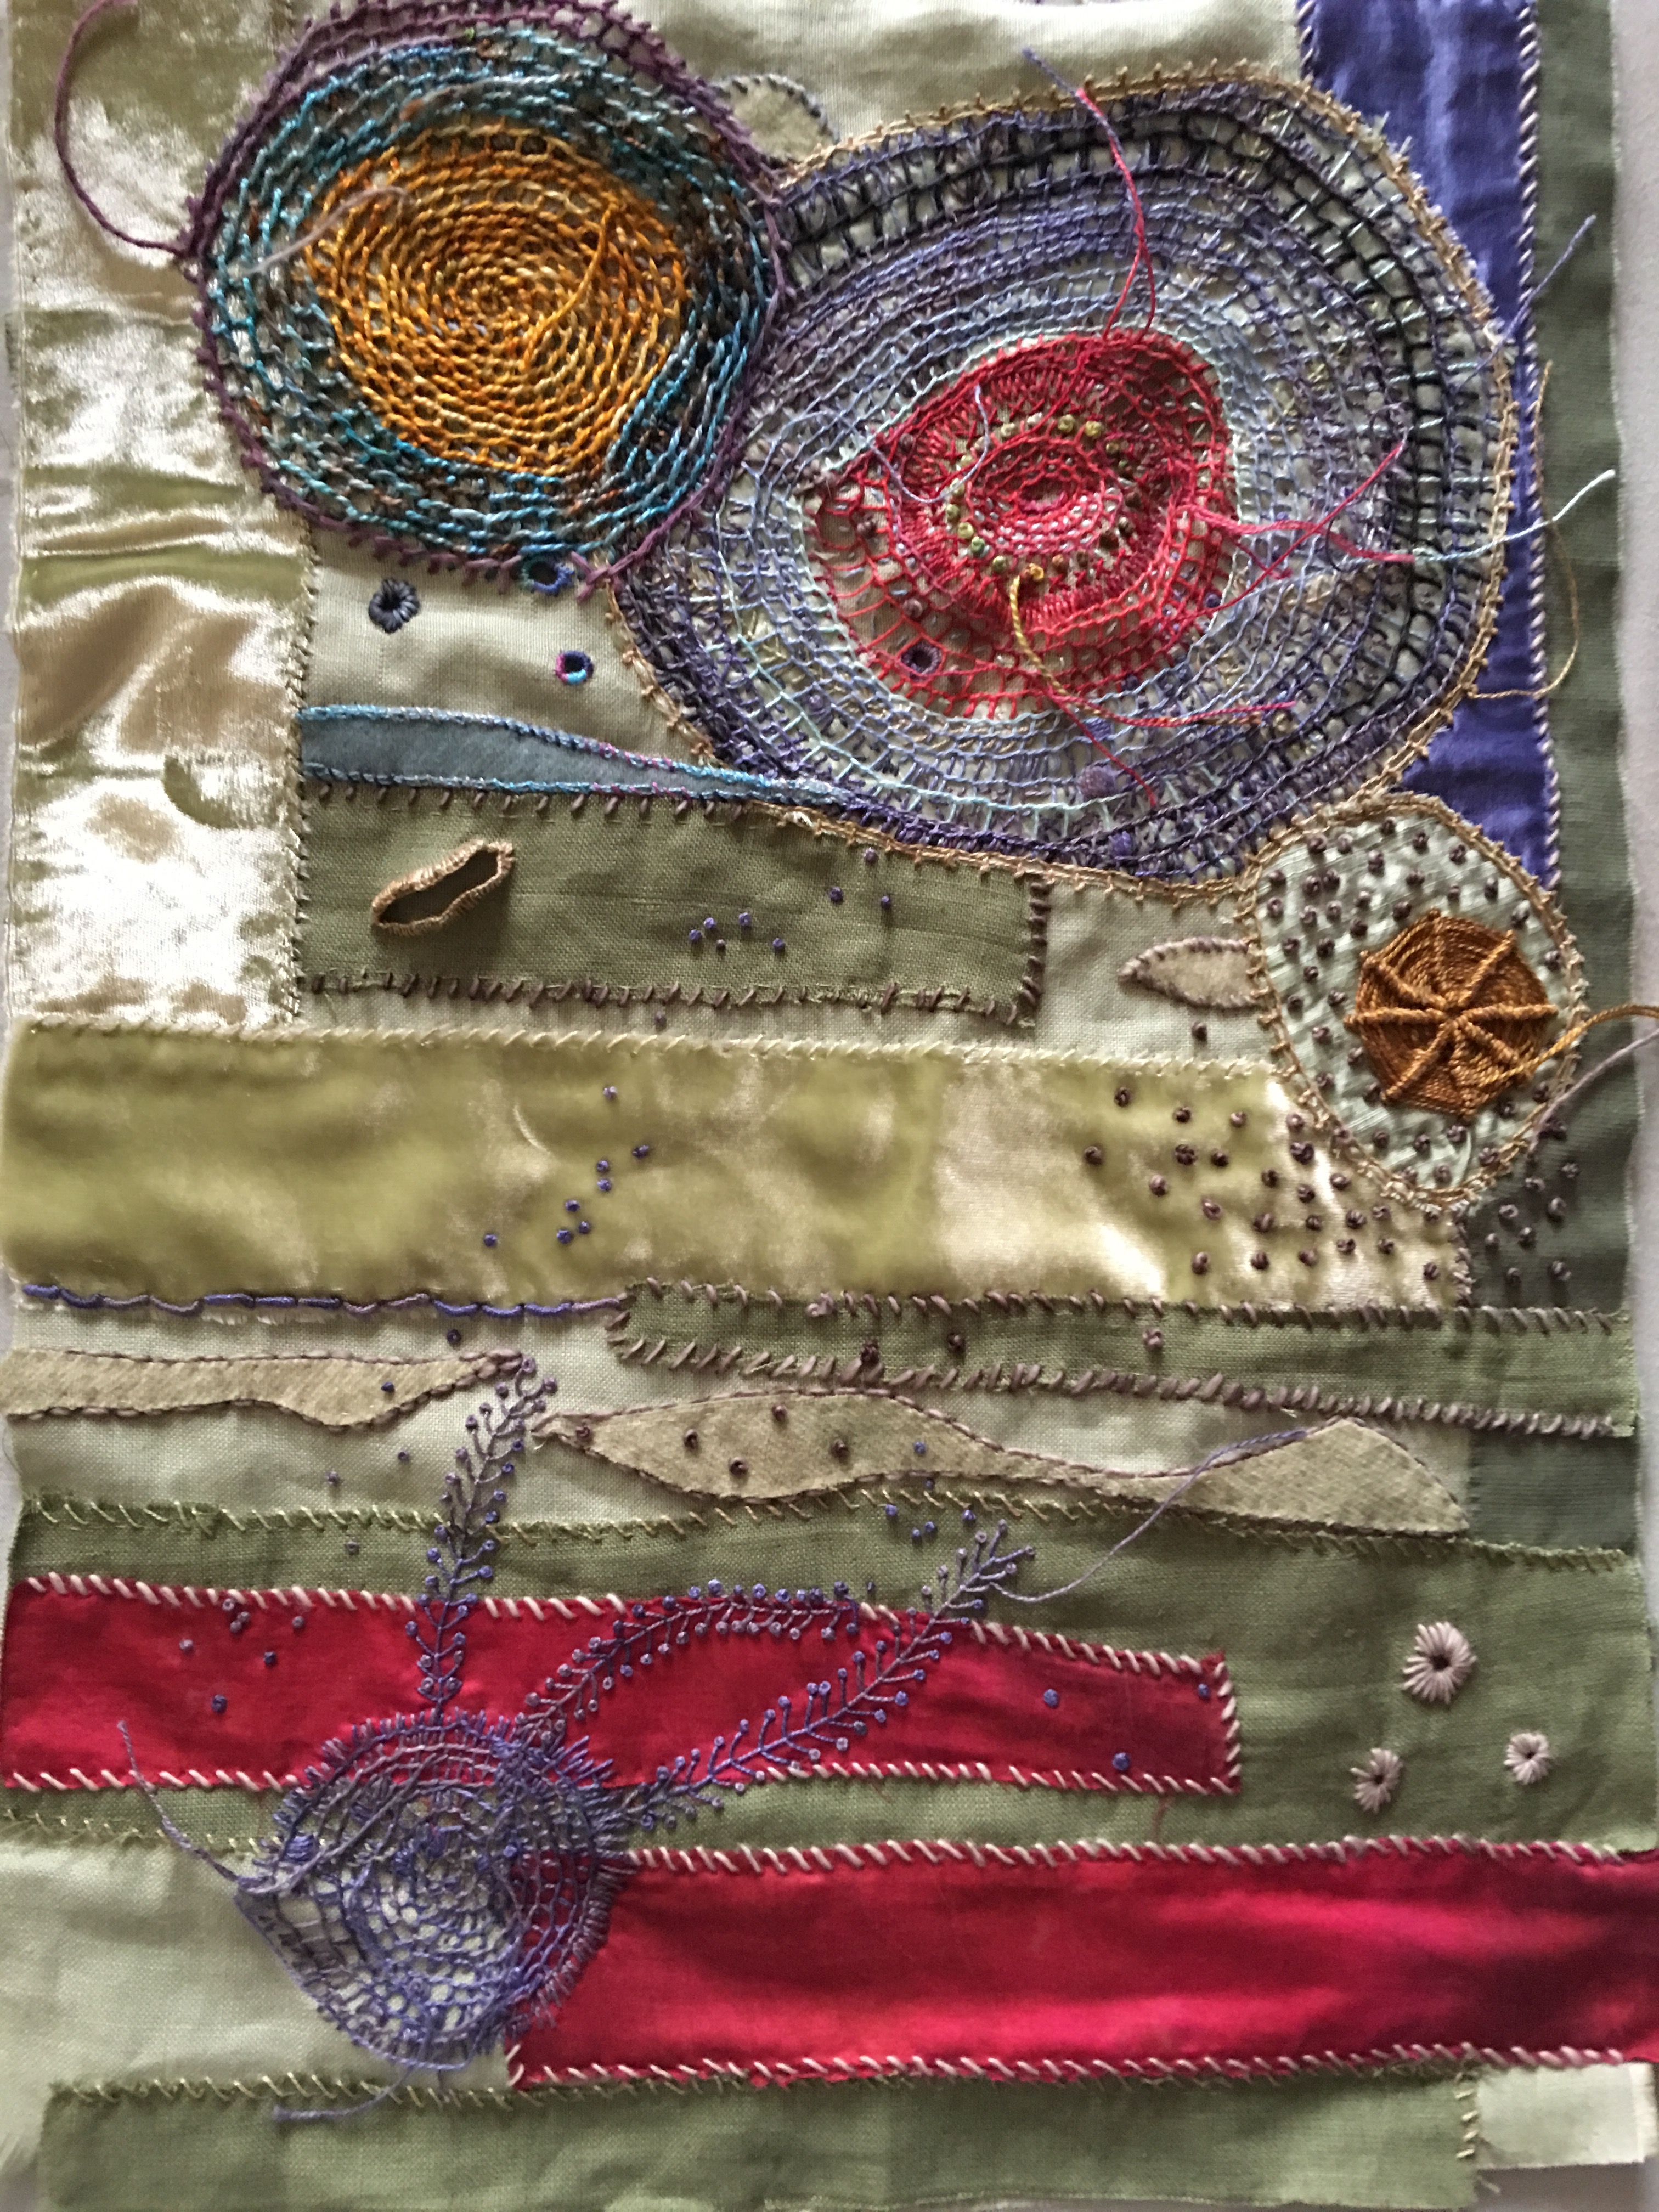
And then I added to it.
In Lorie’s class I took this concept and did this.
Which then became this
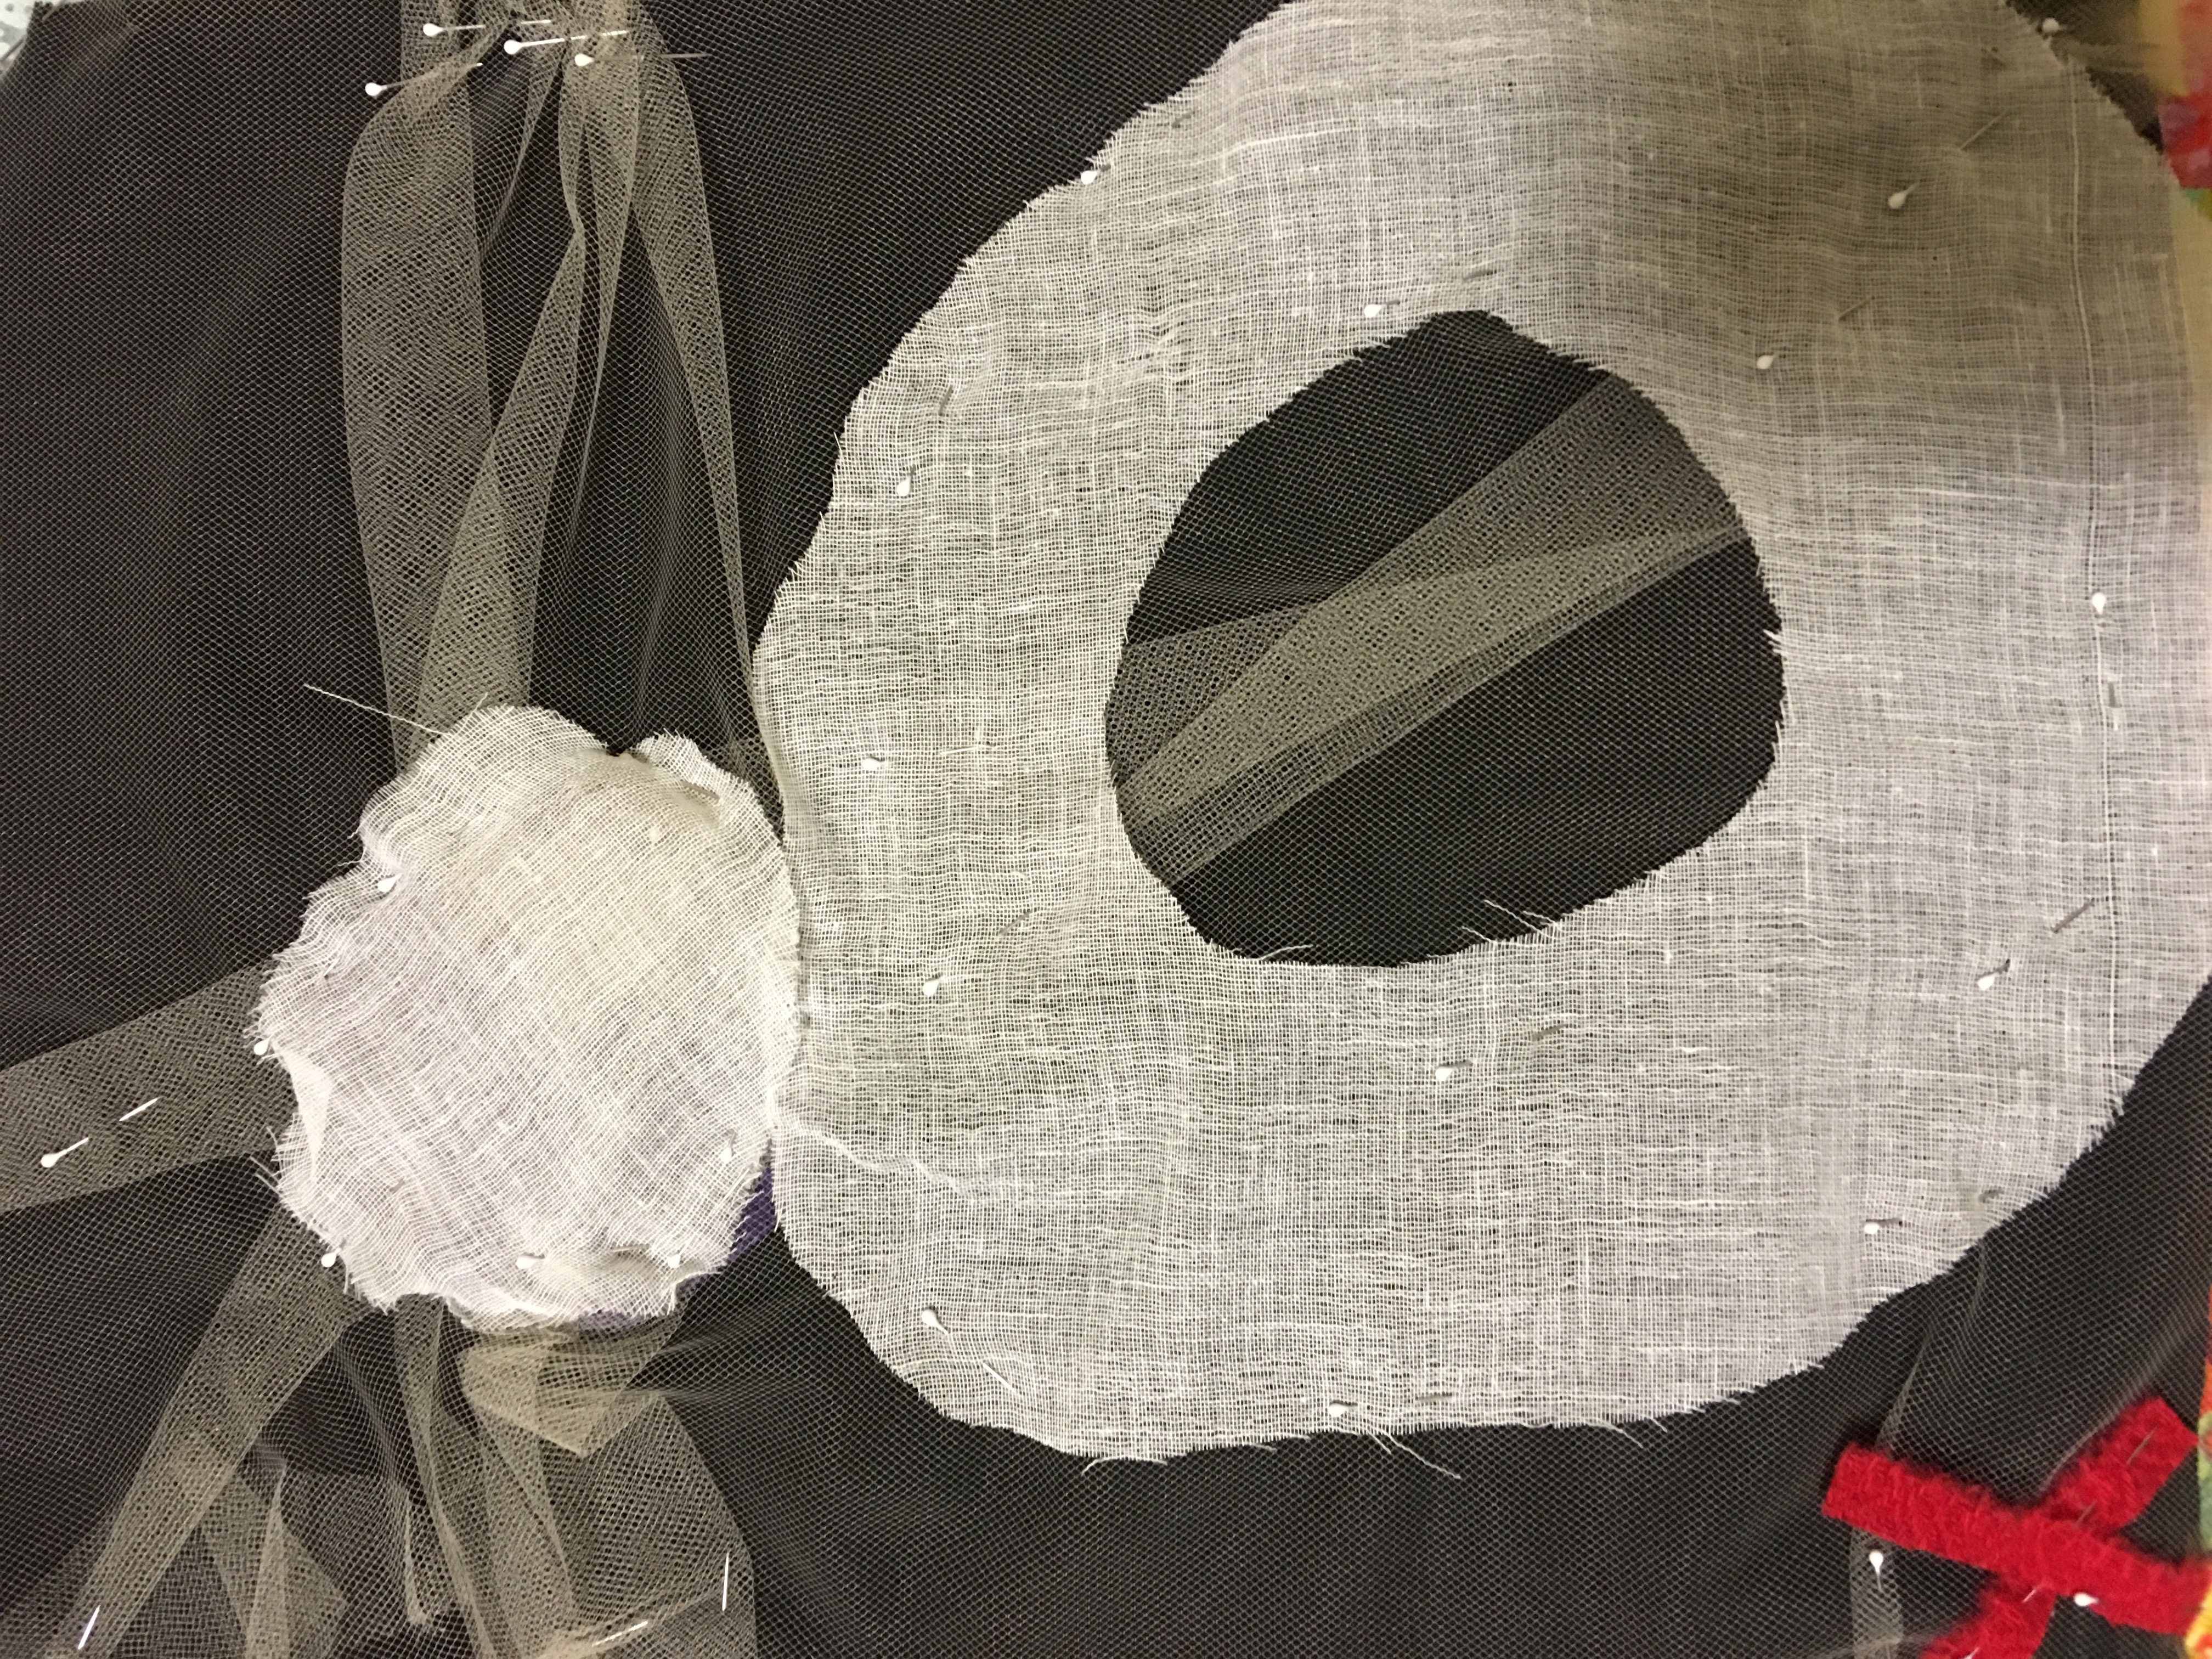
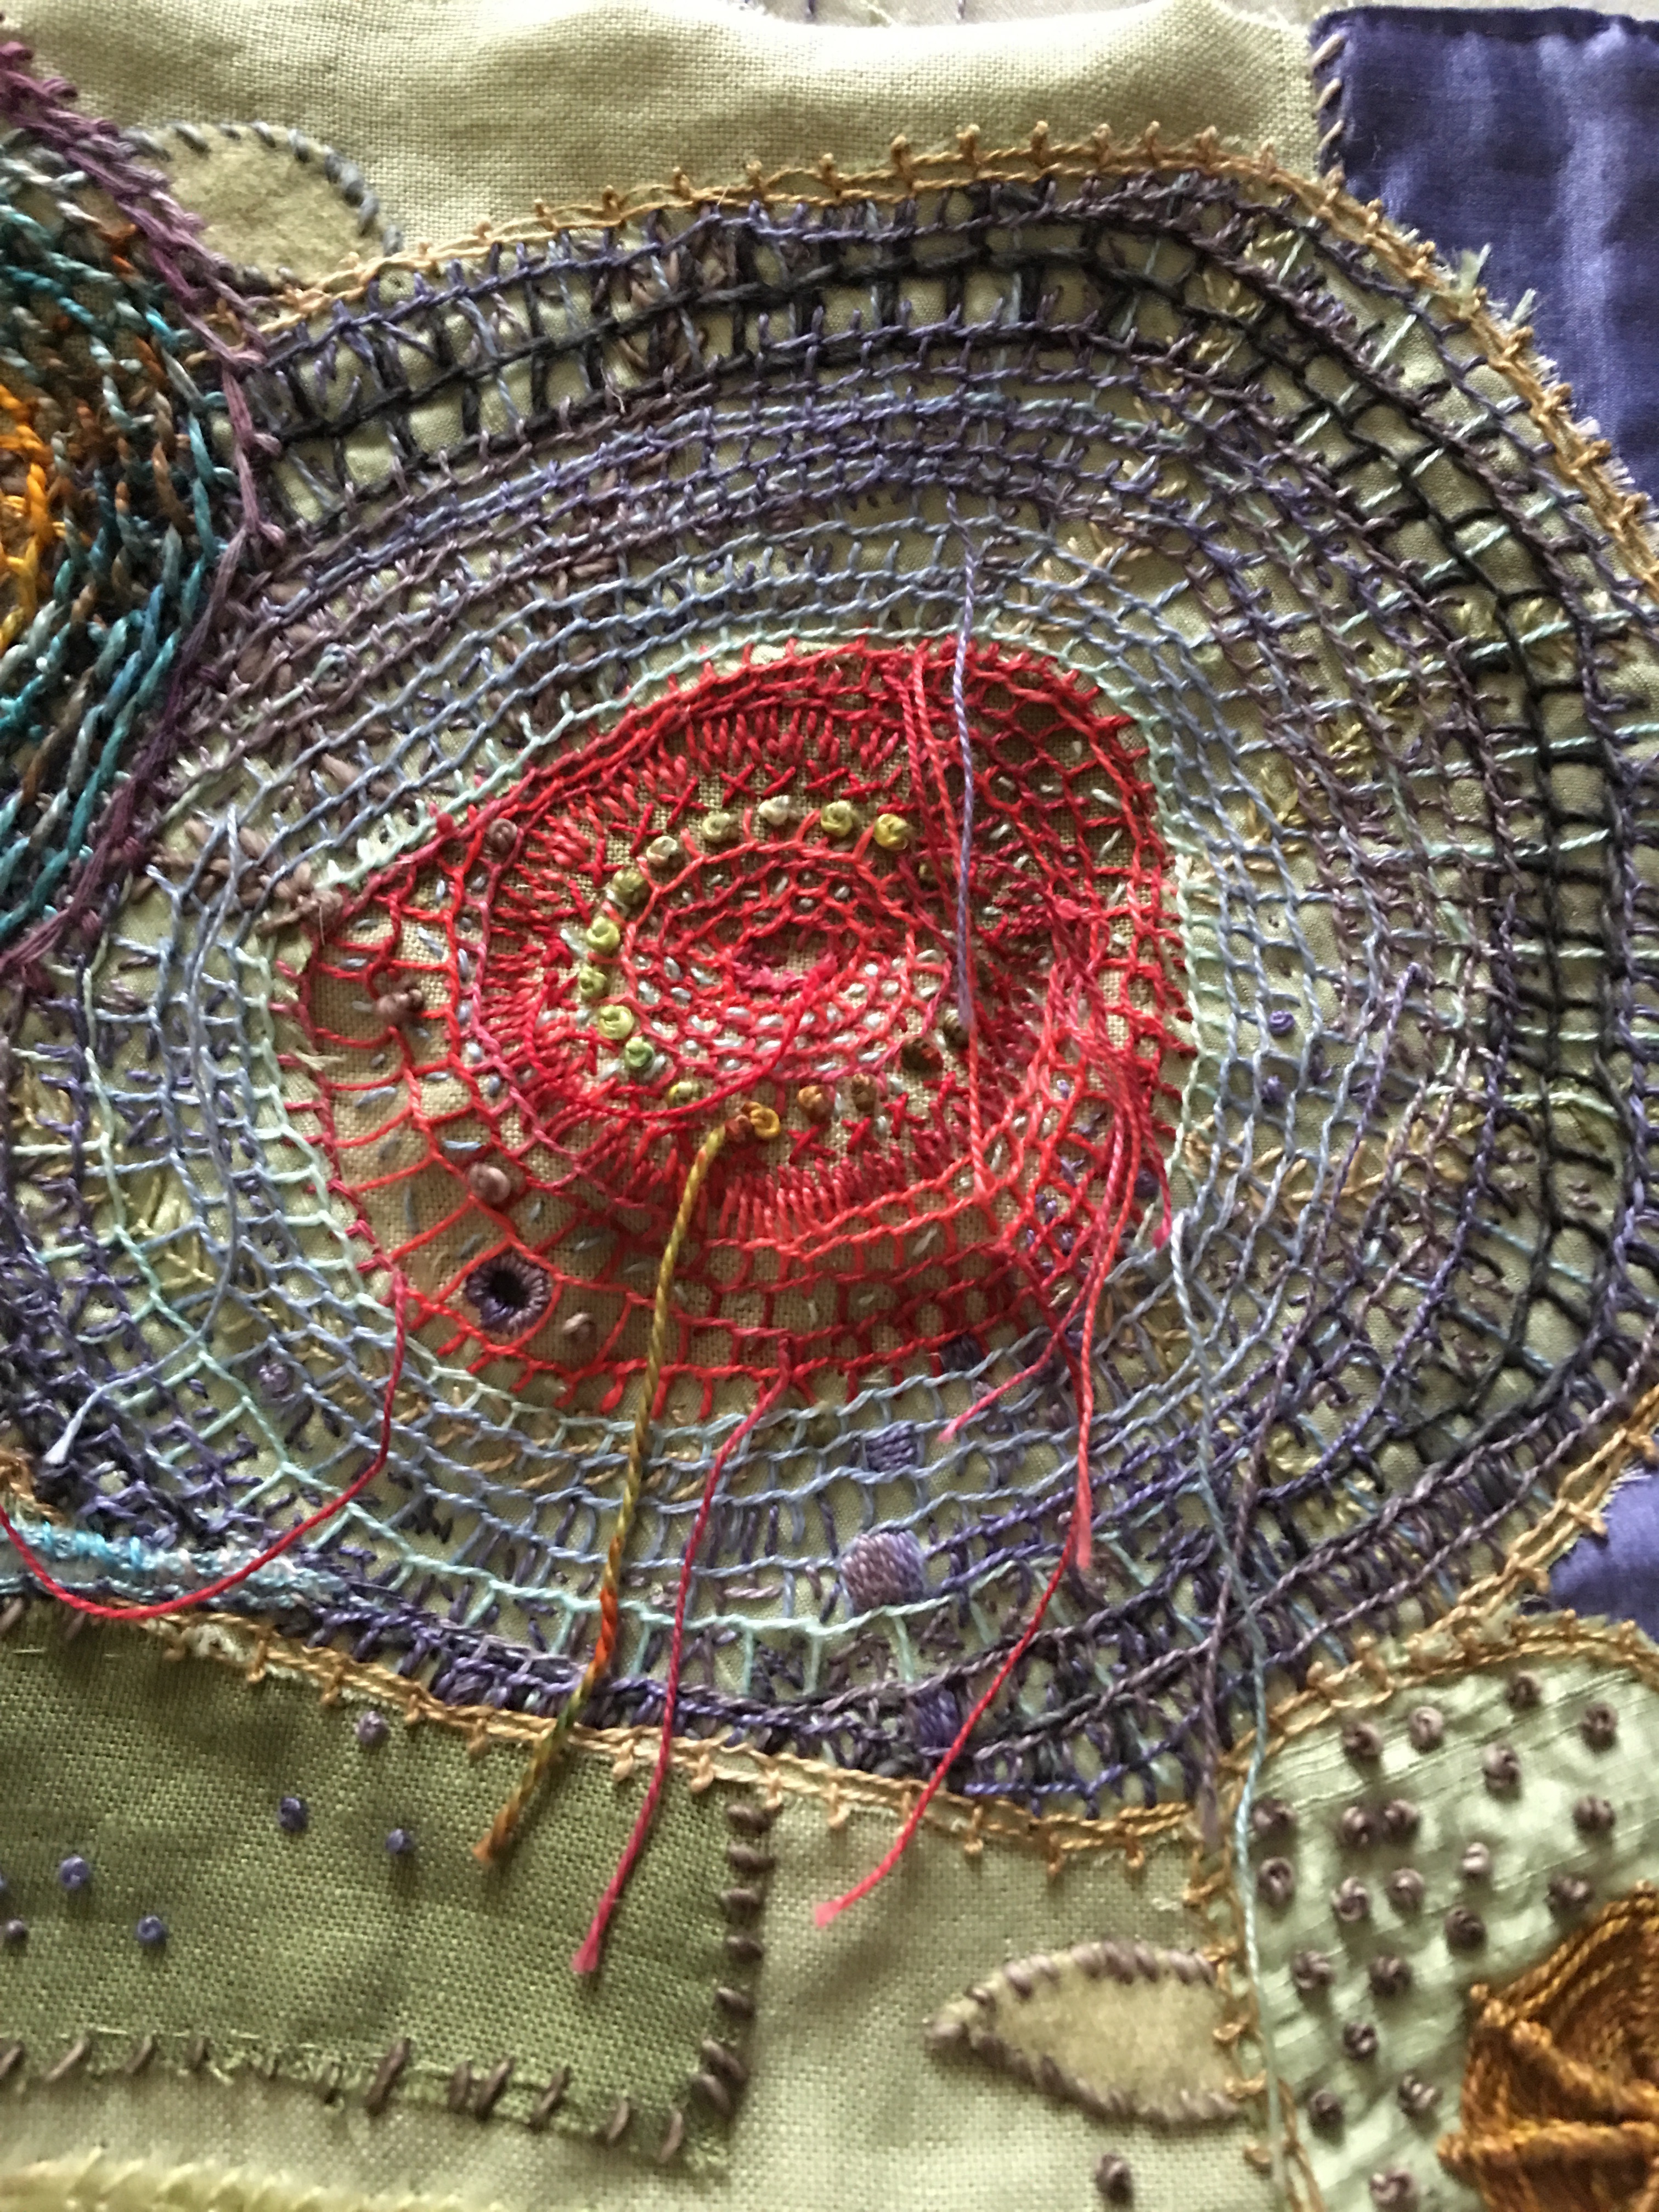
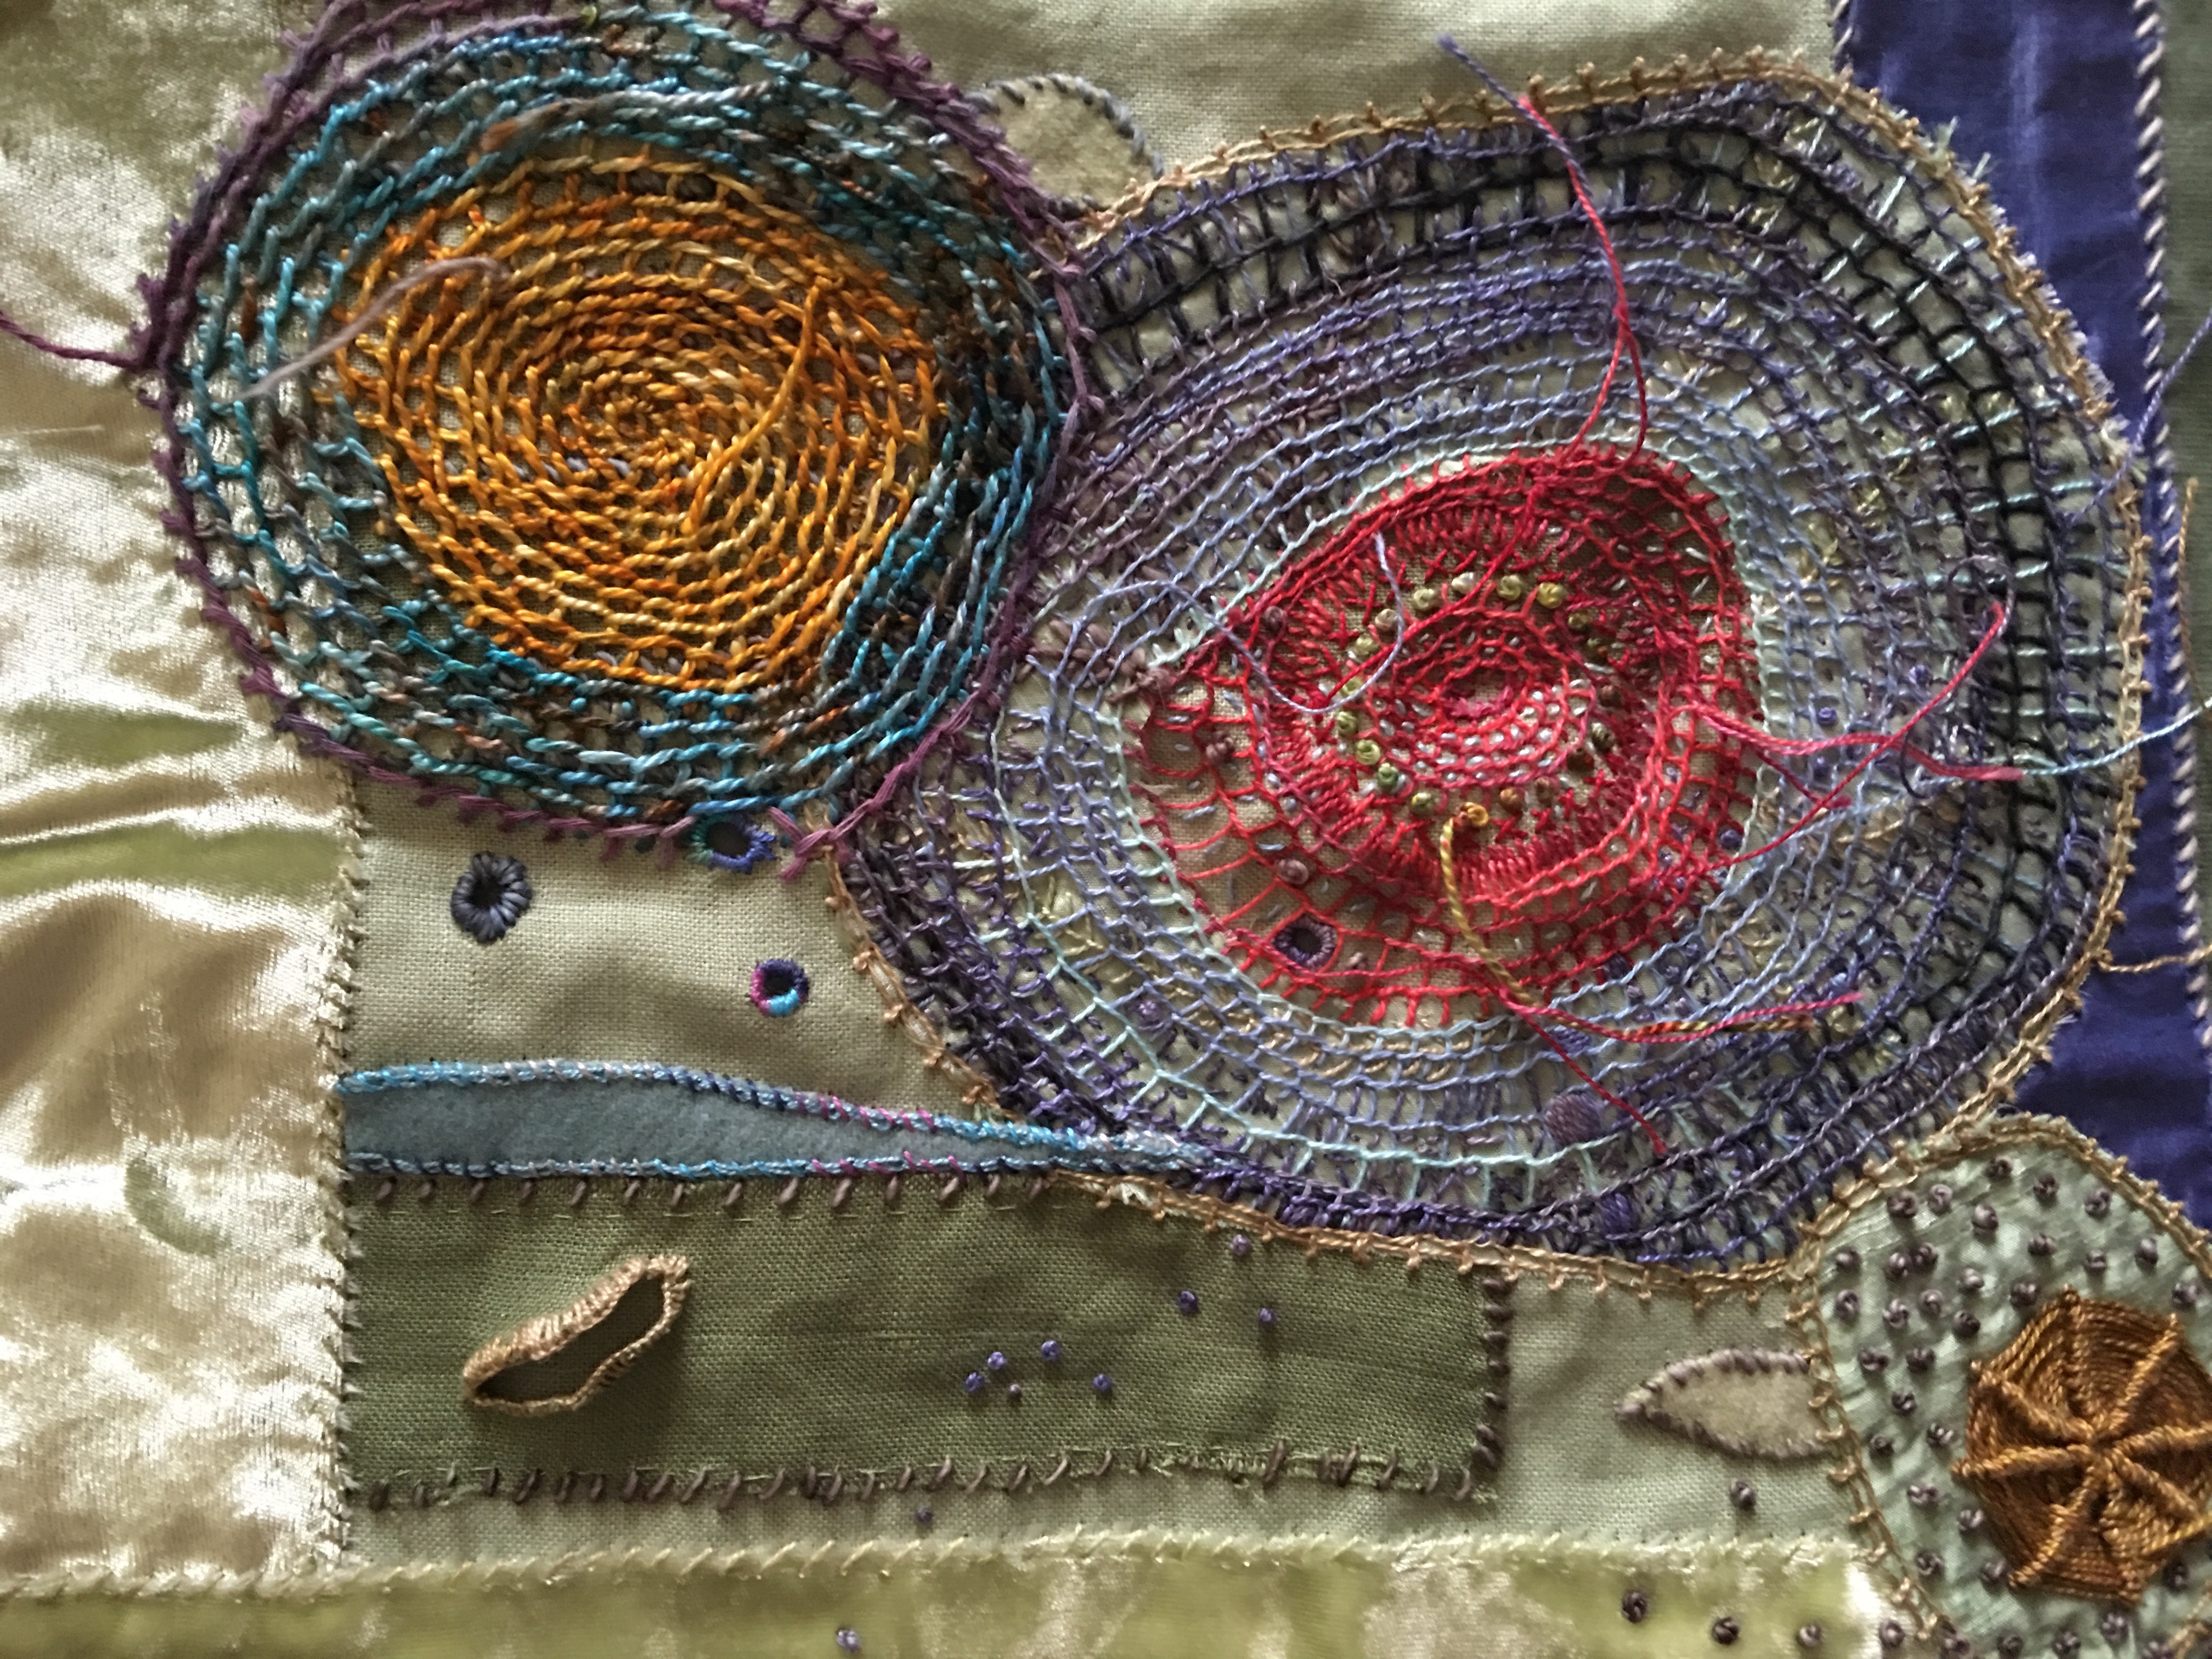
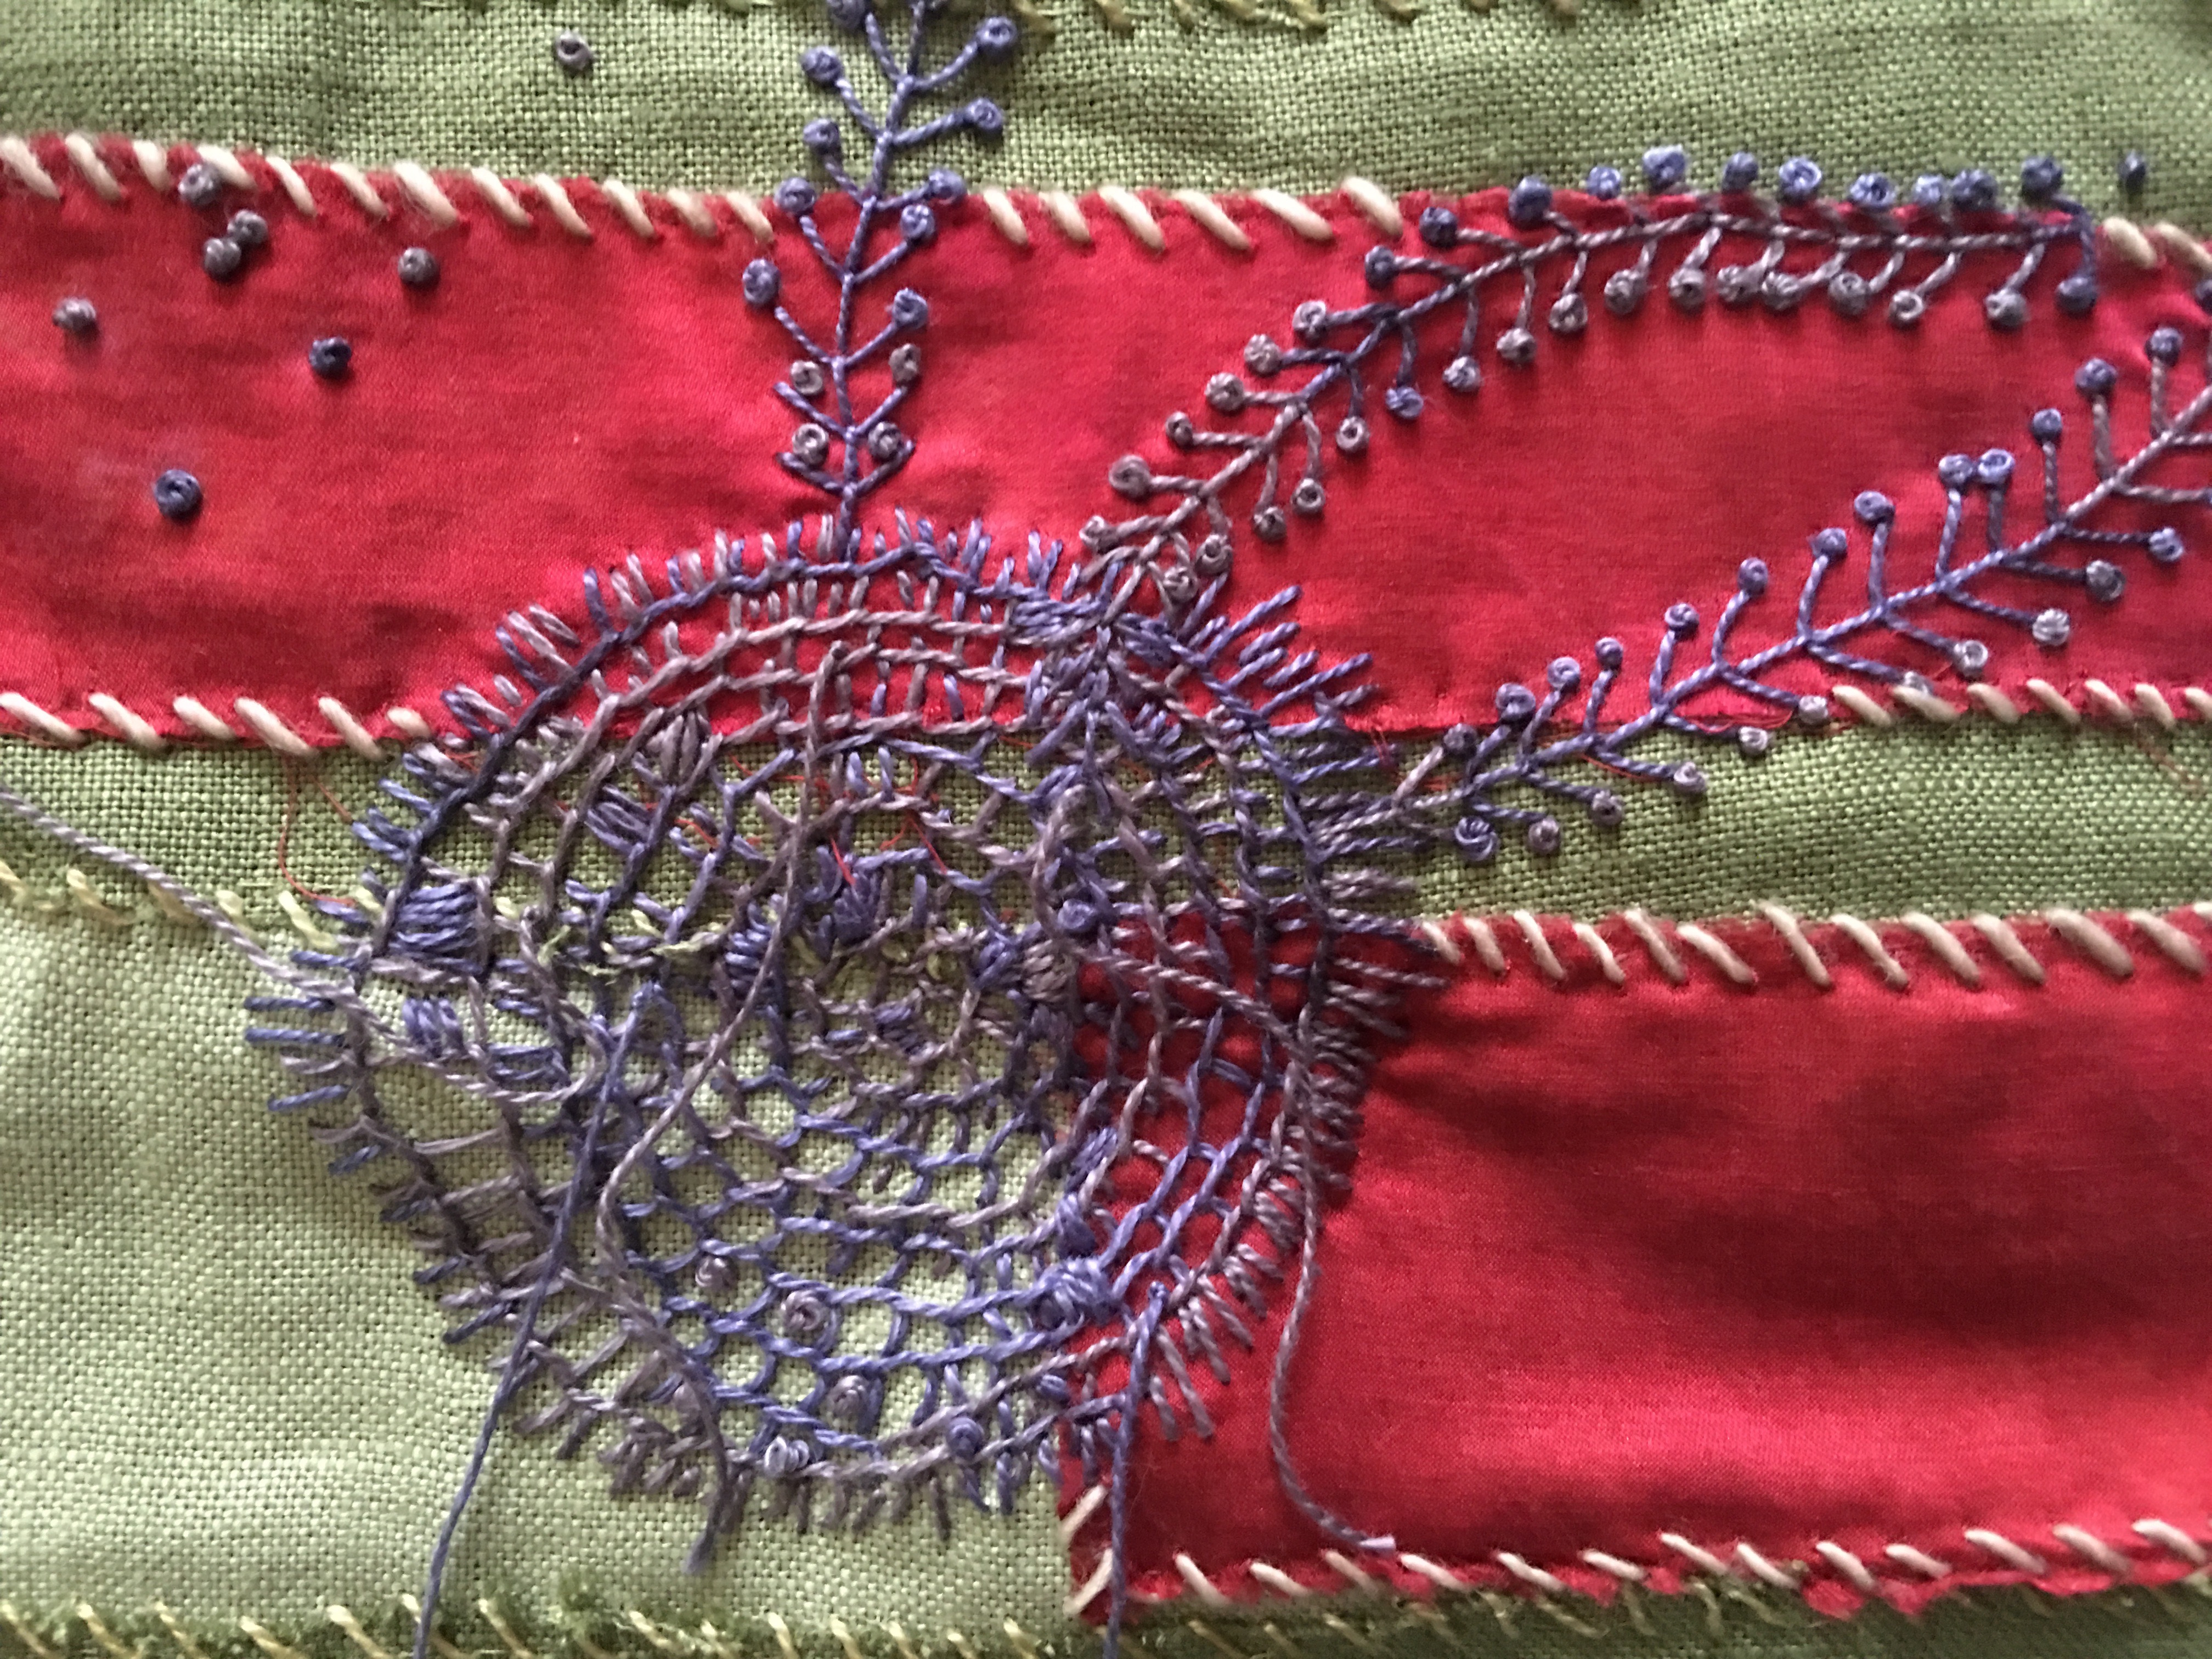
Day 5: I can be a rebel with hand stitching too! The night before, I worked until 10PM and was in class by 7:30AM. I’m determined to work in some of my ideas for this piece – holes and slashes with stitching around them. The piece now looks like this… it’s still a work in progress, I intend to do much more stitching on it and you’ll notice I hand stitched everything on this piece. I’m calling it – “Life #1” and am thinking of making a series. Lorie’s all over the “series” idea, which you can see if you visit her website, and I encourage you to!
A few close ups
Thanks to Quilting by the Lake, the Schweinfurth Art Center, Rosalie Dace and Lorie McCown, but more than anyone I am forever grateful to my husband, Richard Long, who said when I broached the idea of going away, “Absolutely, you deserve it.” And when I asked, “Are you sure?” He didn’t hesitate, “I got this,” he said. I know how much he had to do so that I could go. What a great guy! And what an amazing twelve days I’ve had!
![A Work Space of One’s Own]()
by Ariane Zurcher | Feb 11, 2015 | Art, crafts |
Last May we pulled our daughter, Emma from school and began homeschooling or non-schooling or… I’ve written more about all of this on the other blog, the one I share with my daughter: Emma’s Hope Book. One of the many benefits of homeschooling, aside from the huge relief and plummeting stress level, is that we get to explore, together and separately. The beauty in exploring is that the goal is to be curious and discover. There’s no right or wrong and there’s tremendous comfort in that. The entire process of learning becomes one of joy and experimentation without the burden or stress of feeling one should know something before having learned it.
So it was, some eight months ago when I sat down with Emma and asked her what she was interested in learning about. She typed that she wanted to learn German and take a ceramics class among a number of other things. So we bought Rosetta Stone for German and Emma began taking pottery lessons at a nearby ceramics studio. Her teacher, seeing my obvious excitement and interest, asked if I might like to make some things too. I eagerly said, “Yes, please!”
Learning anything new is full of experimenting, exploring, tweaking, practicing and refining techniques learned. To dive into something you’ve never done before can be daunting, but only if you are comparing your work to another’s. Particularly crushing is if you expect you will be able to produce something that is of similar expertise as someone who has been studying and refining their technique for decades. The exhilaration comes with the process of learning, practicing and improving. But so often we are not taught that this process is wonderful at all. In fact, we are taught that it is hard work and the end product, only produced after years of practice and toil, is all that is of value. Everything else pales in comparison.
I disagree.
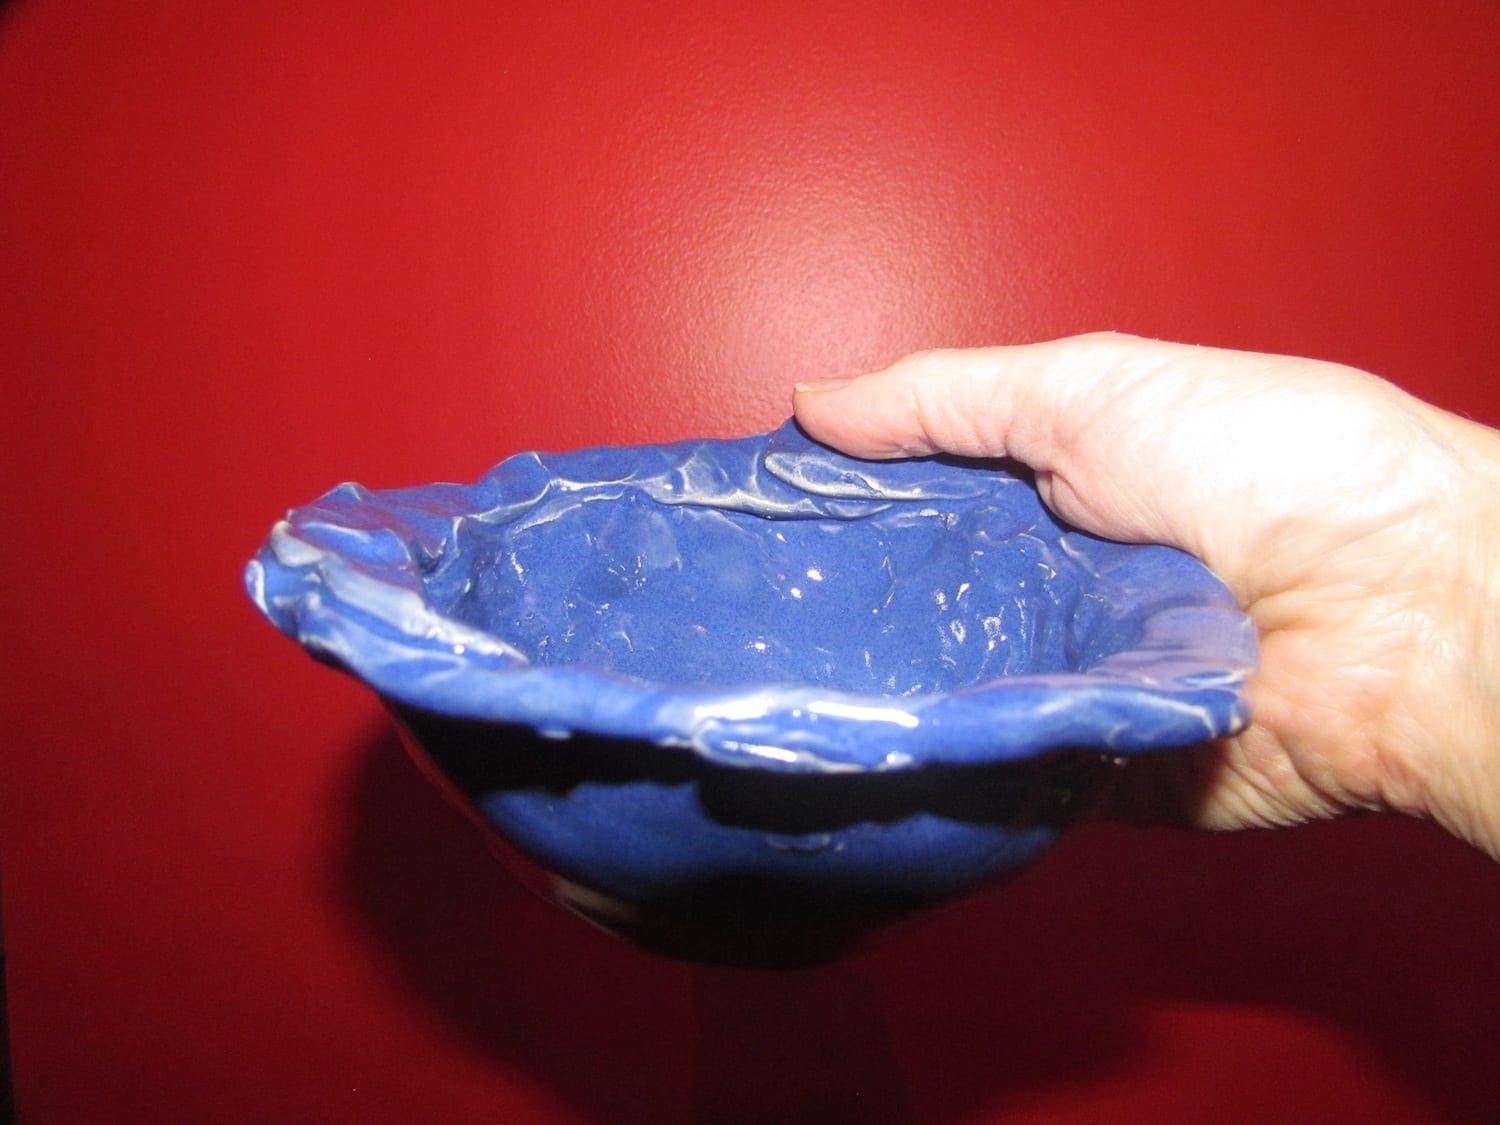
This cereal bowl that Emma made for me is perfect for walking while eating. It has an indentation that perfectly fits one’s thumb while cupping the bowl in your palm. Why hasn’t anyone designed a bowl like this? I’ve never seen one before, but oh, how I love it. This is my new, favorite bowl.
My favorite cereal bowl made for me by Emma.
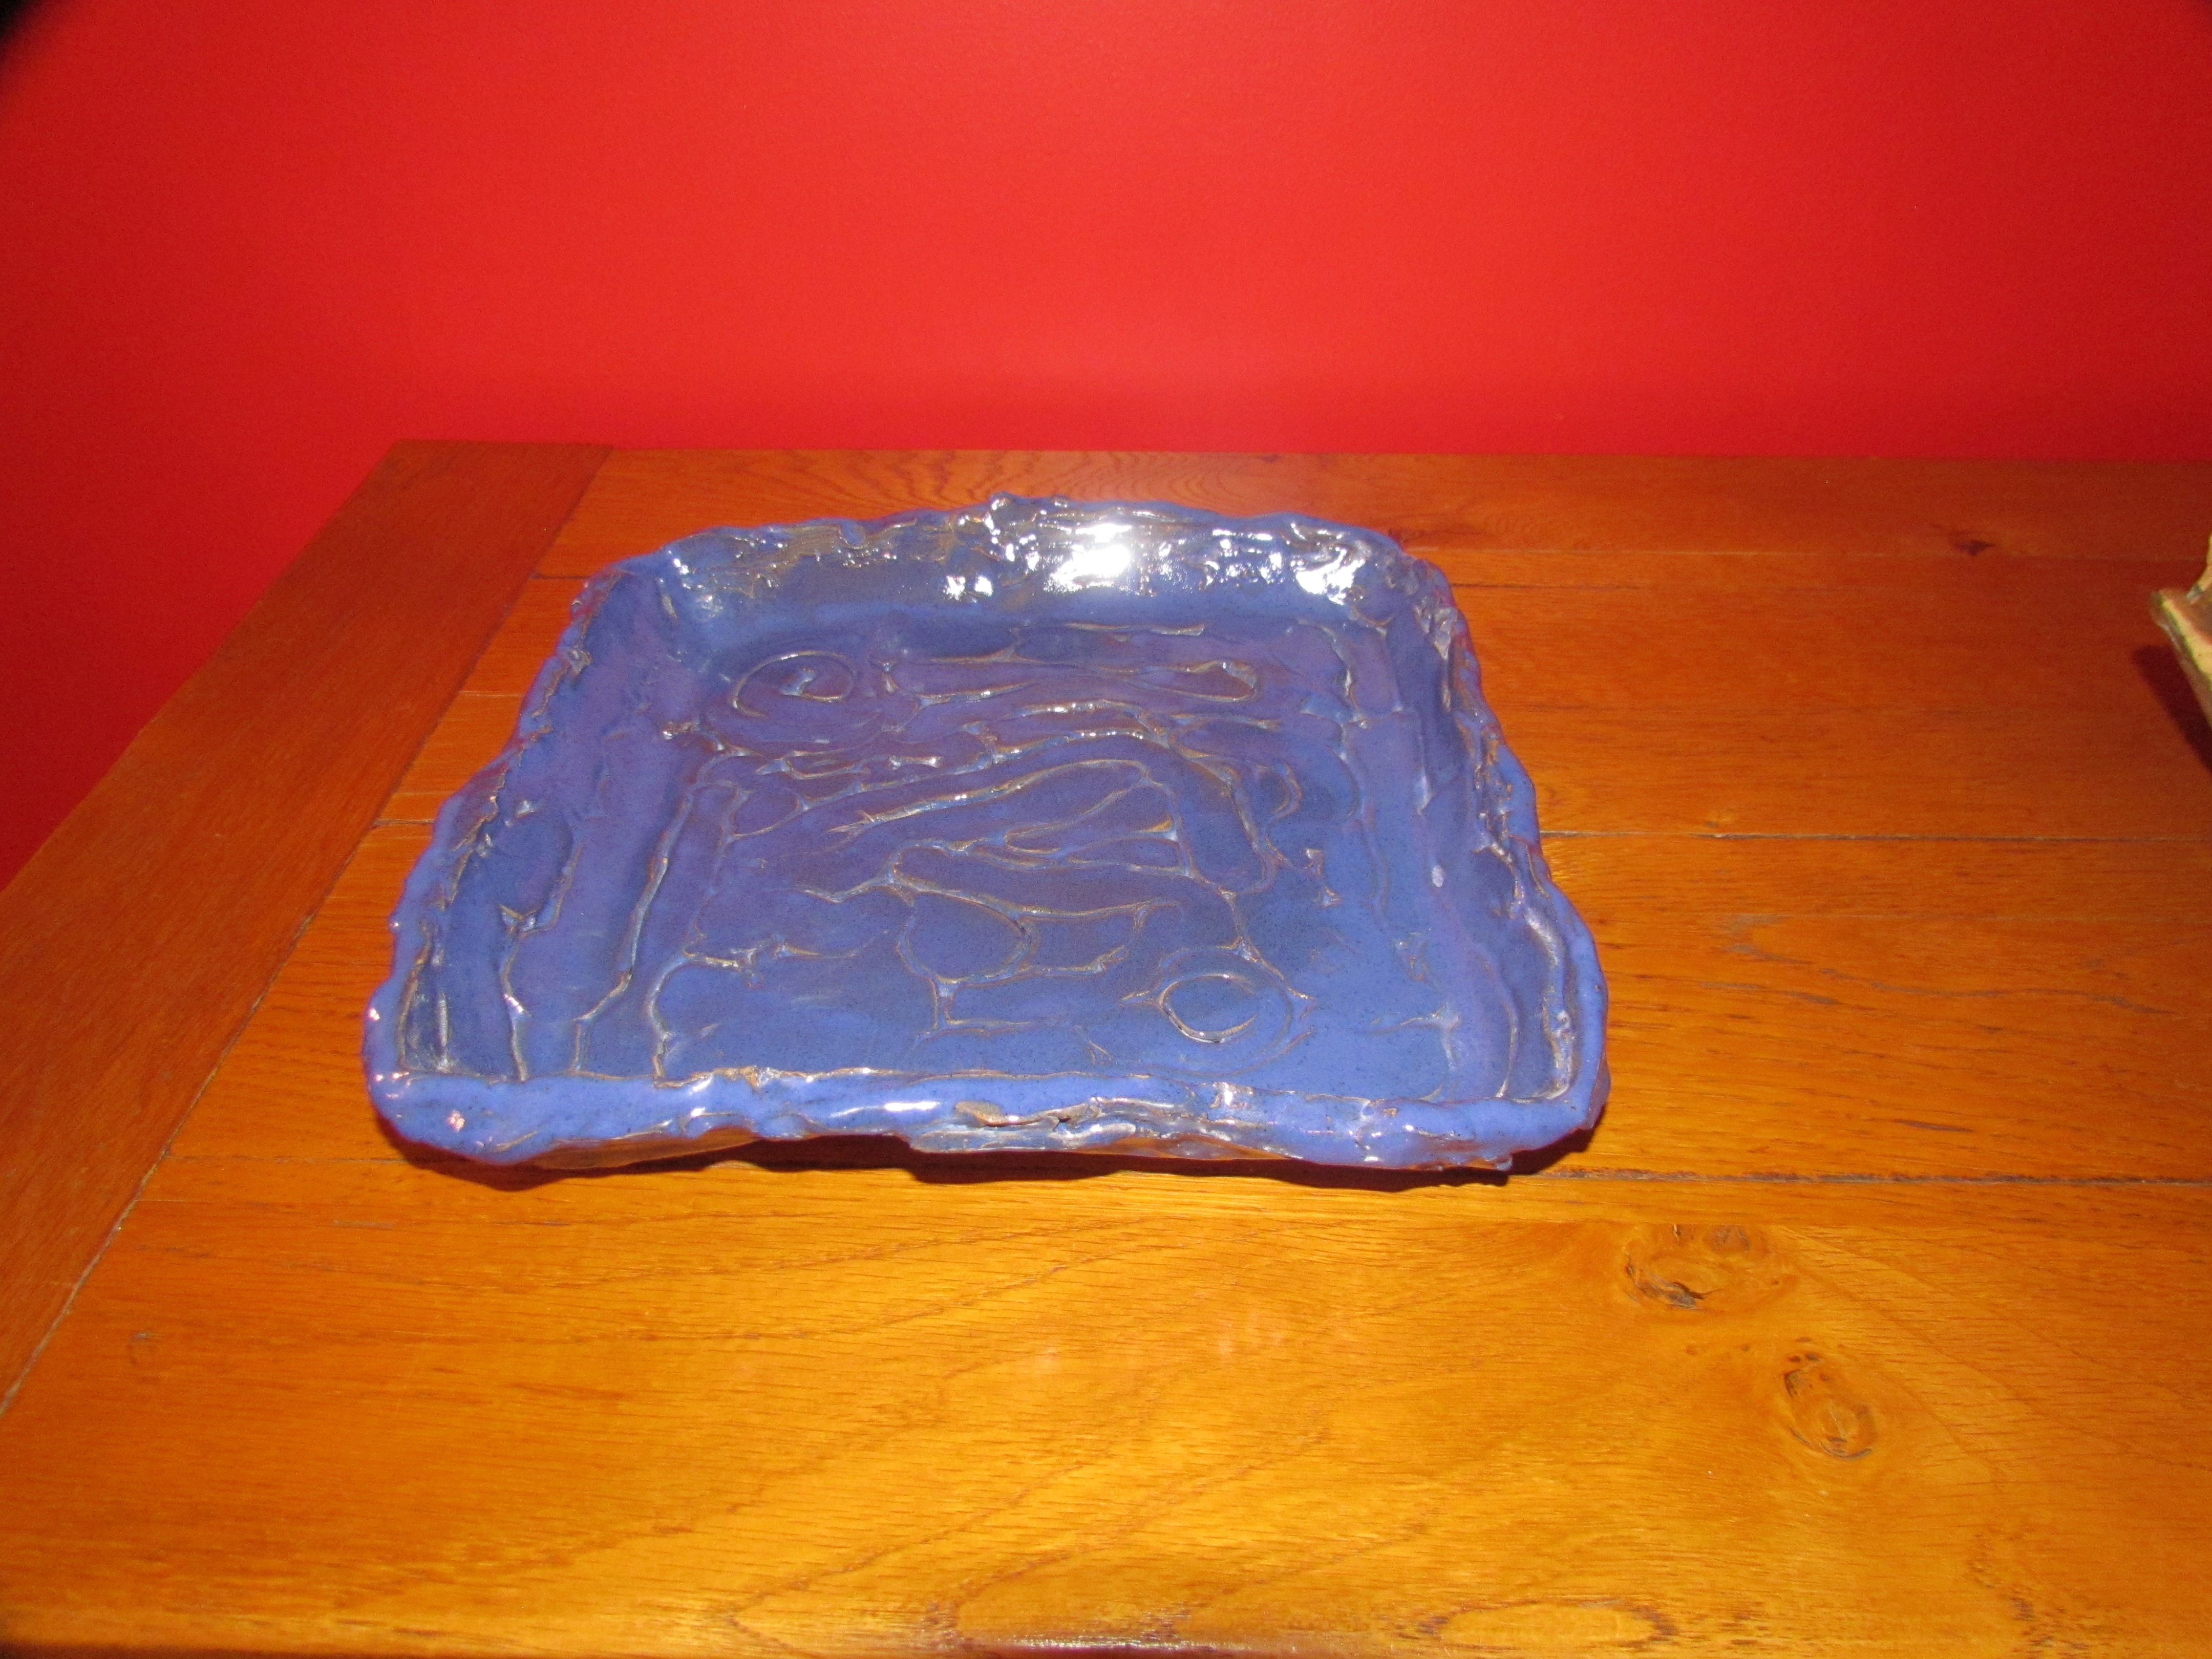
The platter below? “It matches” was what Emma typed in reply to my exclamation that I thought it perfect for serving cheese and crackers or maybe a brioche en croute with fresh baguette.
Emma’s Platter
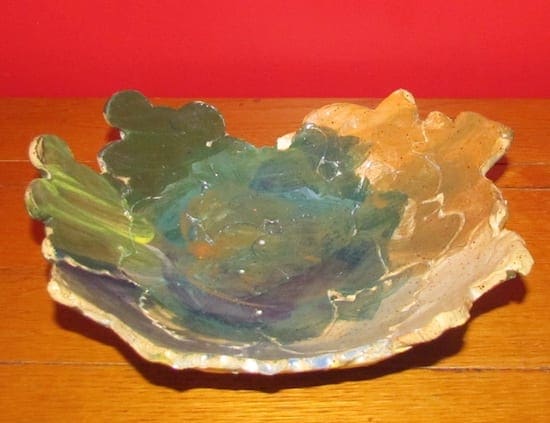
This bowl that Emma made used cookie cutters and then she painted after joining all the shapes.
An Autumnal Bowl
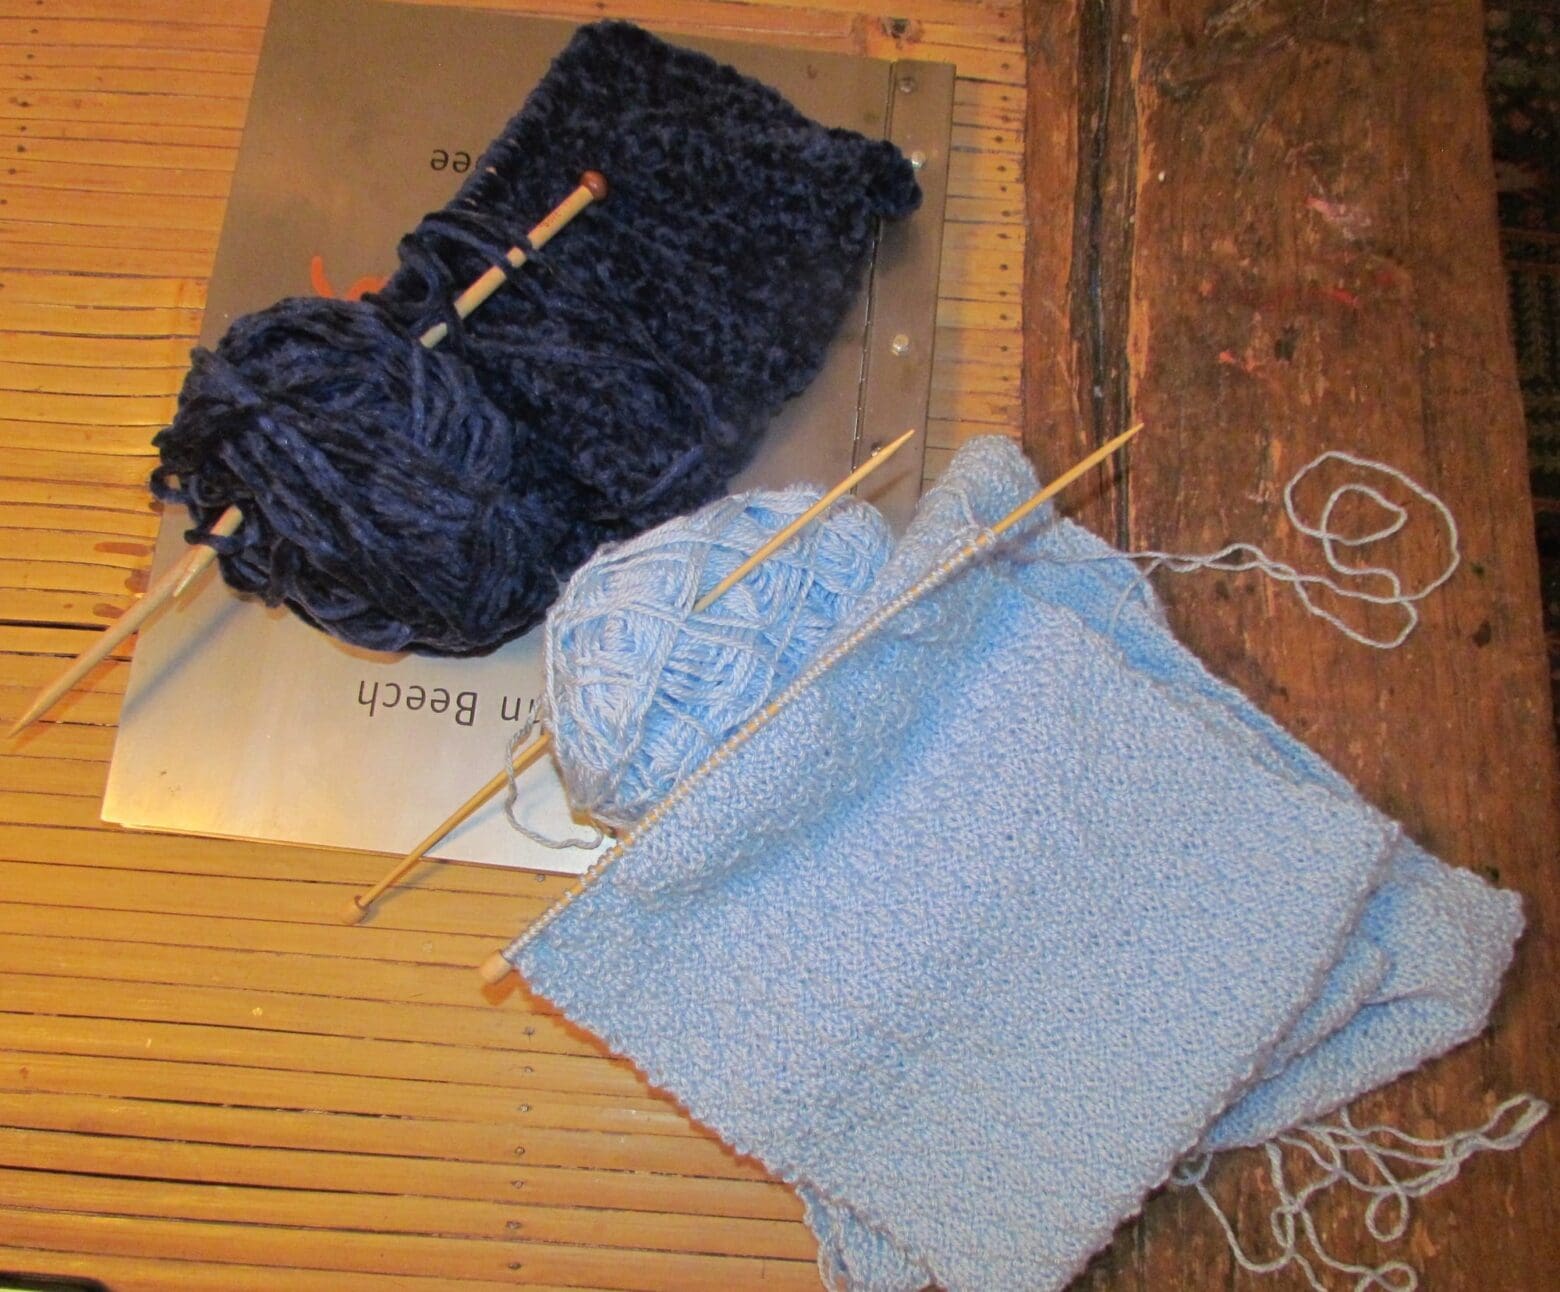
A few months ago, or maybe it was years, (this is an aspect of getting older, the years feel like months, yet another example of that saying people tell you when you first become a parent – the days are long, the years are short) I asked Emma if she had any interest in learning to knit. She said she did, and as I love knitting (I wrote about some of that “here“) and used to design knitwear, I thought we’d start with something simple, like a scarf. Emma chose a light blue yarn. After a couple of tries, she lost interest and so I began making a long scarf using an alternating knit 2, purl 2 pattern. I rarely use knitting patterns or cooking recipes for that matter, but that’s another post. Anyway the scarf began like this.
Light blue scarf in alternating Knit 2, Purl 2 pattern with the beginning of a navy blue chenille infinity scarf in the background.
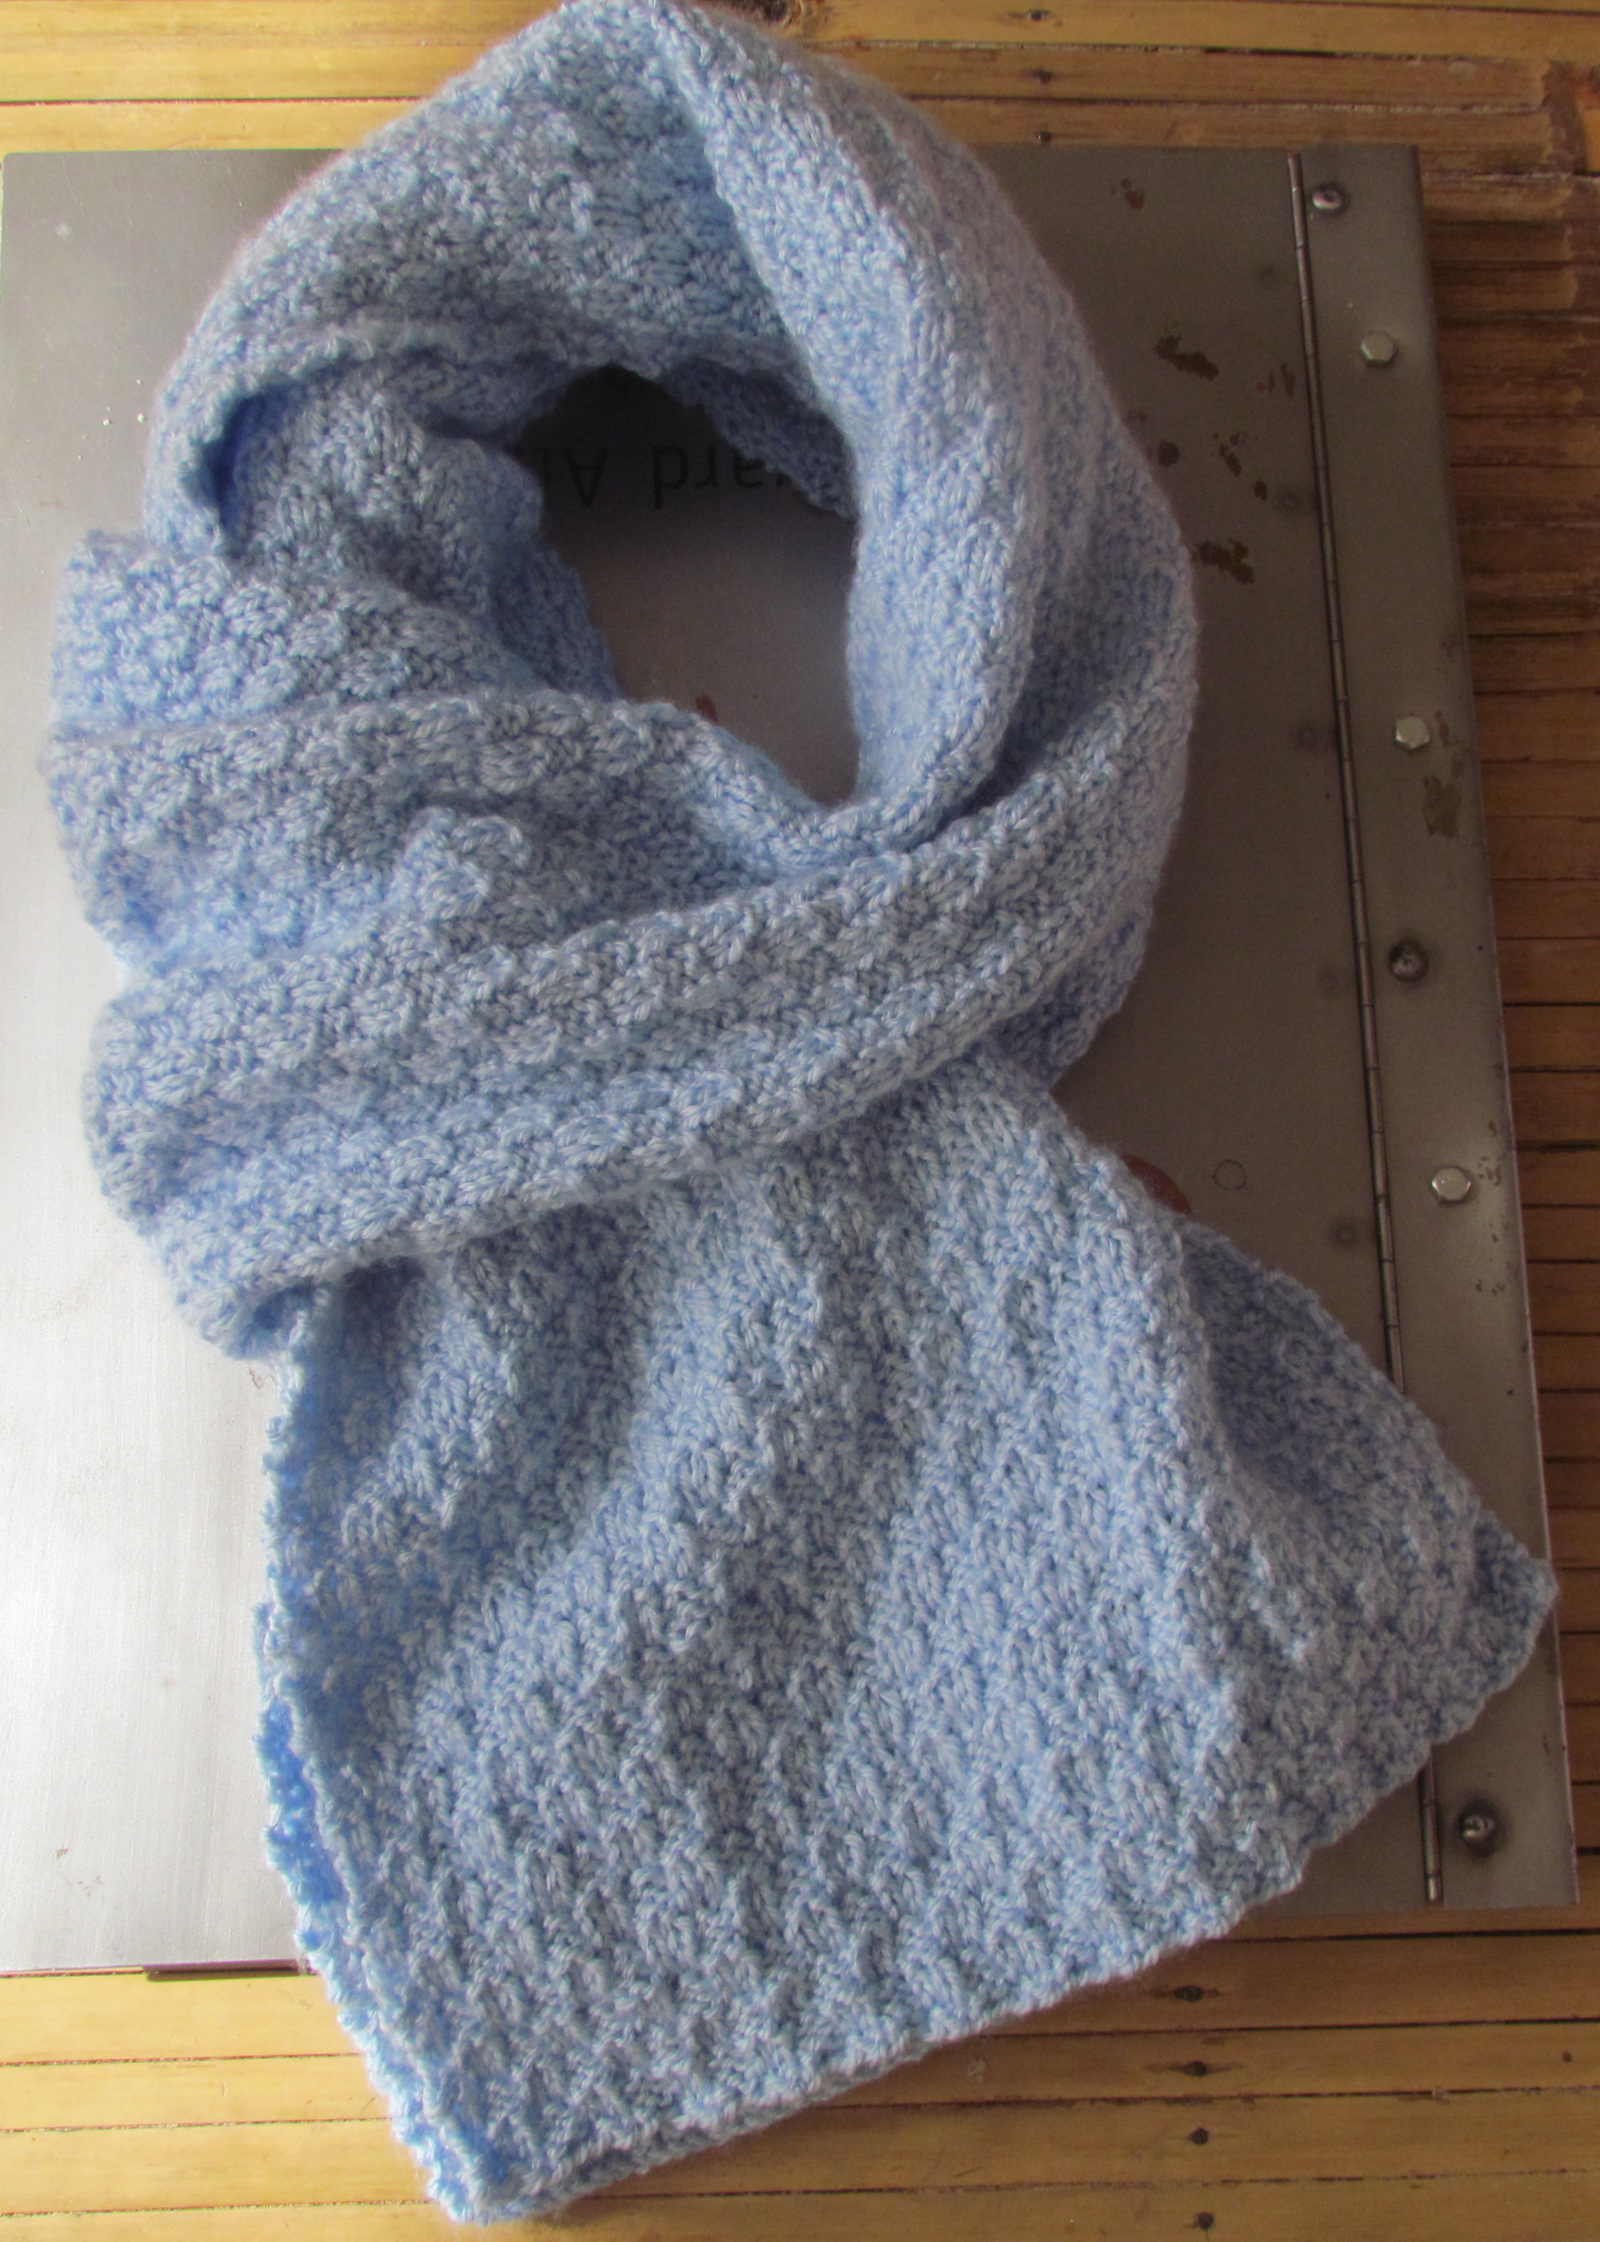
The finished scarf ended up measuring 87 inches in length and 11 inches wide. What you don’t see is the other side where I changed my mind after an inch or so and decided to make the pattern more elongated.
The Finished Scarf
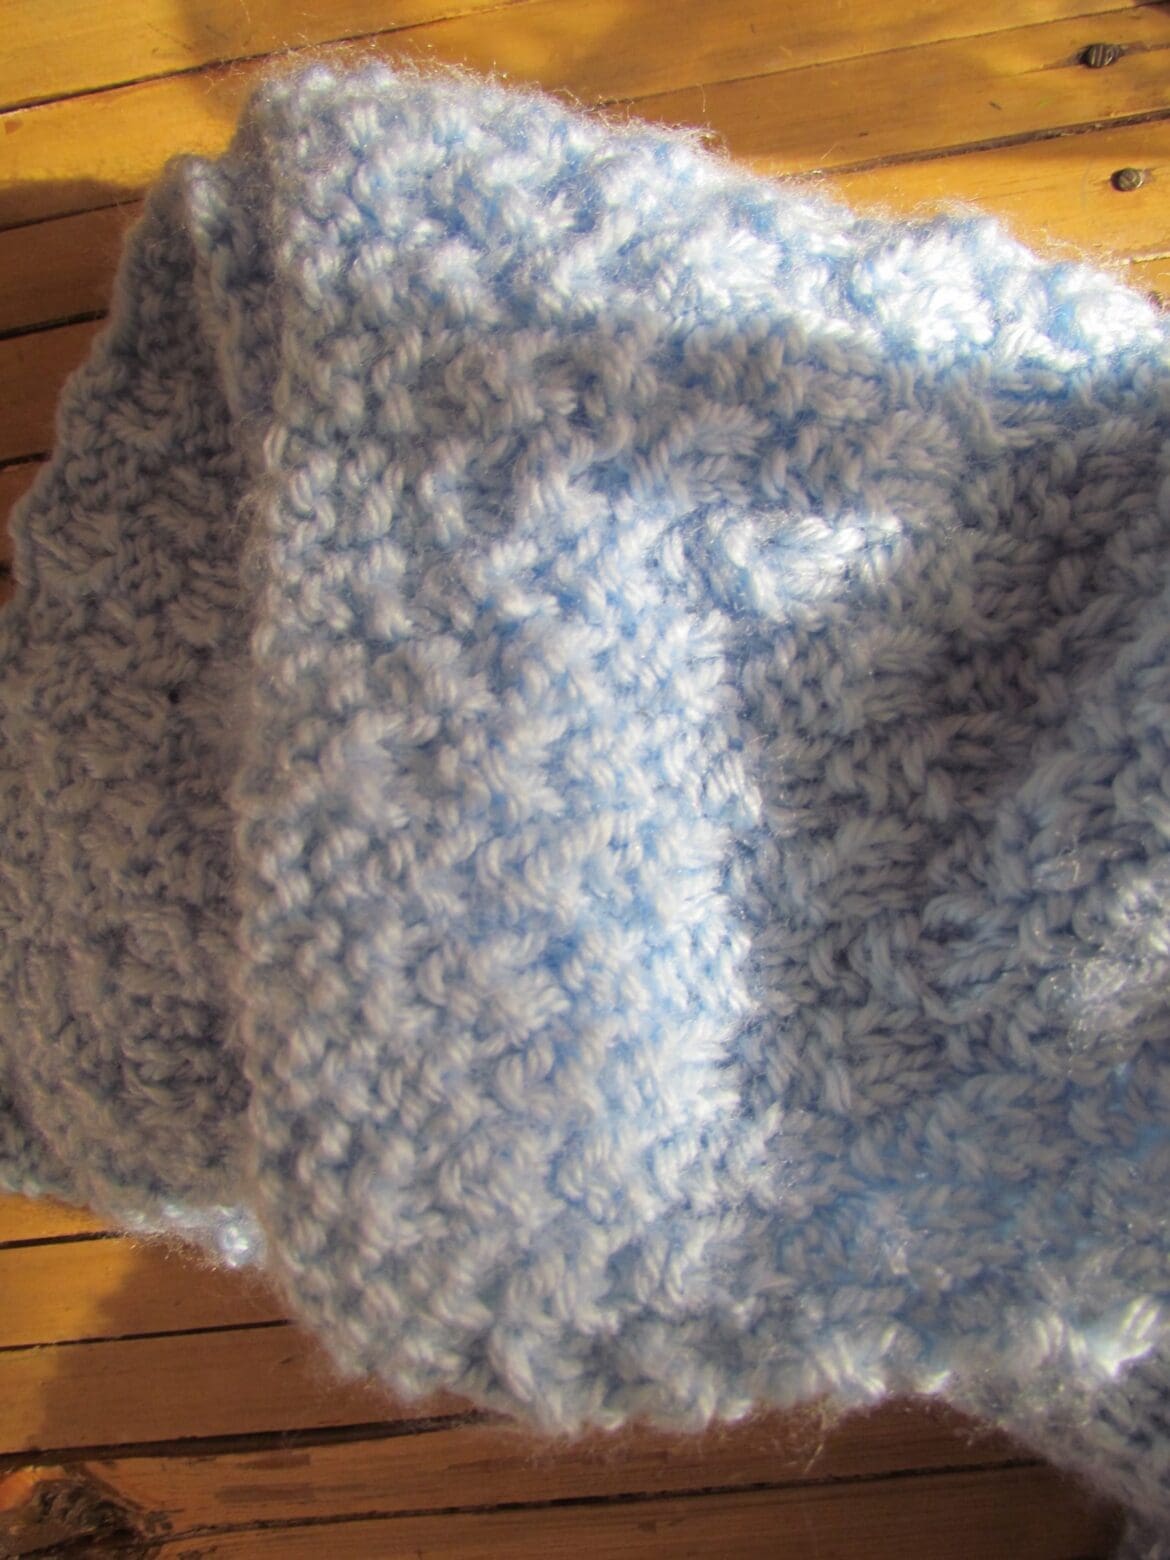
This is the edge where I began knitting and decided to change the stitch. Three times. The final stitch pattern is a Knit 2, Purl 2 for three rows and then Purl 2, Knit 2 for 3 rows and repeating for the remainder of the scarf.
The I-Changed-My-Mind-Edge
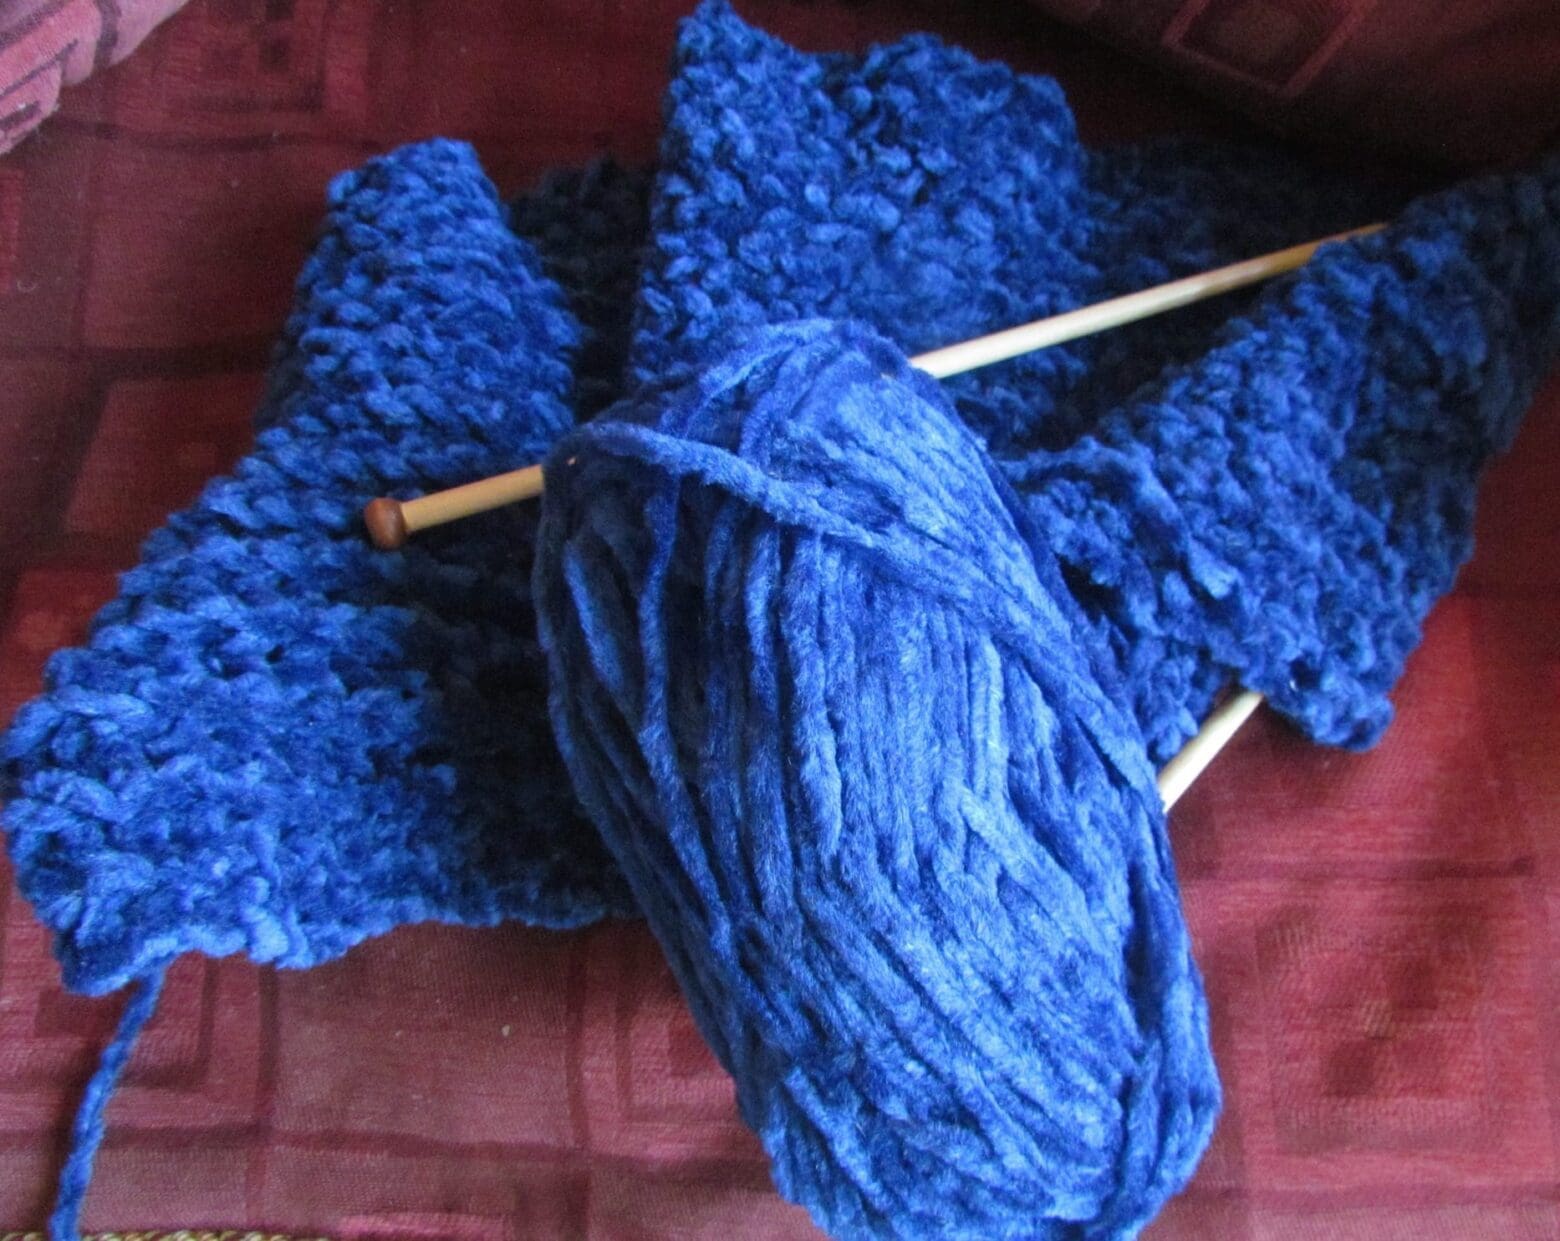
I’m hoping Emma will try knitting again sometime, but in the meantime, I’ve started a couple of other projects, one is this deep blue chenille yarn that I’m knitting, using a newly learned brioche stitch, into an infinity scarf for a friend.
The makings of an infinity scarf using a brioche stitch
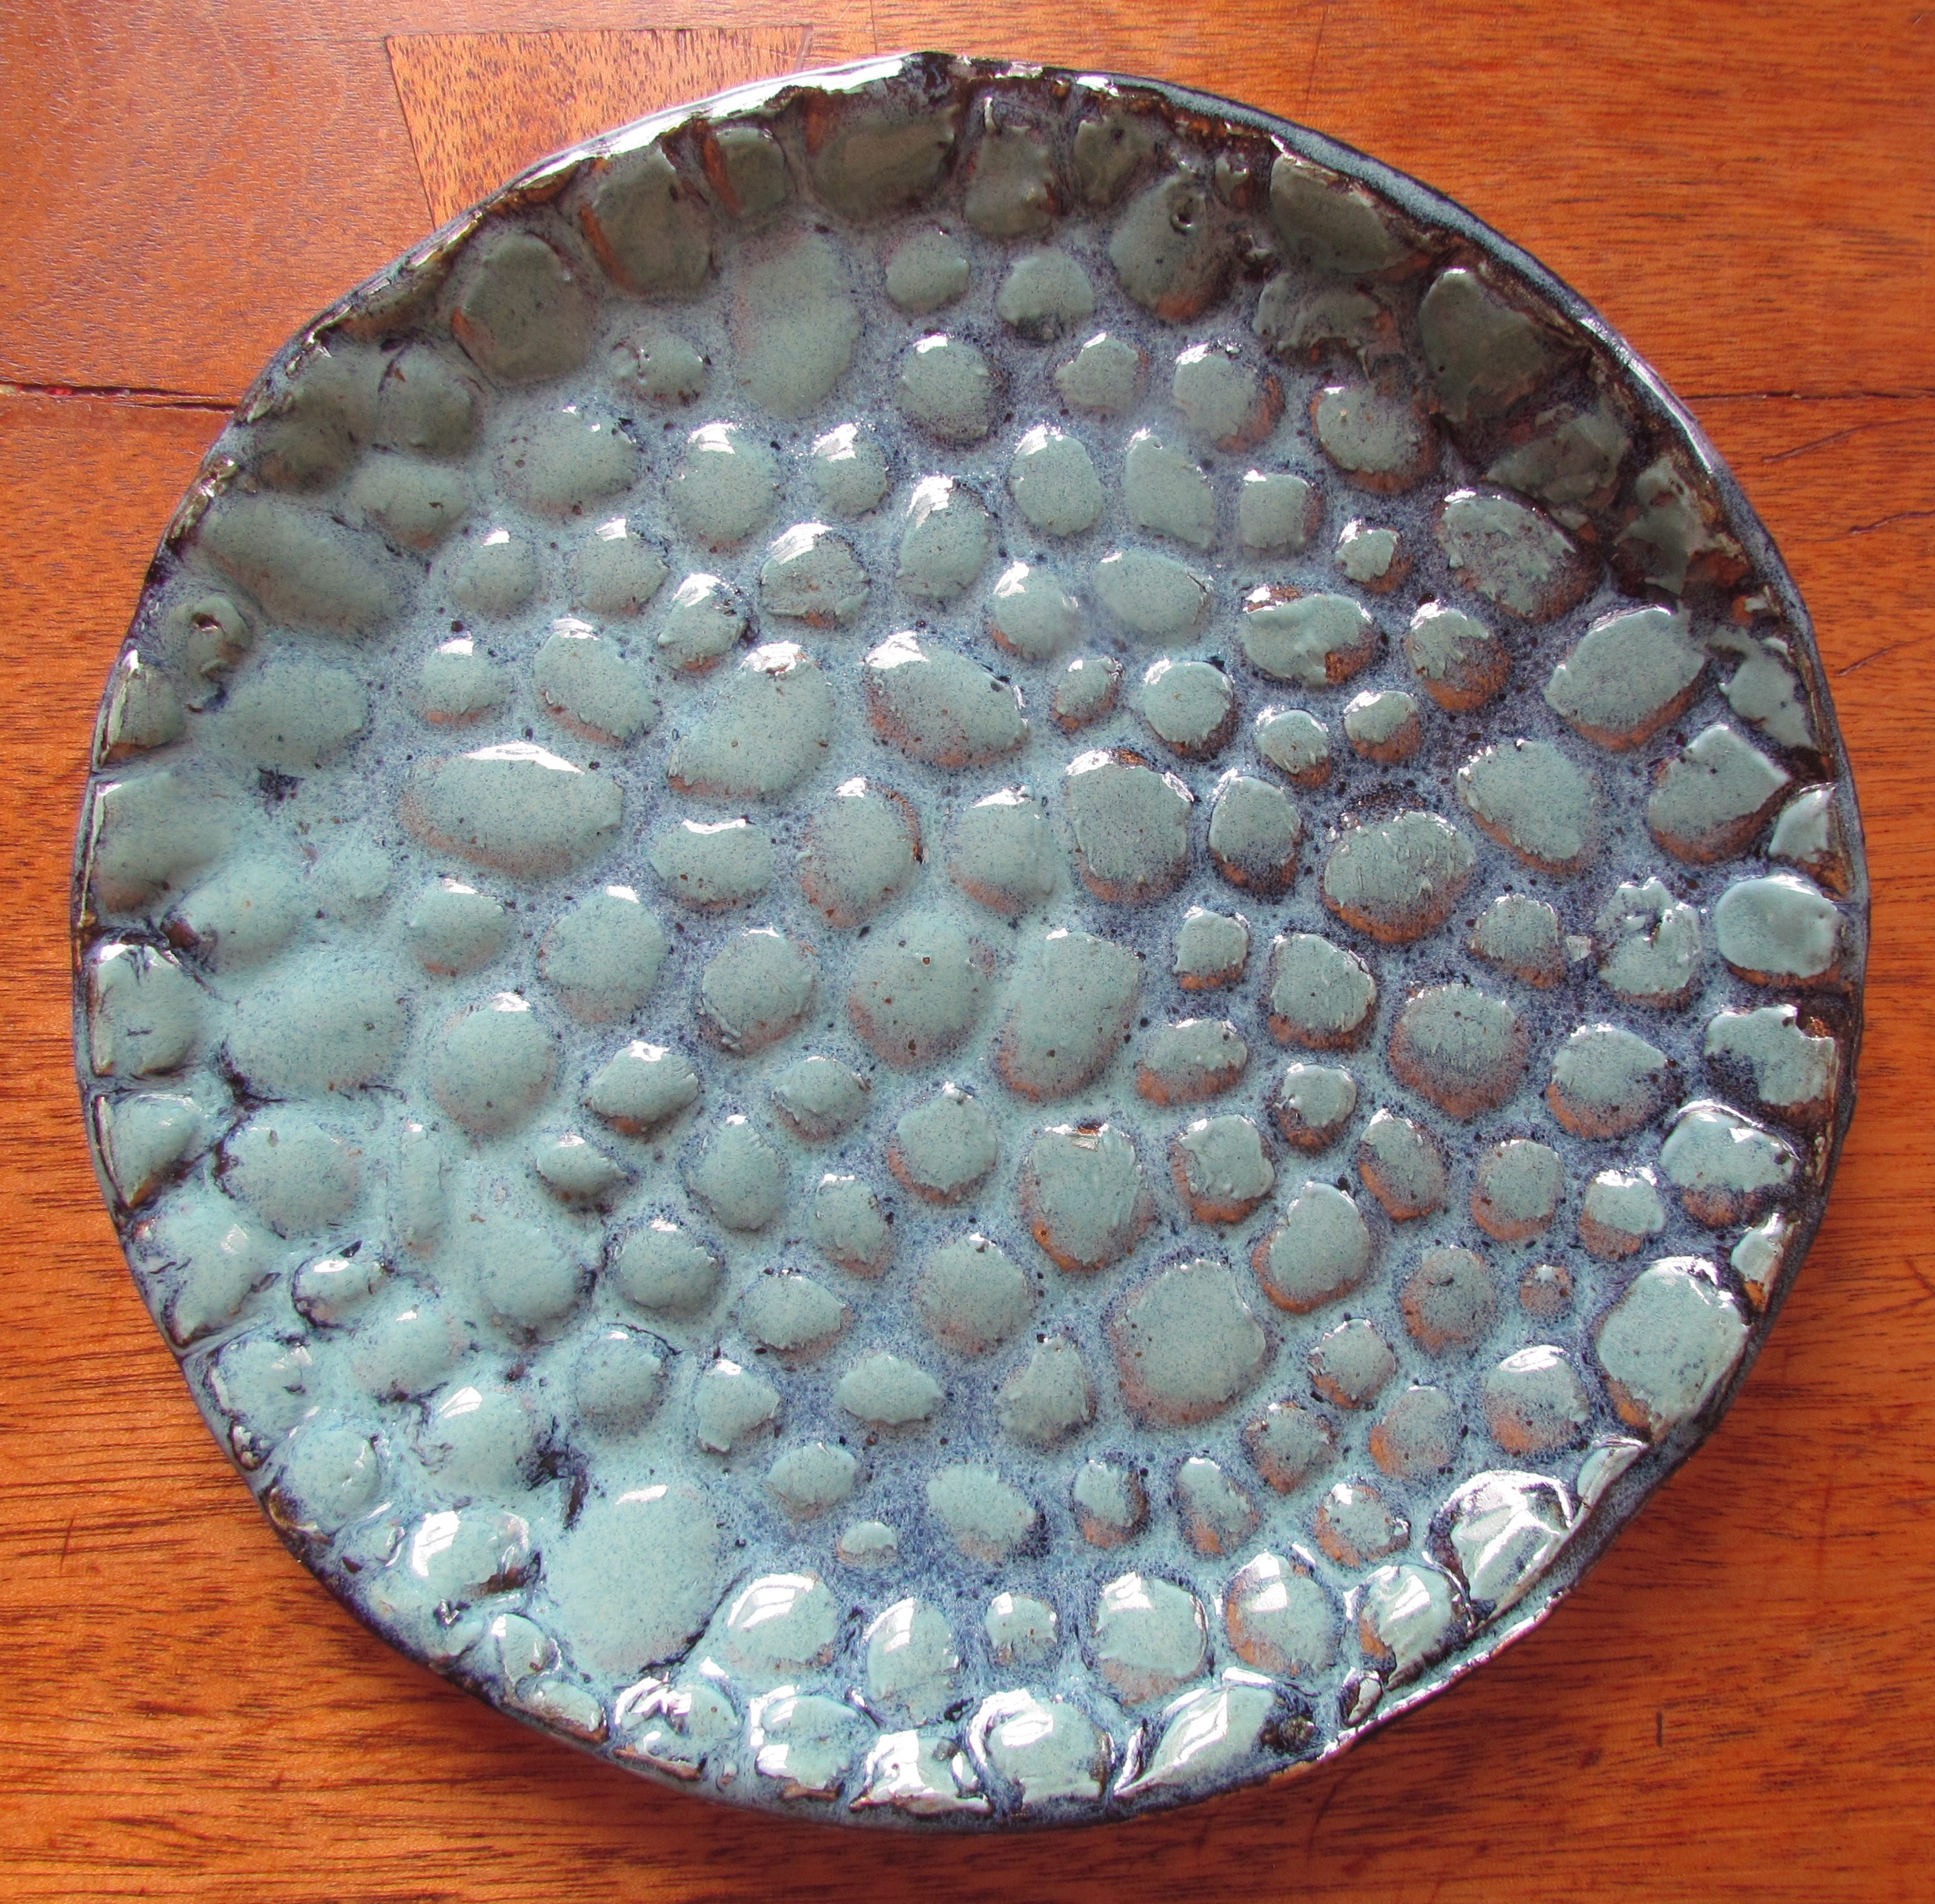
And finally this is one of my ceramics projects.
Pebbles in a Plate
For those familiar with my jewelry, this may remind you of something else…
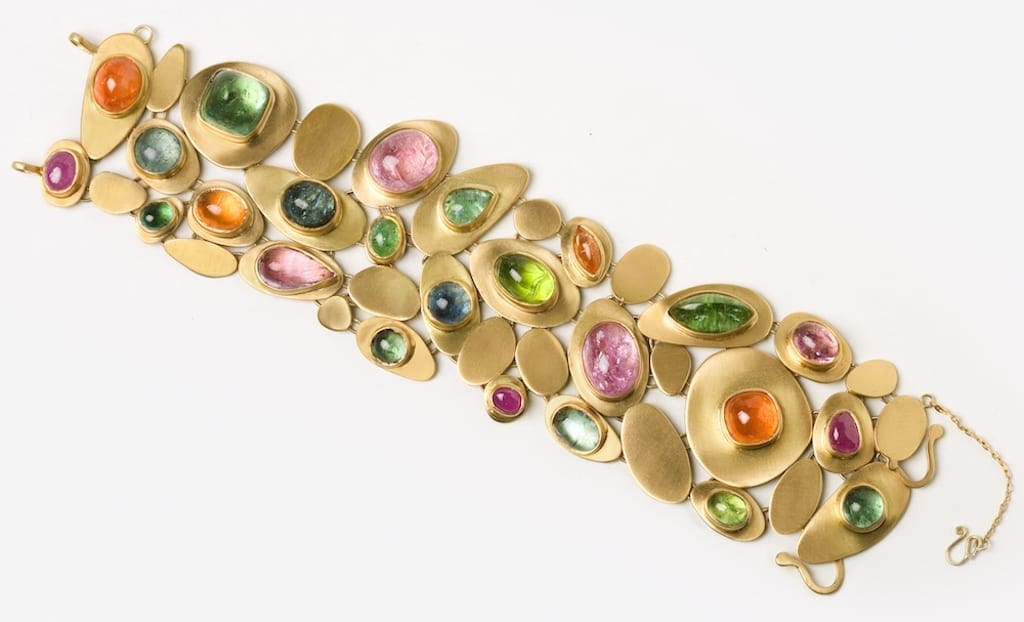
Ariane Zurcher Jewelry – B26 Lotus Collection – 18 Kt Brushed Yellow Gold, 25.08 ct Pink Topaz, 2.69 ct Pink Sapphire, 12 ct Tourmaline, 2.96 ct Aquamarine, 17.21 ct Mandarin Garnet, 4.03 ct African Paraiba
 Then there was the question of my design wall, which is removable.
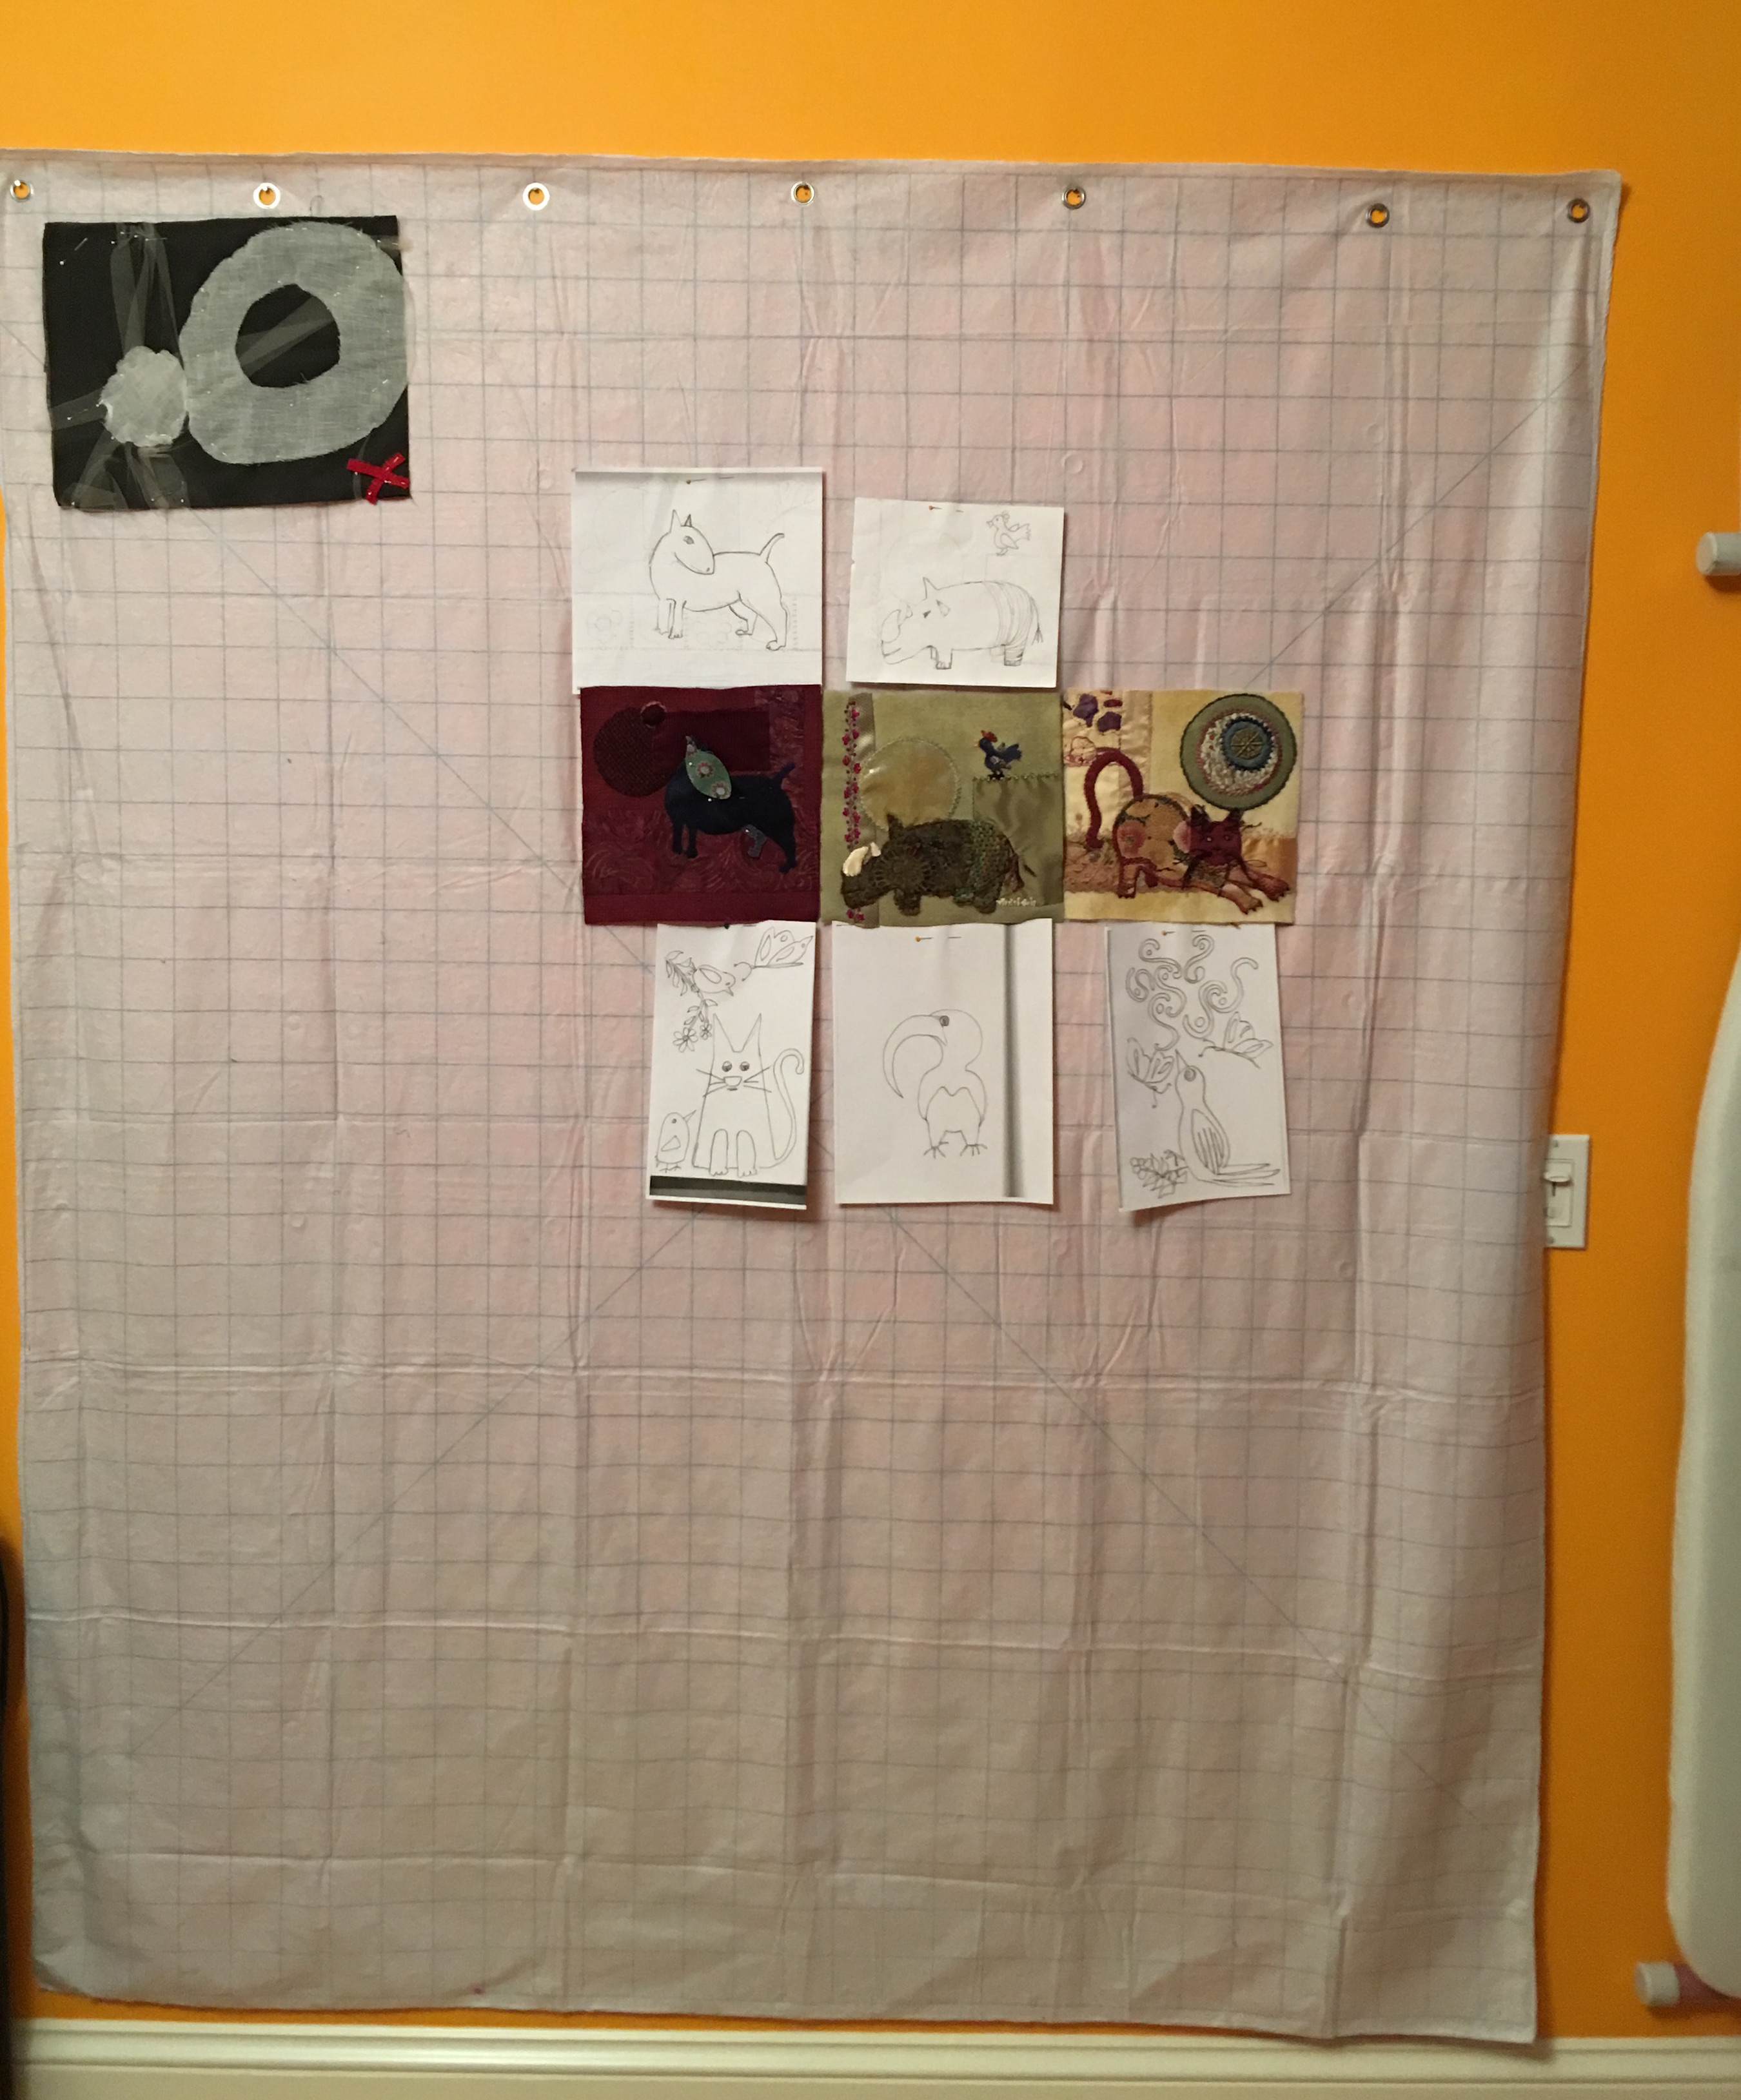 I needed to organize my fabrics and other materials that I use for my jewelry design, such as wax, files, metals, wire, etc. While I was doing all of this, I came across my old portfolio from my days in fashion design and got a little side tracked…
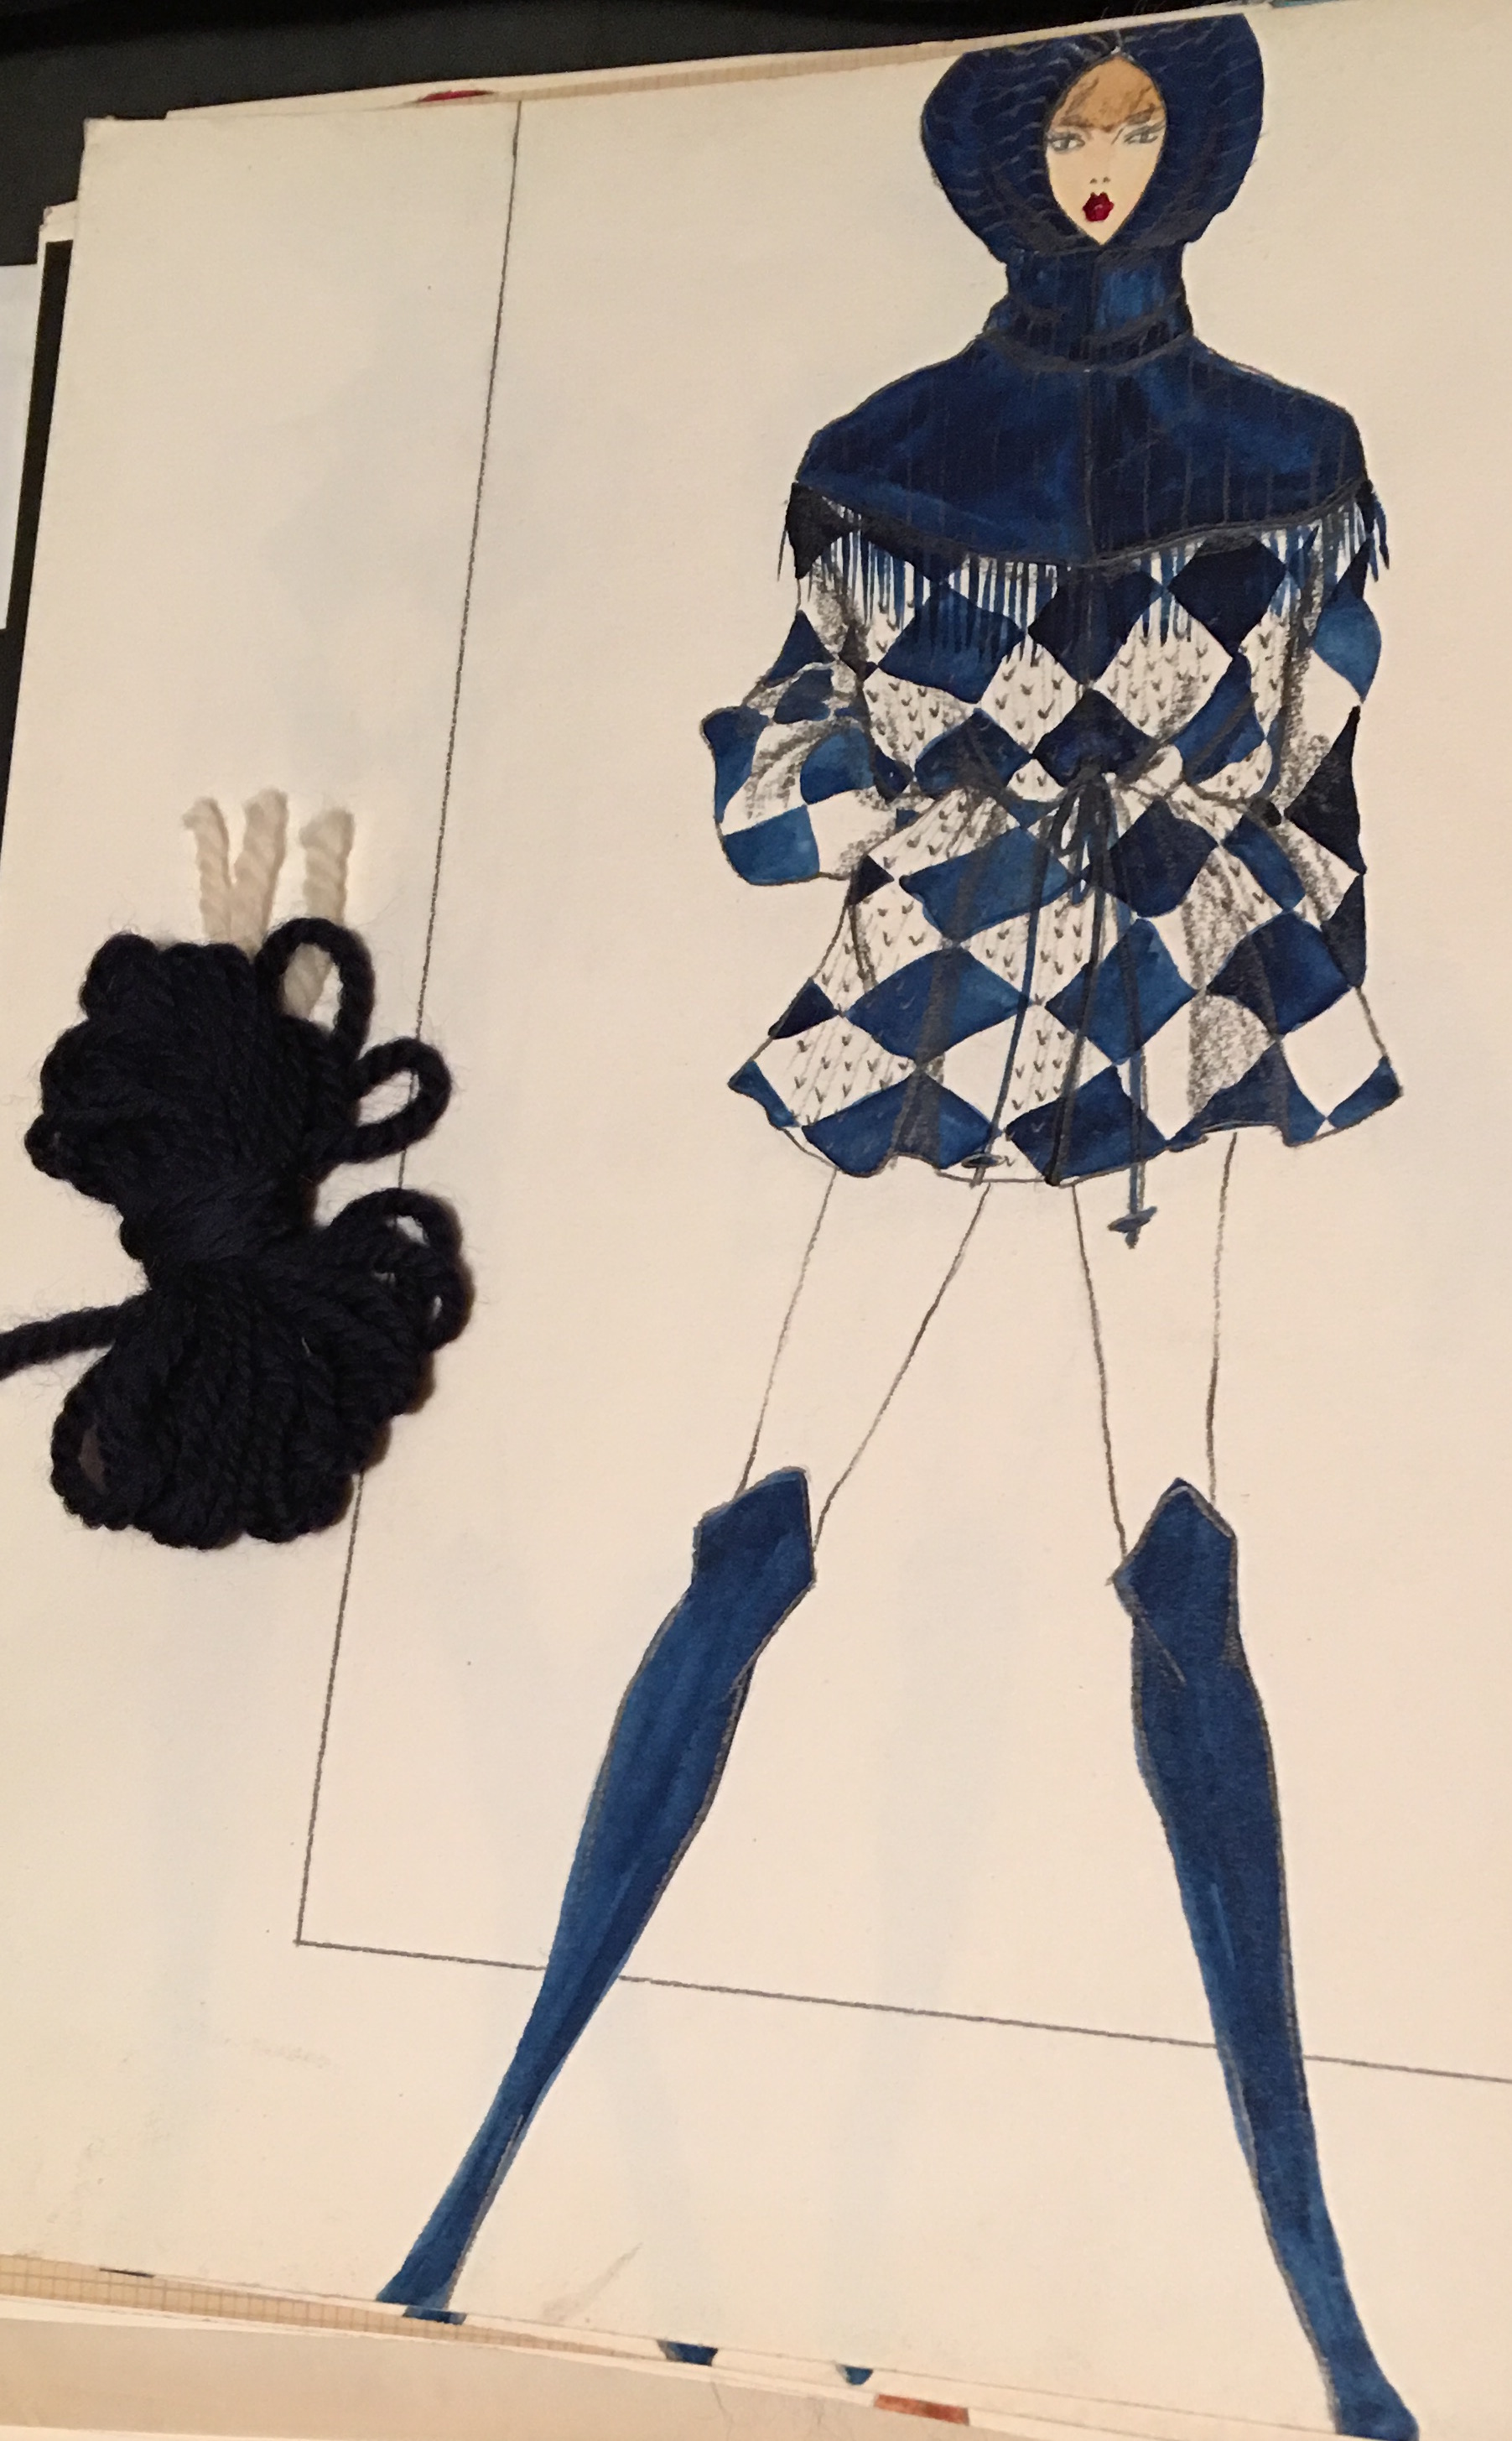
 Finally, after all of that, I got back on track.
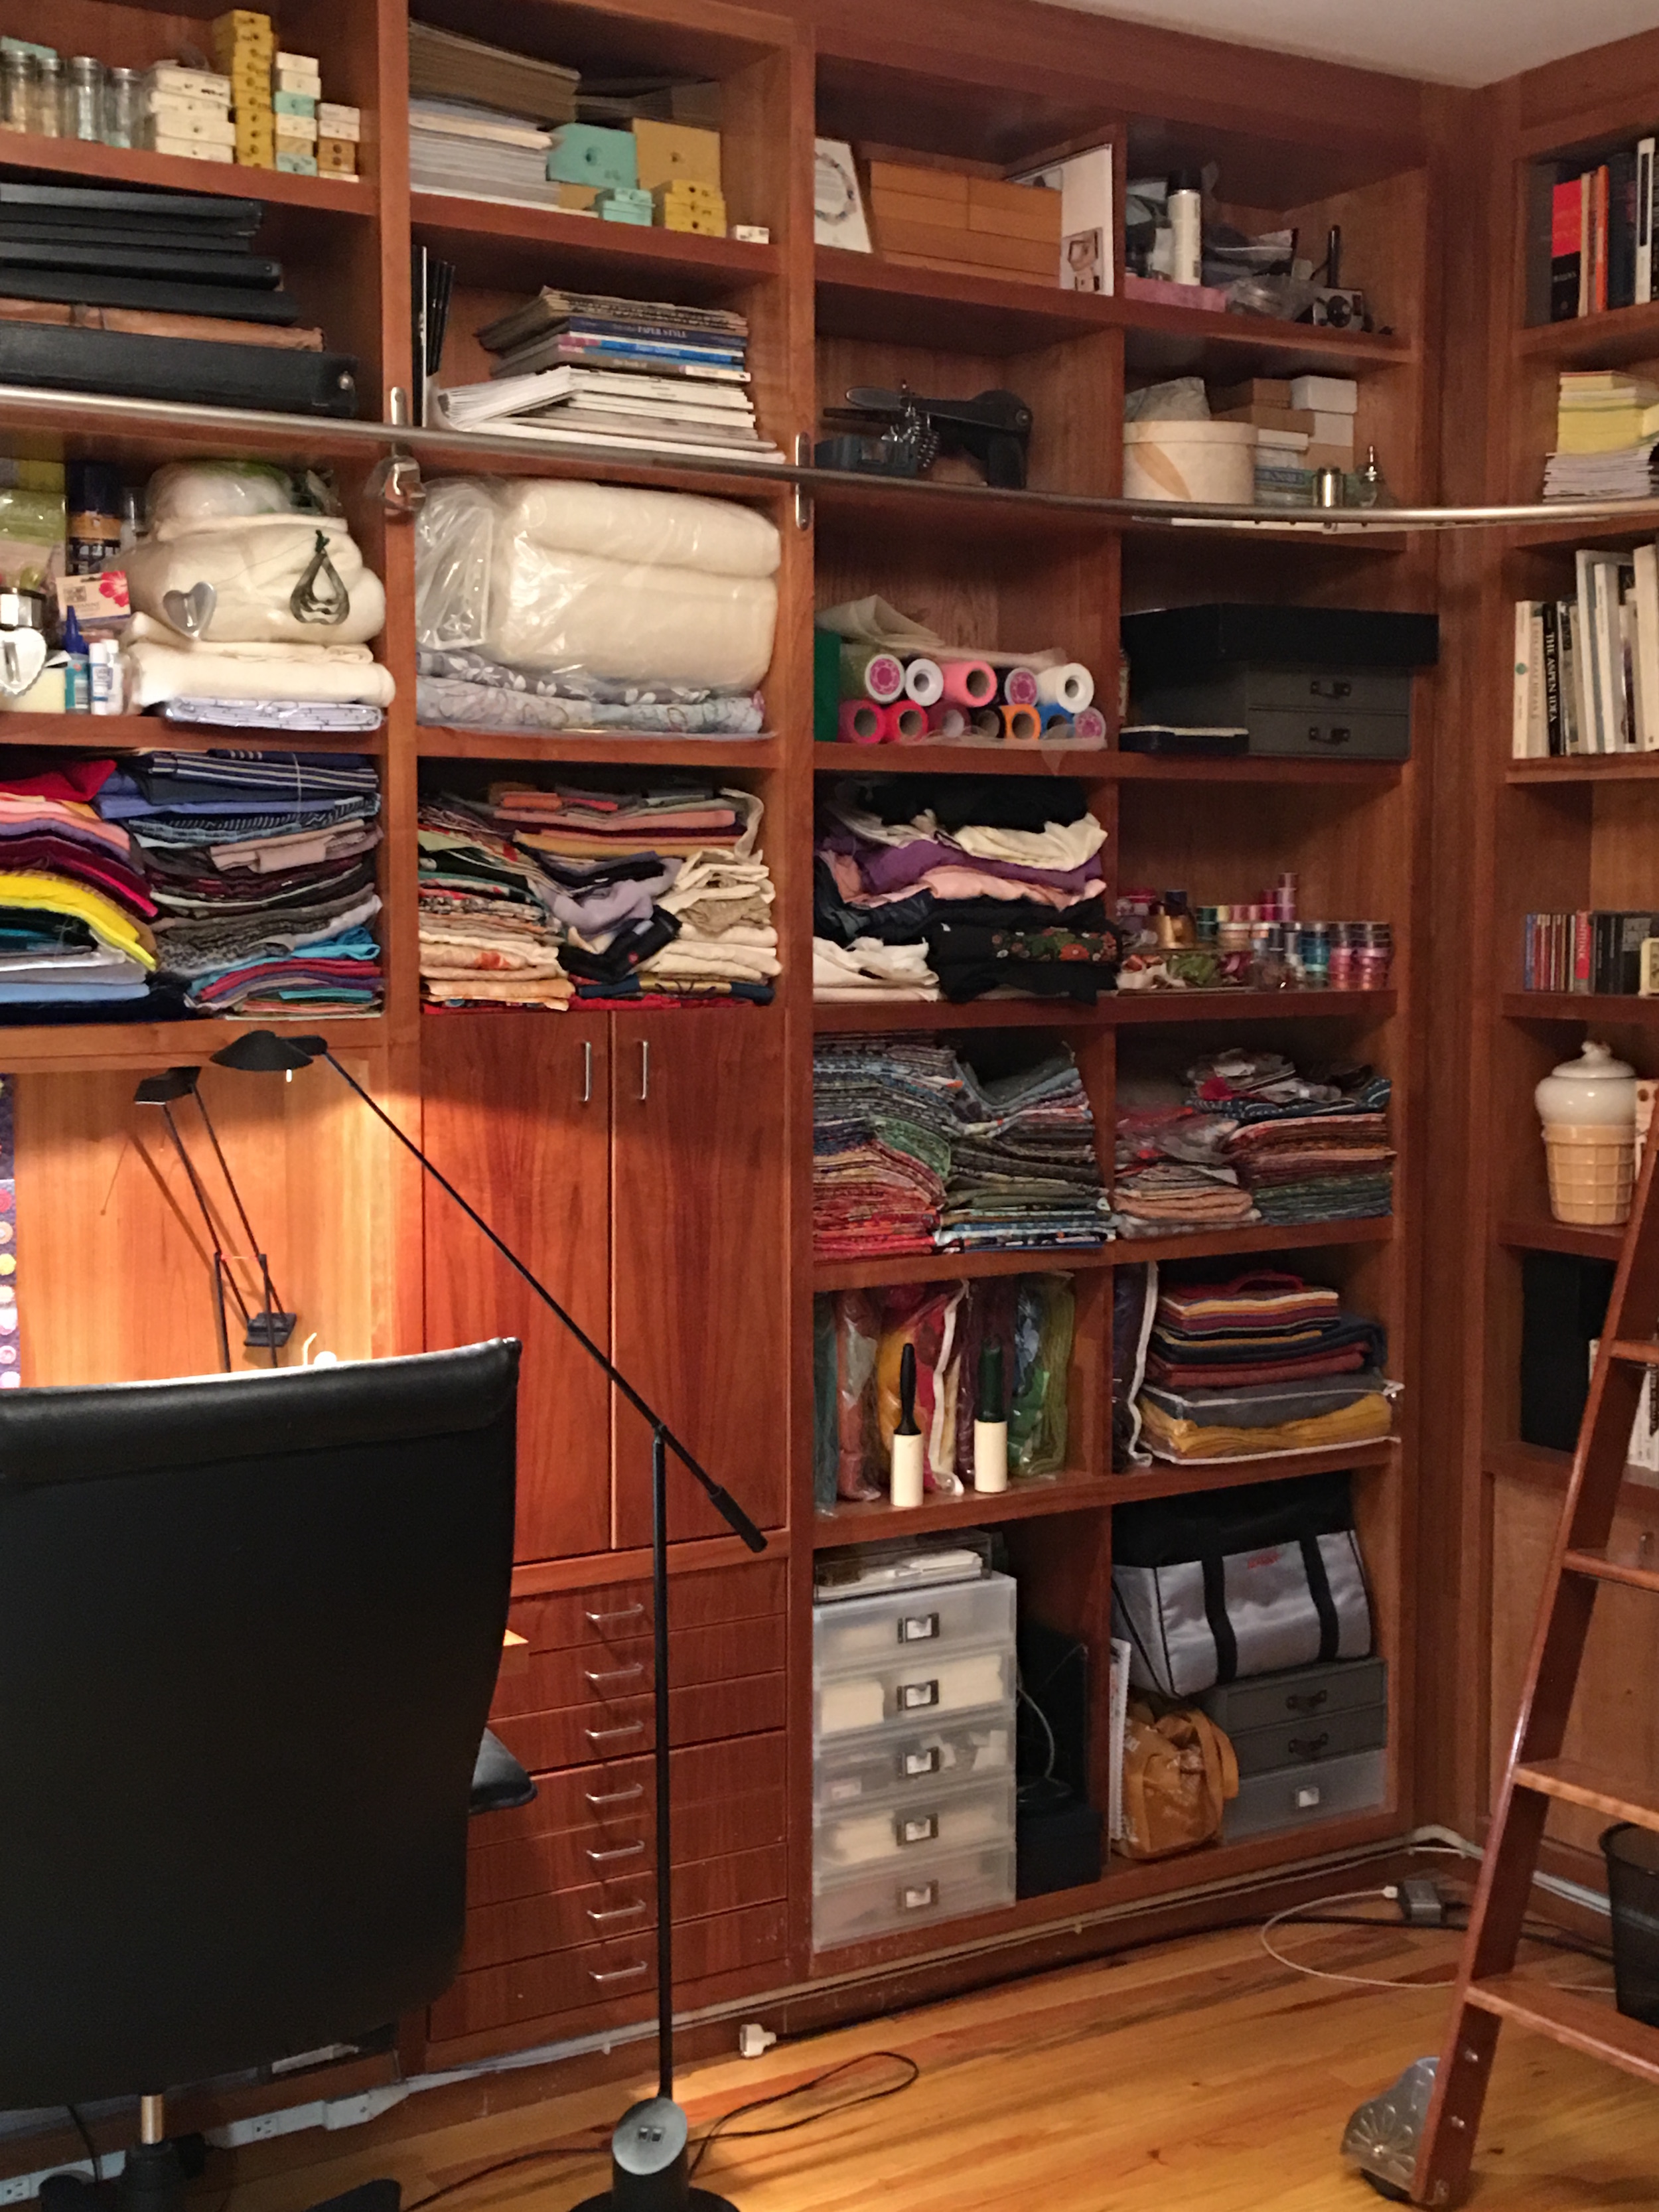
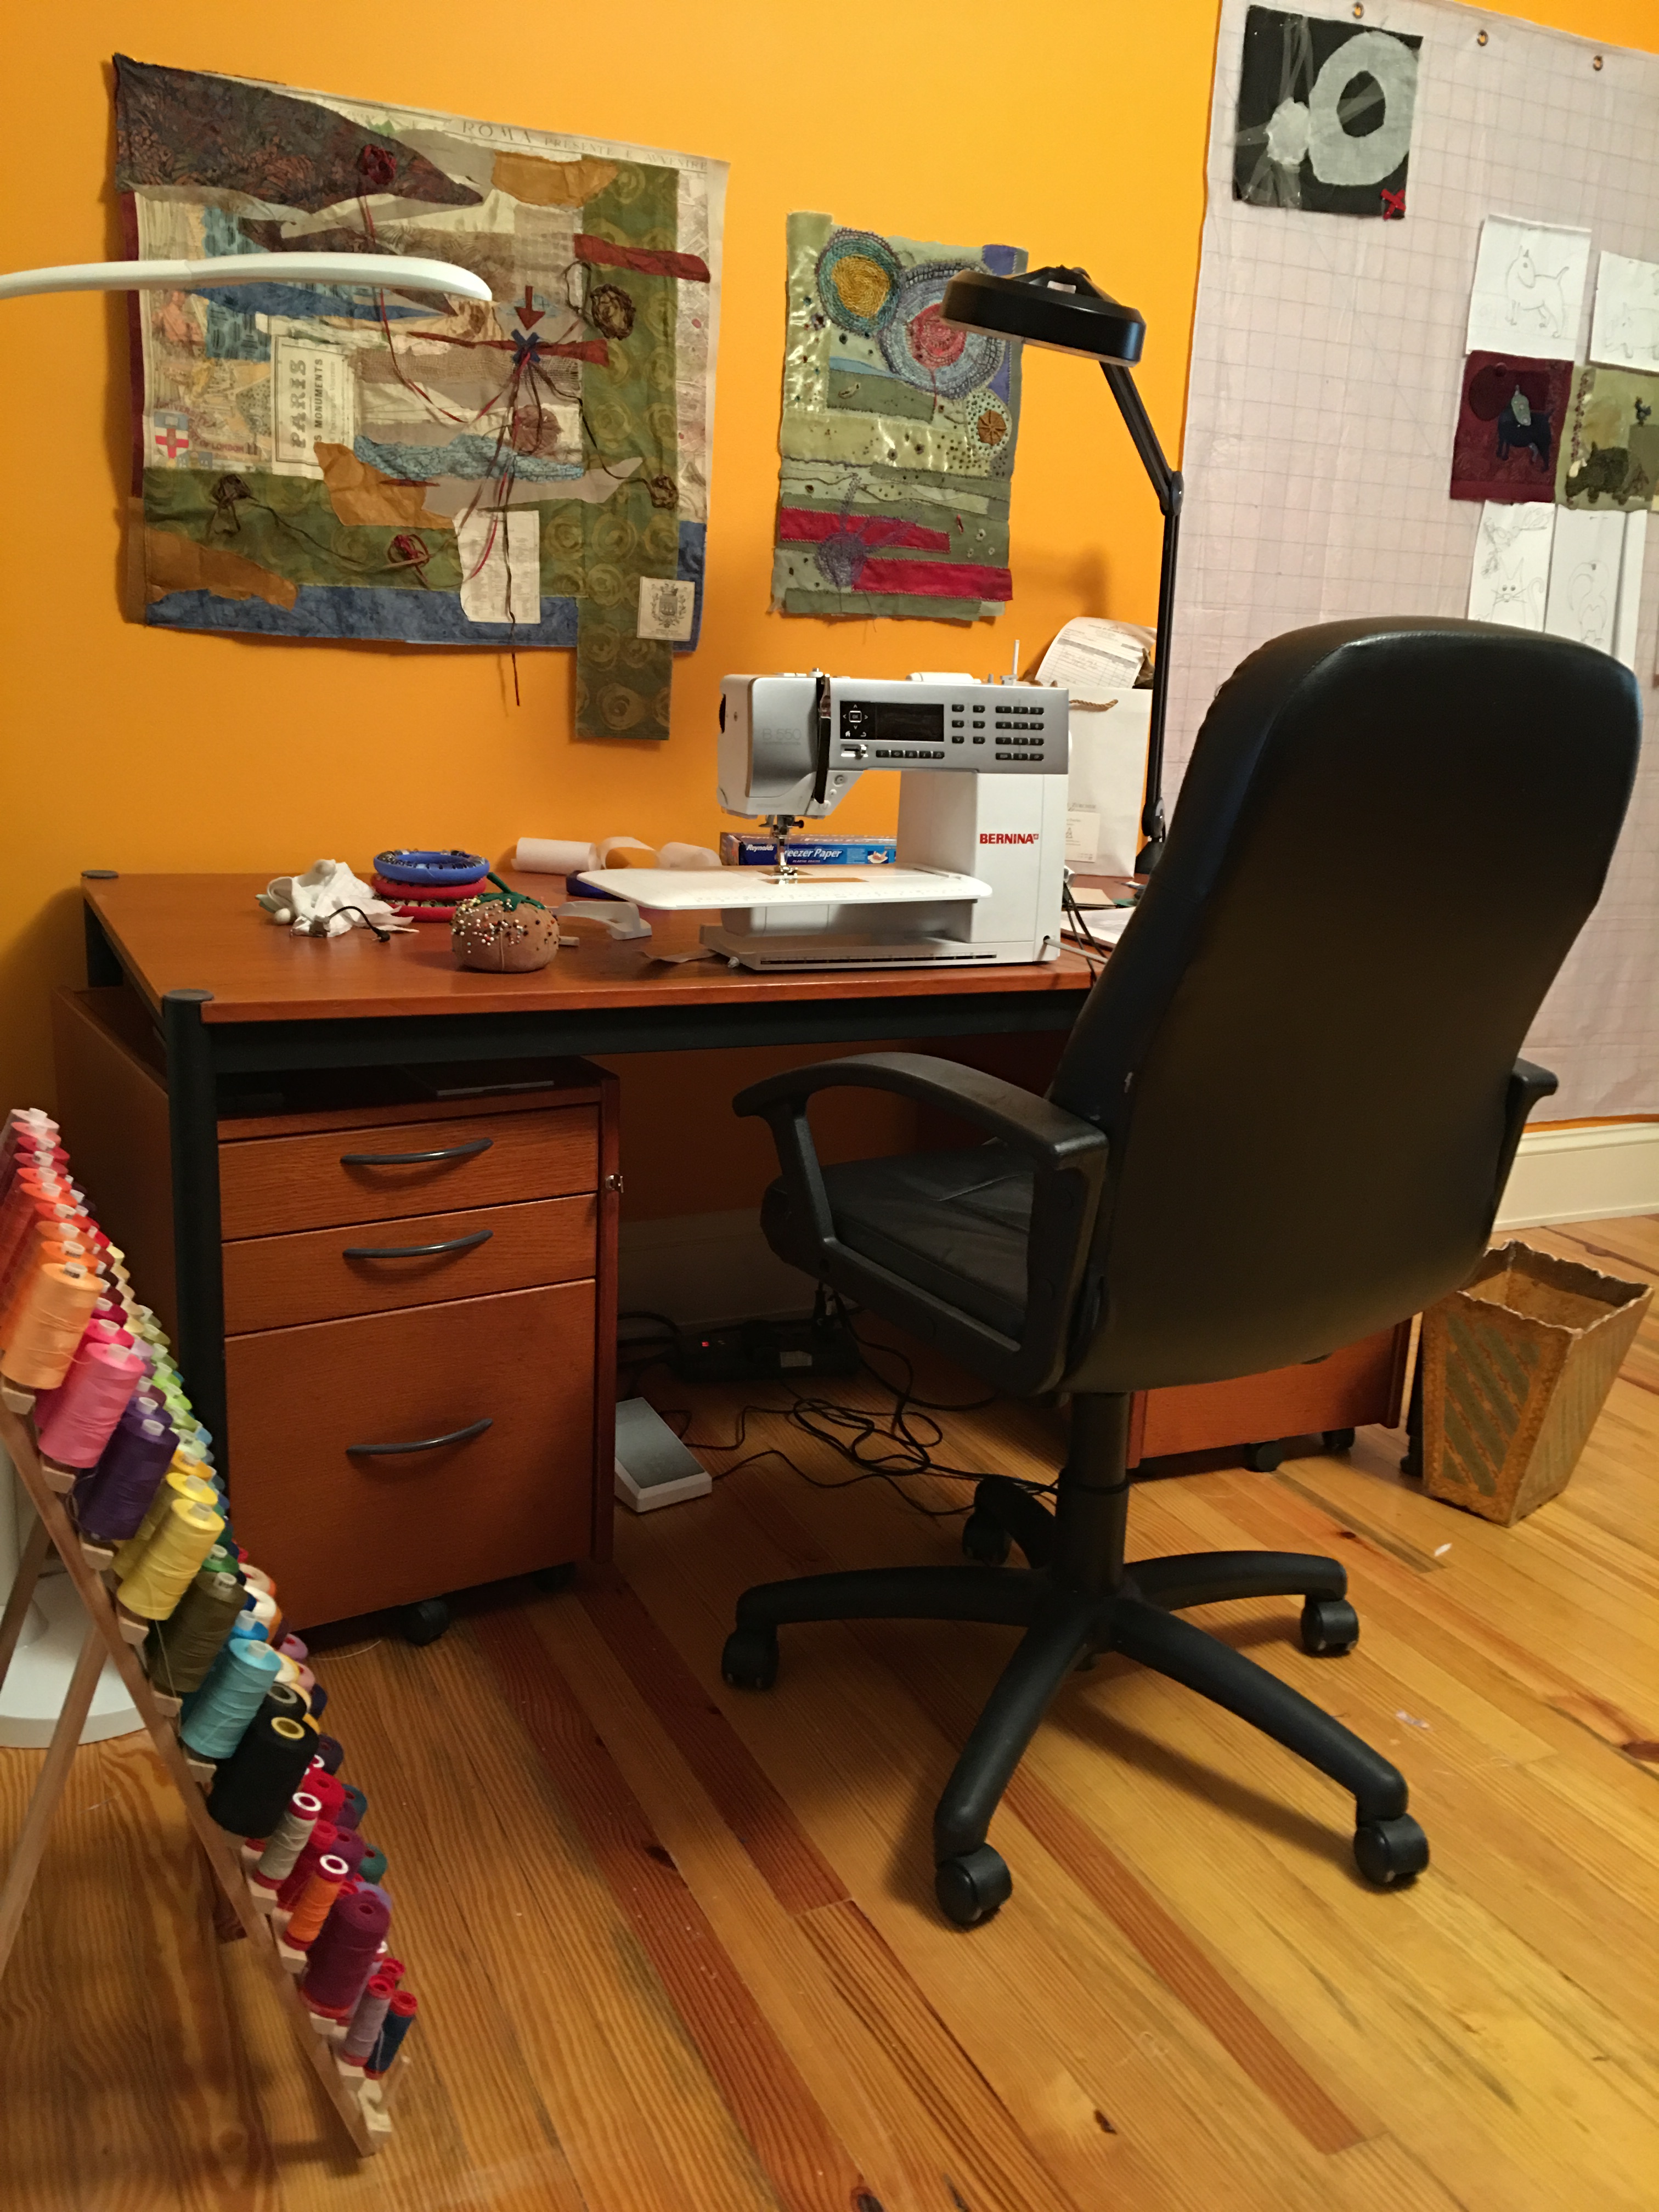 Now it’s time to get back to work – I have a queen-sized quilt to sandwich, baste and free motion quilt and then there are these little guys who keep calling to me.
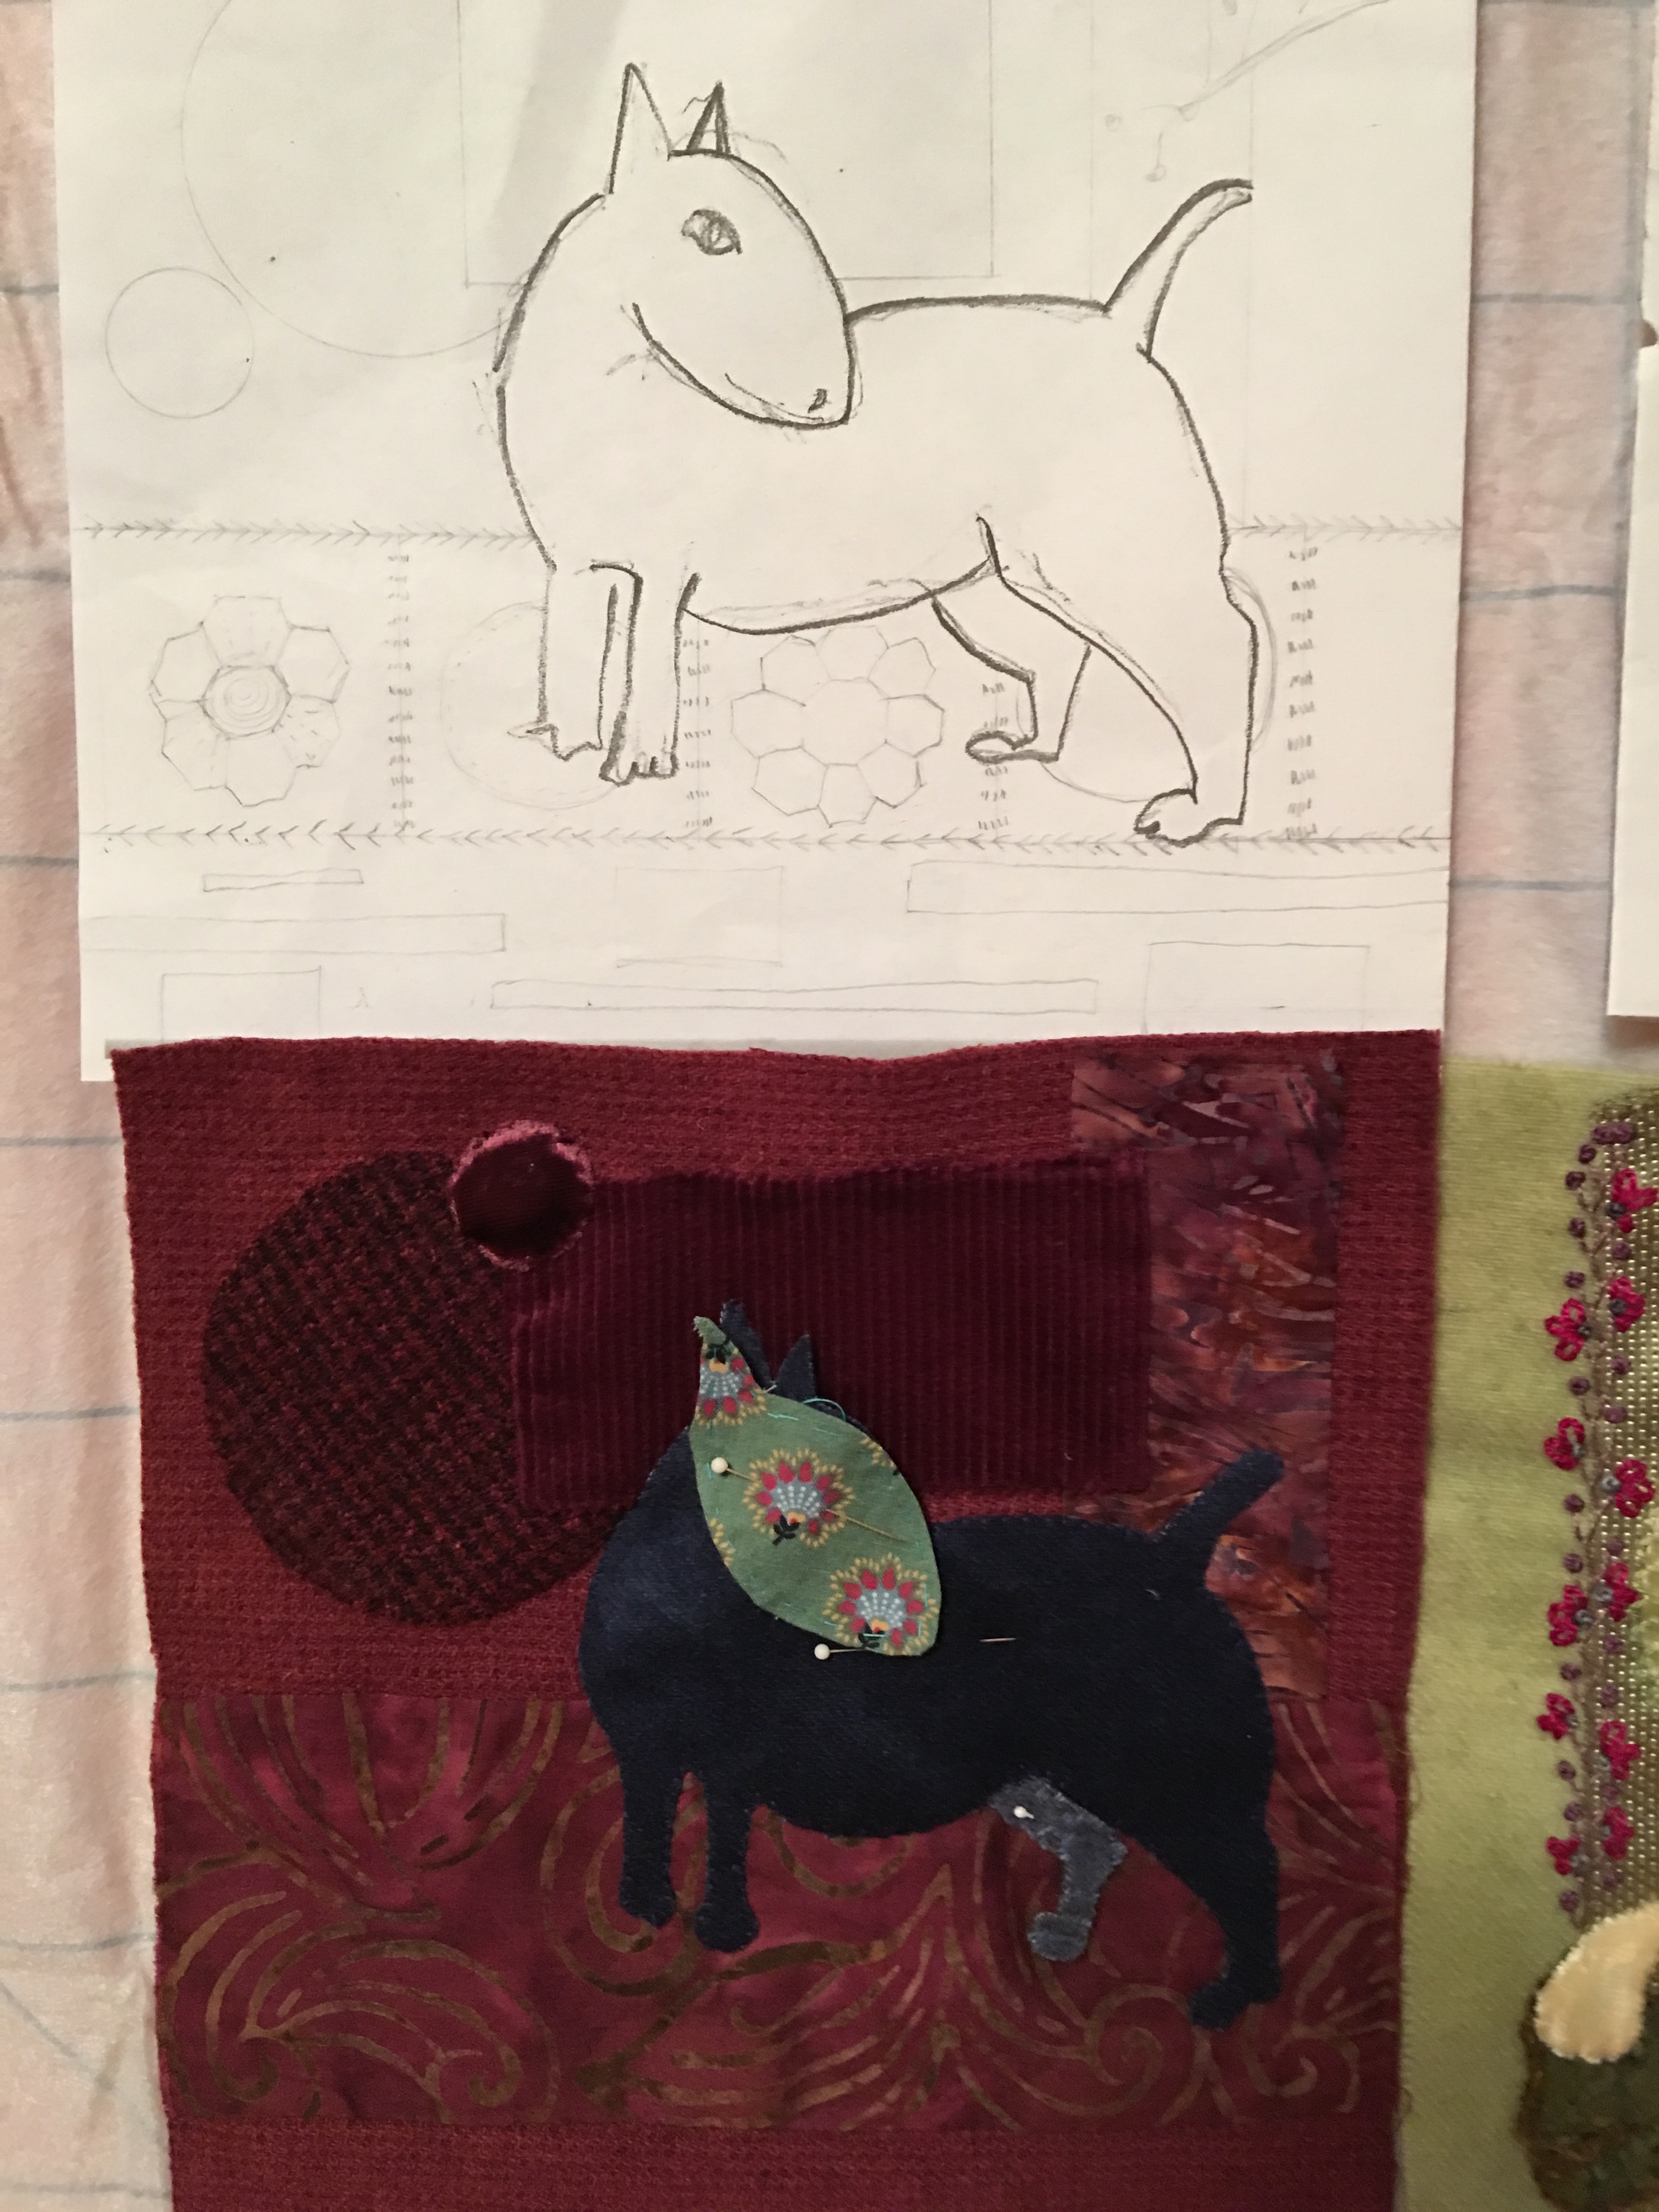
 So all of this will have to wait until the end of the week!
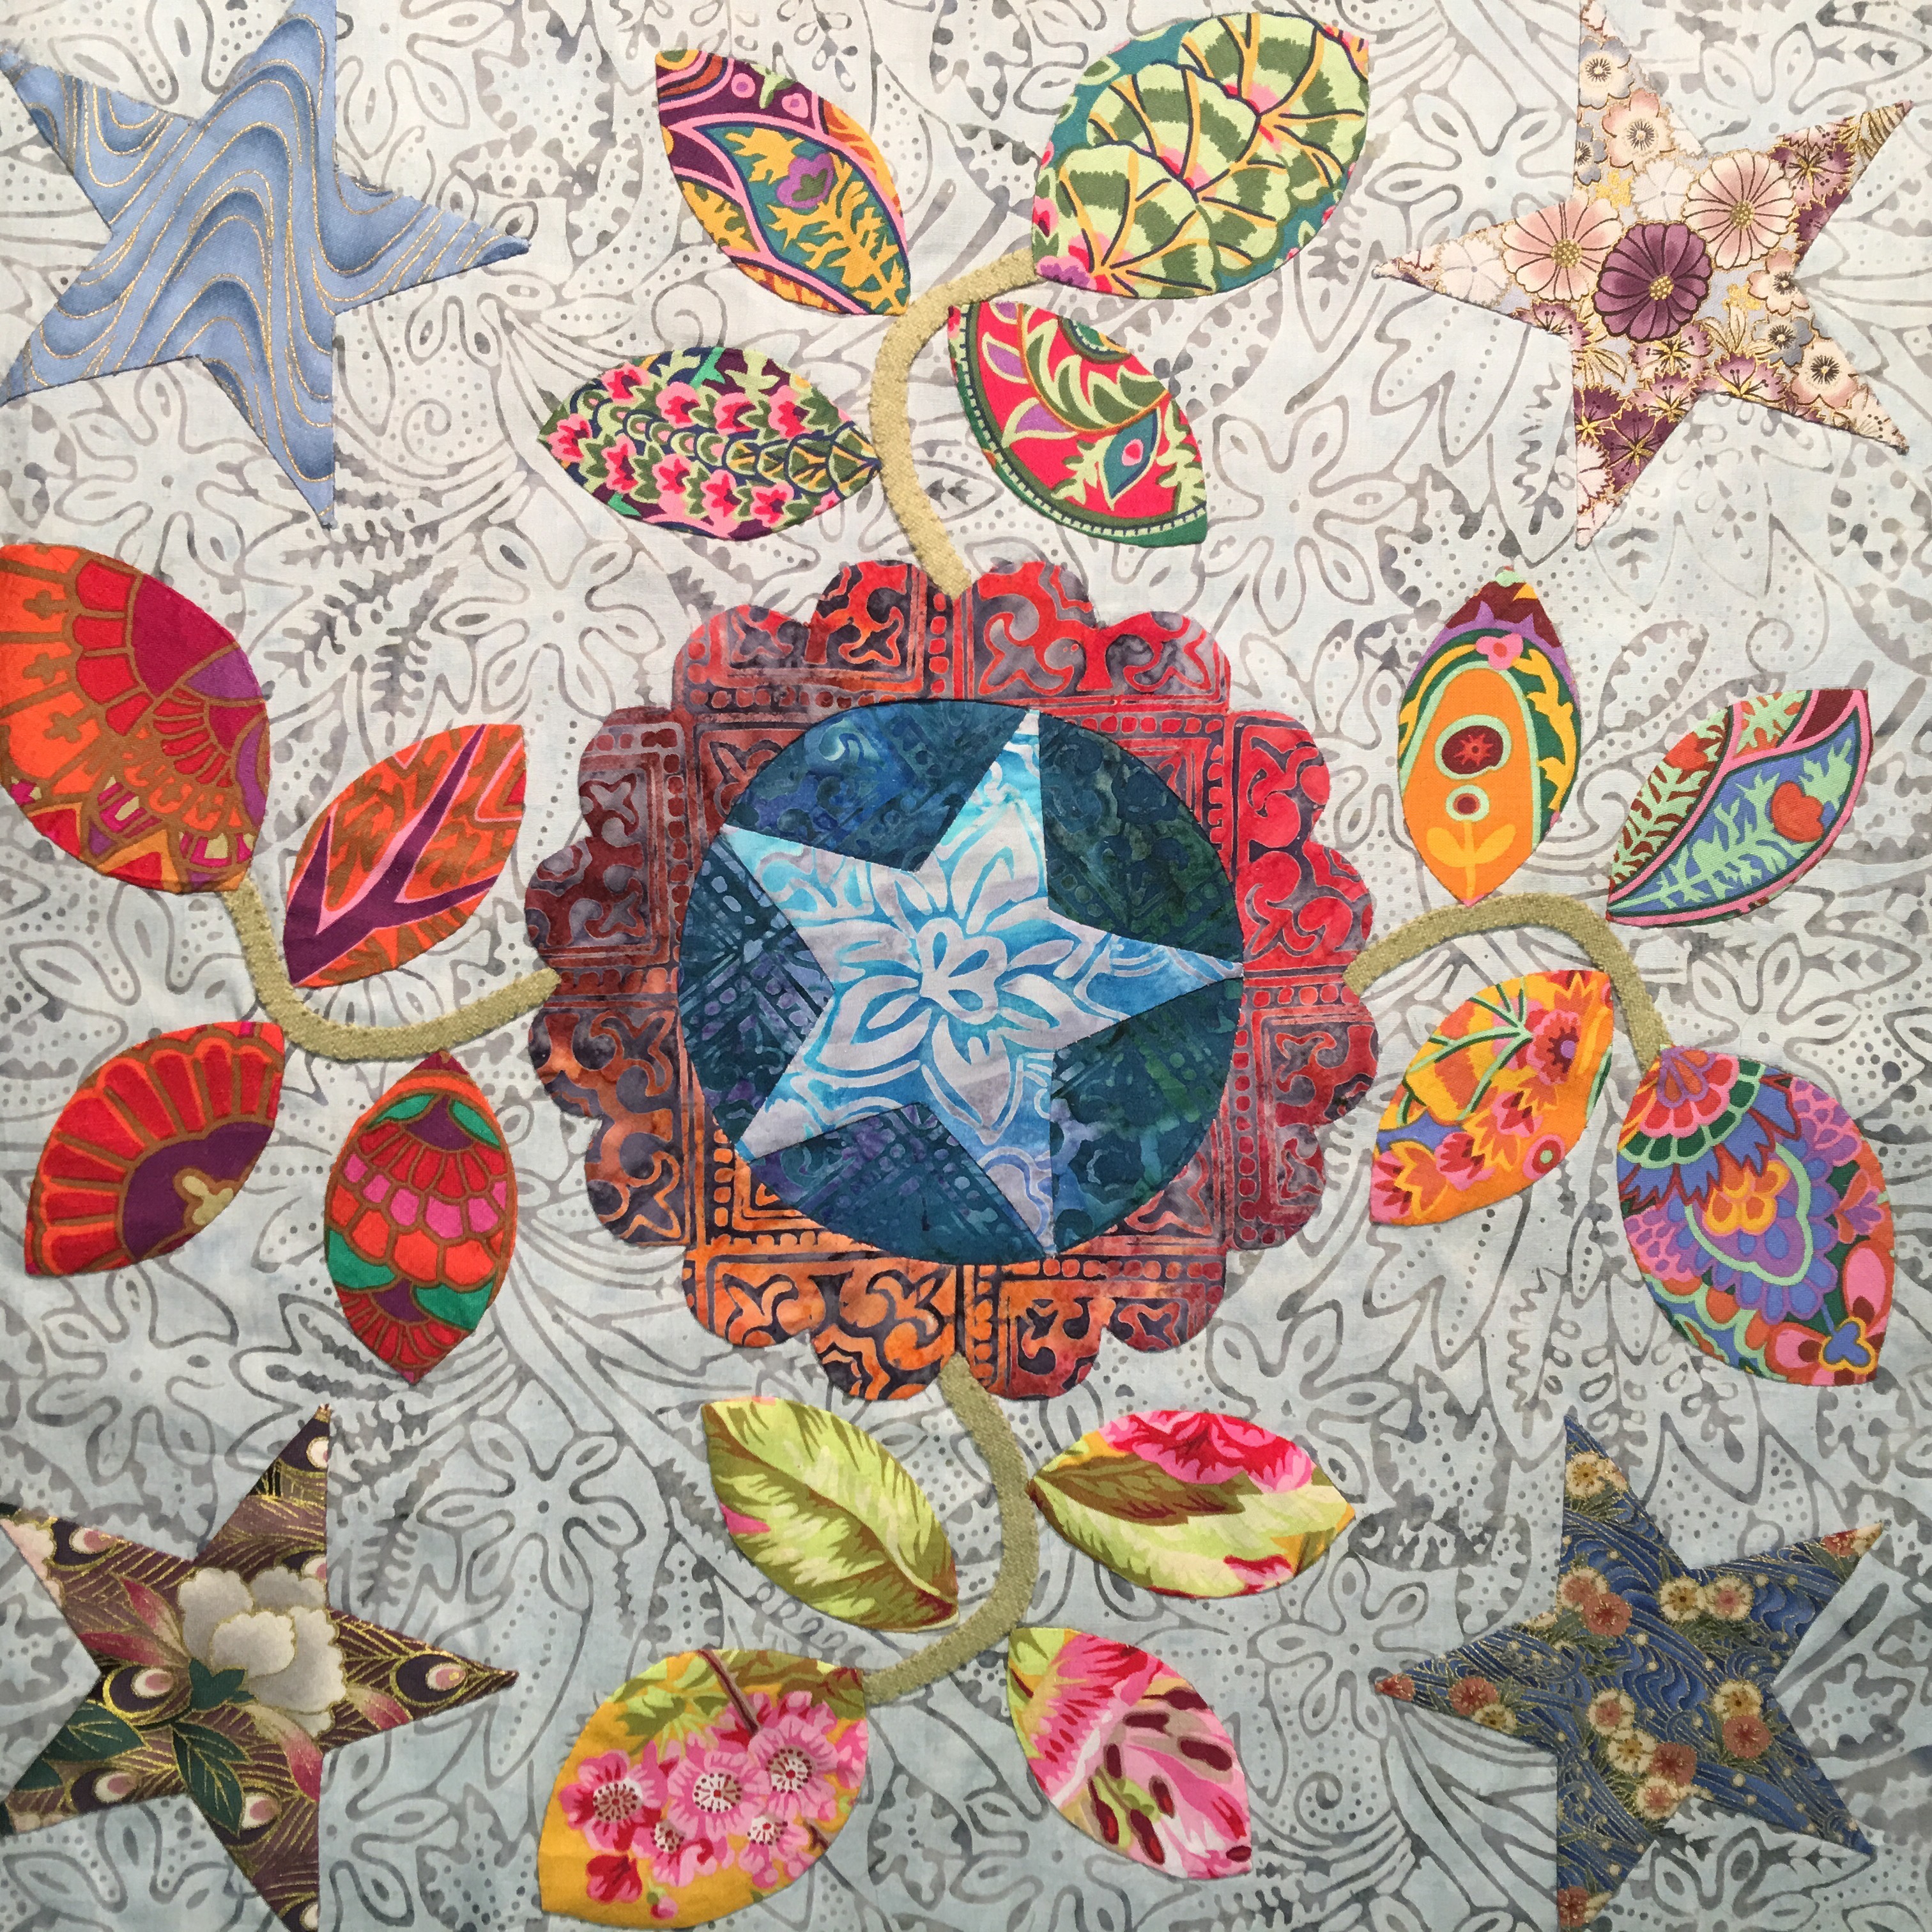


Recent comments