![Turbulent Times]()
by Ariane Zurcher | Nov 21, 2016 | Art, creative process, Design |
I began this blog a few years ago because I wanted a place where I could discuss creativity, art, inspiration and being an artist. Since life has always informed my art, I came up with the name – Where Art & Life Meet. Art has always been the thing that saves me. When I am creating I am completely present, focussed and I am most at peace. I’m in the zone, an almost trance-like state of being. I feel happy and serene. So when life gets turbulent, when I am scared, when the world feels chaotic and unpredictable, art is the thing that beckons me, soothing me, allowing me to appreciate life and it’s beauty, if only in that fleeting moment. However these last two weeks have been particularly difficult, so much so that for an entire day I couldn’t do any art at all. Nothing.
Thankfully, I had my online class, Dyeing to Design given by Elizabeth Barton, which I’ve written about ‘here‘ and ‘here‘ and we had another project due, so I forced myself to focus. We began with some basic shibori dyeing. Shibori is the Japanese art of wrinkling, creasing, folding and binding fabrics before dunking them into dye. One can get a great variety of patterns from Shibori. Here are some of mine.
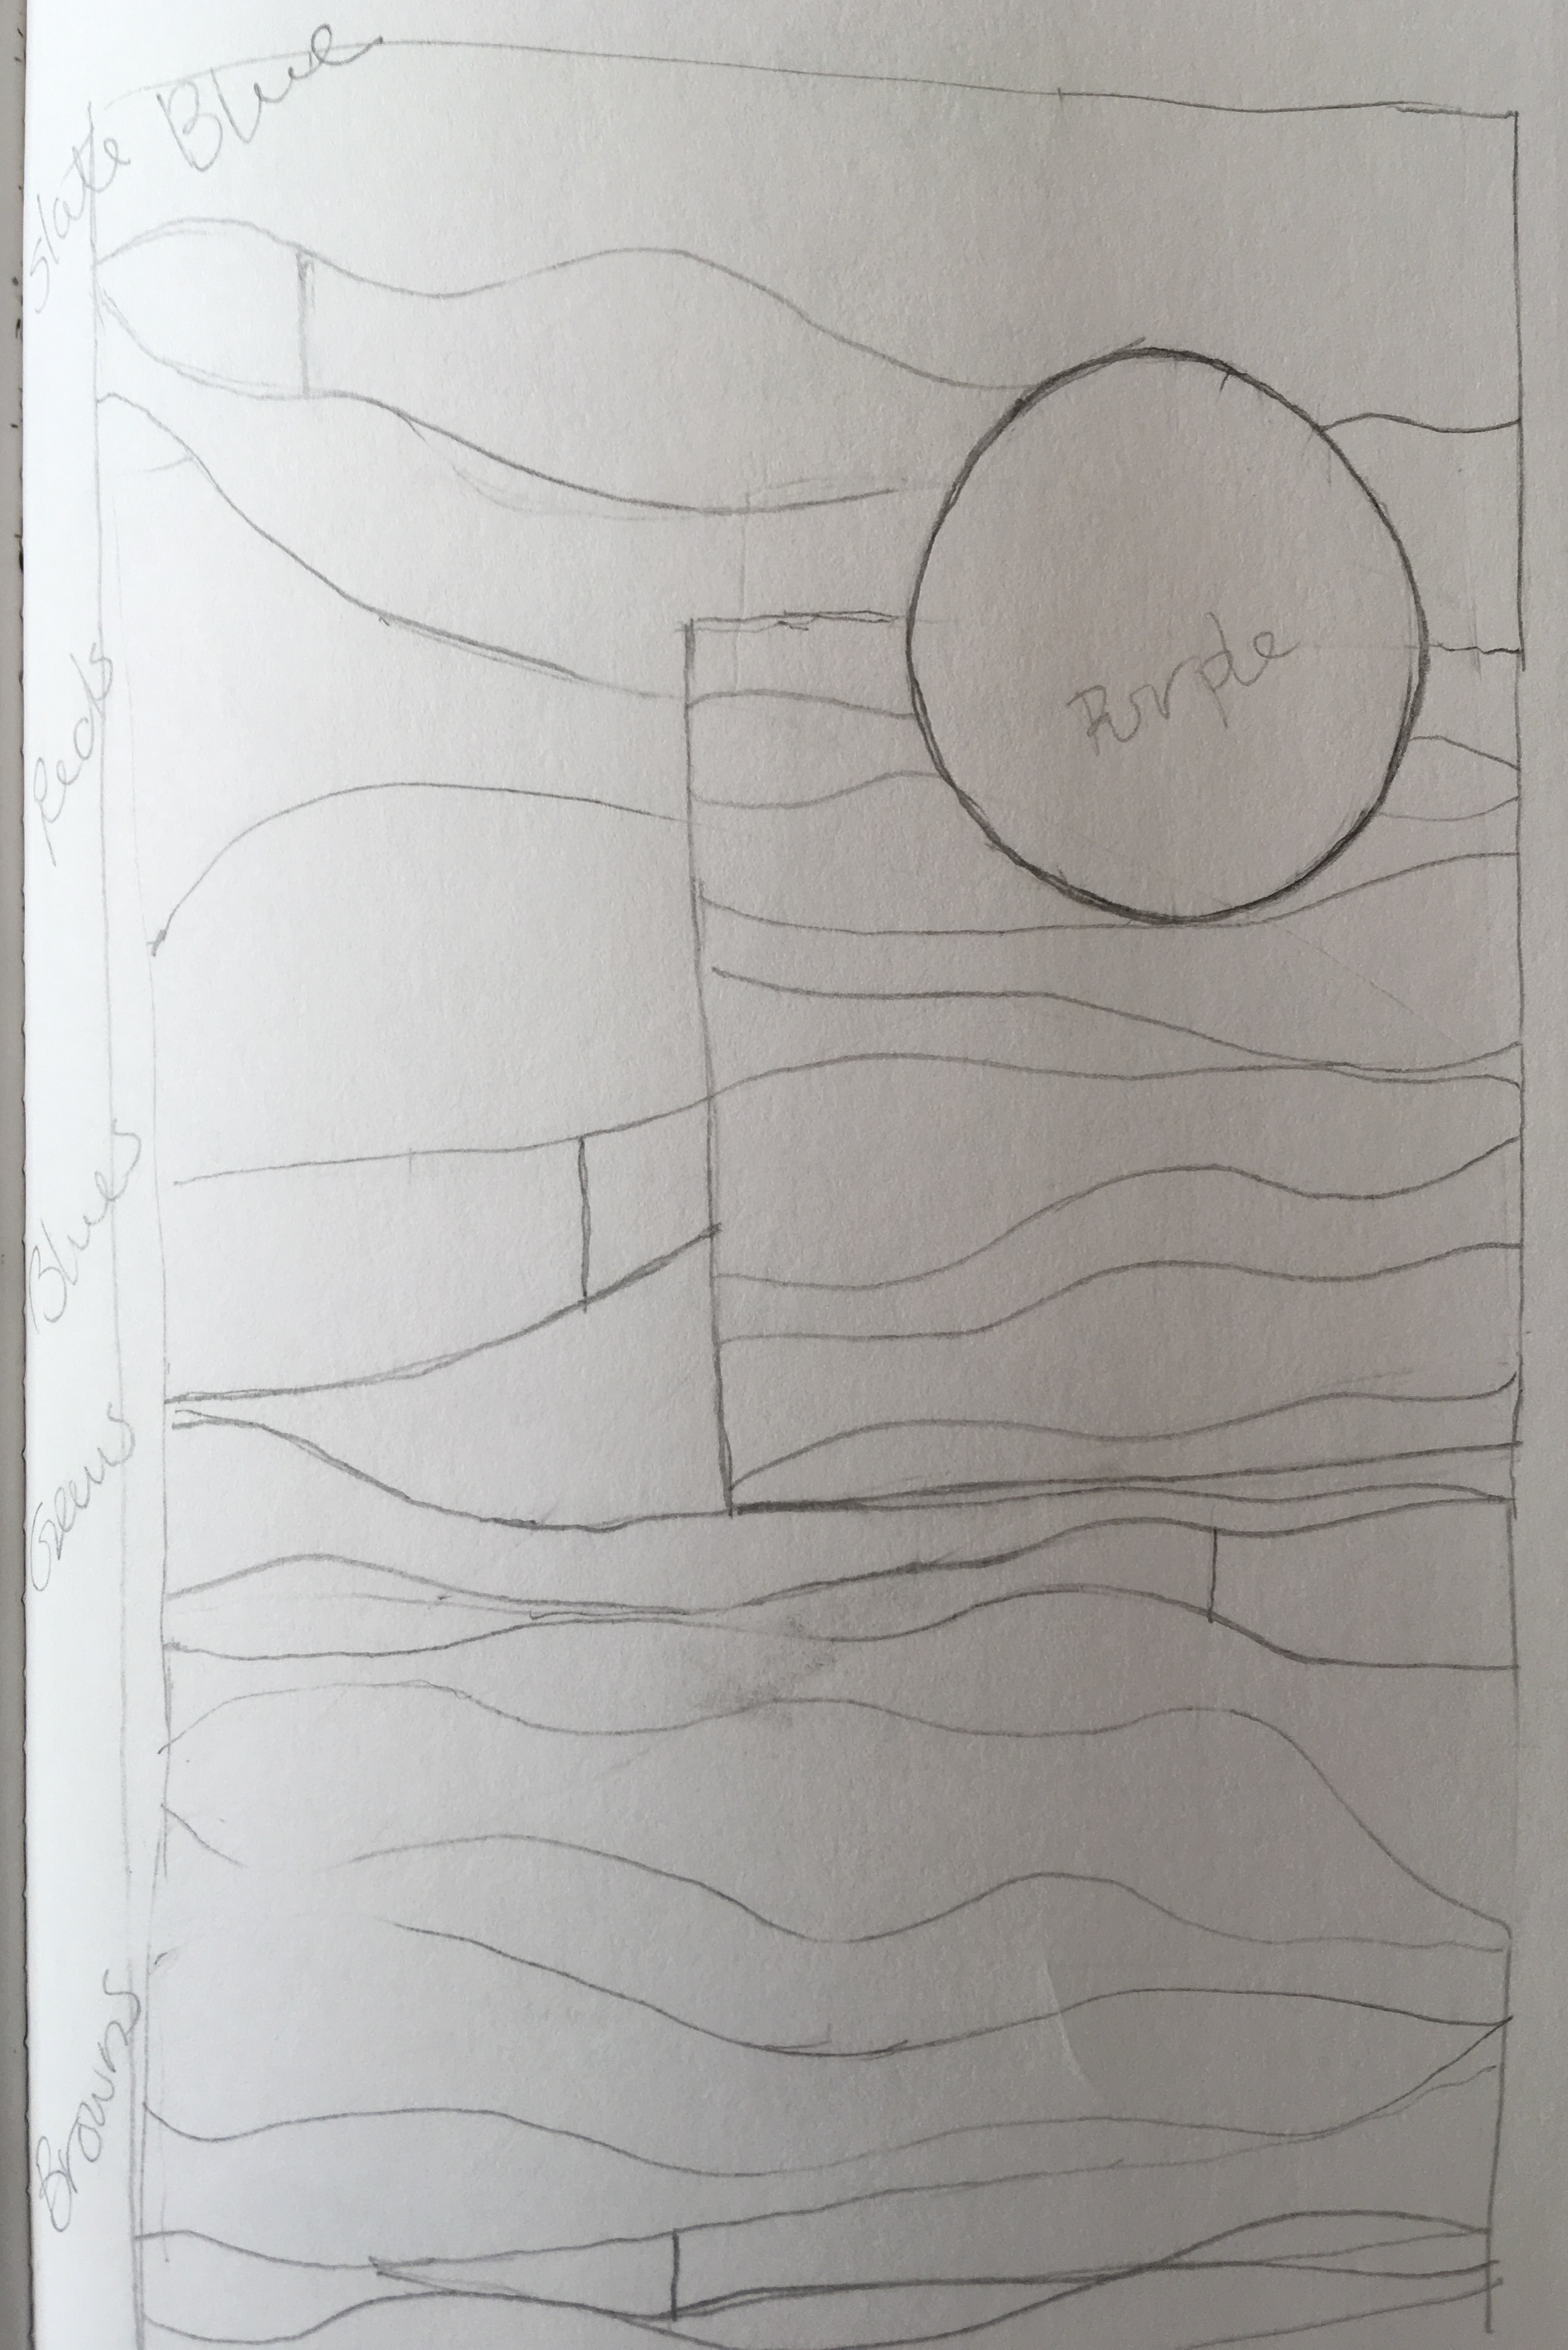
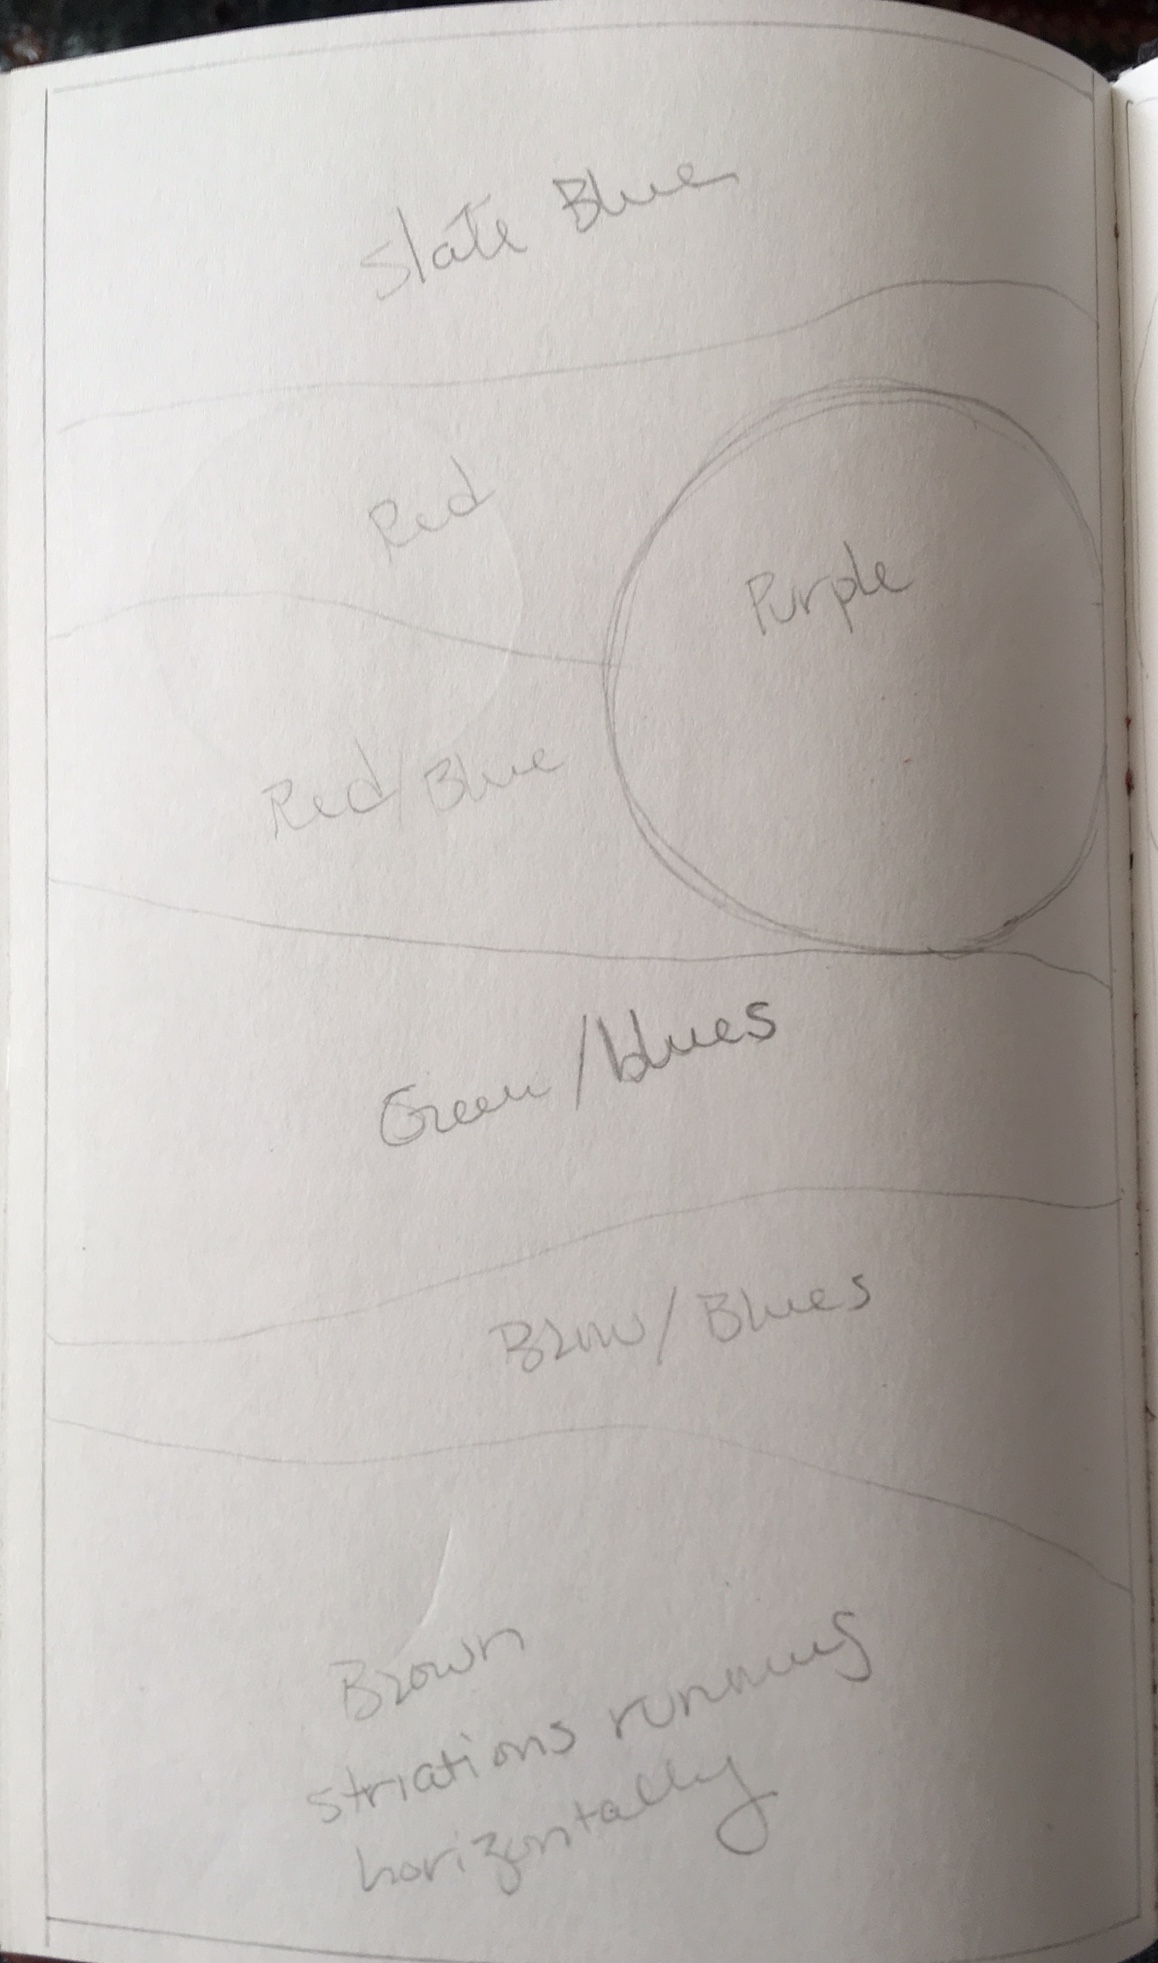
But once the fabrics were dyed, I felt at a loss as to what to do with them. I am drawn to shapes and usually sketch out my ideas first, but these fabrics are so bold, even bossy, that I couldn’t figure out how to respond to them. Finally I had an idea that I began to play around with, but it was going to be far too complicated and I didn’t have enough time to create it…

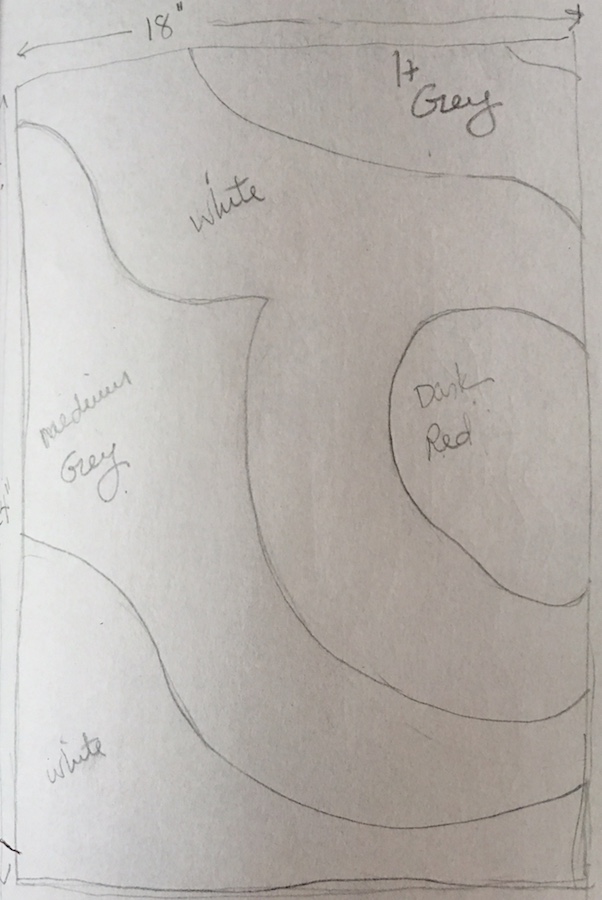
So I refined and came up with this…
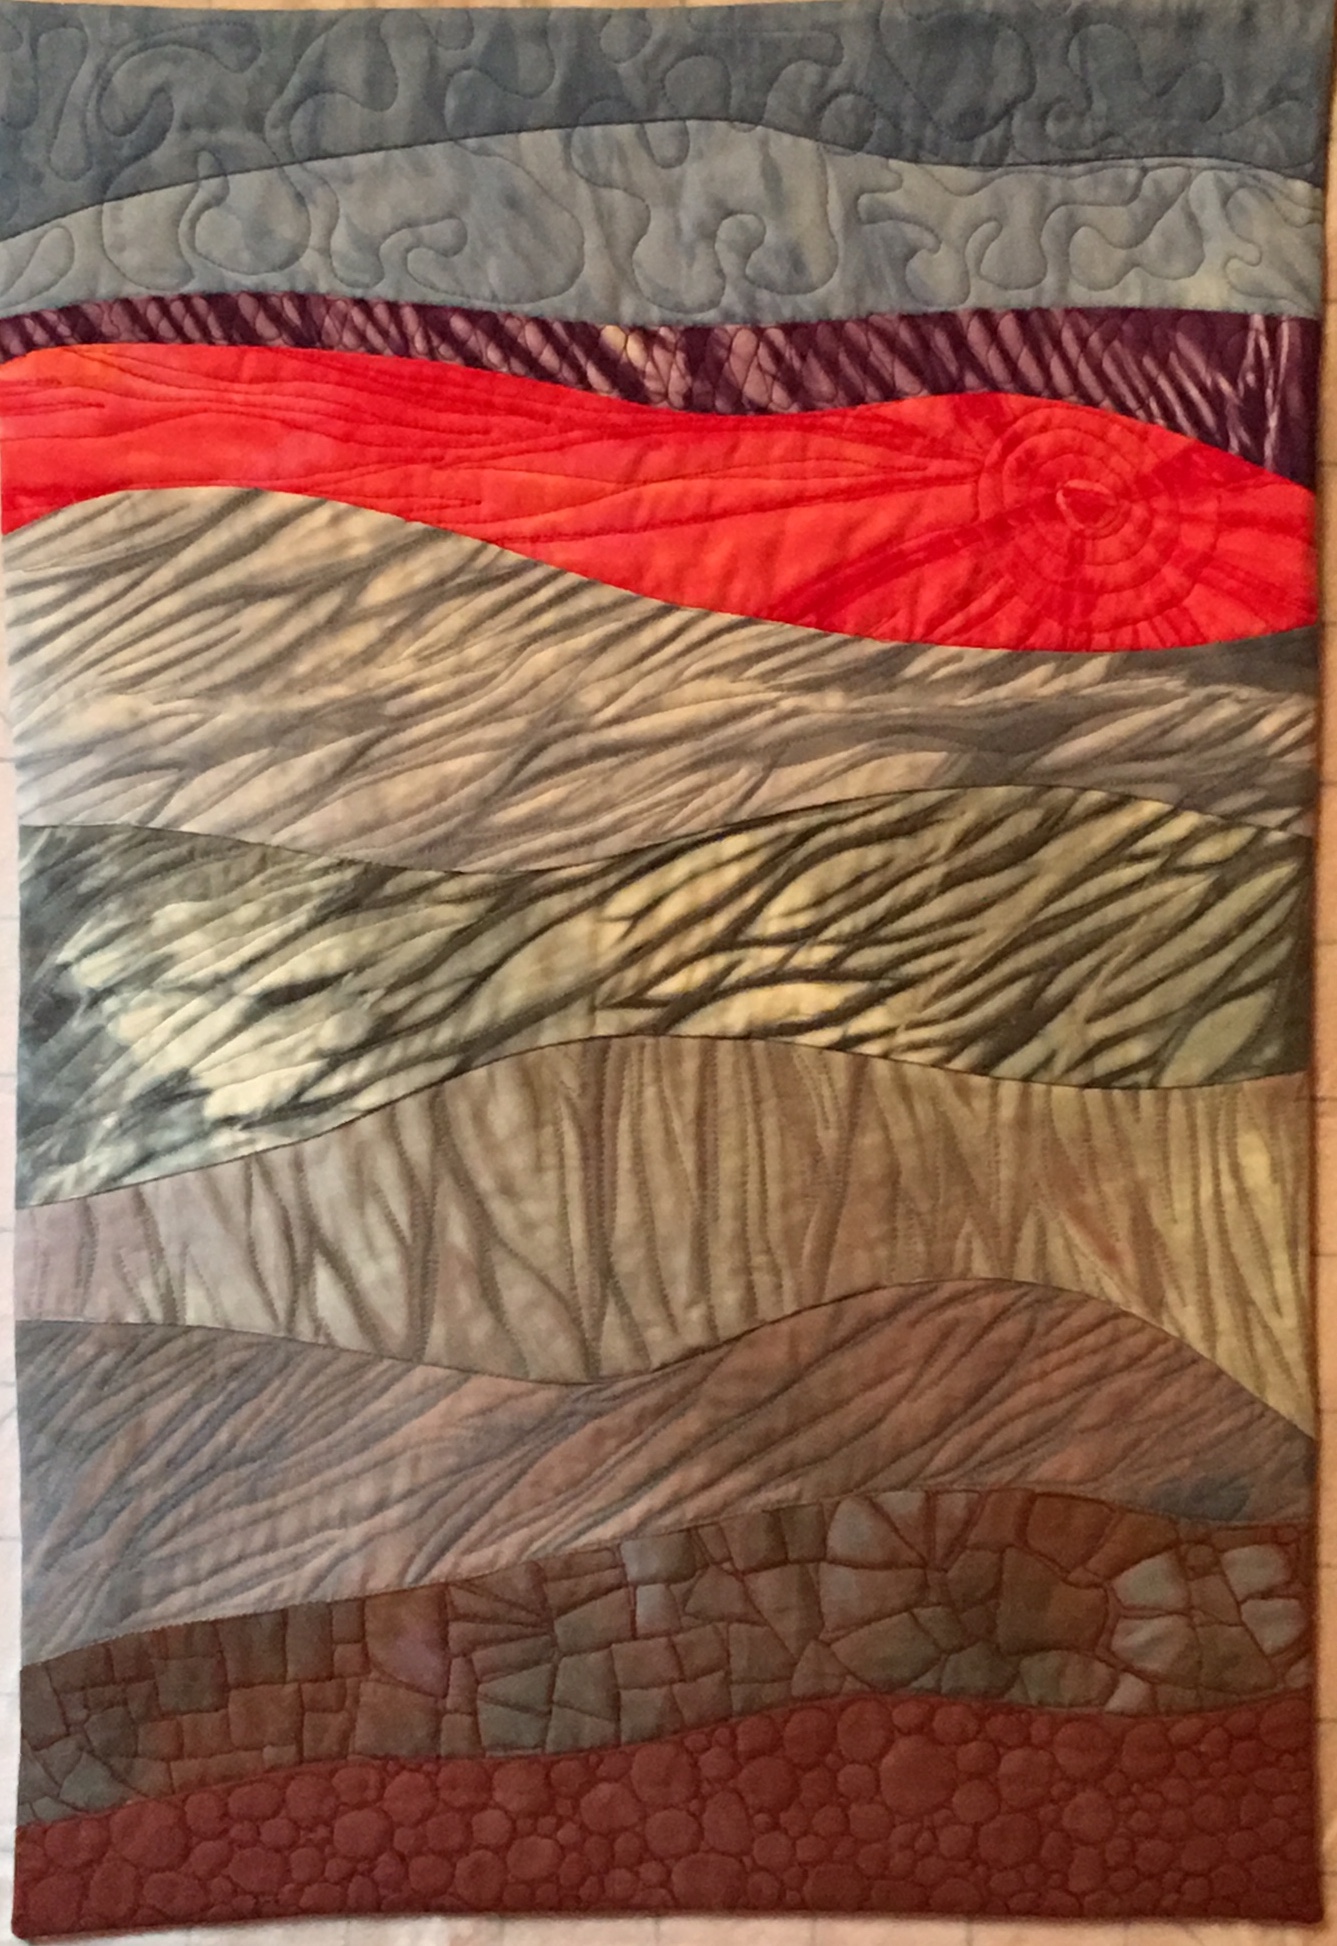
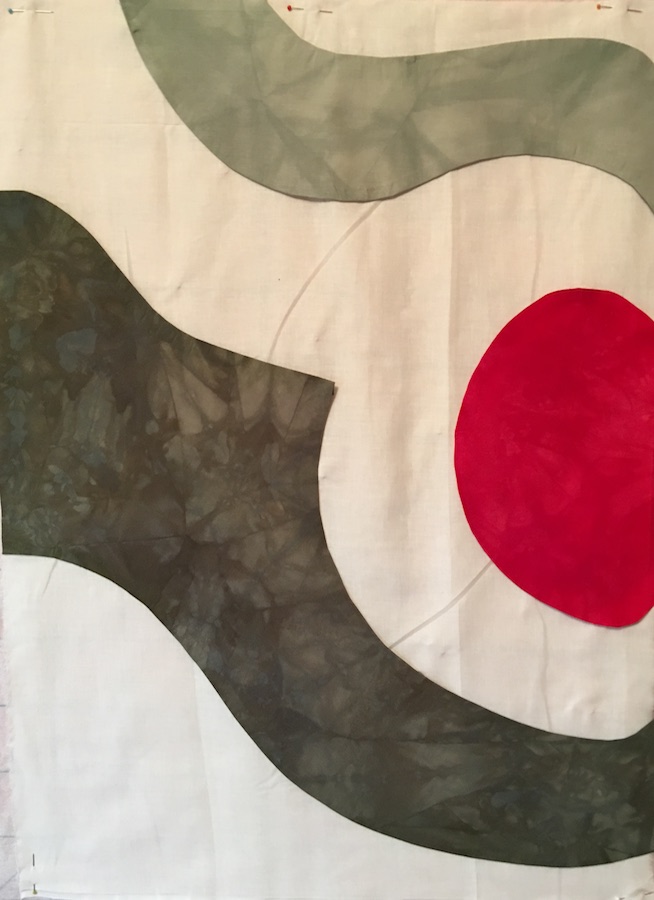
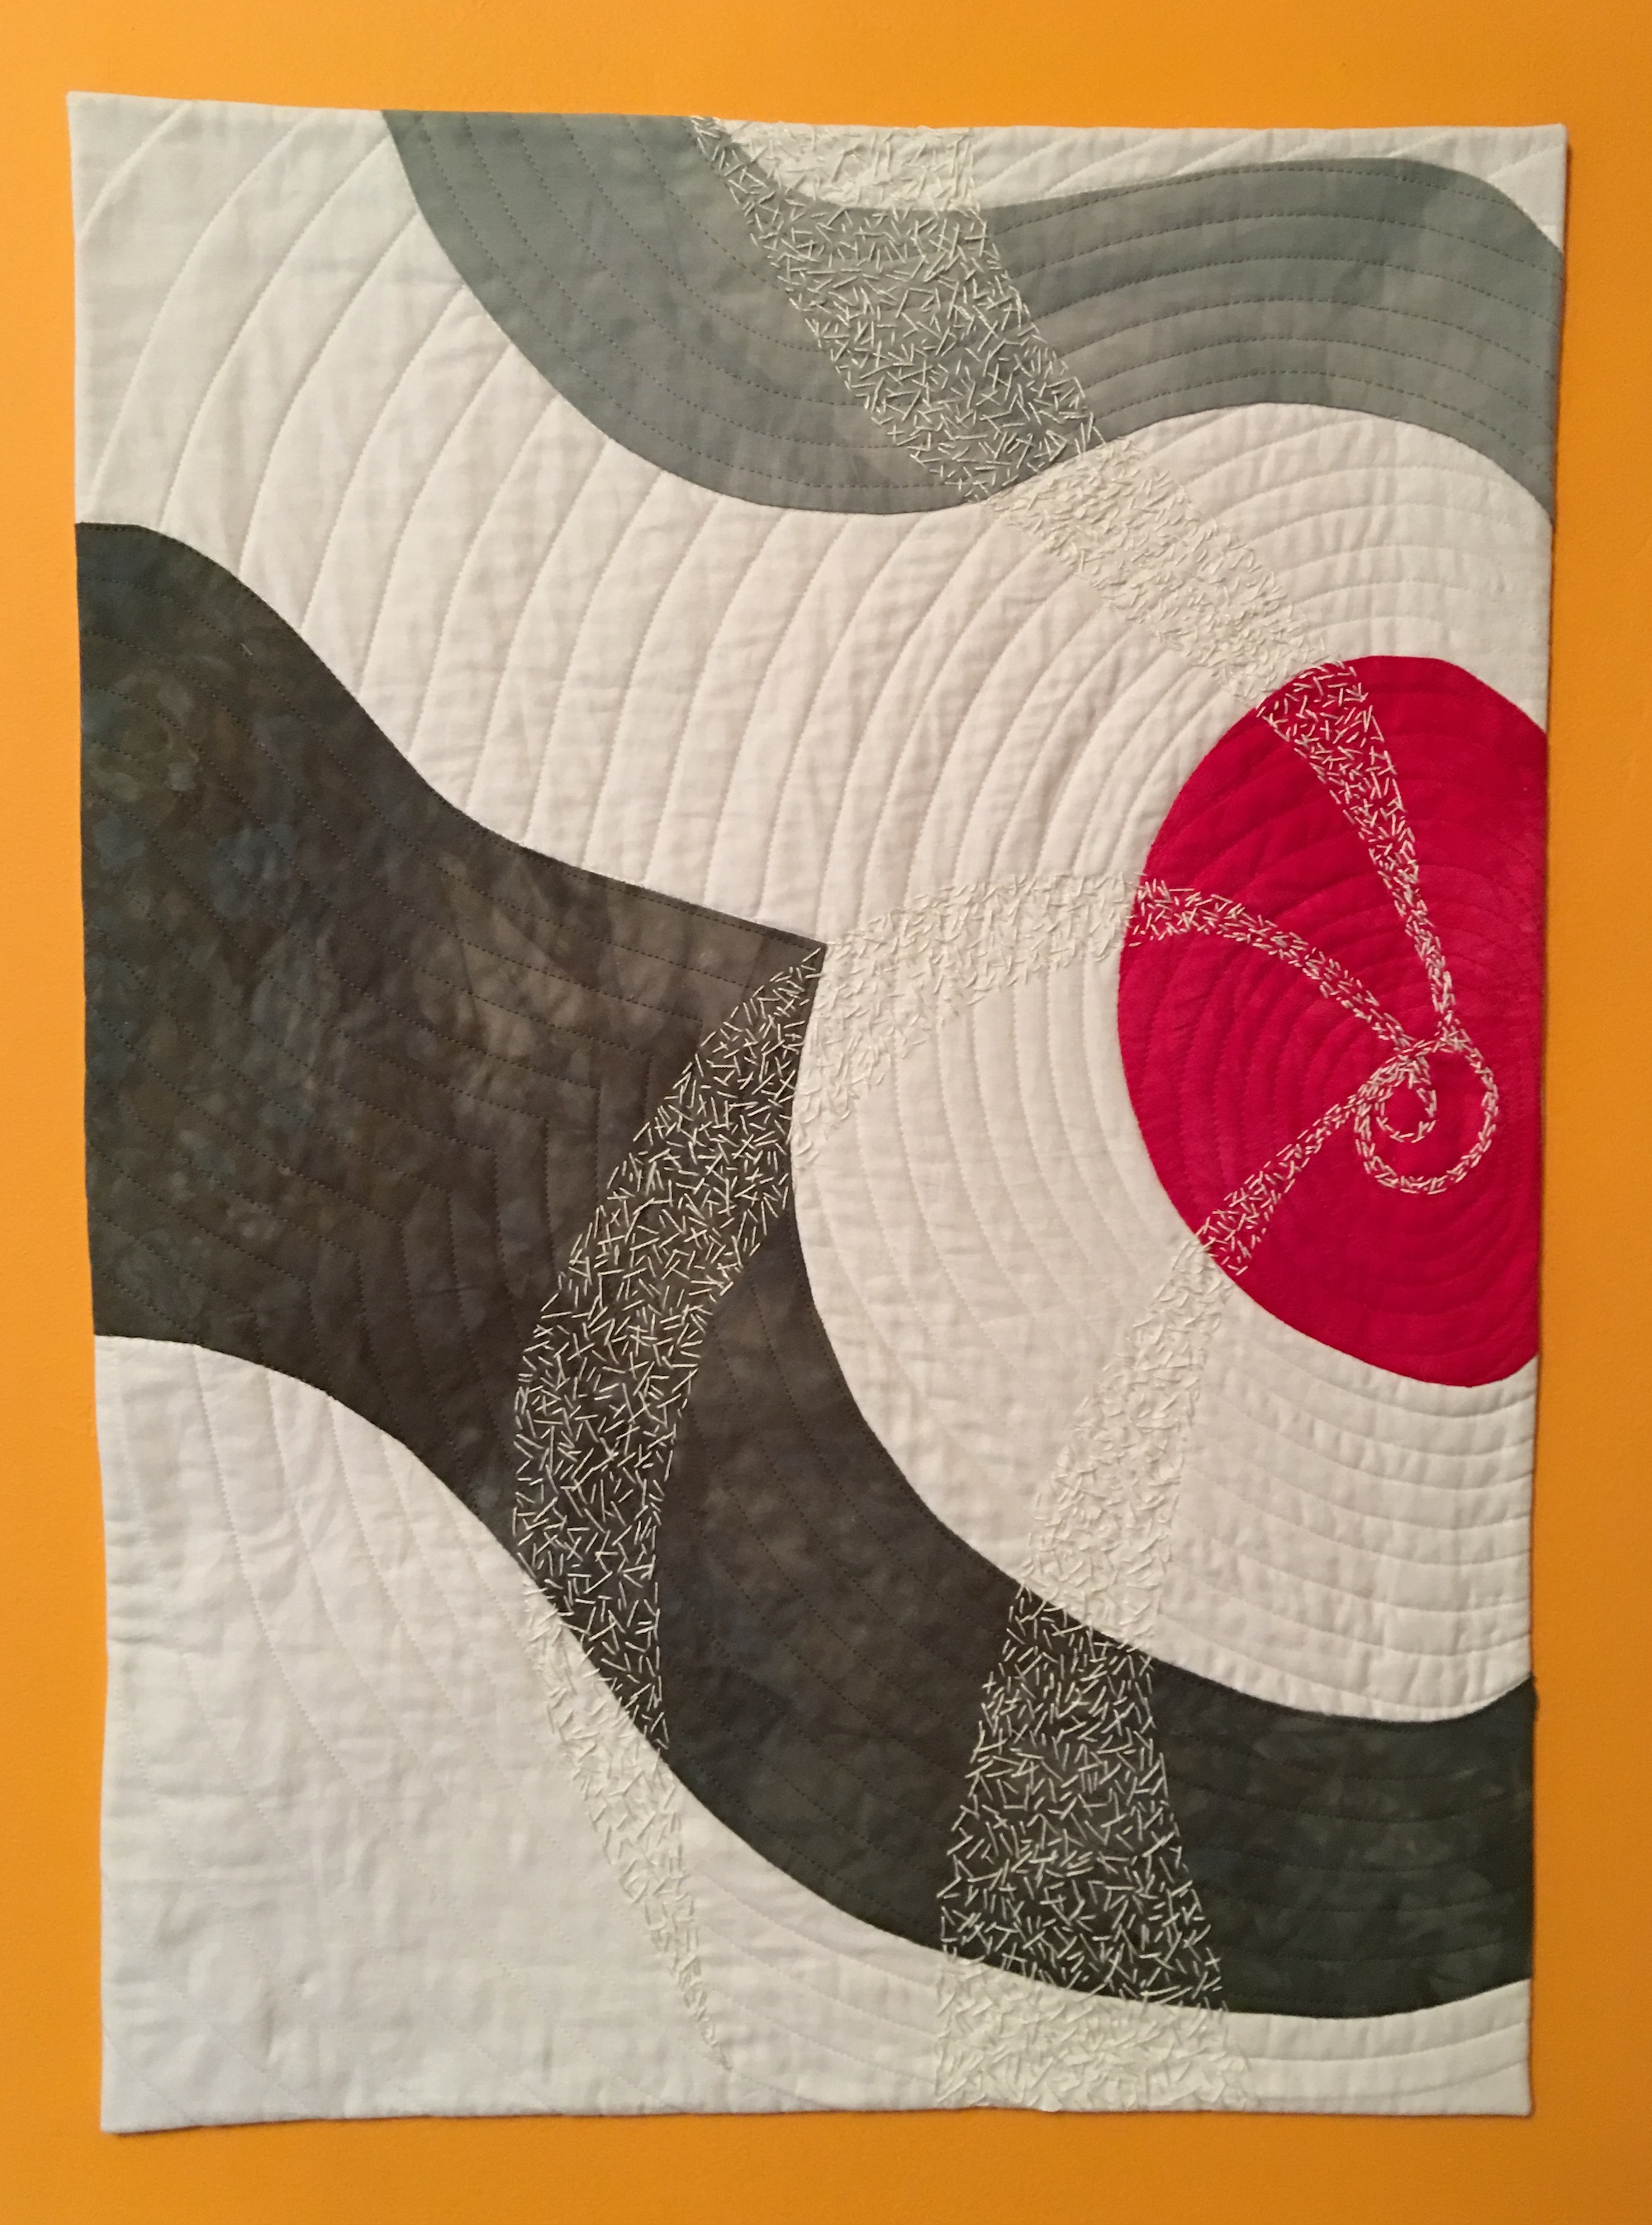
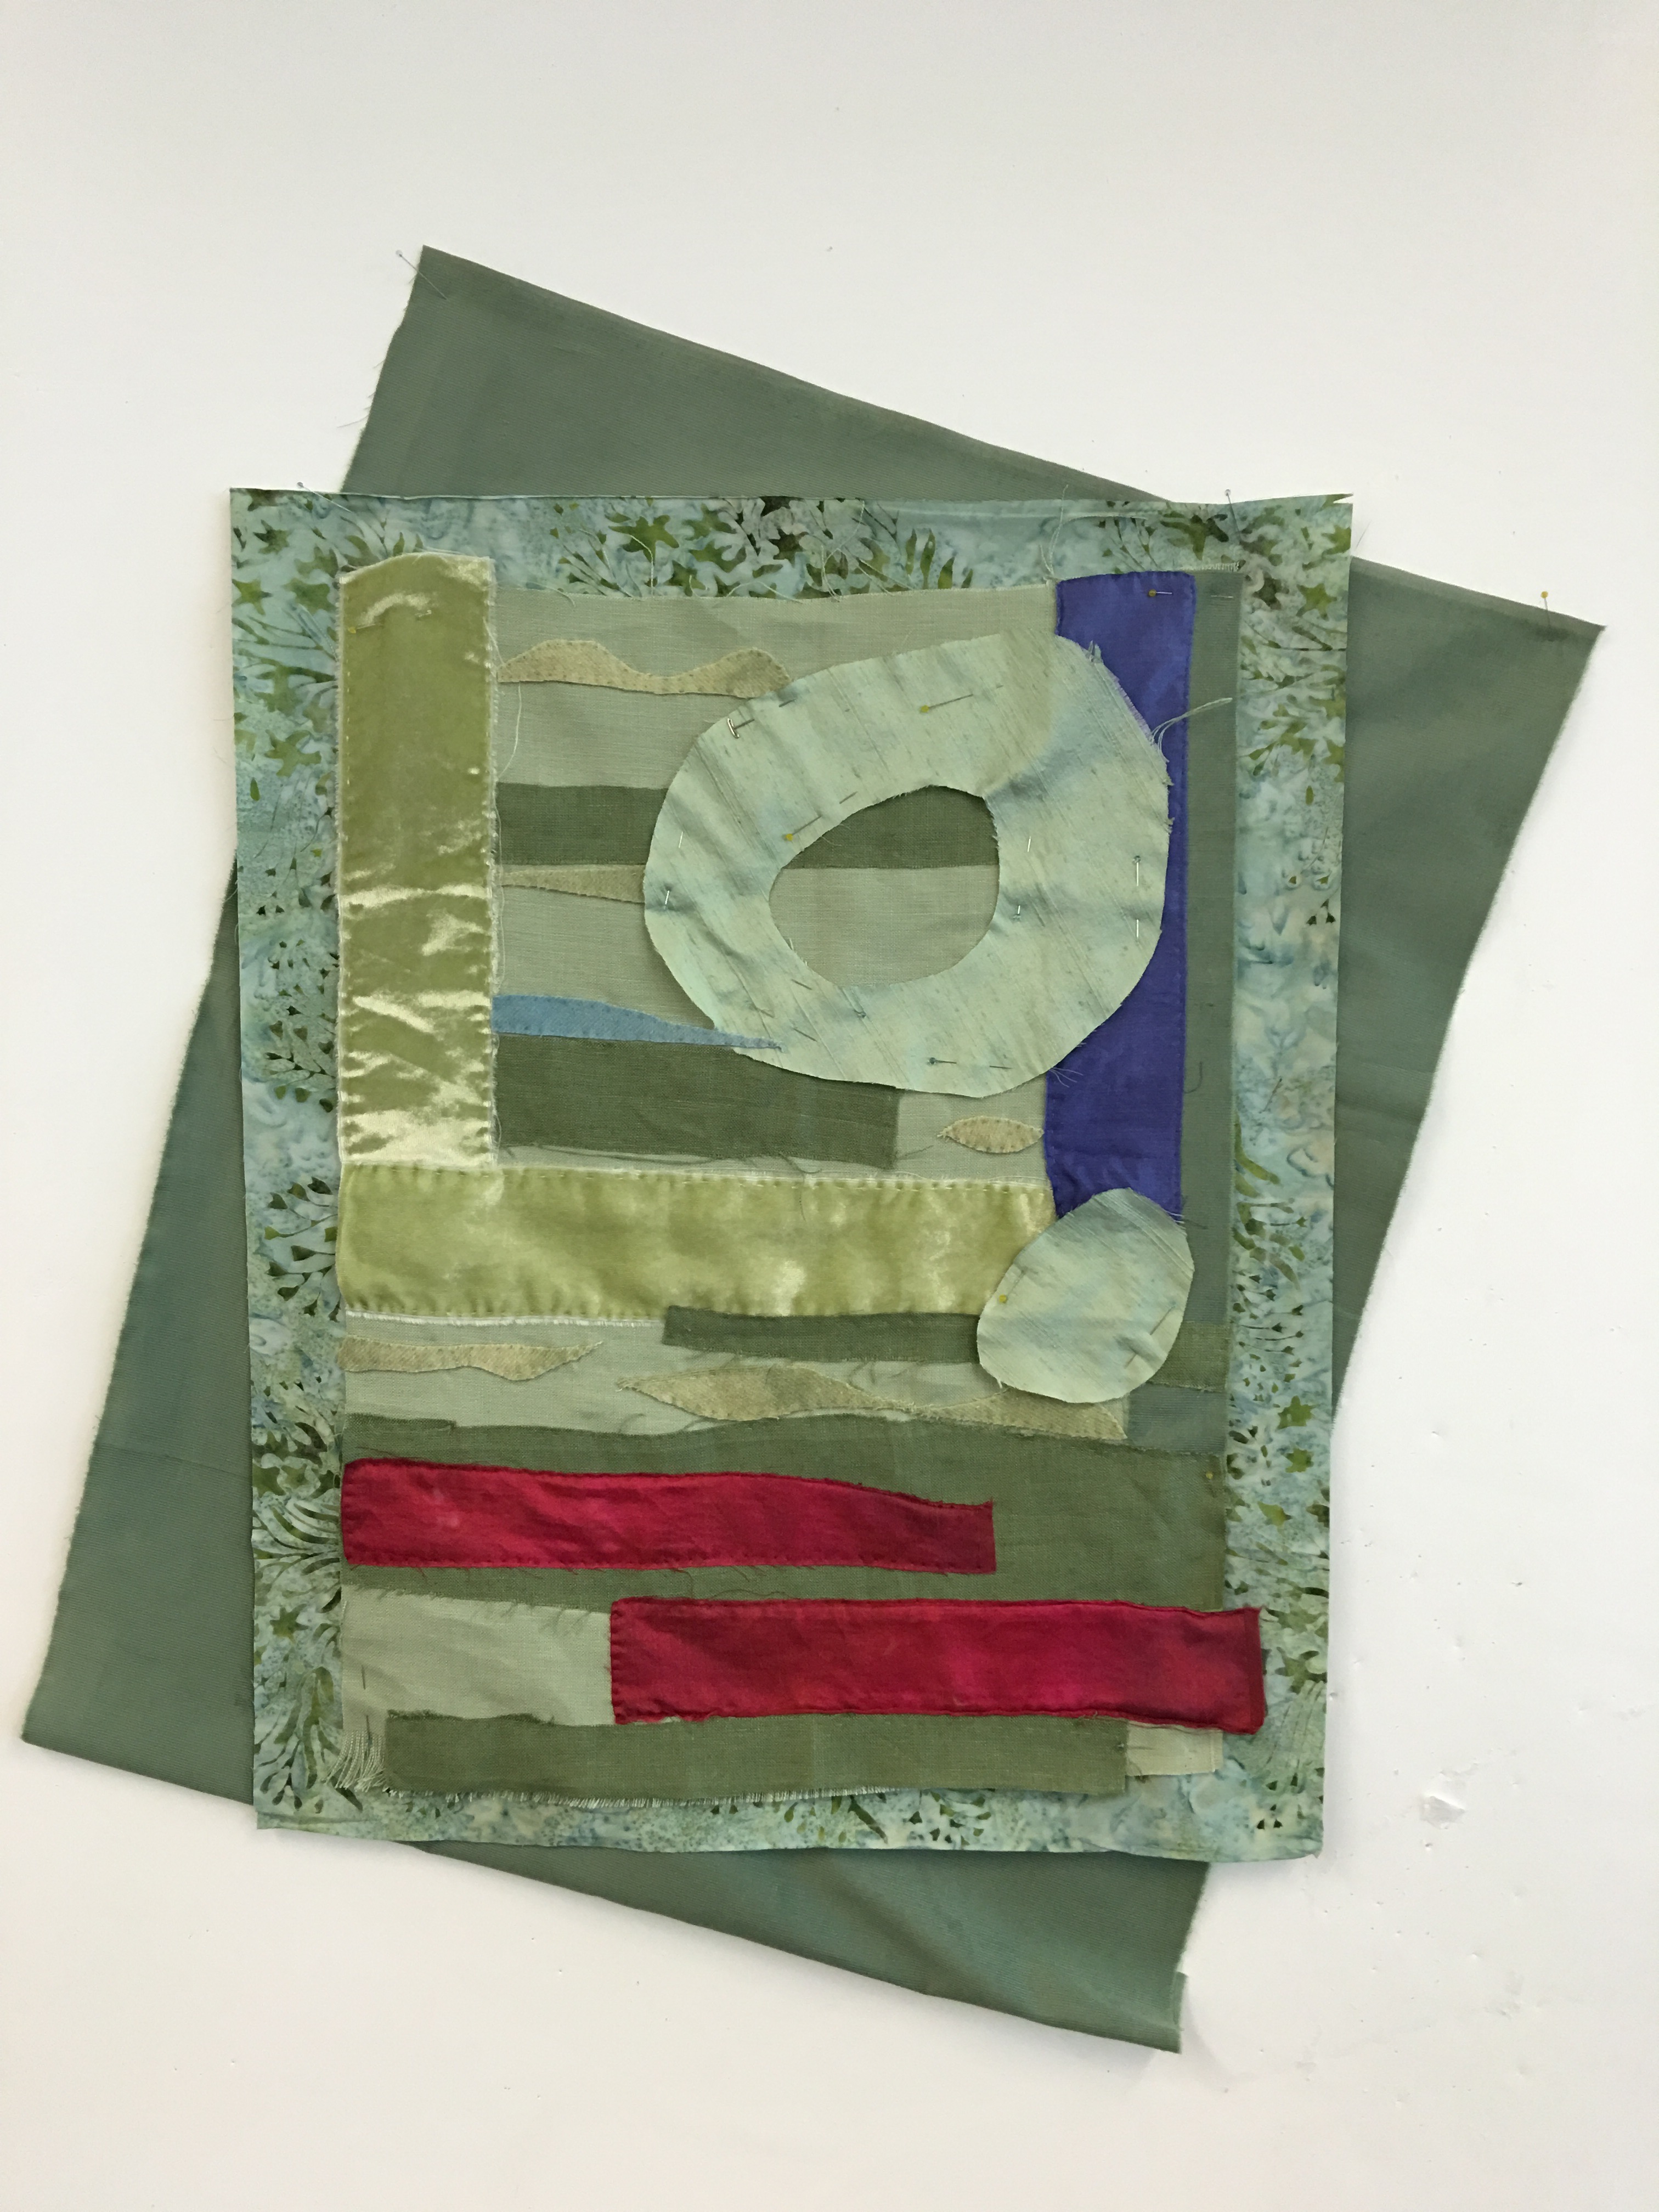
I plunged in and began cutting out shapes, putting them up on my design wall, pulling things down, putting other things up. Eventually I designed this.
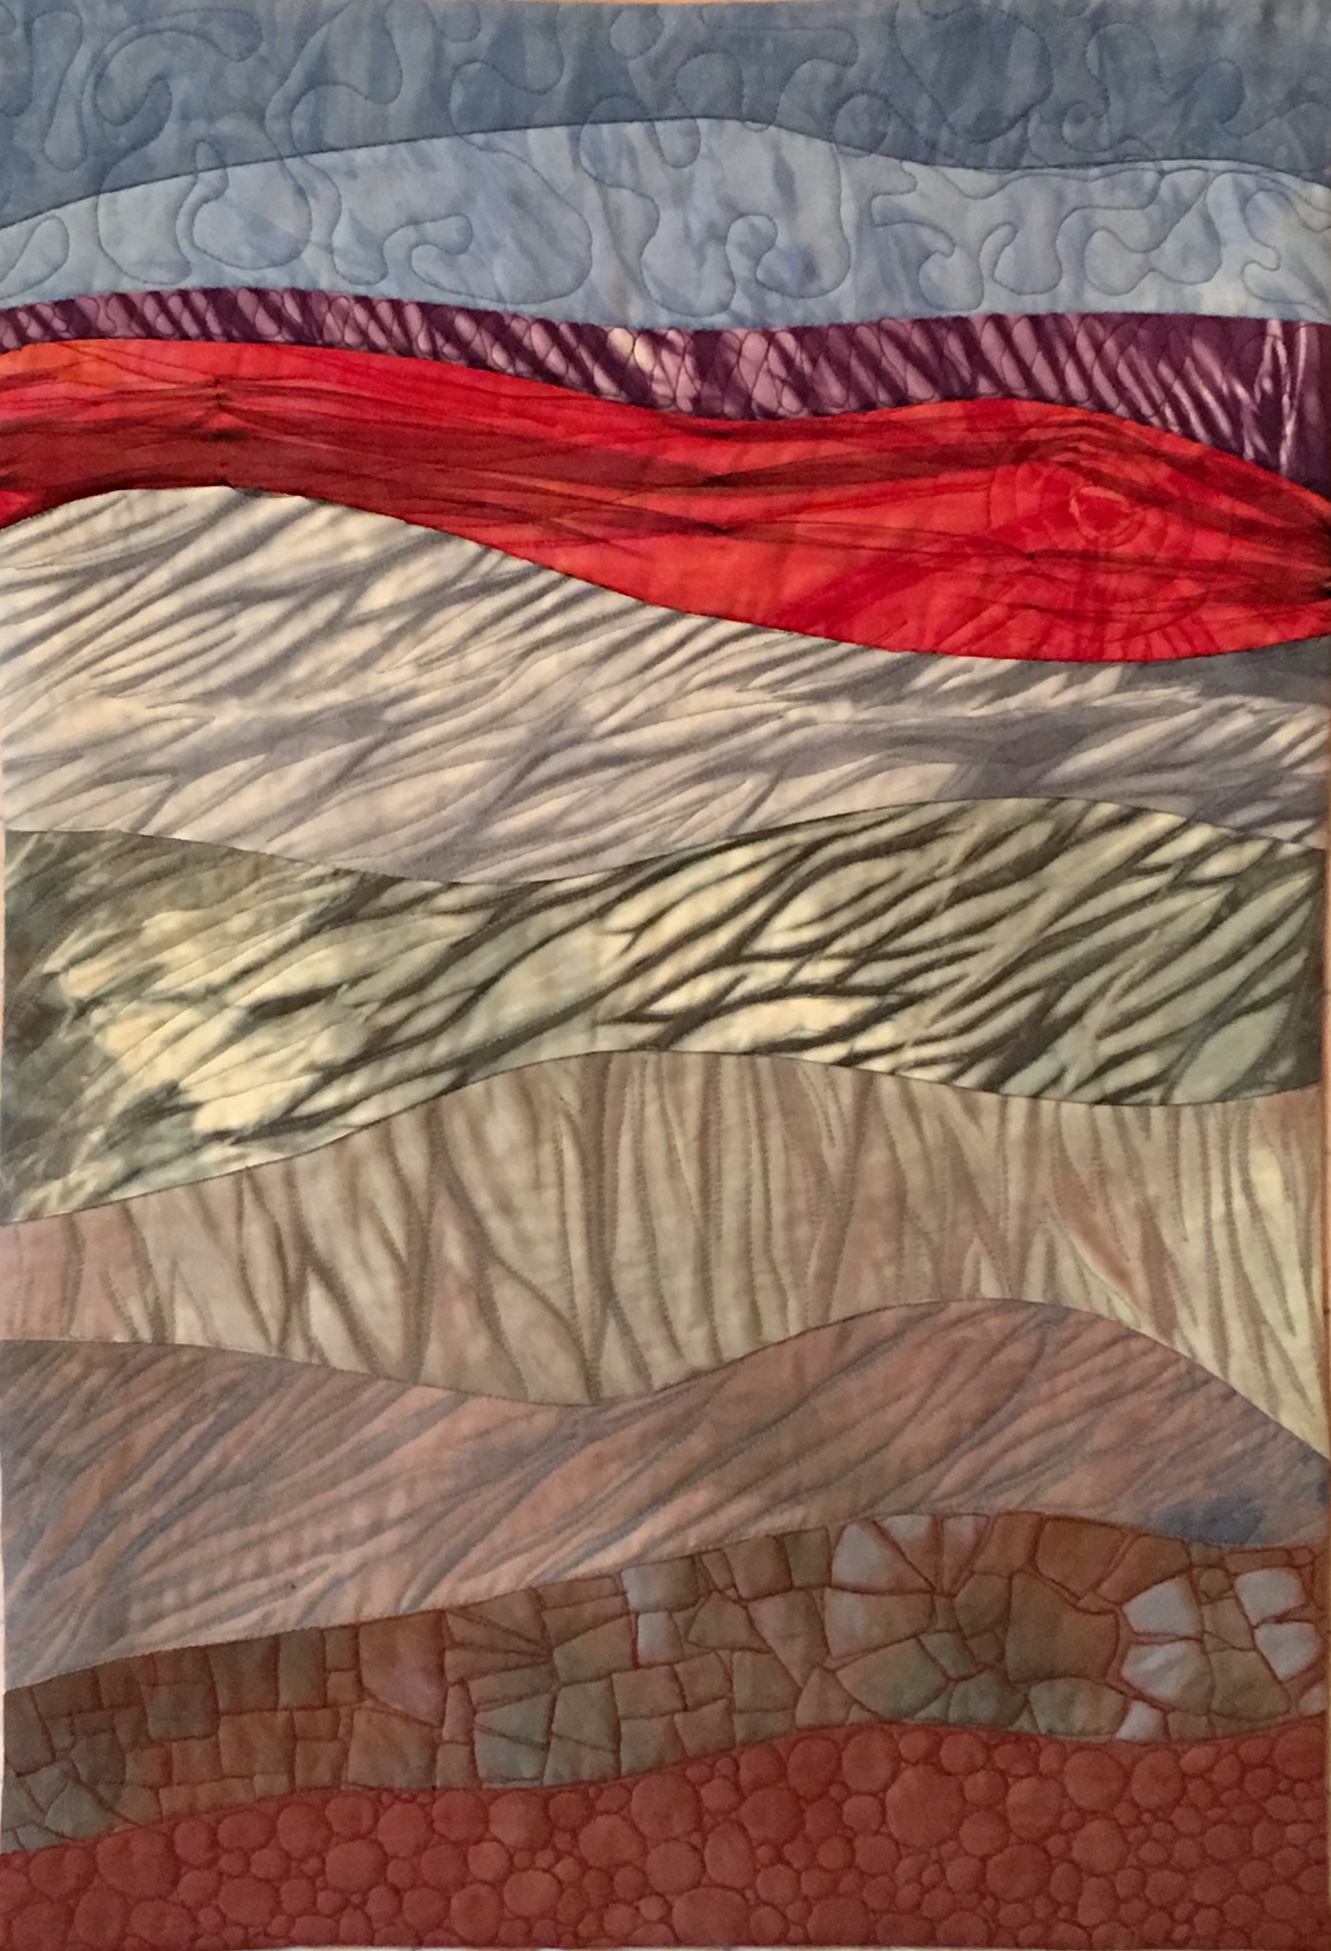
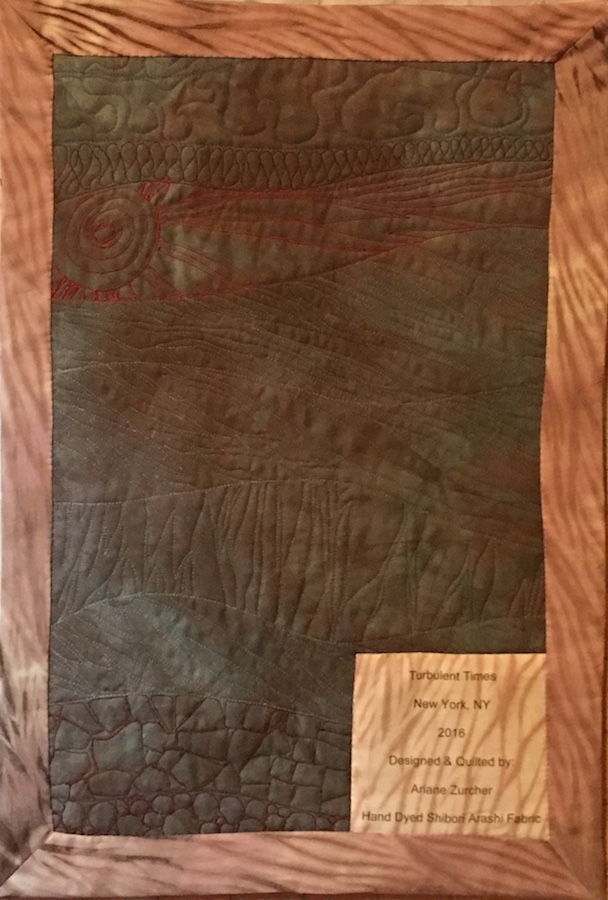
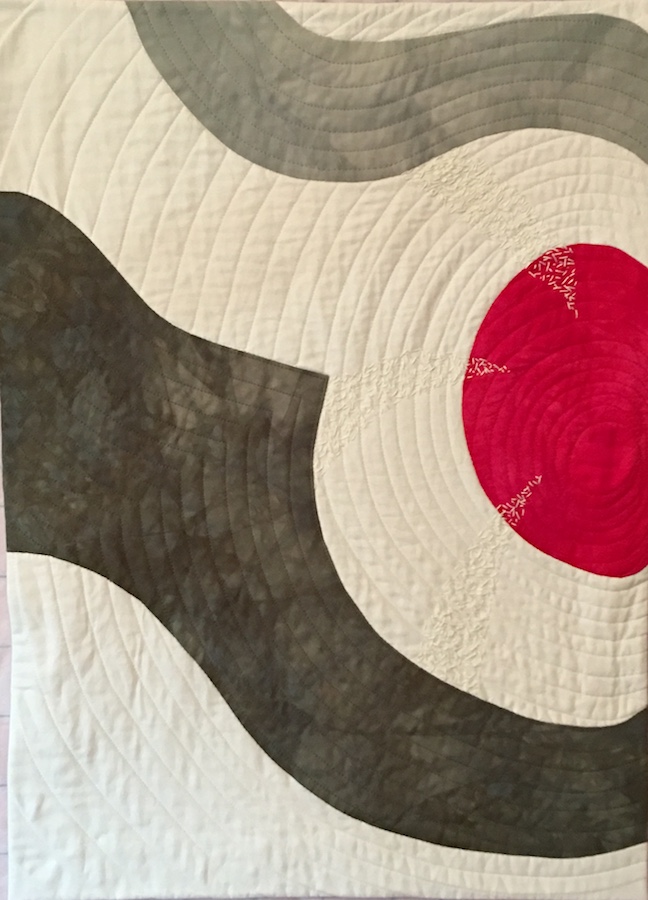
In part this piece was in response to a comment about how things seemed dark, but the sun would shine again. That red was glaring and SO red, so I went back to my design wall and did this.
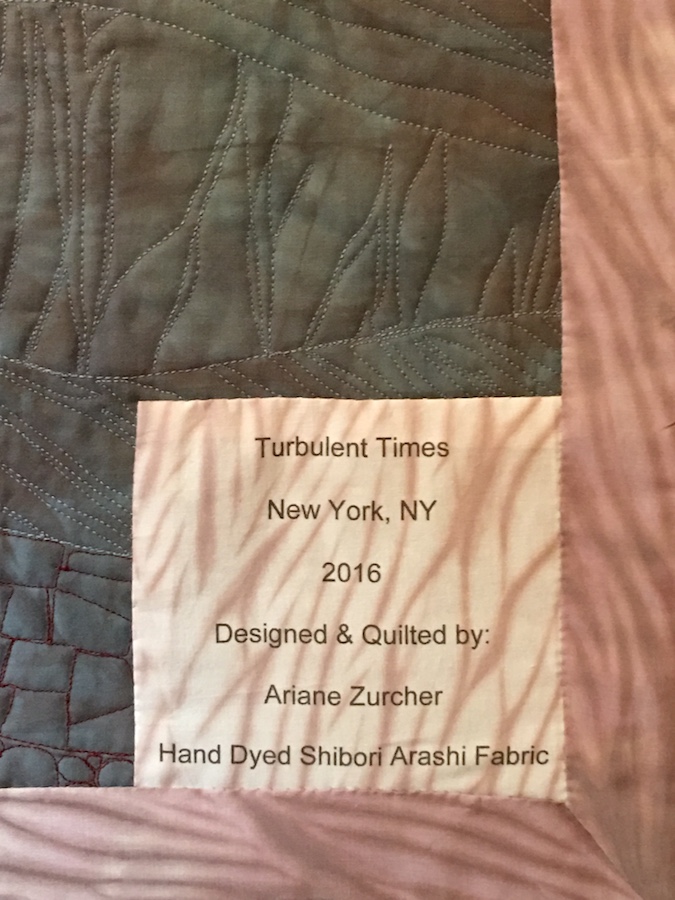
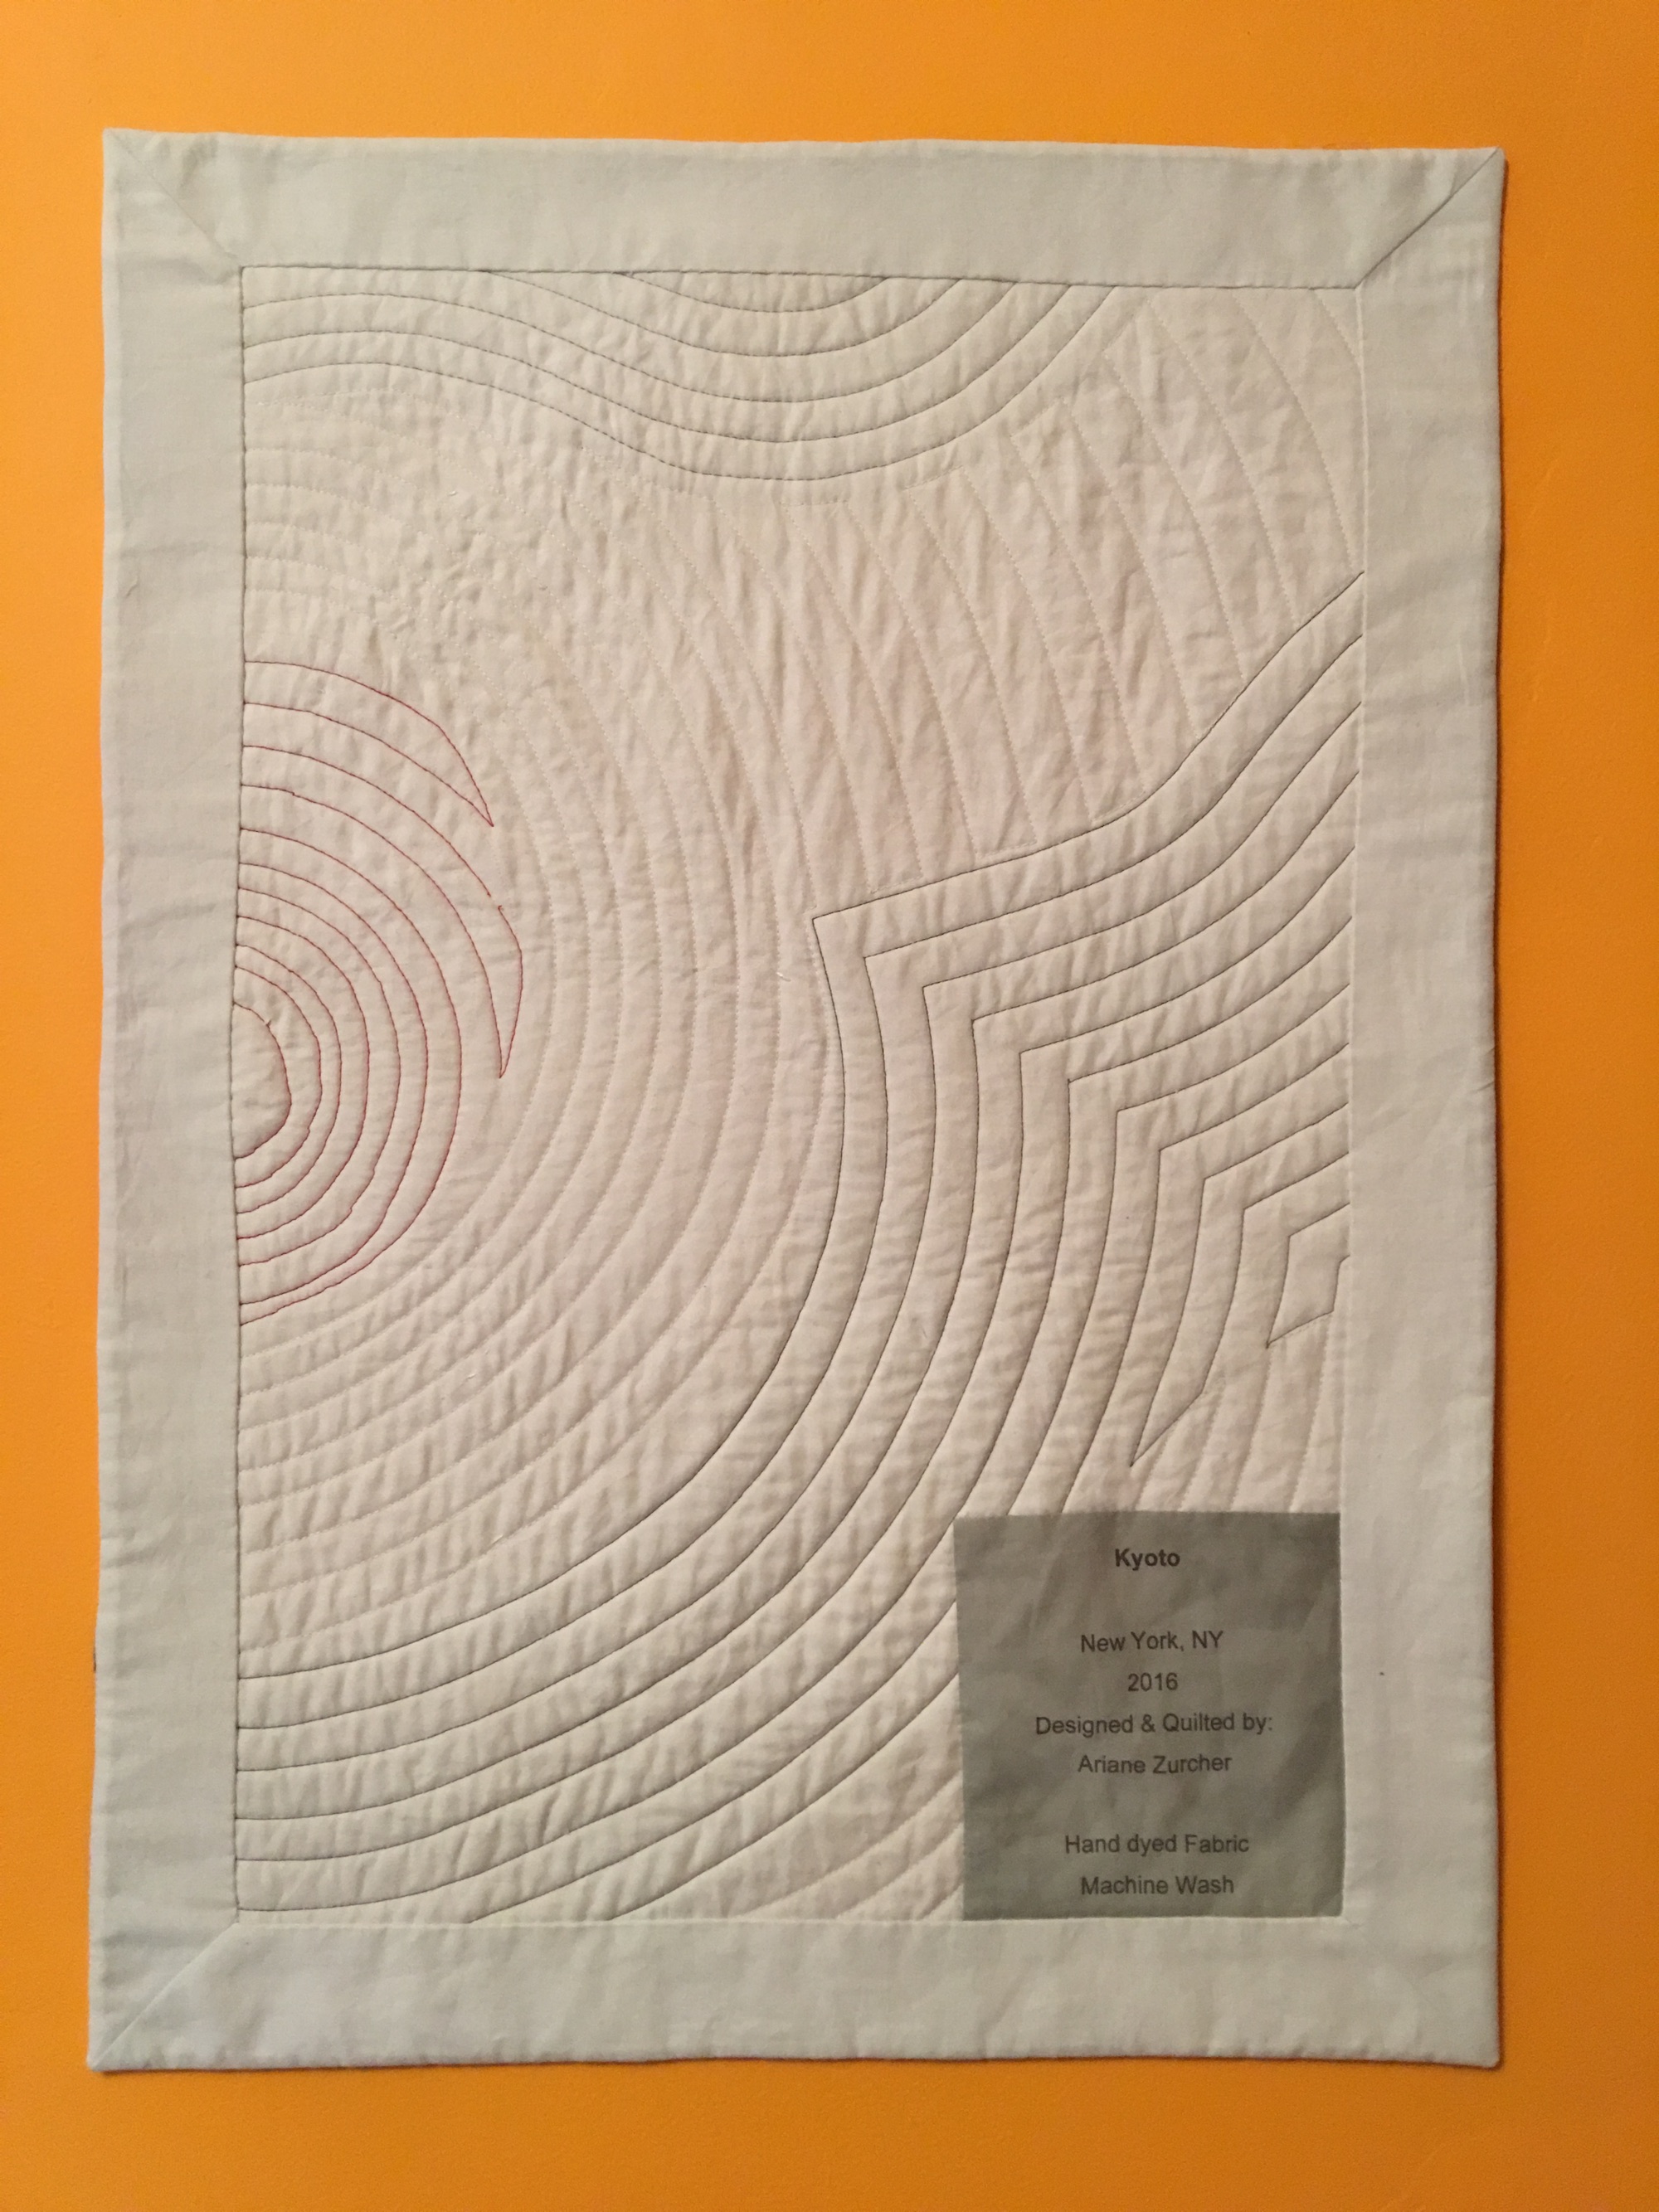
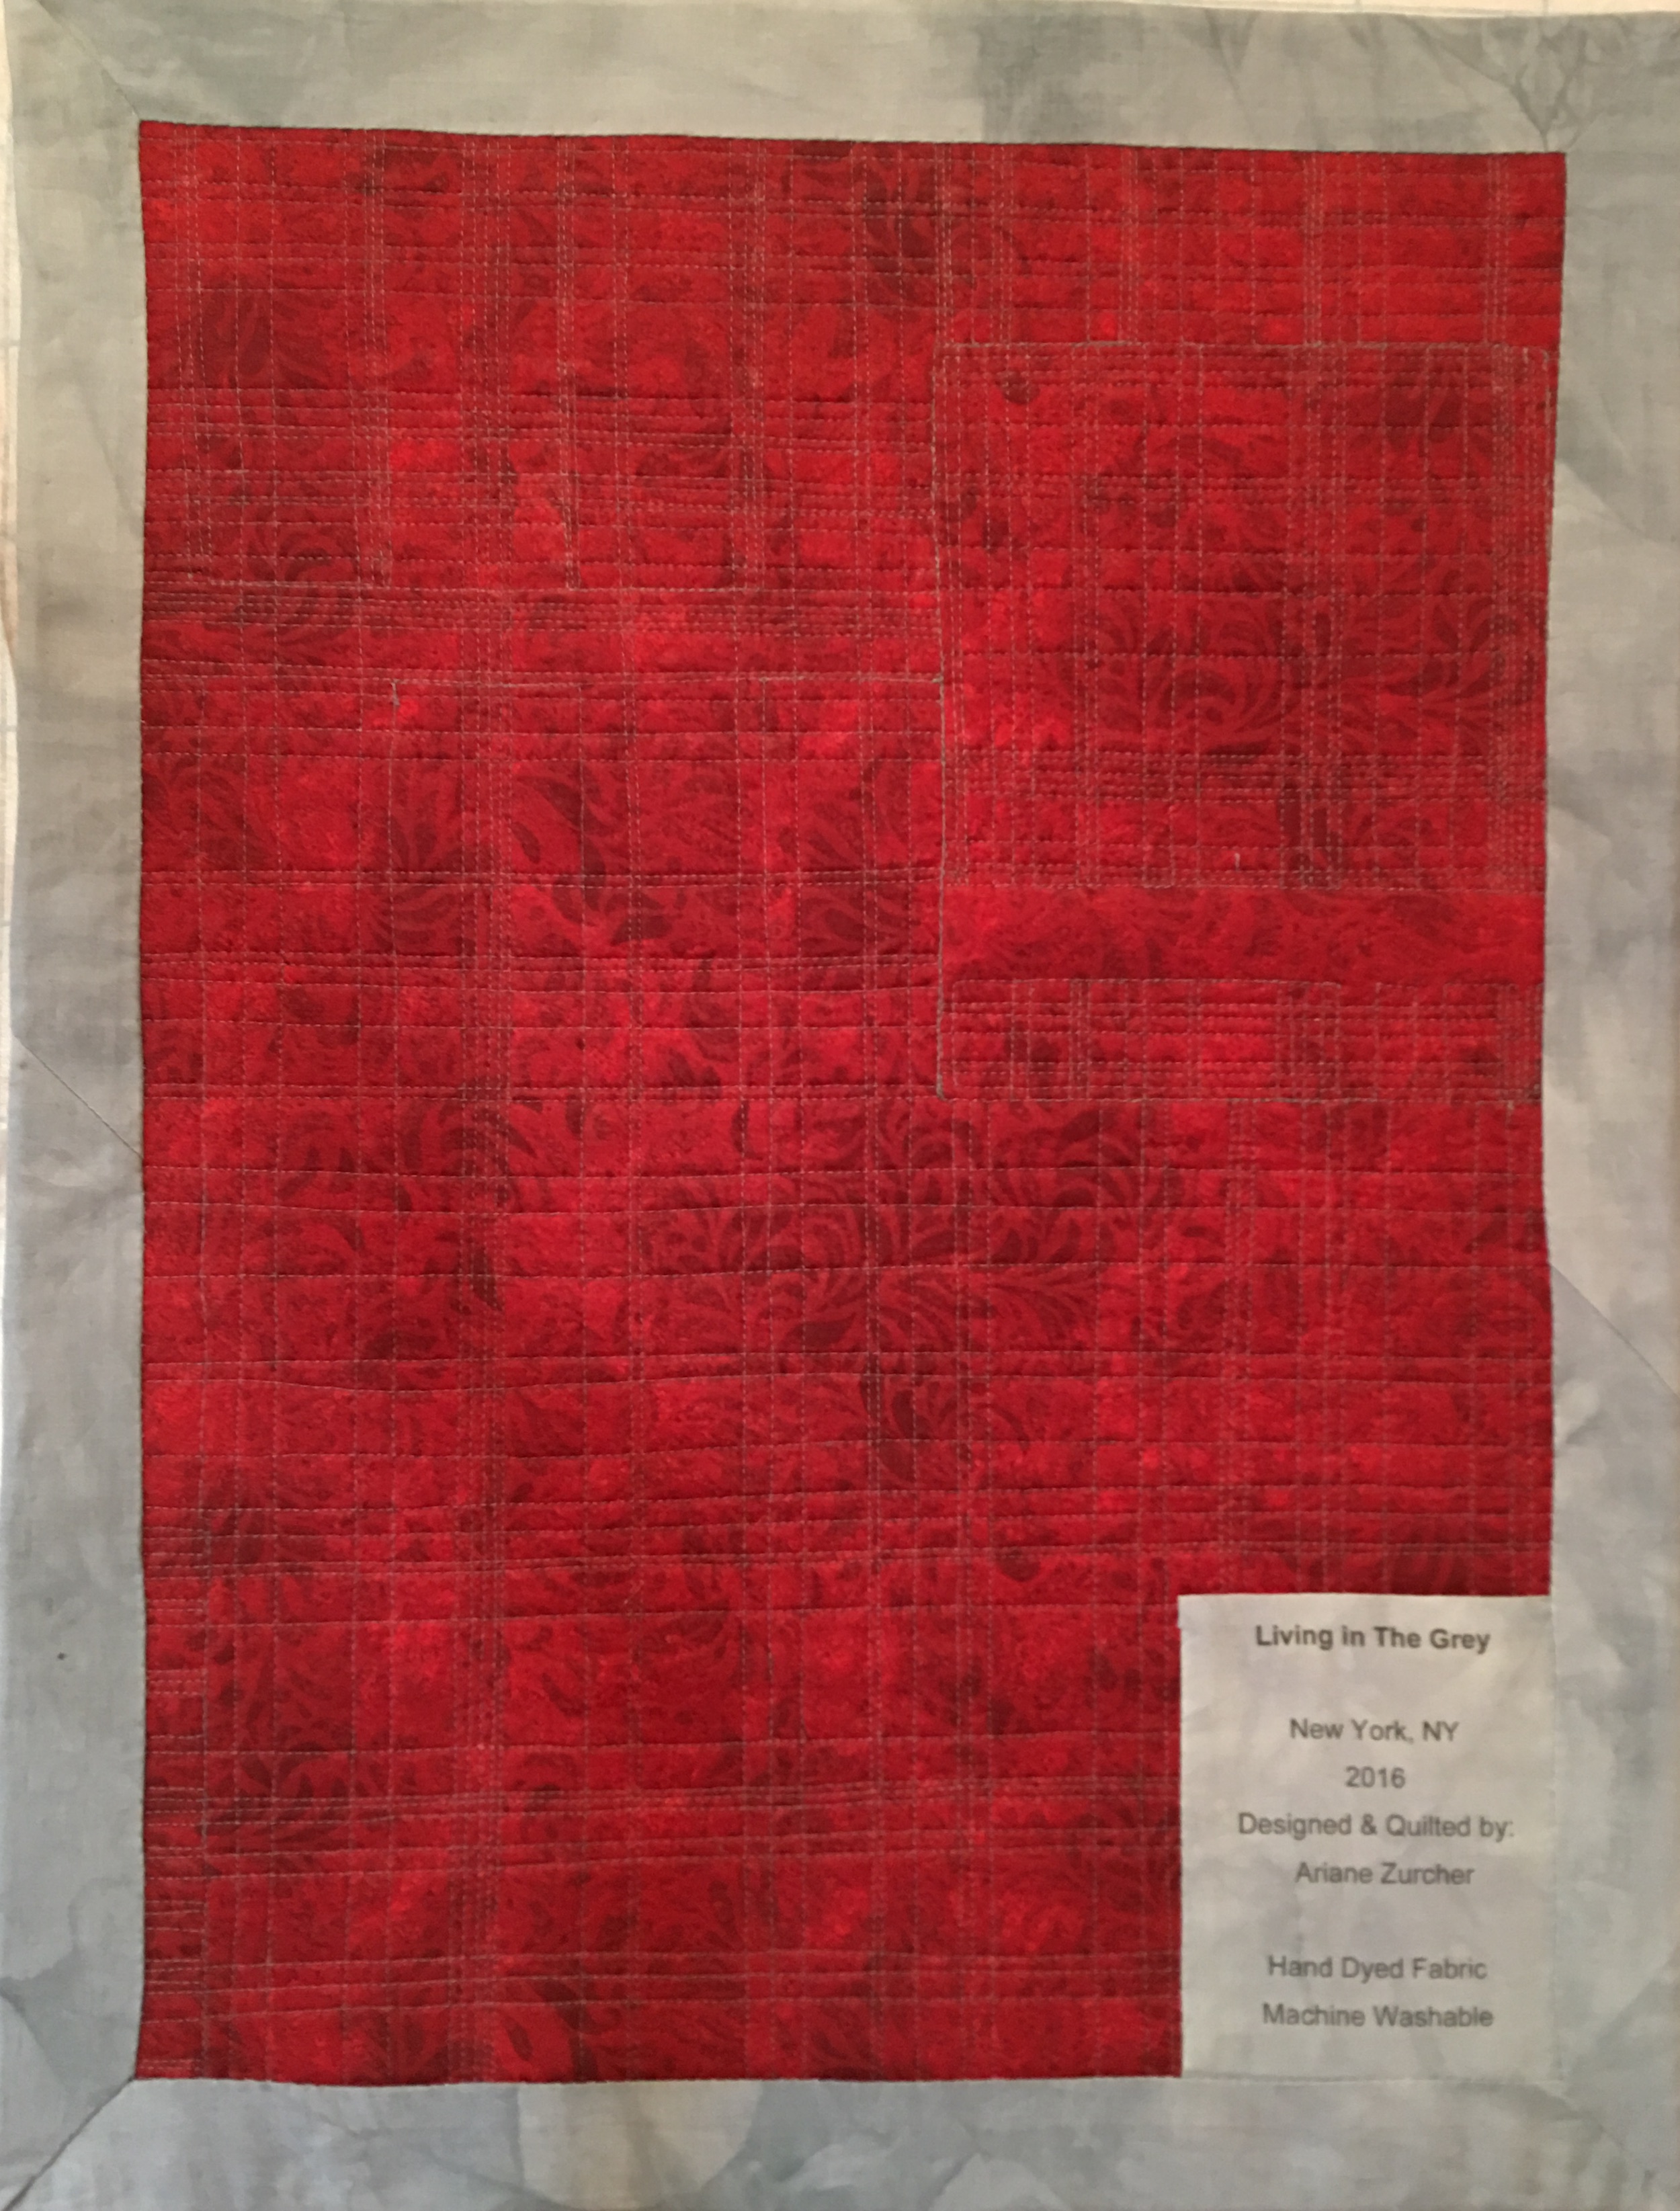
And here’s the back and the label.
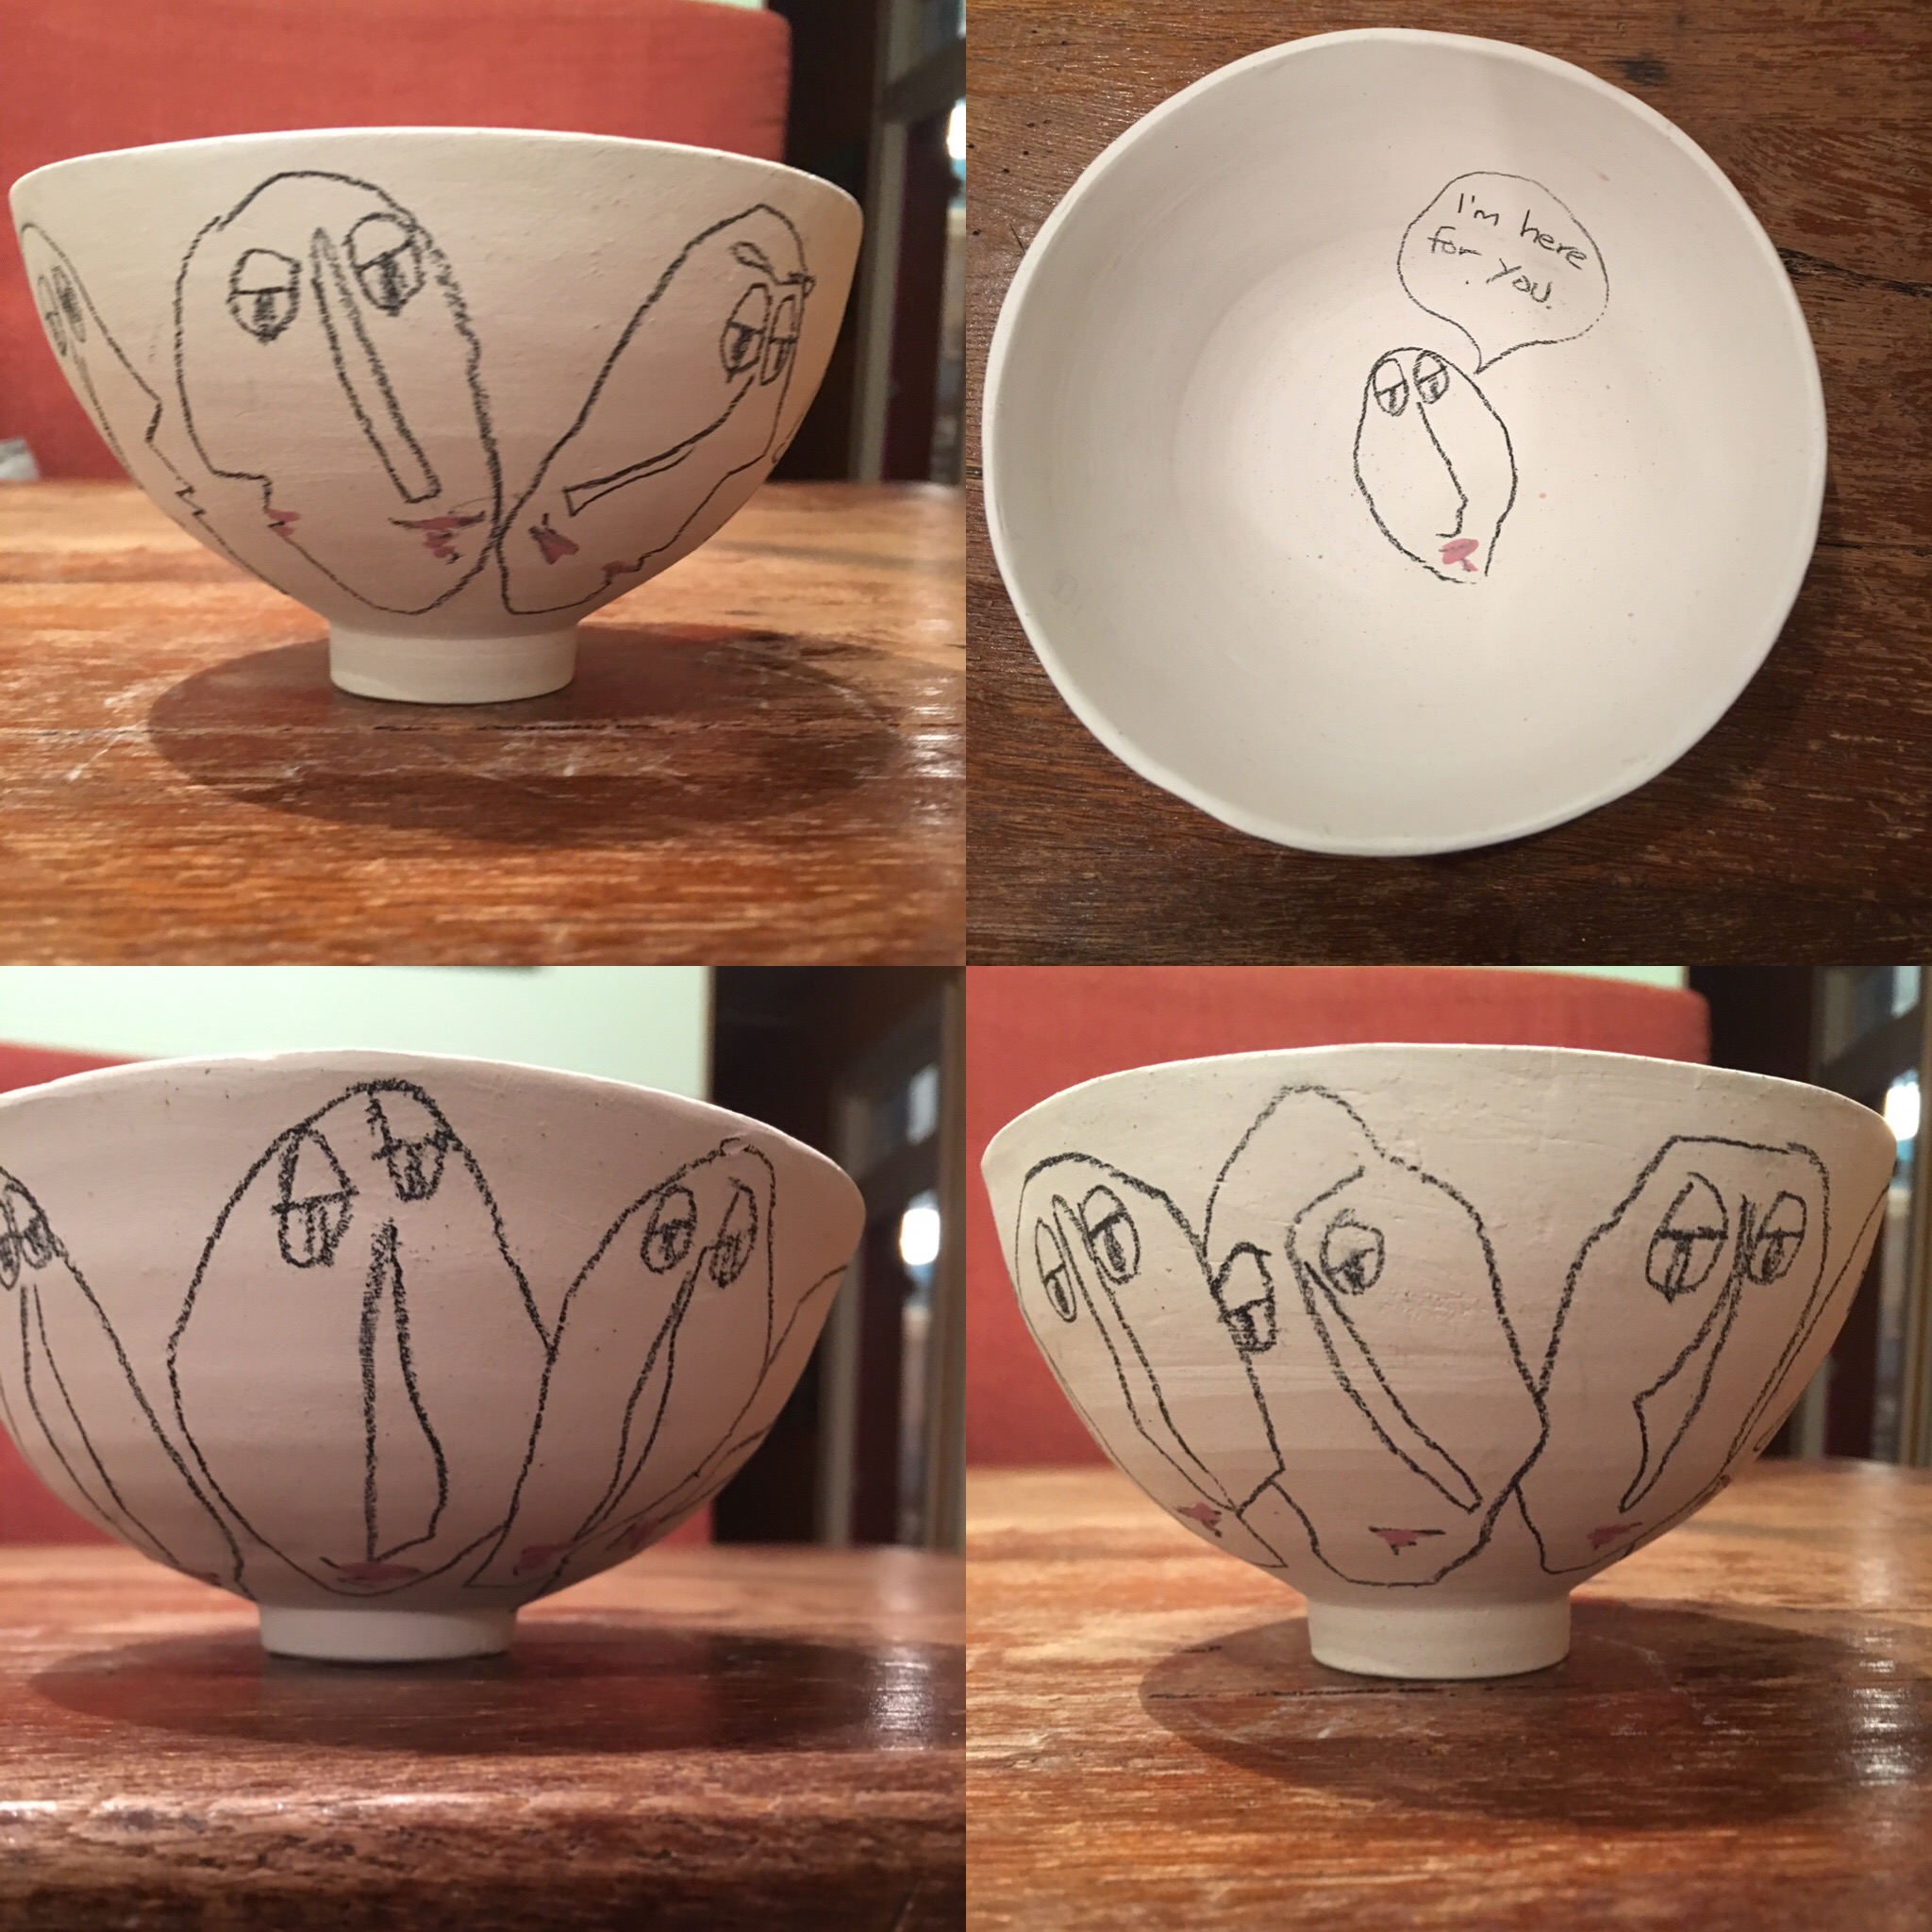
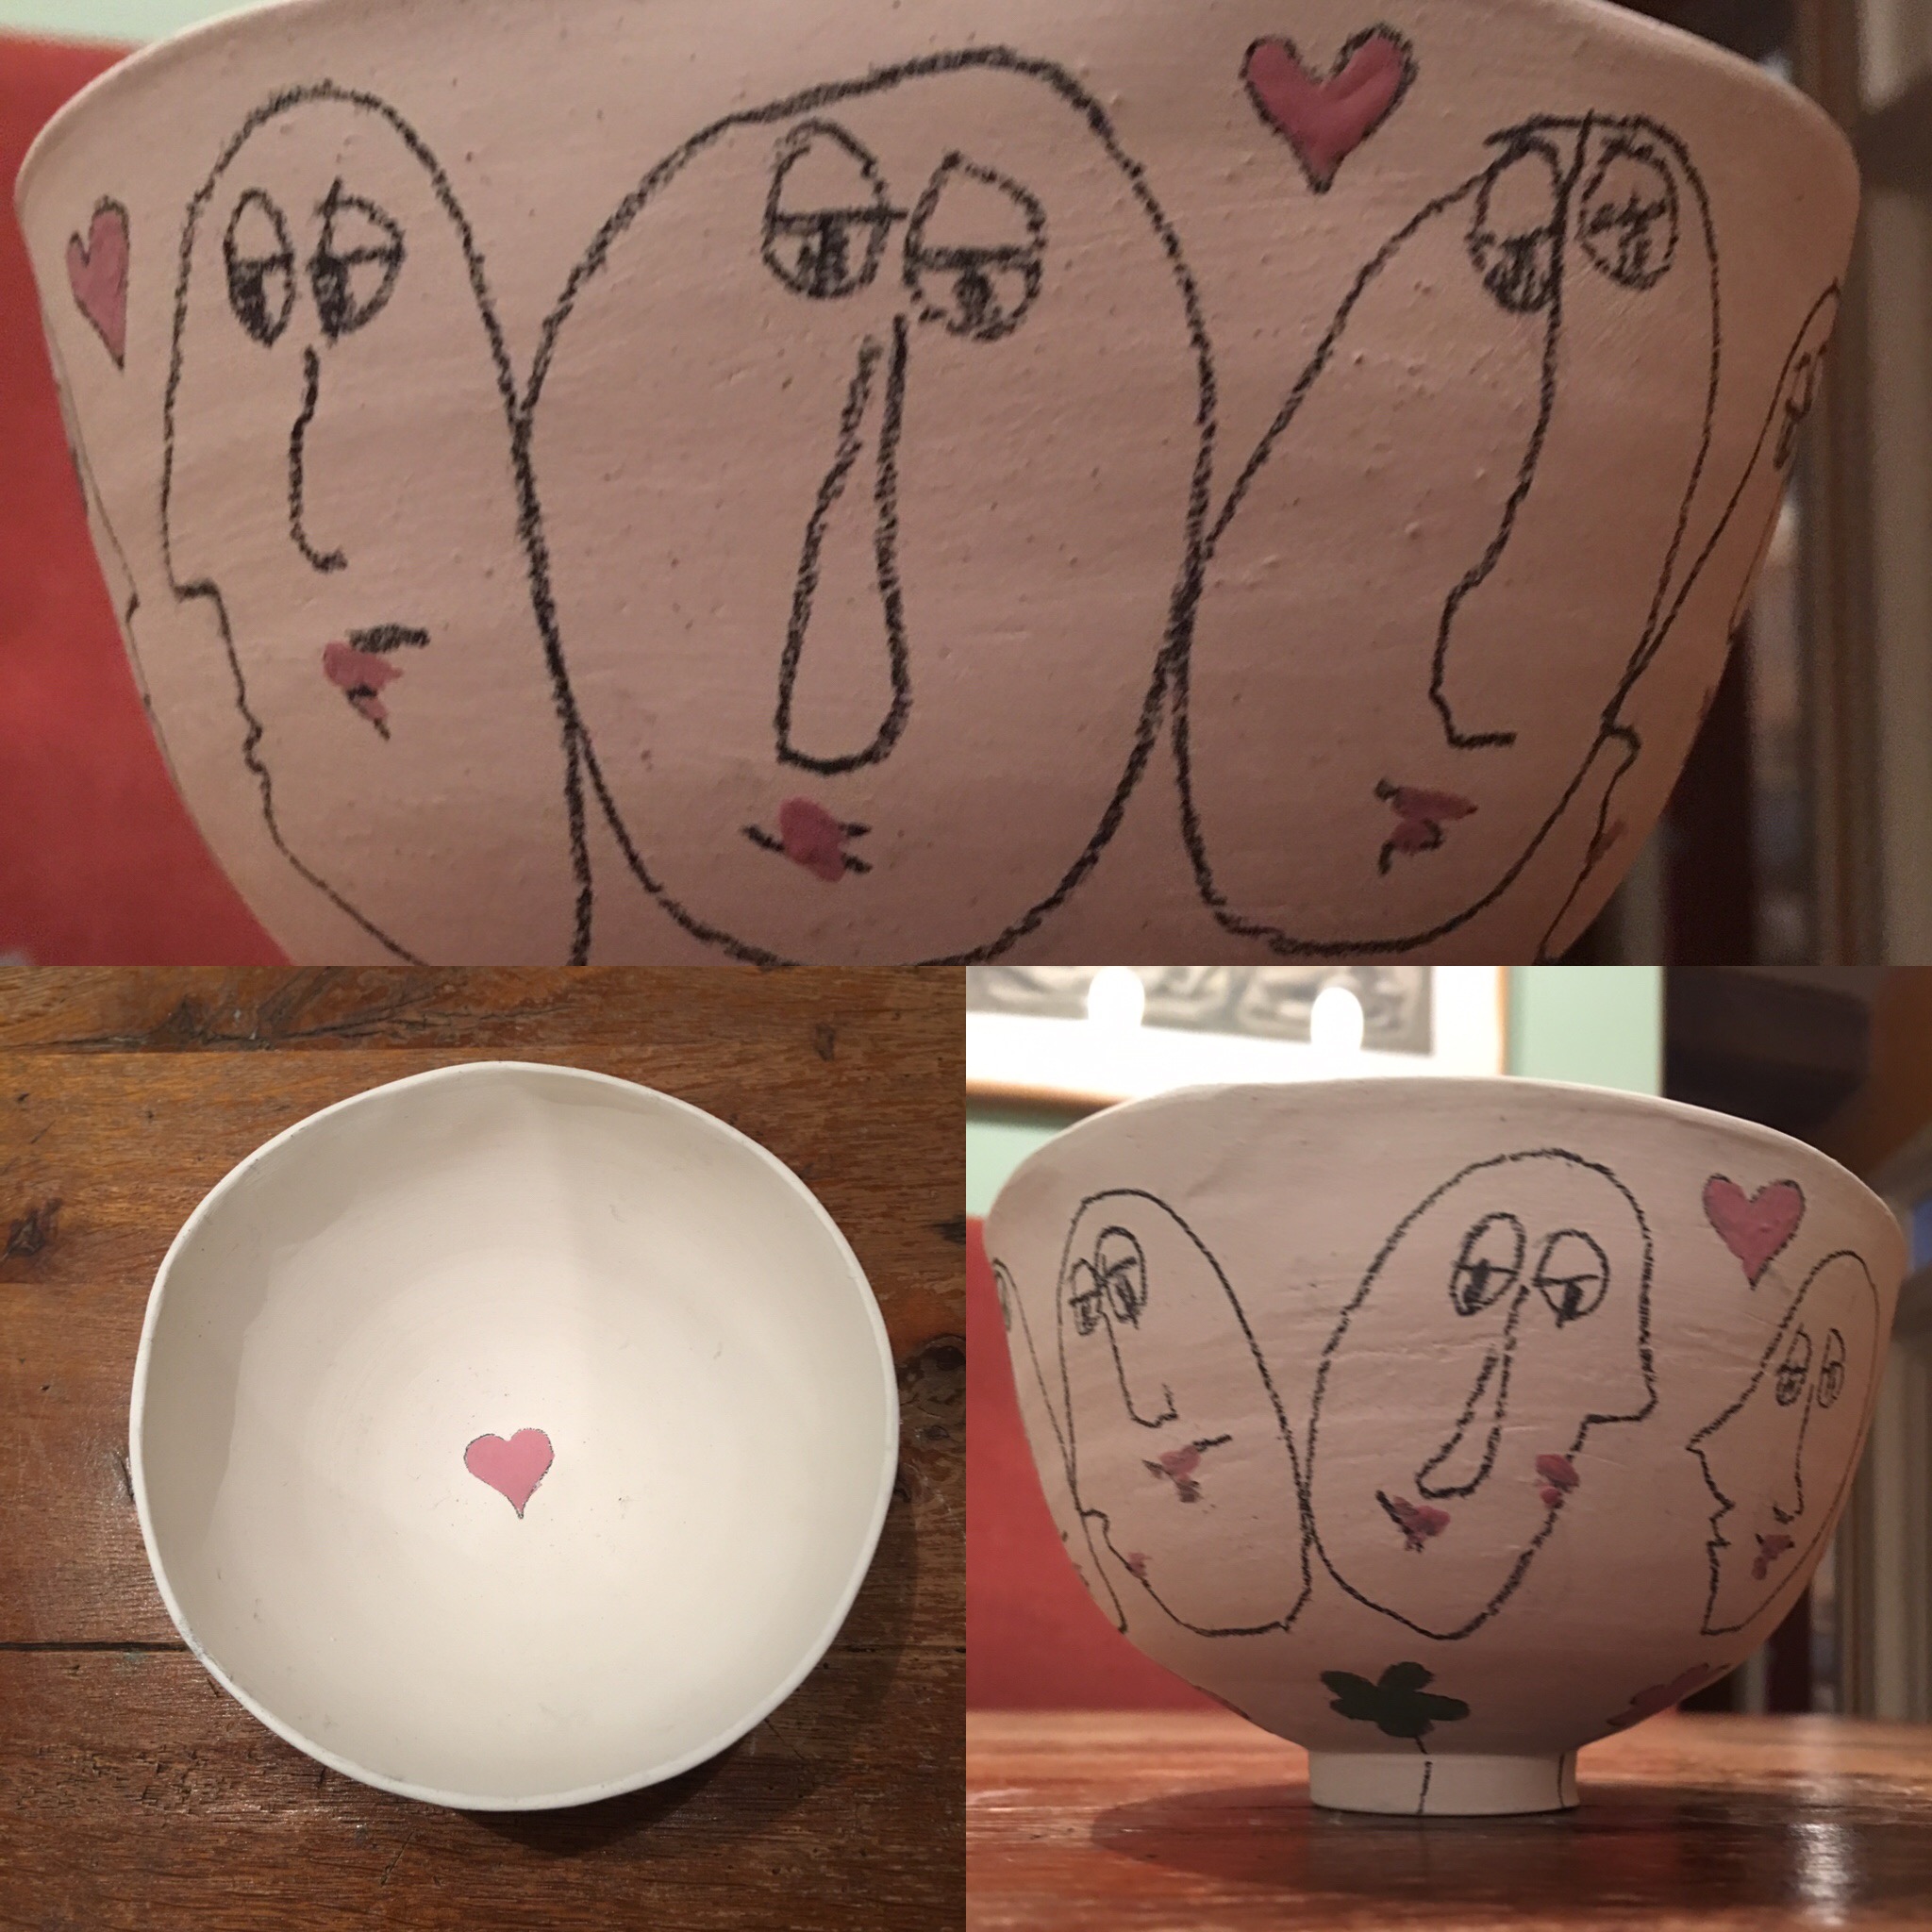
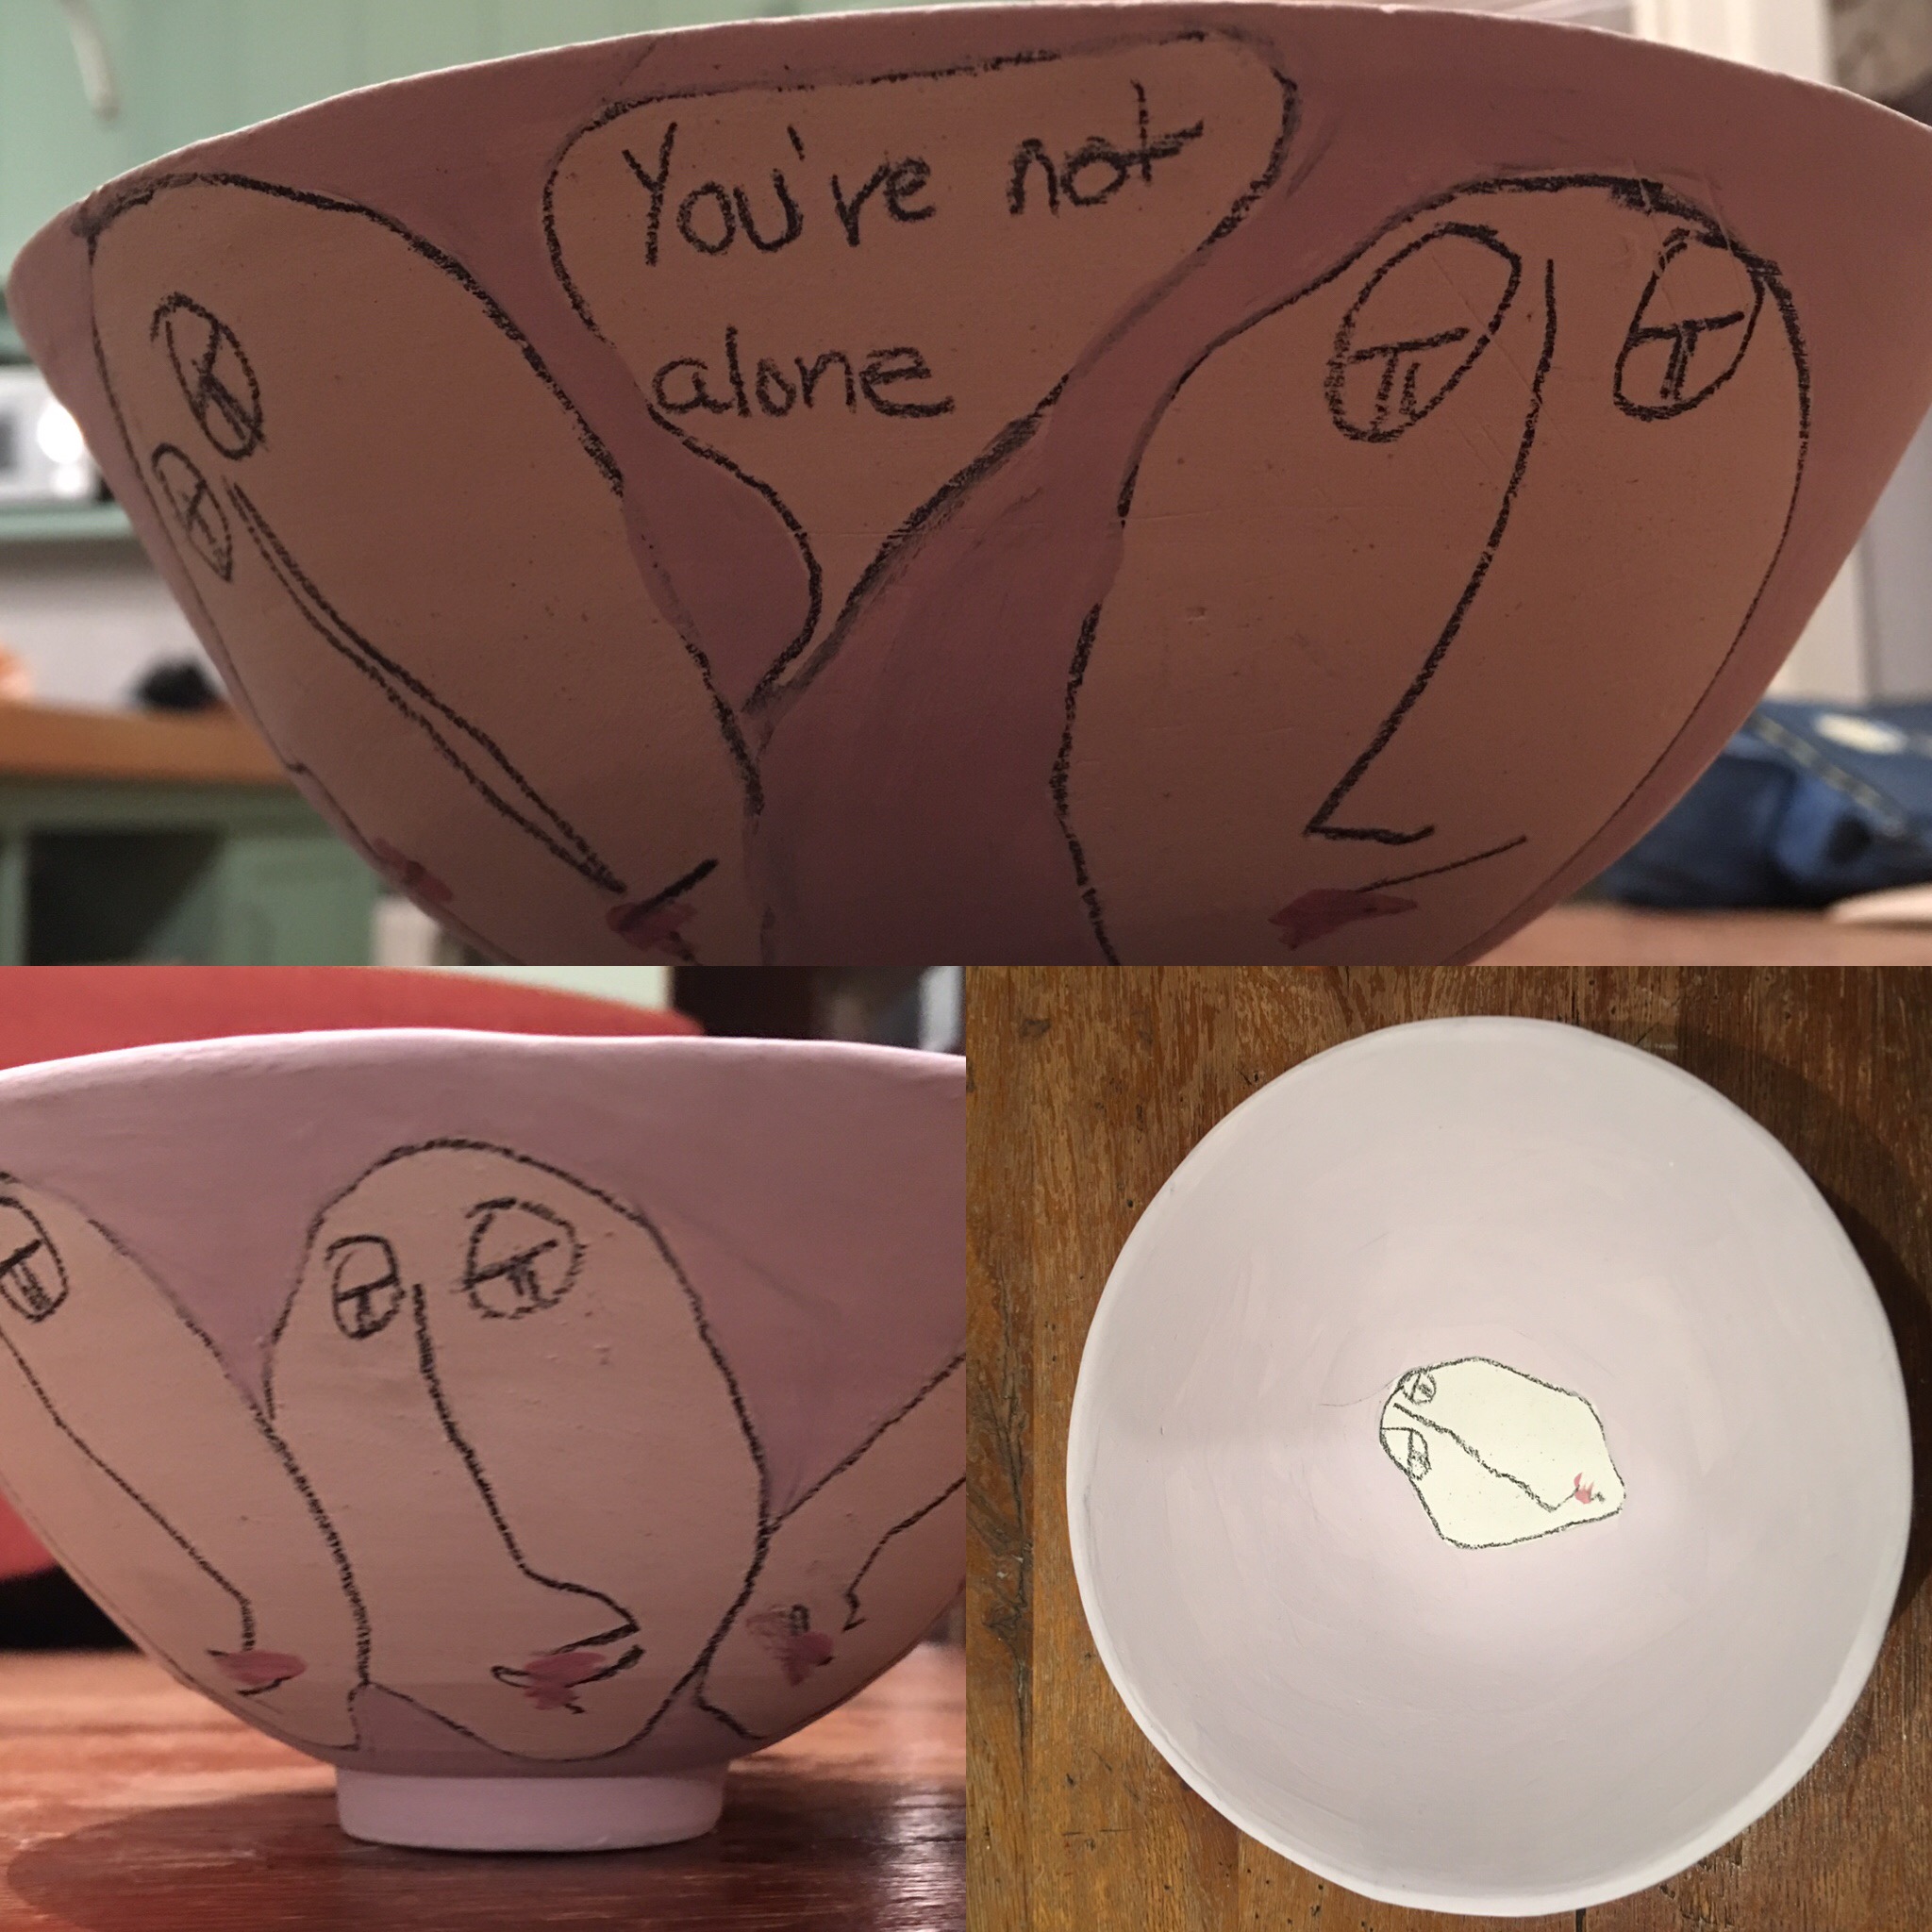
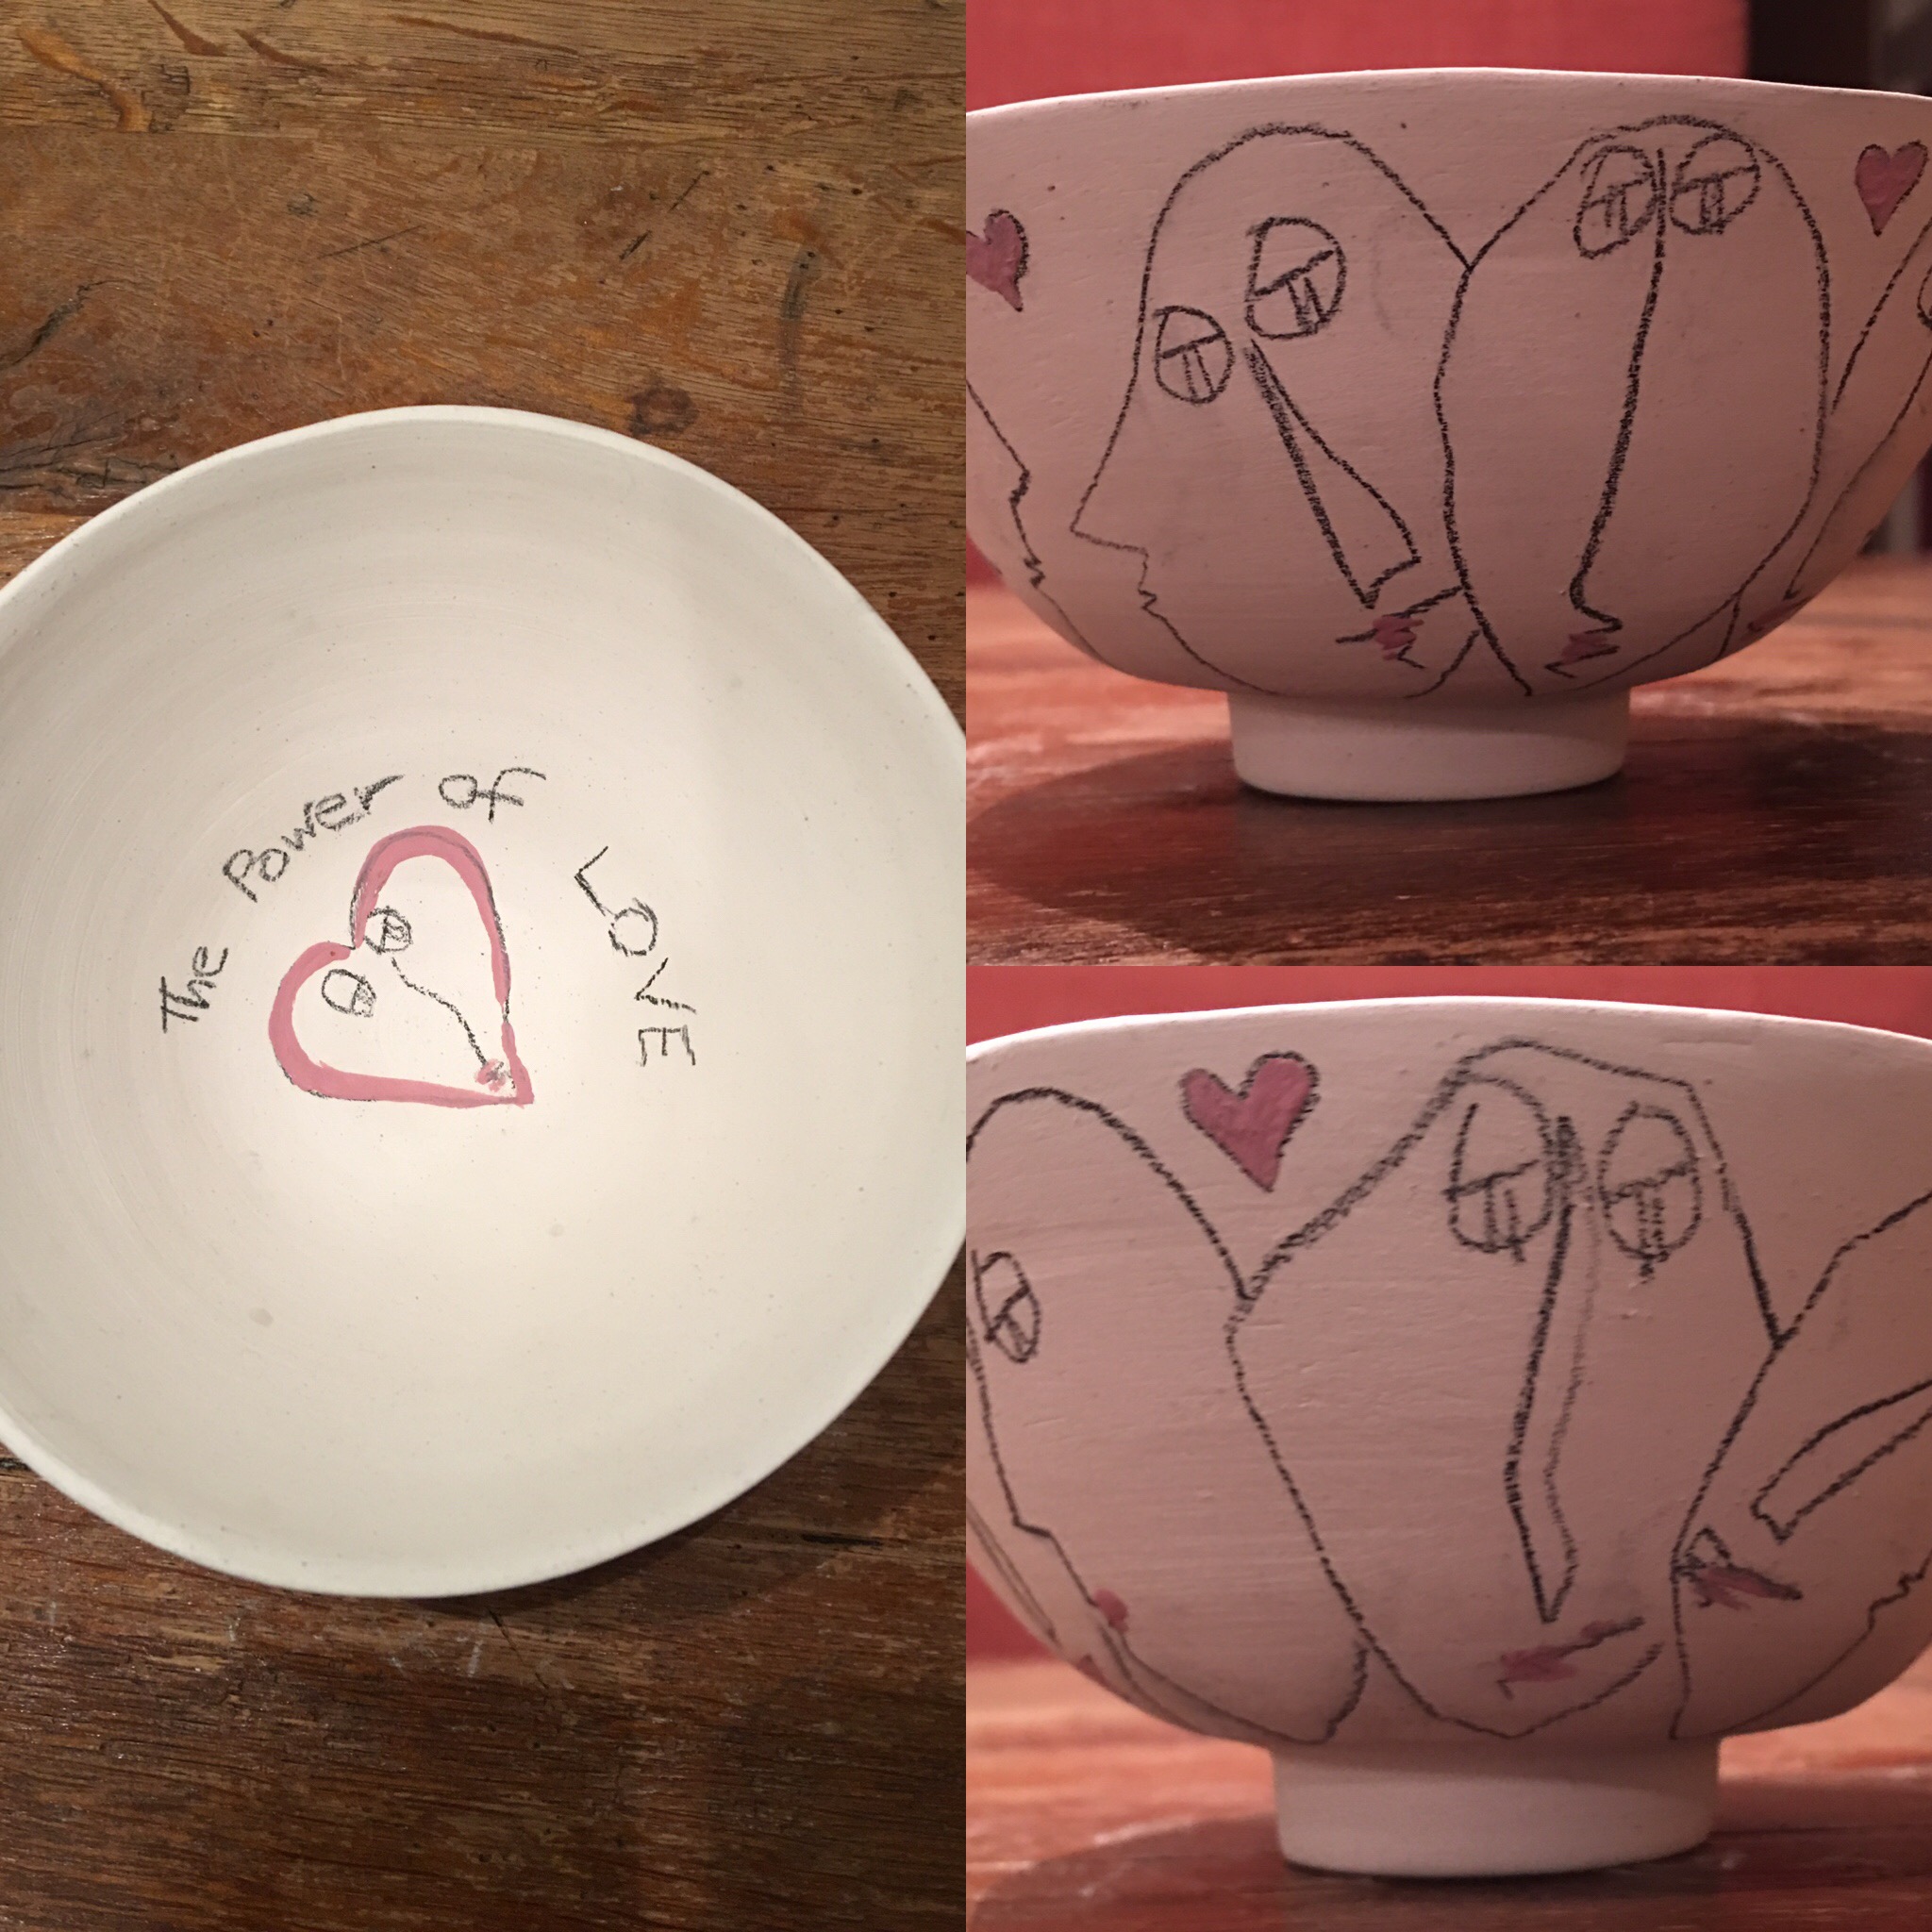
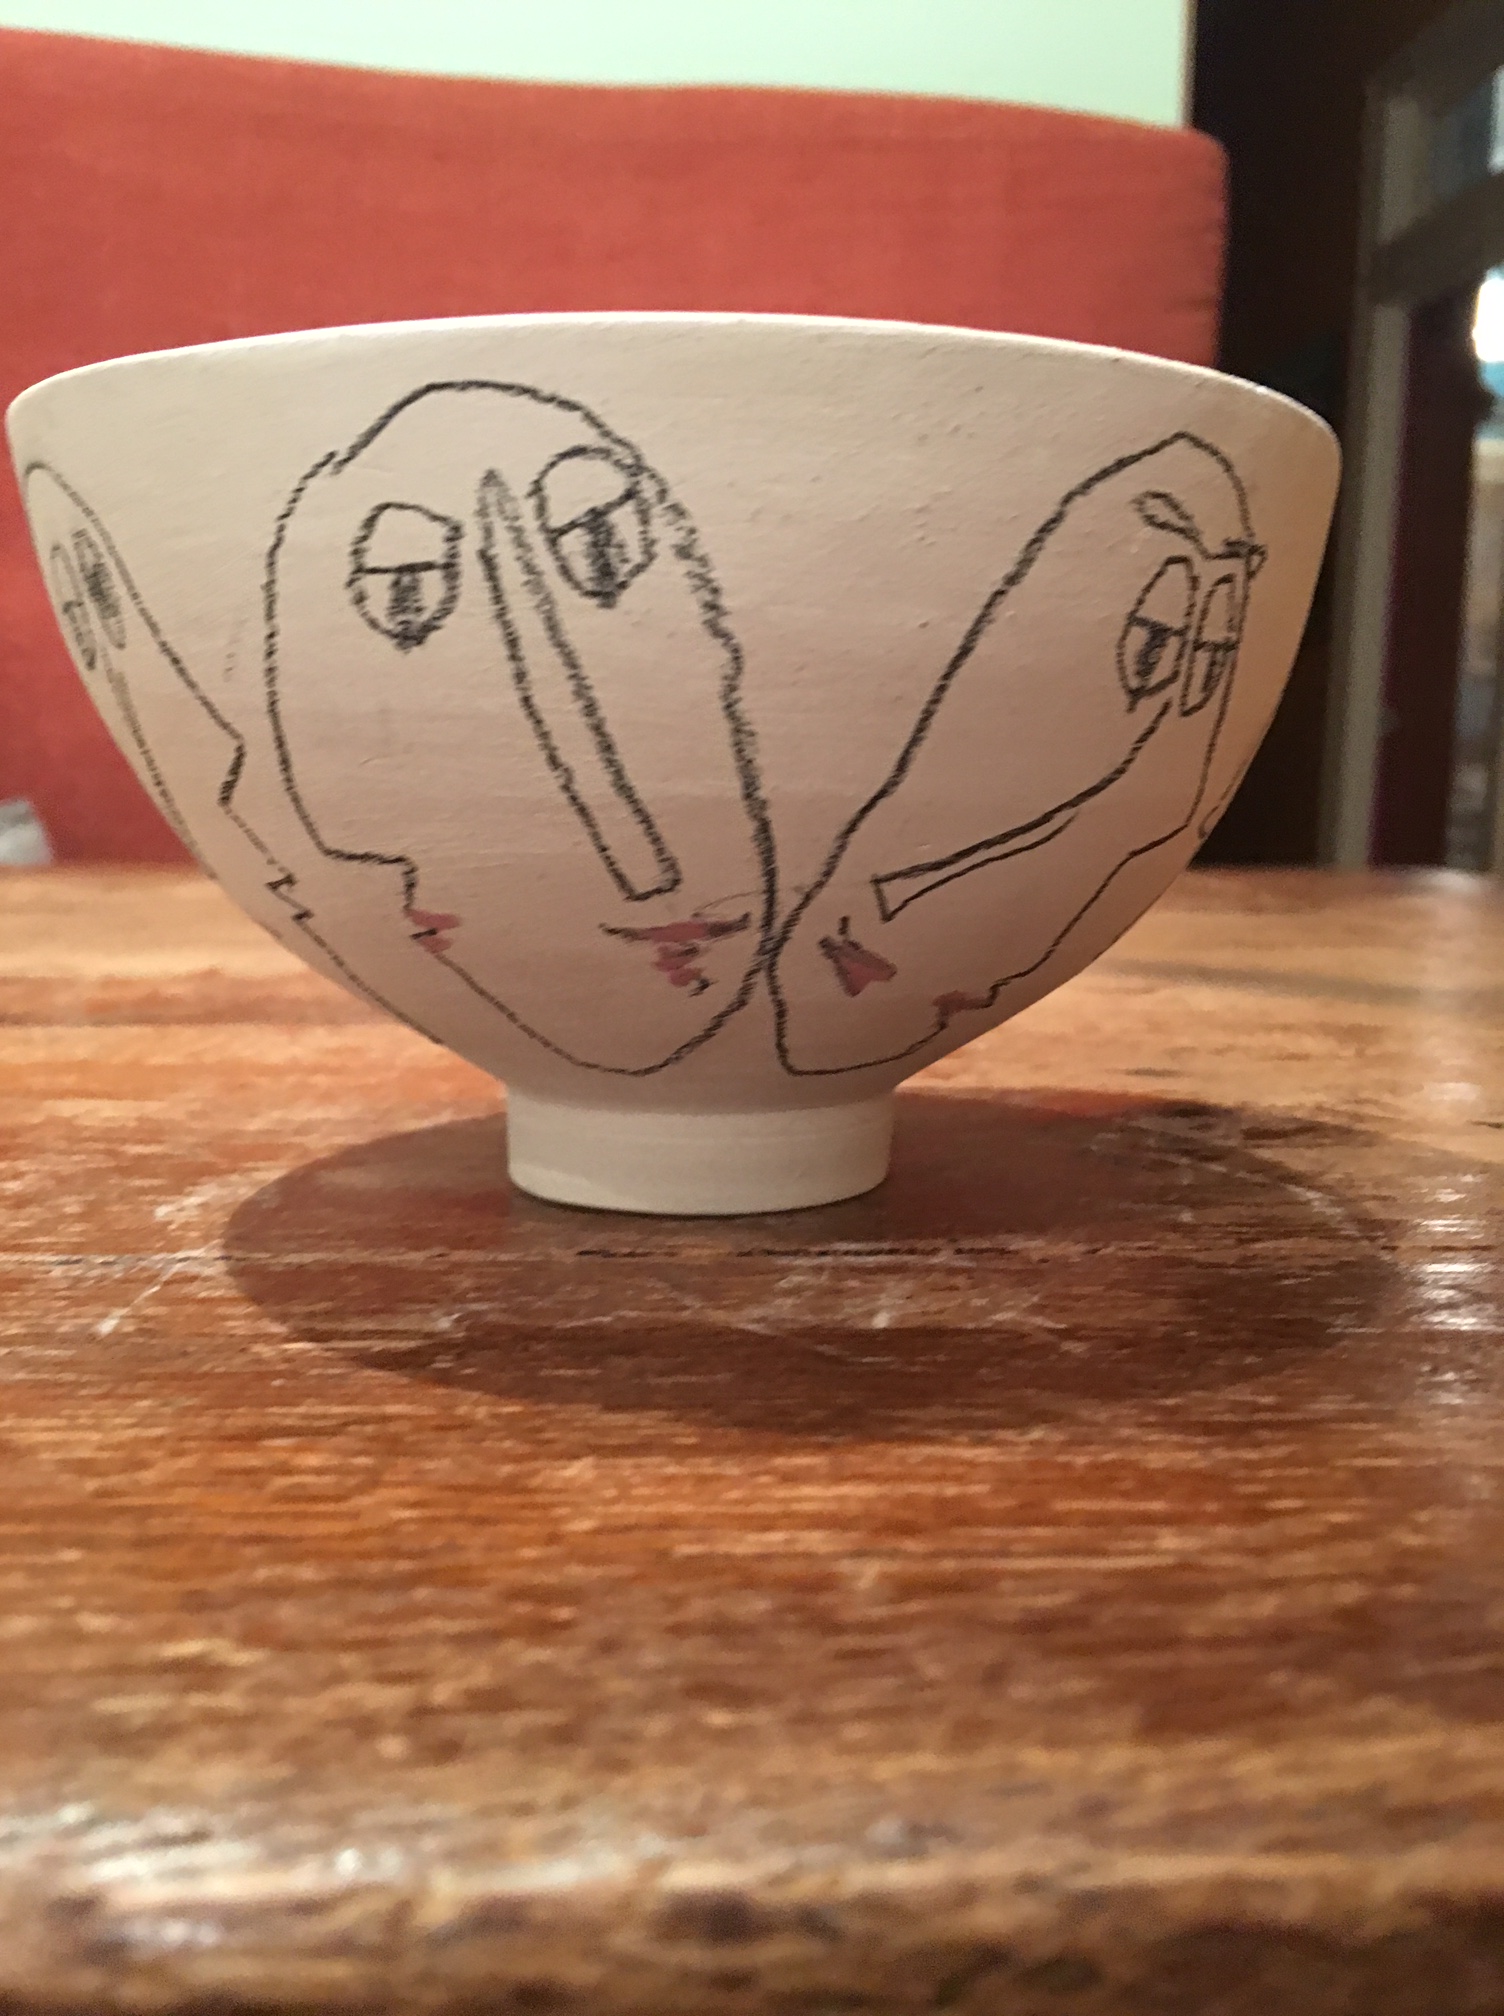
In between working on this piece, I lost myself in the bliss of hand painting some of my pots that I threw over a month ago. They make me happy. I am calling them “Message Pots.” The next batch will feature a more diverse population, which I’m looking forward to creating. Did I mention that I haven’t been sleeping much? I think all these guys look sleepy.
To all of you who celebrate Thanksgiving, have a happy one. To all who are feeling frightened and despondent, know that there are many feeling the same.
As for me, I will be losing myself in several days of cooking, another art form(!) before getting back to my painting, dyeing, quilts and designing.
Next week – screen printing!
![Turbulent Times]()
by Ariane Zurcher | Nov 8, 2016 | Art, Dyeing, Elizabeth Barton |
I almost didn’t post this today as it’s Election Day and figured many of us would be out voting or thinking about voting or waiting in anxiety for the presidential election’s outcome and then I thought – a perfect time for some levity while waiting in line to vote or for those reading this from elsewhere… okay not sure where I’m going with this, so here it is…
“Dyeing to Design” is the title of the terrific five week online class I’m taking given by the talented artist Elizabeth Barton through the Academy of Quilting. I wrote about the first week ‘here‘ and promised to write about the second.
I started the second week by pretty much dyeing every bit of white cotton fabric I had. Seriously. I went through the ten yards that was suppose to last us the entire five weeks of the class. Restraint is not a strong suit. In addition I went through so much dye that I realized I was not going to have enough to get me through the rest of the course, which meant I had to order both fabric and dye. Waiting was excruciating. I was going to work in a pun using the word “dyeing”, but restrained myself. See. I try where and when I can. While I waited however, I had all these beautiful fabrics to look at and consider for my next design.
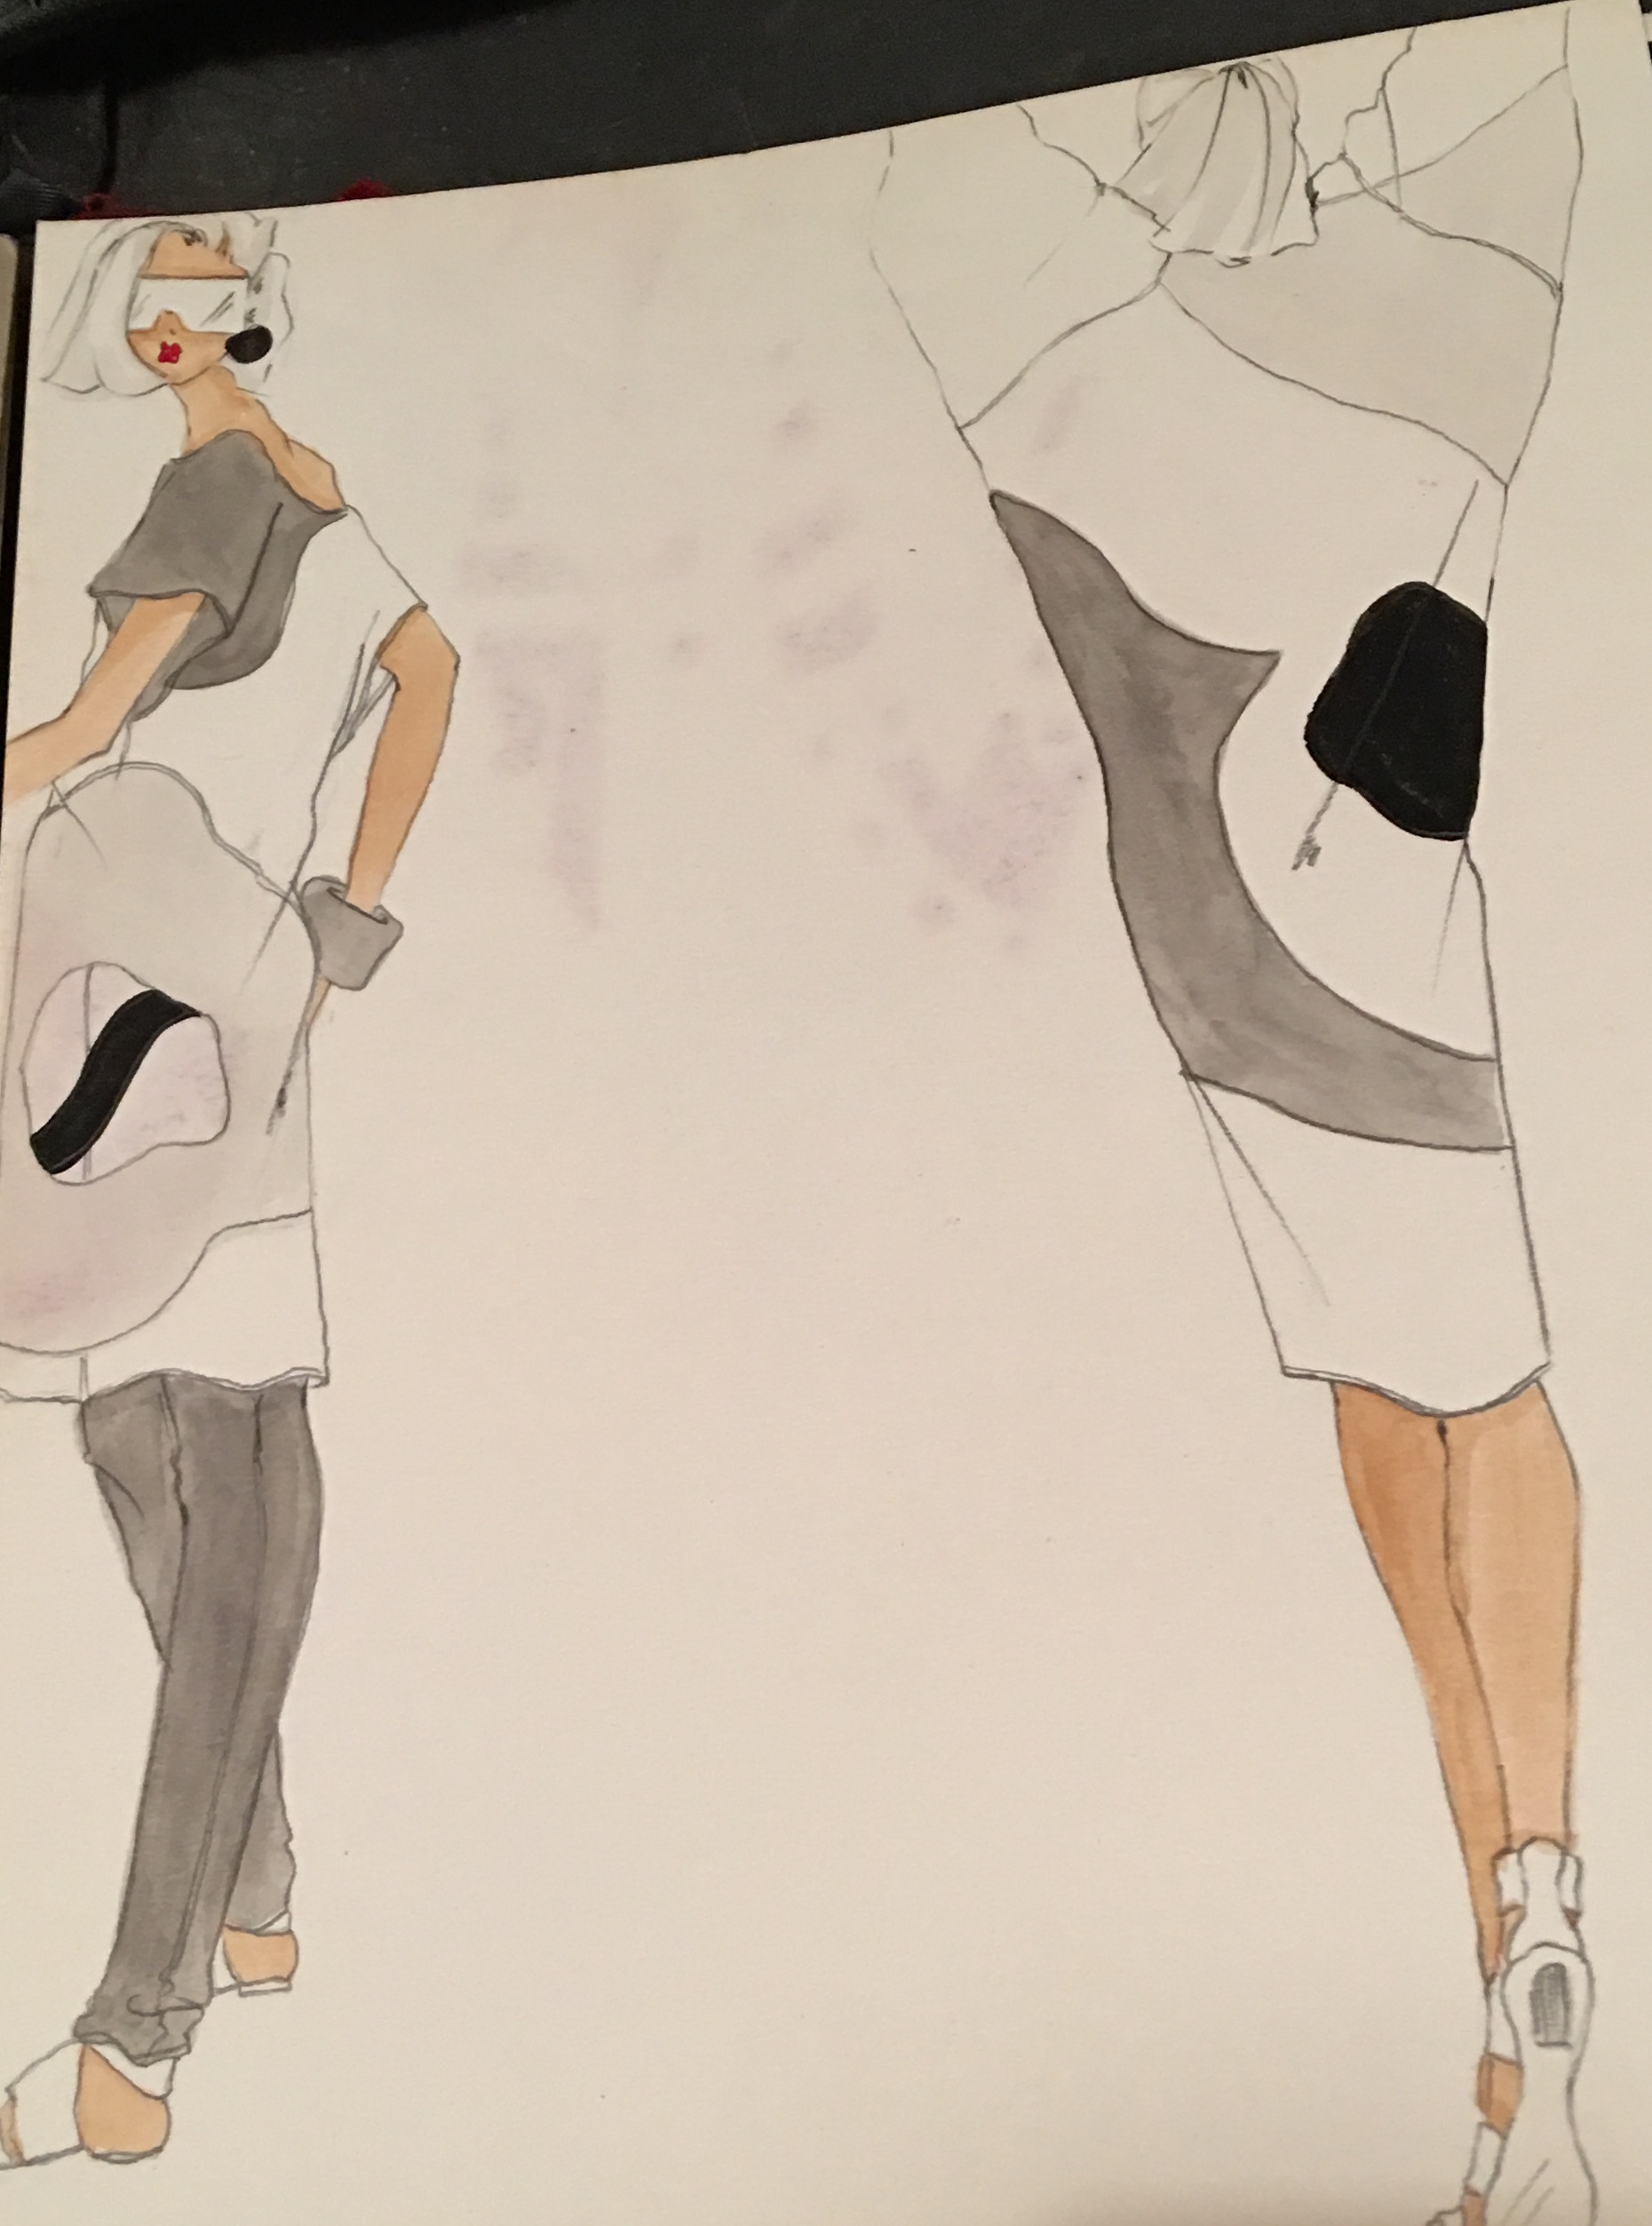
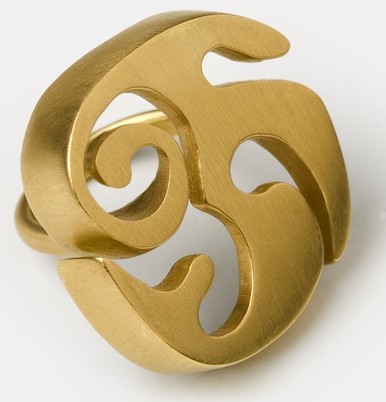
The design I decided to do used shapes I come back to again and again, long ago when I was a fashion designer, now still designing jewelry and again this past week while using my hand dyed fabrics. Let’s not spend any time analyzing this, yes?
R17 – 18 Kt Brushed Gold
I chose two colors to work with, red and, with Elizabeth’s suggestion, an olive color. Elizabeth encouraged me to play with the olive color using it’s various gradations, which of course required more fabric that I didn’t have. Not easily thwarted, I pulled out some muslin and dyed that. It was at this point that the faucet in the kitchen sink suddenly stopped working. It was a drought. Nothing, but the slightest trickle of water, a whisper, really. However, we have a slop sink in the pantry. It was one of my brilliant ideas when we gutted the place; I envisioned our loft as a veritable greenhouse with furniture. Think Max’s bedroom when he falls asleep in Where the Wild Things Are. This vision of mine never came to fruition and so the slop sink became a receptacle for rags, cleaning supplies and other items no one knew what else to do with. And to add insult to injury underneath the sink we keep the kitty litter box. As we live in NYC our “pantry,” while sounding grand and spacious, is actually the size of a very, very small closet, combined with the kitty litter under foot, a stacked washer and dryer, the slop sink overflowing with assorted cleaning supplies… Let’s face it, it’s really really cramped.
I was determined to make it work, and while this made for some interesting maneuvering on my part, I did fall in love with my slop sink, but not so much that I didn’t call the plumber. He came a few days later and fixed the kitchen faucet, but in the meantime I washed all my dyed fabrics in my now beloved slop sink inside our closet, I mean pantry. It was all very Alice in Wonderlandish.
Two days later, after the sink was working again I came home to the smell of smoke and asked FH (fabulous husband) what happened. “Well,” FH said, and then after a lengthy pause and with a pained expression he finally added, “I think our washing machine blew up.” I would have suspected wild exaggeration on his part had it not been for the lingering evidence of noxious smoke wafting through our home. Evidently he was doing a load of laundry and heard a loud bang. He went over to investigate to find smoke billowing out of our front loader. You have no idea how happy I am that I was not there to witness. So for the next few weeks we are without a washing machine. But I digress… Here is the preliminary piece on my design wall.
Slowly it began to take shape and as everything seemed to be falling apart, exploding, going dry and whatever else, my sewing machine, not wanting to be left out of all the fun, decided it was no longer going to play nice with my walking foot, perhaps it was taking a cue from our presidential race, requiring me to spend more than five hours watching various you tube videos, reading the instructions over and over again to troubleshoot. There were a LOT of late, late nights. Eventually I was able to convince my sewing machine it was in its own best interest to get along and all is well. In actuality I realized that my walking foot was causing the automatic threader to jam. When I thread it manually everything works.
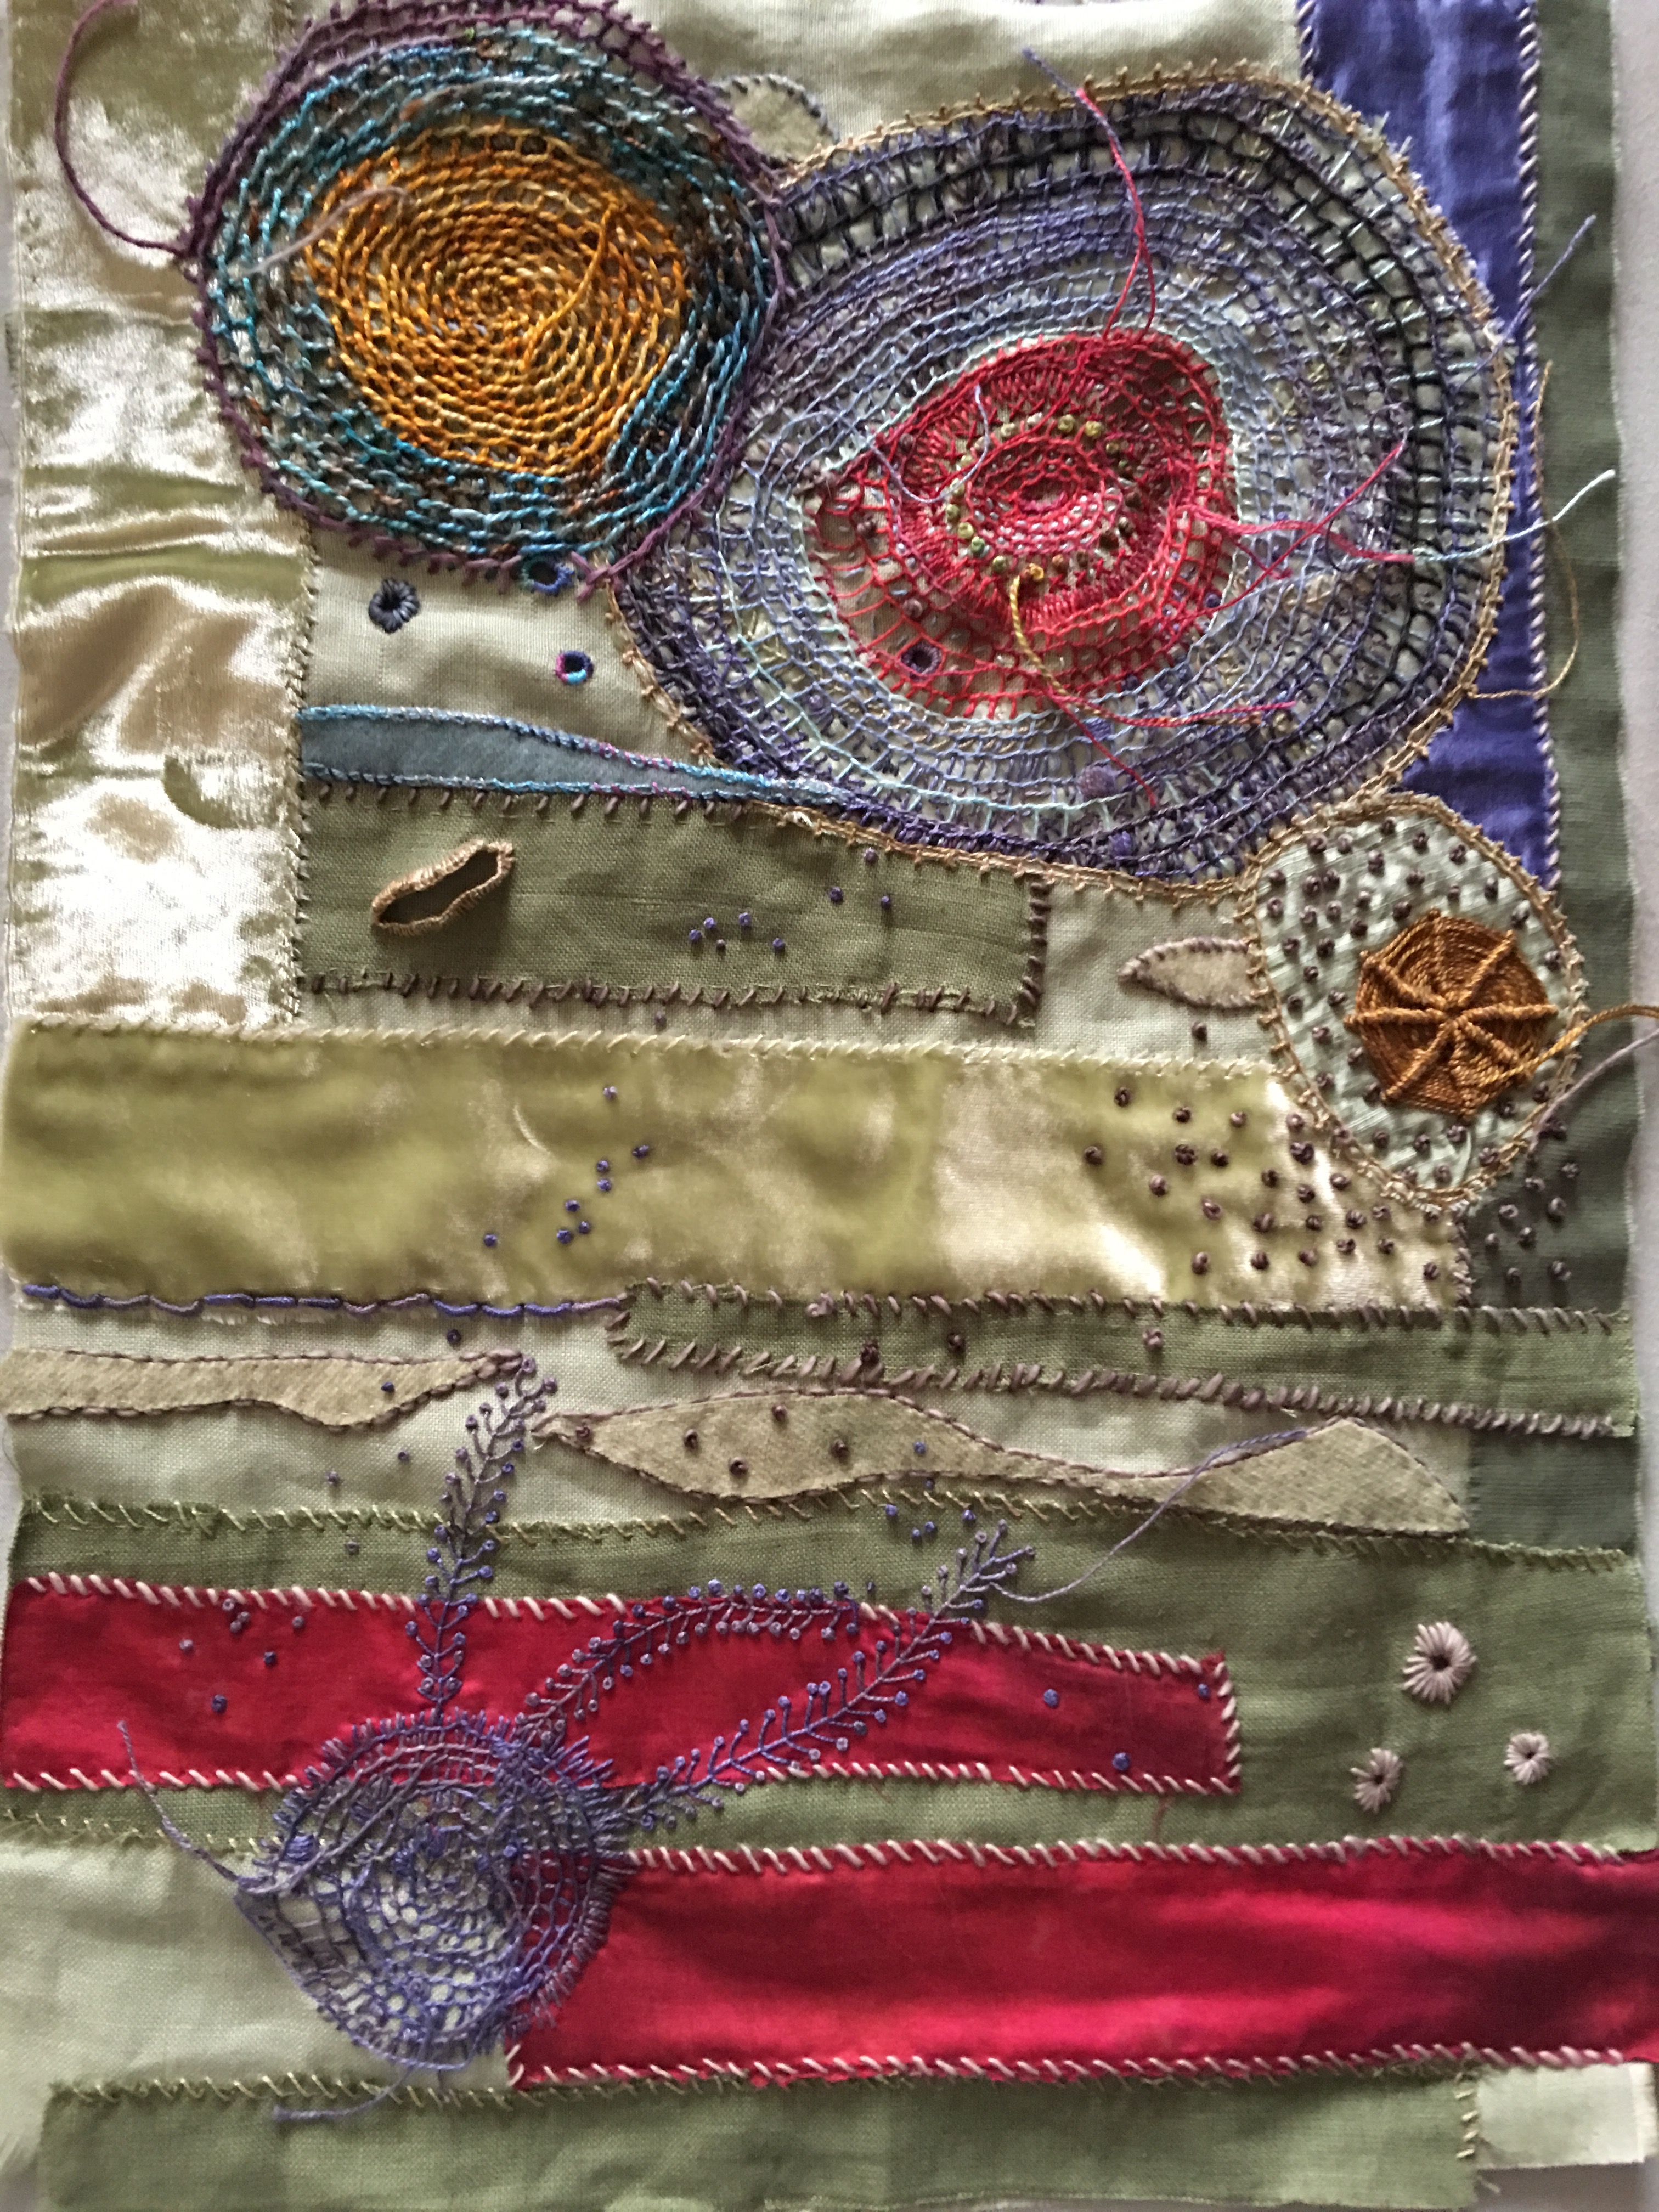
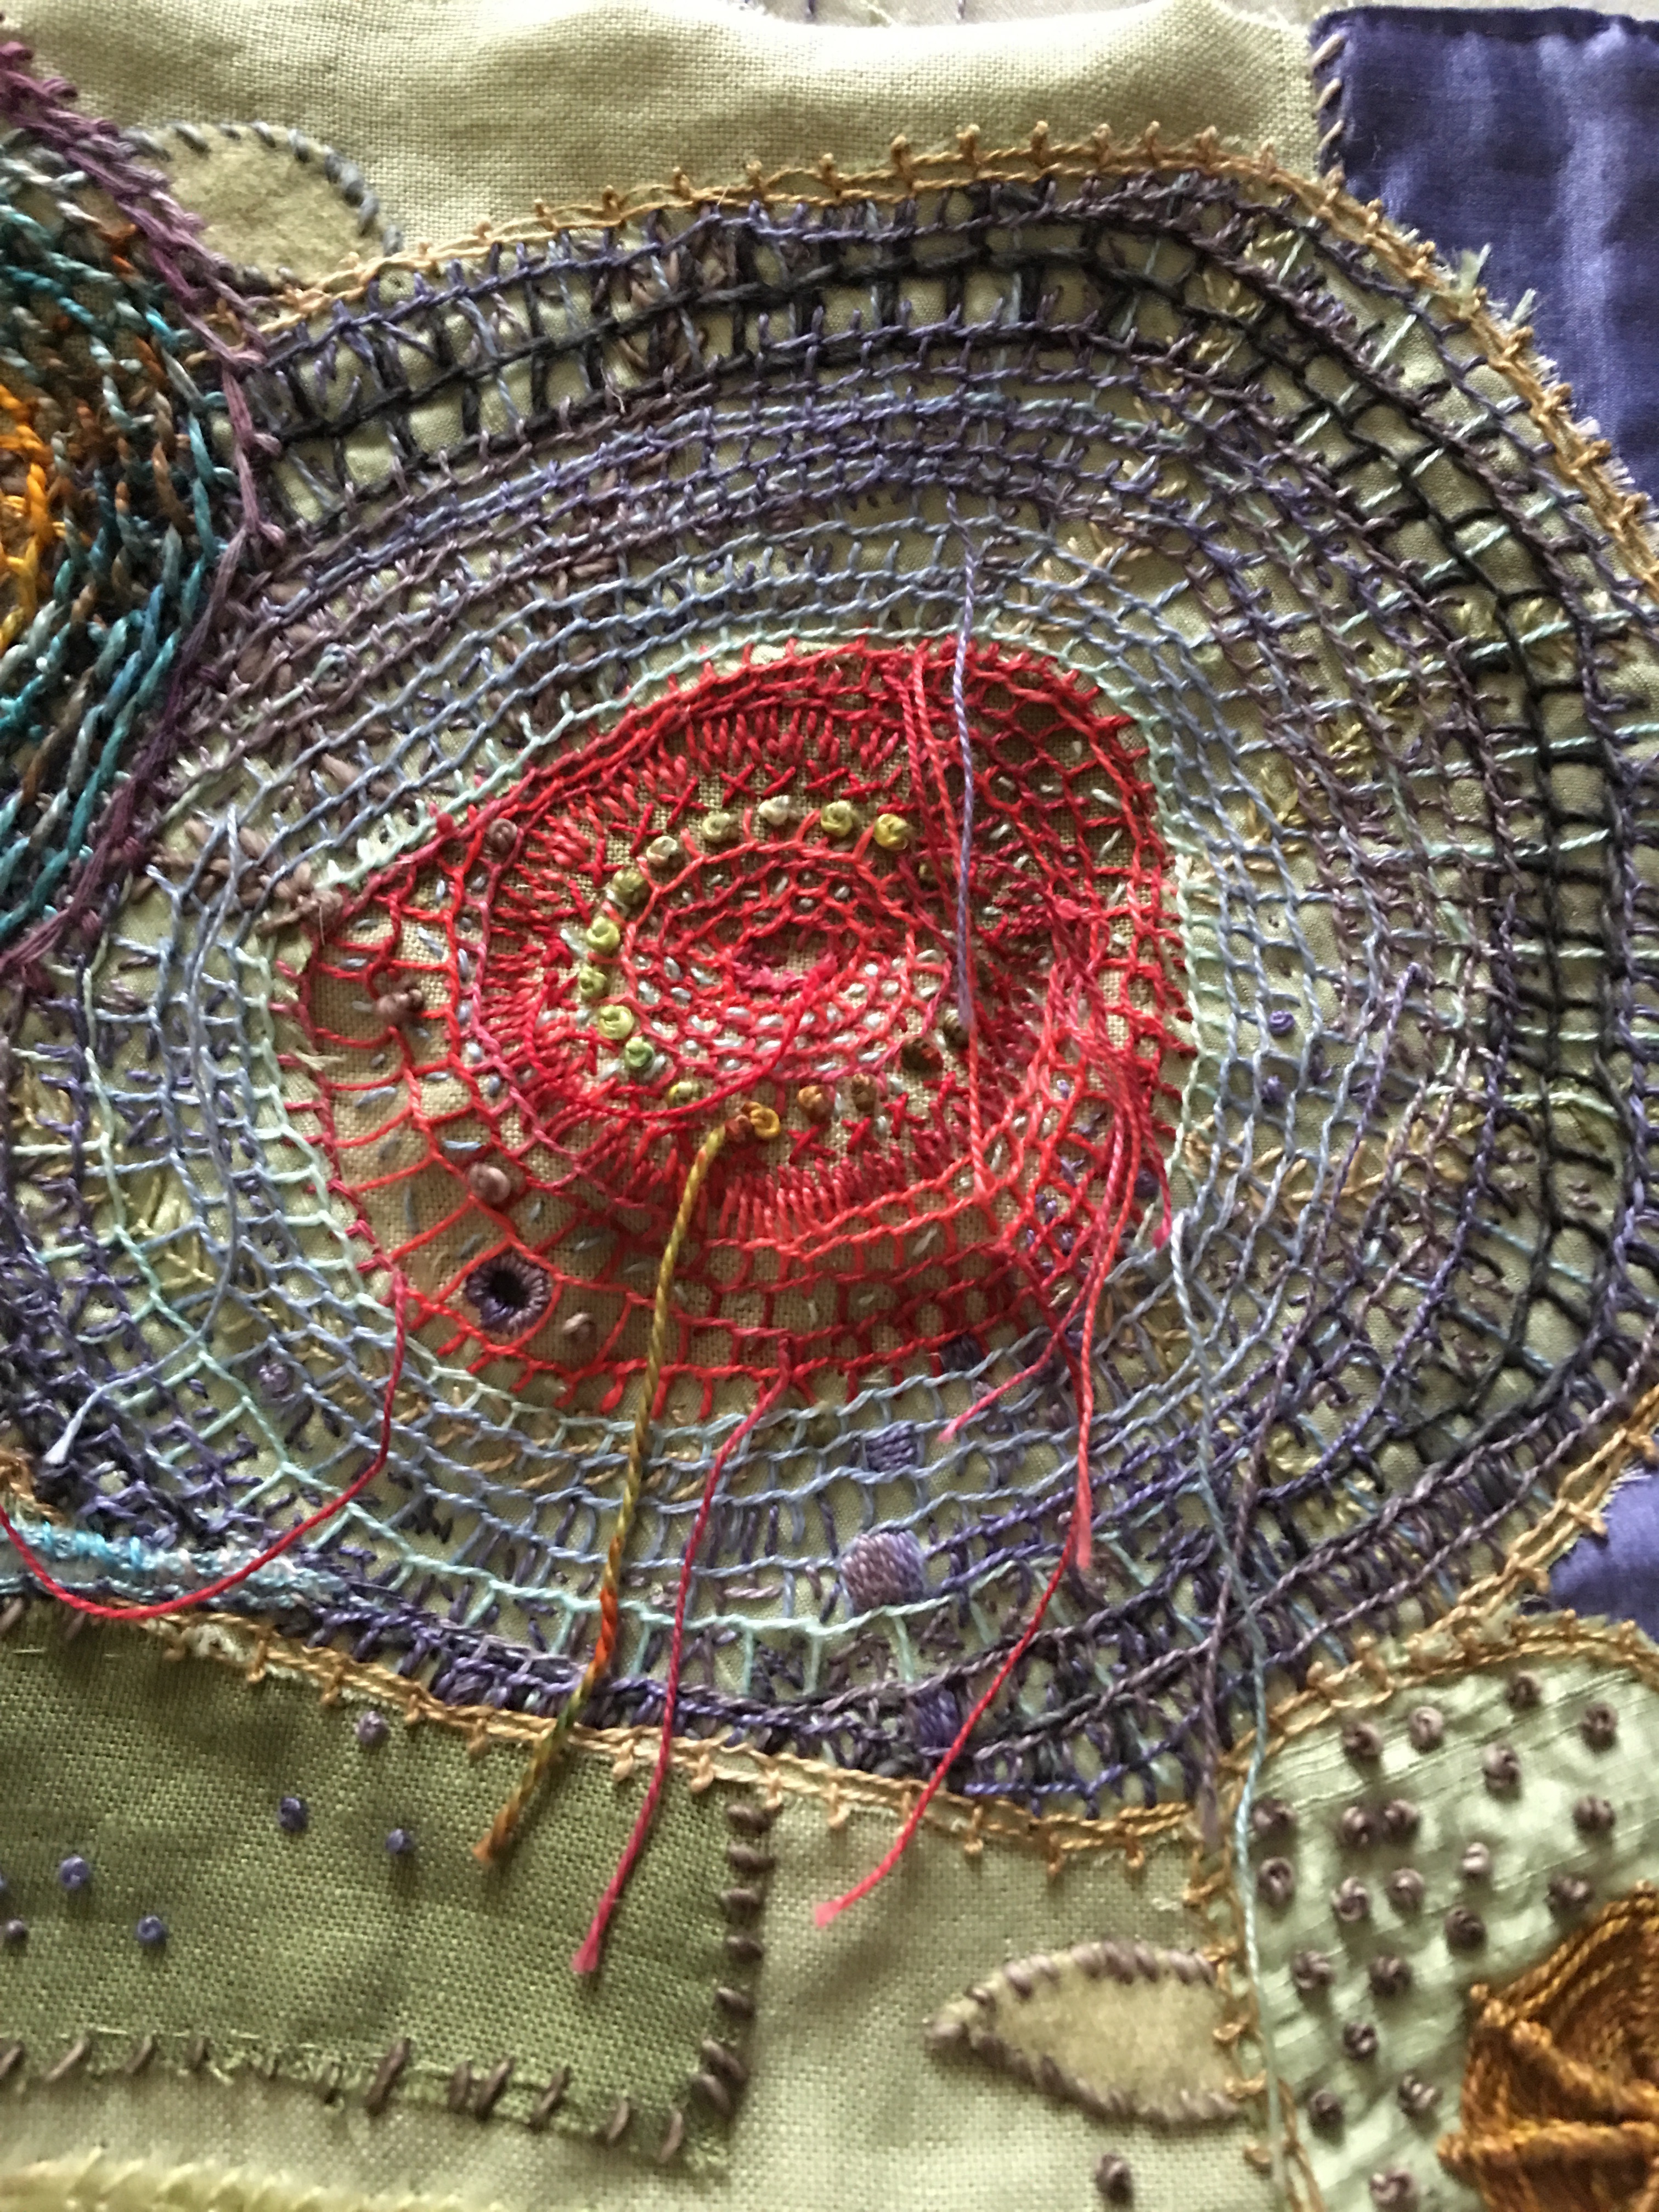
After I did the quilting I decided to add some hand stitching, but couldn’t decide whether to do more or take it all out. So what does one do when you’re not sure? Ask Elizabeth and others in the class for feedback, of course!
Which led to this…
And here’s the back.
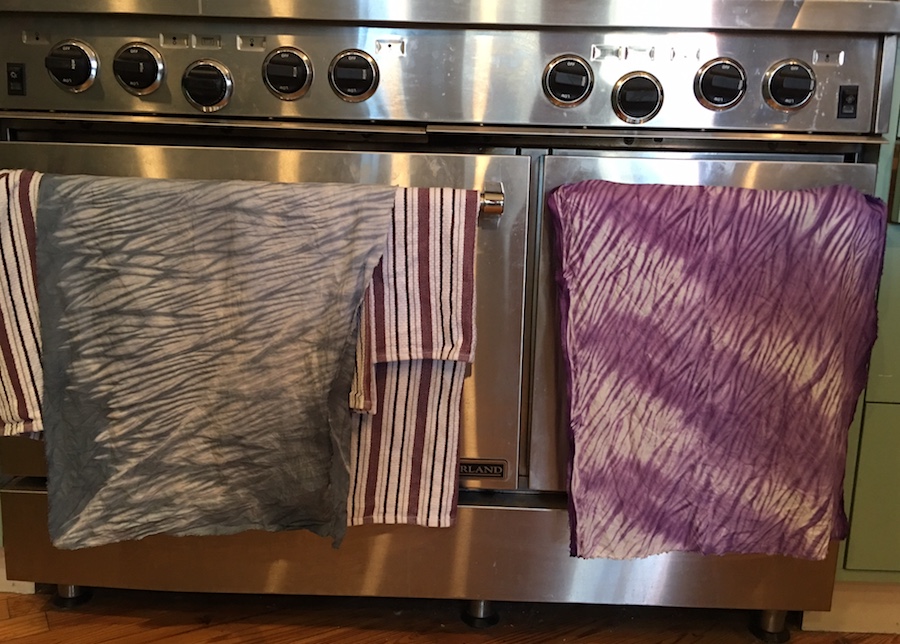
The third week of the class is well underway, my fabric arrived, the sink is running as is my walking foot (haha) and oh what fun I’m having! We are learning basic Shibori arashi dyeing. I still don’t have a washing machine, (and have two teenagers in the house) but these are luxury problems. I haven’t figured out what I’m doing with my beautiful dyed fabrics, but will come up with something in the next day or so. Here’s a sneak peak at this weeks dyeing and drying New York City style. And I didn’t make a single dye joke. The title doesn’t count because it’s Elizabeth’s name for her class. How can you not love that title? I may go back and edit a few in, just to amuse, or you can make a few in the comments!
![Turbulent Times]()
by Ariane Zurcher | Oct 31, 2016 | Art, creative process, Dyeing |
Lest you, good readers, misread the above and think this is going to be about a metaphoric death resulting from an existential crisis, let me set you straight, it’s not. This is about dyes, dyeing fabric and design. Now if you’re like me, you might be thinking – oh who has time for all that? – but let me tell you, there’s so much more to dyeing than you think. Get it? Trying not to laugh, really, really trying… It’s impossible to write a post about dyeing and not keep thinking of all the puns one makes without even trying… This is just too easy. You might dye of laughing… hee-hee!
Ahem.
Okay.
Seriously.
I never thought I’d enjoy dyeing fabric. I always felt there’s so much great fabric out there, why would I want to dye my own? Well… it turns out, not only was I wrong, but what a beautiful world it is once you begin dyeing! Before I get ahead of myself, this all began because I was looking for blogs by quilters who are also artists. As I was looking around I found the extremely talented artist Elizabeth Barton, and her blog, Art and Quilts, Cogitations Thereon. What a find! I read this post, The Proliferation of Online Classes, which I then felt compelled to comment on, which in turn led me to investigate the classes Elizabeth teaches and in particular one that began a week ago Friday, which I promptly signed up for. Her five week online class, given through The Academy of Quilting, is titled – Dyeing to Design. Love that.
Dyeing has never called to me, but I enjoyed reading Elizabeth’s blog, really like her work, and this class had the most immediate starting date and I’m impatient, so I thought – Why not? This is one of the many wonderful things about being new to something, it never hurts to try something you’ve never done before and the worst that can happen is you discover it’s not for you and you move on. On the other hand, you might fall in love with whatever it is, become totally obsessed and that is a indescribable joy unlike any other. The latter pretty much describes my experience with quilting and fiber art. And so it was again, with dyeing and this class, now in its second week. What a fantastic class. I cannot recommend it, and Elizabeth Barton, more highly!!
It helps that Elizabeth is a terrific instructor, very responsive and thorough, has a great eye, and gives excellent feedback. She writes extensive instructions with good explanations and examples of her own work to illustrate what she’s talking about. The first week we dove right in mixing all our various dyes for the next five weeks and did this – gradations of black (photograph below.) You’ll notice the mottled effect, which I think is so beautiful and striking. As we were working with black and since there’s no such thing, the blues, pinks and greens can be seen in different areas. The organic look to the fabric also appeals to my sense of design and so I was hooked. Totally fell in love. Completely. Dramatically. In. Love. Designing a piece using these gradations was next. I had a couple ideas and with Elizabeth’s encouragement settled on this one, which also happened to be the first idea I came up with.
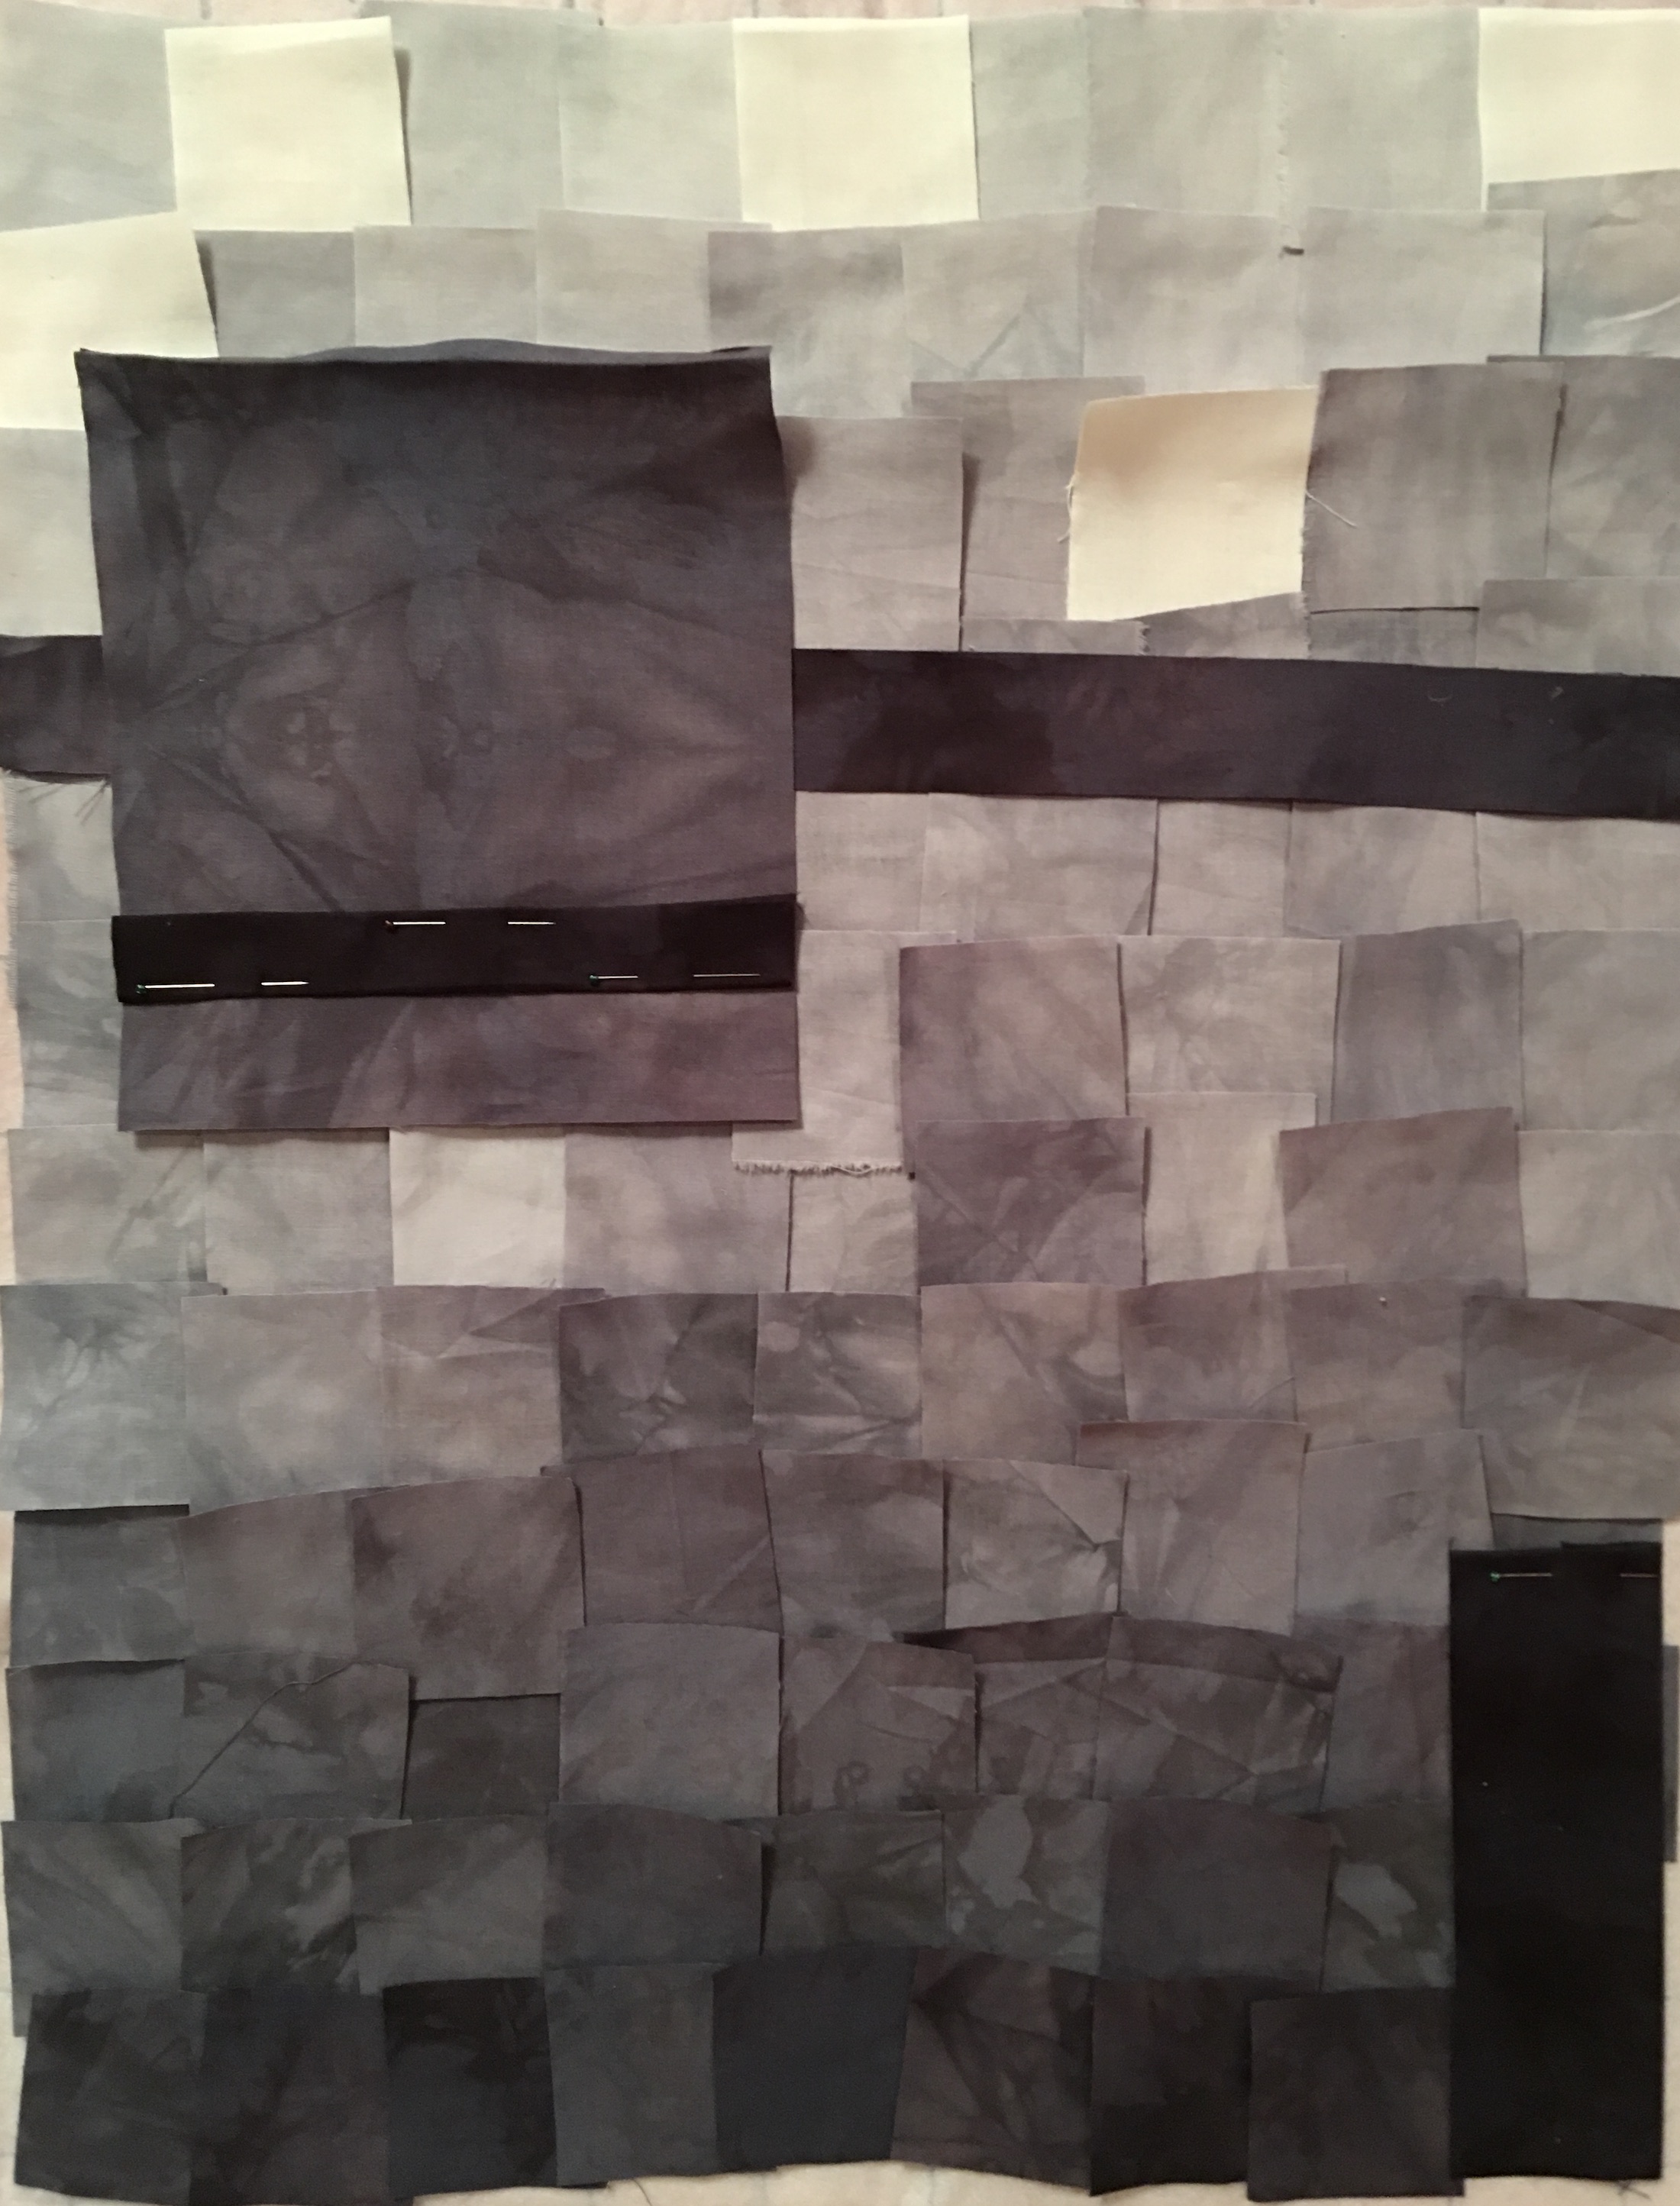
I decided I would cut the fabric into 2.5″ squares, which meant that after they’d been sewn together they would be 2″ squares, gradating from light to dark, but a little unevenly to keep things interesting. This is how it looked positioned on my design wall.
Emboldened by Elizabeth’s helpful suggestions, I made a few adjustments and began sewing all those squares together. That’s a whole lot of squares… After consulting Elizabeth (again), she suggested linear and horizontal stitching, I began quilting, but left the larger square alone as I wasn’t sure what to do with it. I wanted to do something, but couldn’t figure out what.
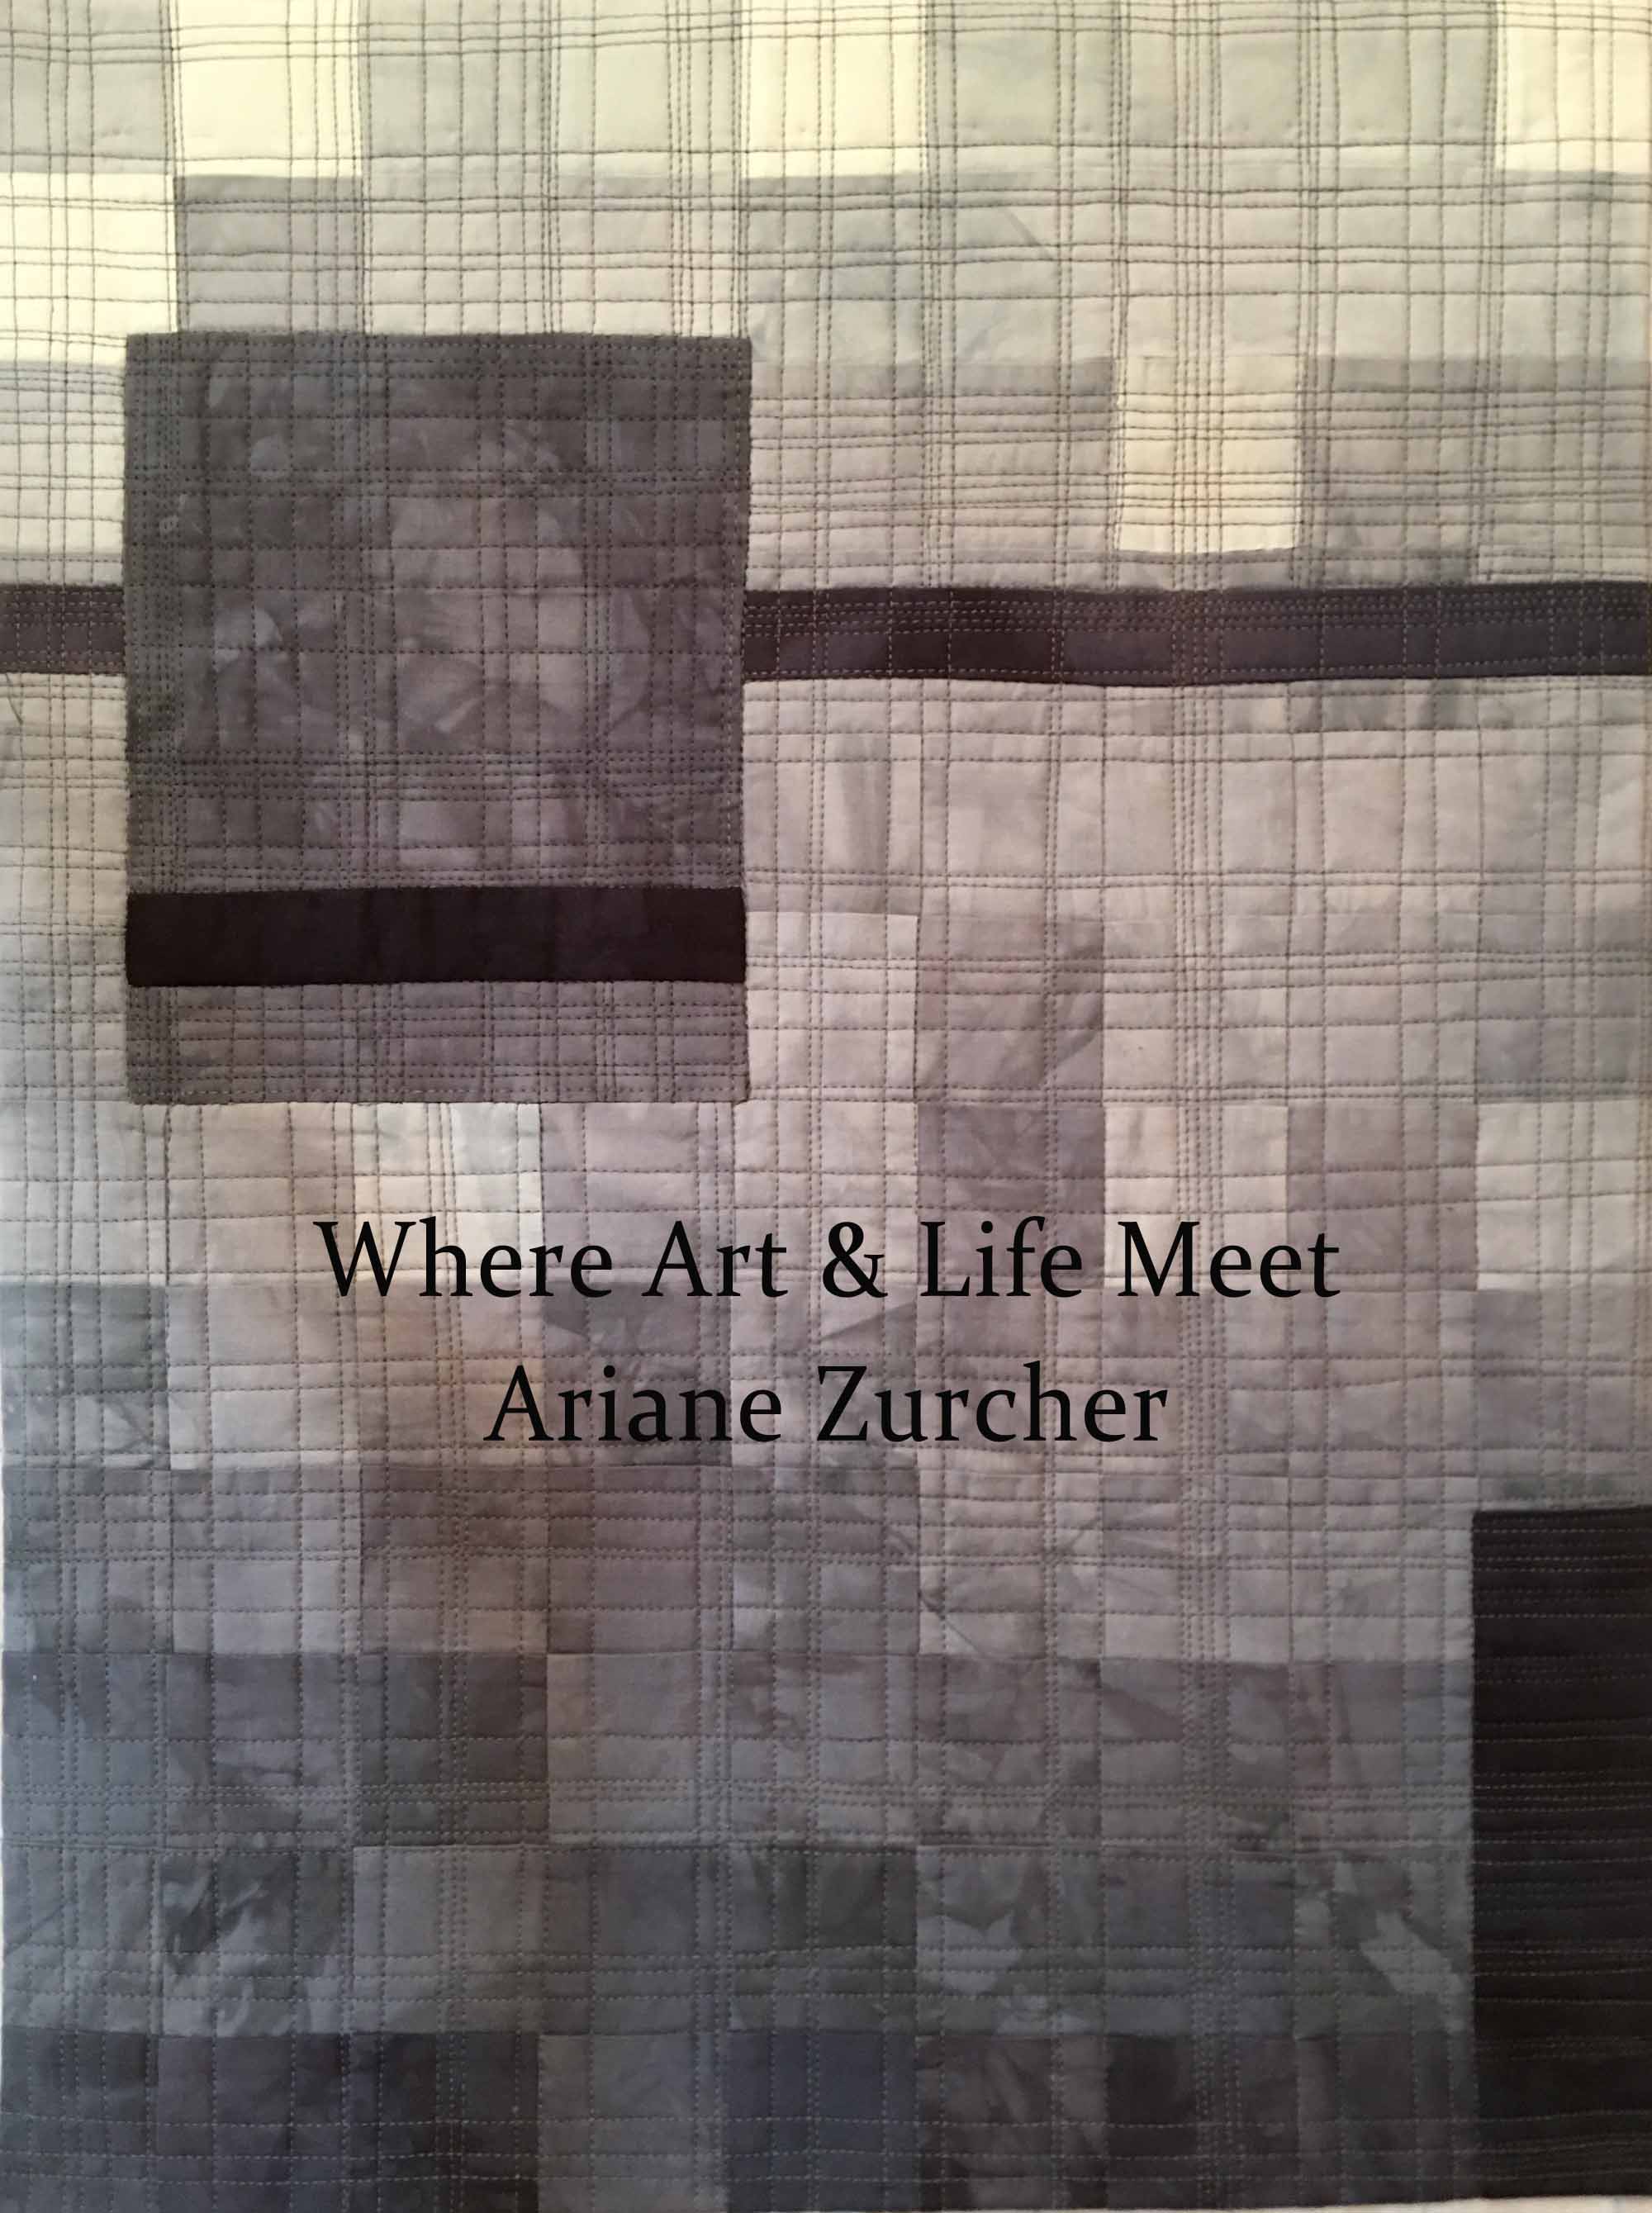
Back to Elizabeth who gave me more excellent feedback, suggesting a different color thread and syncopating the stitches so they didn’t meet with the other lines from the larger piece, and off I went to finish it. I decided against a binding, instead made a facing out of my lightest grey and backed it with a piece of red fabric I had. I made a label, again from one of the light greys and voila! This piece, entitled Living in the Grey, is 17″X 23.5″.
The thing about dyeing your own fabric is how utterly seductive it is. You can mix any color you want by tweaking the proportions of your primary colors. The mottled effect enhances the overall feel of the fabric, making it completely unique and like no other.
We are now in Week Two and are dyeing as many colors as we have the time, inclination and material for. Of course I went totally nuts with dyeing all the possibilities. I admit – I’ve now dyed every color including varying intensities and am eager to start experimenting with the subtler, more nuanced shades of each, but ran out of fabric, dye and other materials I need, so will have to wait until all the things I’ve ordered arrive. Here’s a sneak peak of a few of the colors I dyed over the weekend, (and stayed up until 3 or 4am, I can’t remember now, to do so!) getting ready for my next design using colors. Lots and lots of colors. You could even say… colors to dye for. Oh behave yourself!
I’m just dyeing to read your comments. Okay, okay, I’ll stop.
No, really.
I promise.
You have no idea how hard I’m restraining myself right now.
![Turbulent Times]()
by Ariane Zurcher | Jul 31, 2016 | Art, Design, Quilting by the Lake |
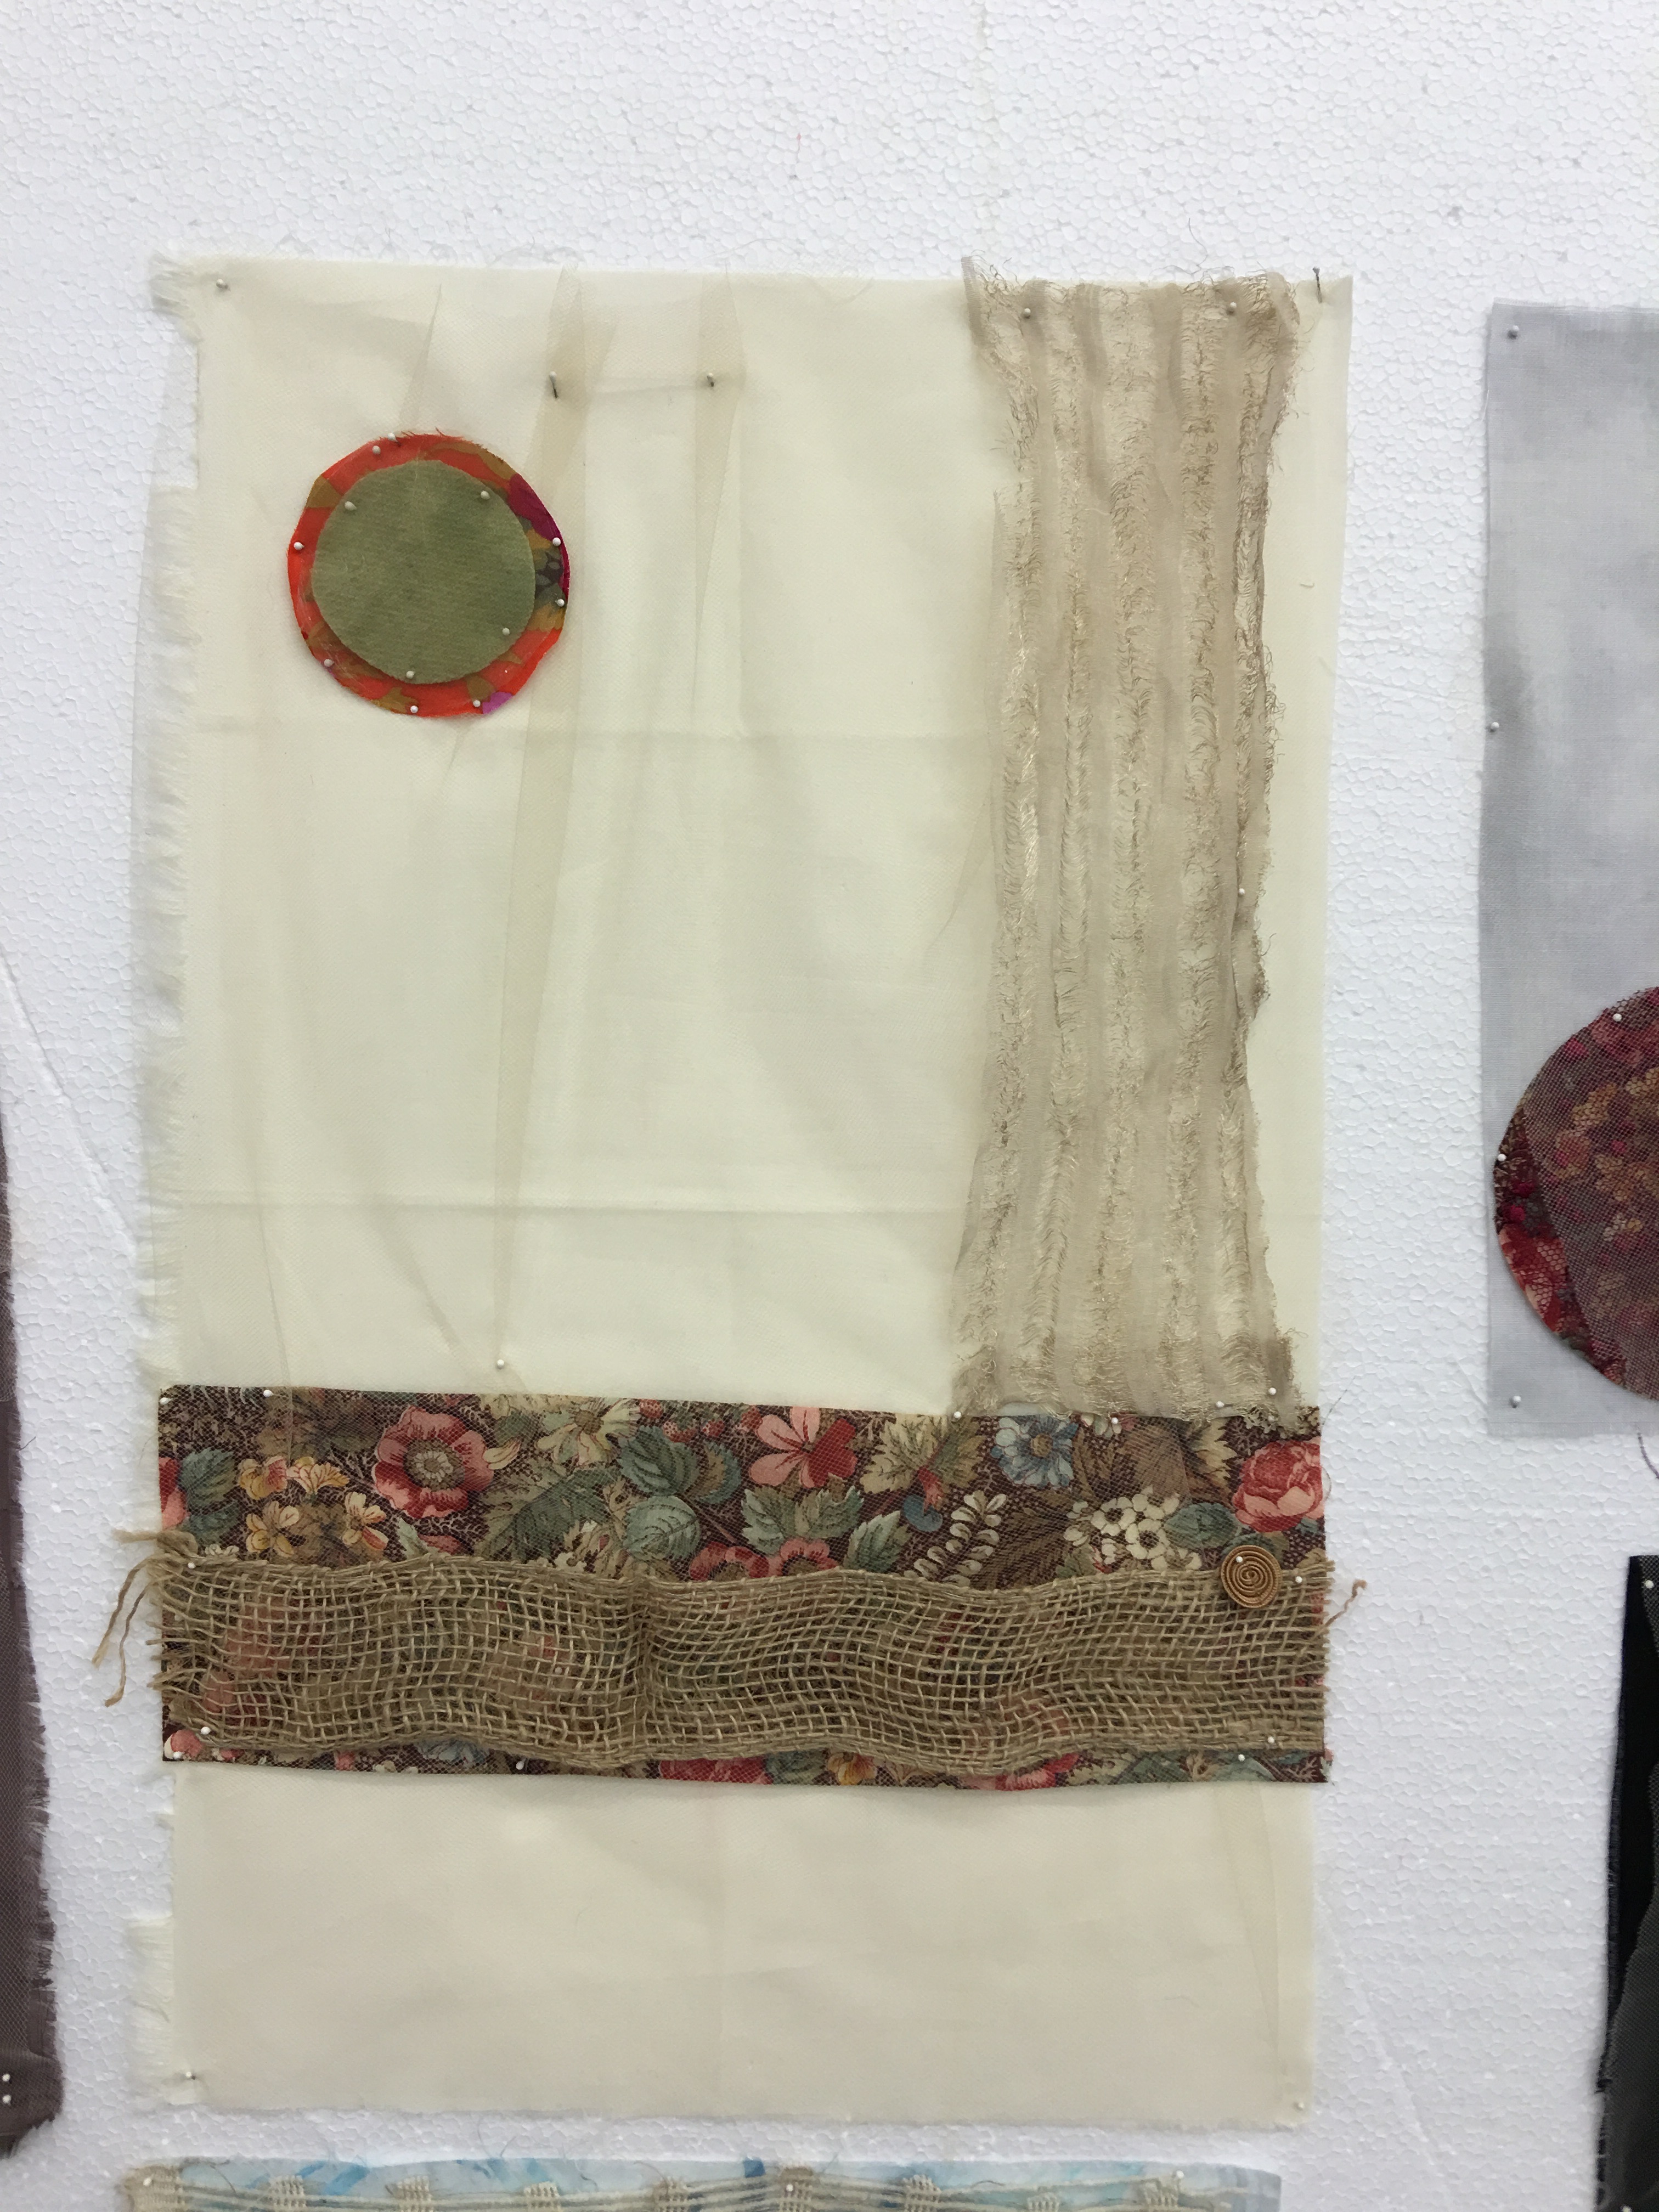
I just returned from a two week long artist’s workshop, where I studied with the fabulous and fabulously talented artist, Rosalie Dace for five days, followed by five days with another fabulous and extremely talented artist, Lorie McCown. The workshops are part of the Schweinfurth Art Center‘s yearly summer program – Quilting by the Lake, also known as QBL. Though there is now no lake, there was one at the place they first began doing these workshops more than thirty years ago, and not everything produced is quilted, though it depends on the workshop you signed up for.
Here’s a run down of my time at QBL.
Day 1 of Rosalie Dace’s Workshop entitled Skin Deep: Panic! and the realization that perfectionism is creativity’s executioner.
By the end of the first day I have a couple of ideas, but am definitely struggling.
Day 2: I begin repeating something Rosalie had written on one of the large boards propped up on one of two easels in front of the class. “DON’T PANIC!” This becomes my mantra for the rest of my time at QBL.
Day 3: I hate everything I’ve created thus far and have the rude awakening that my expectations are a killjoy. Around the middle of day 2 and into day 3 Rosalie encourages me to use machine stitching, which definitely pushes me out of my comfort zone. I proudly show Rosalie the machine stitching I’ve done (and am devising ways I will hide it after showing her) she applauds my efforts and then drops a bomb by suggesting I add two more lines of machine stitching so for every one line there are now THREE and a little part of me dies inside.
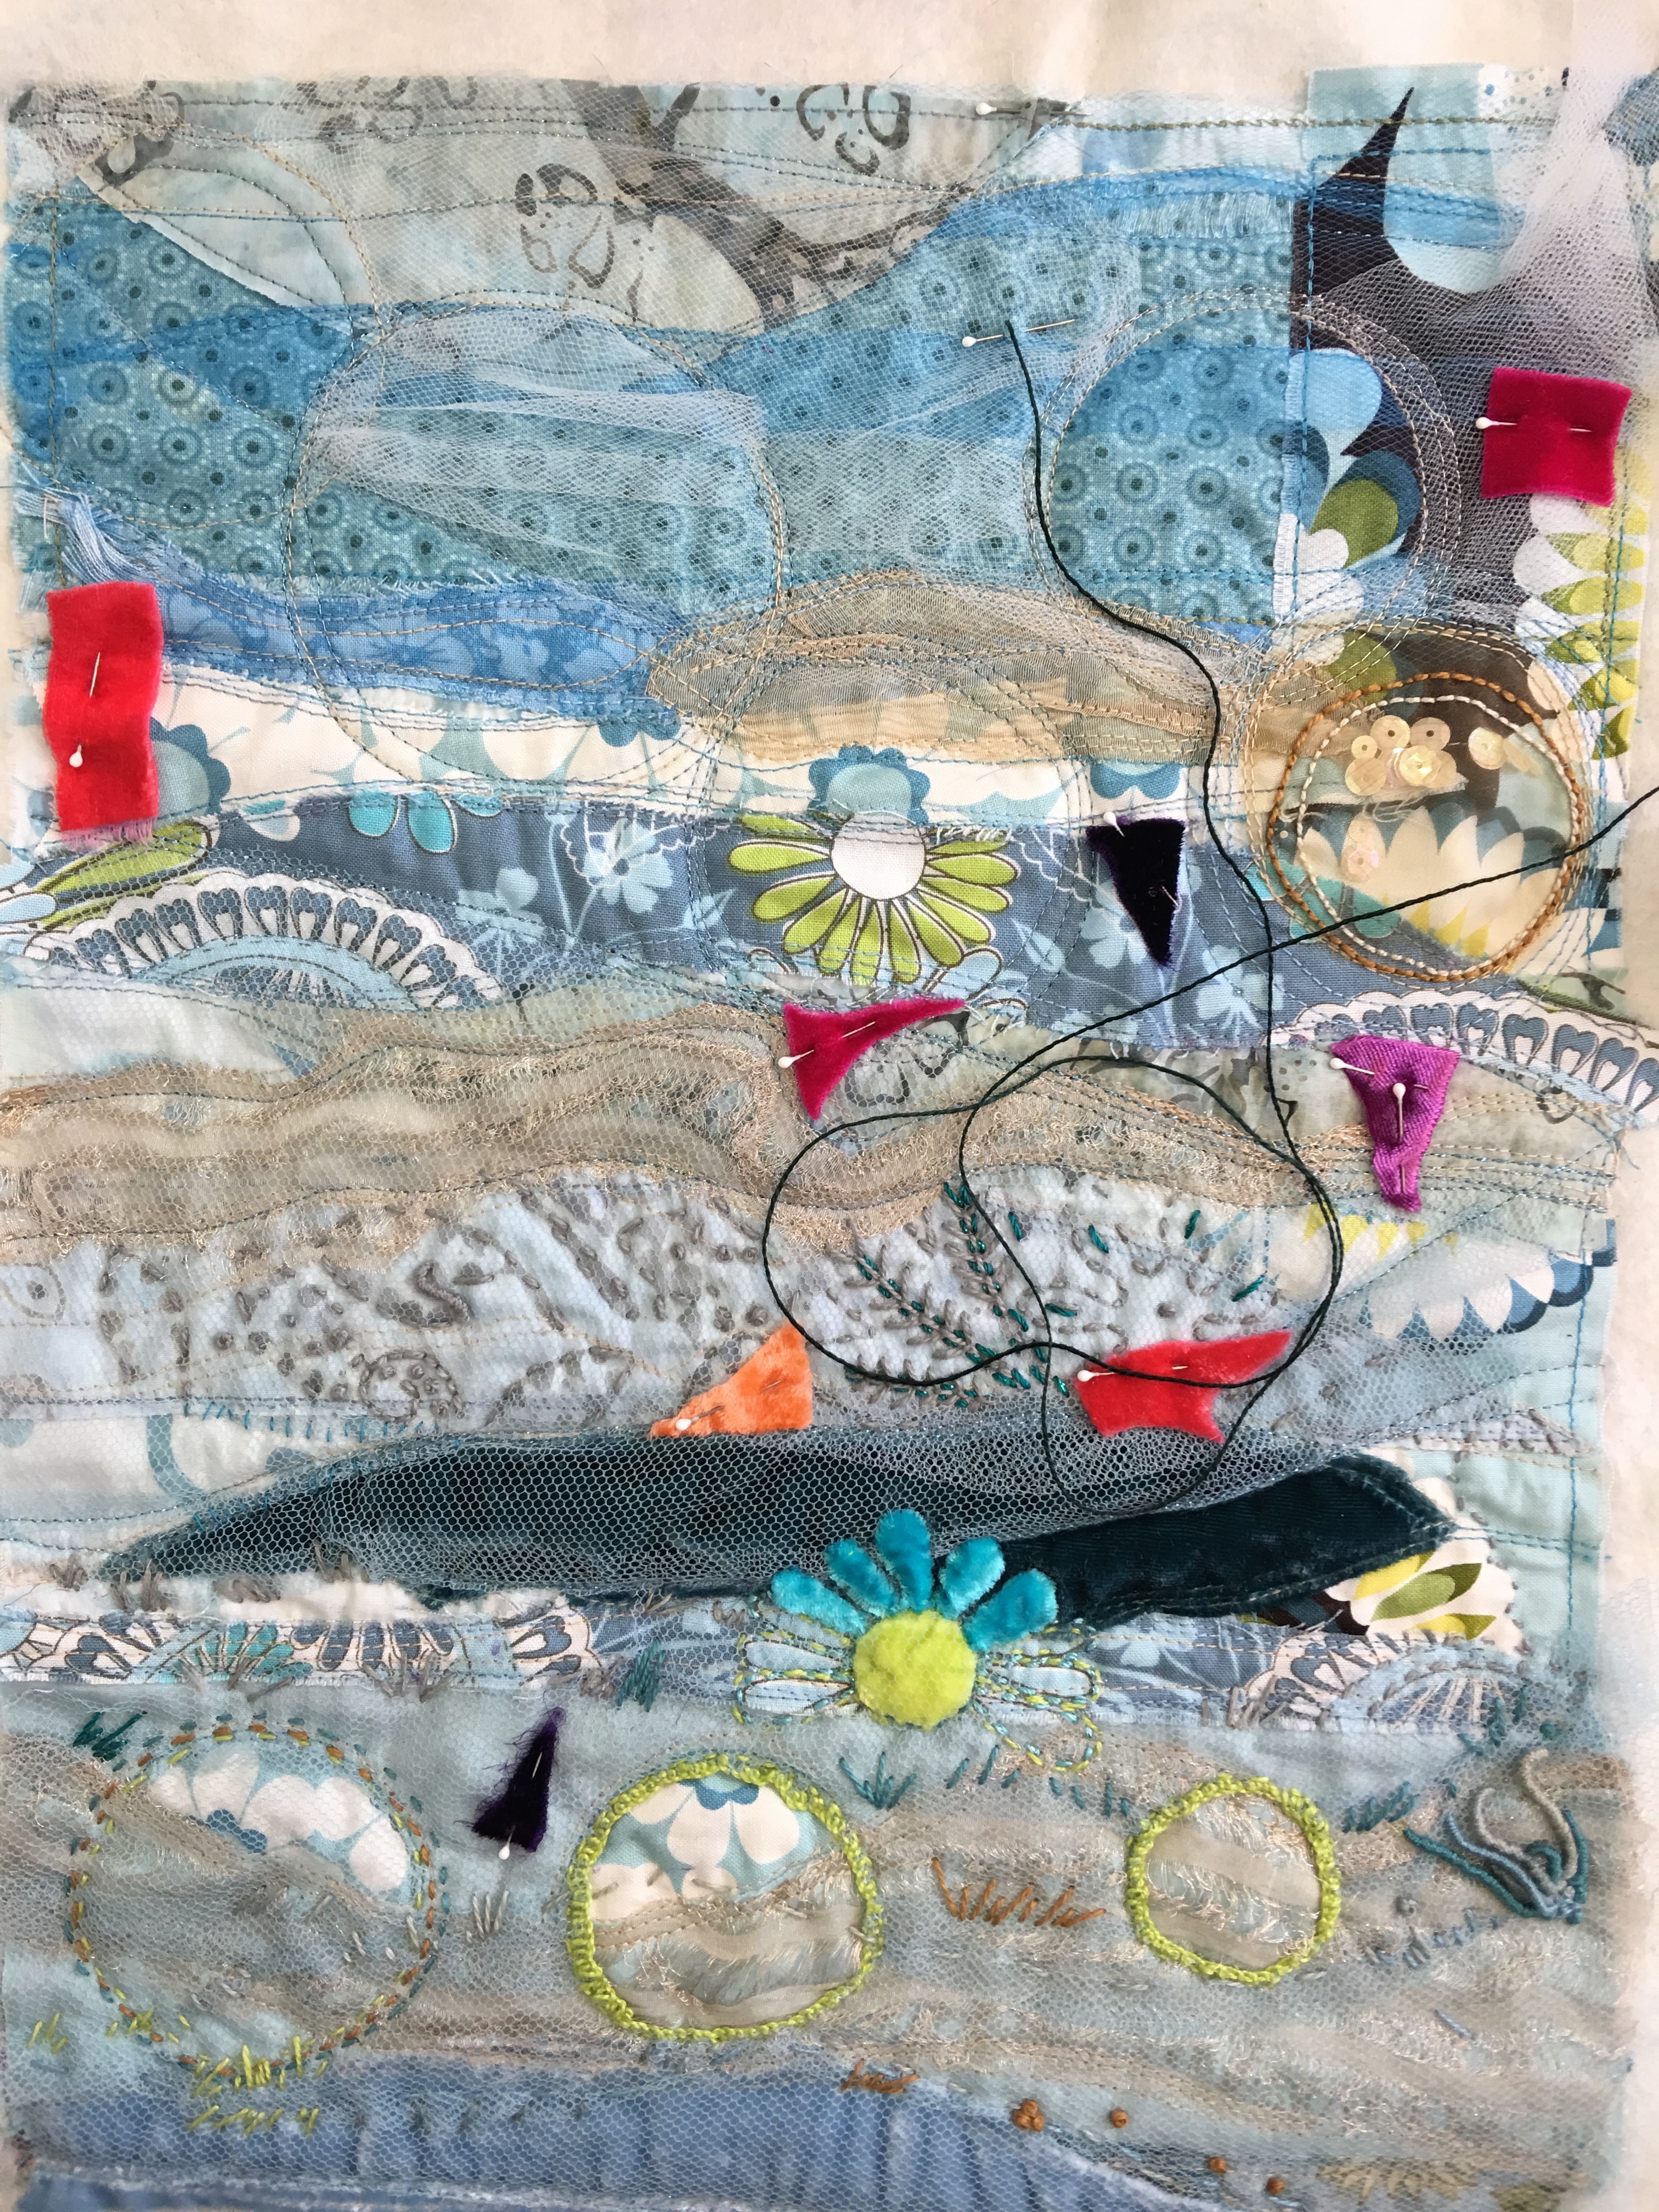
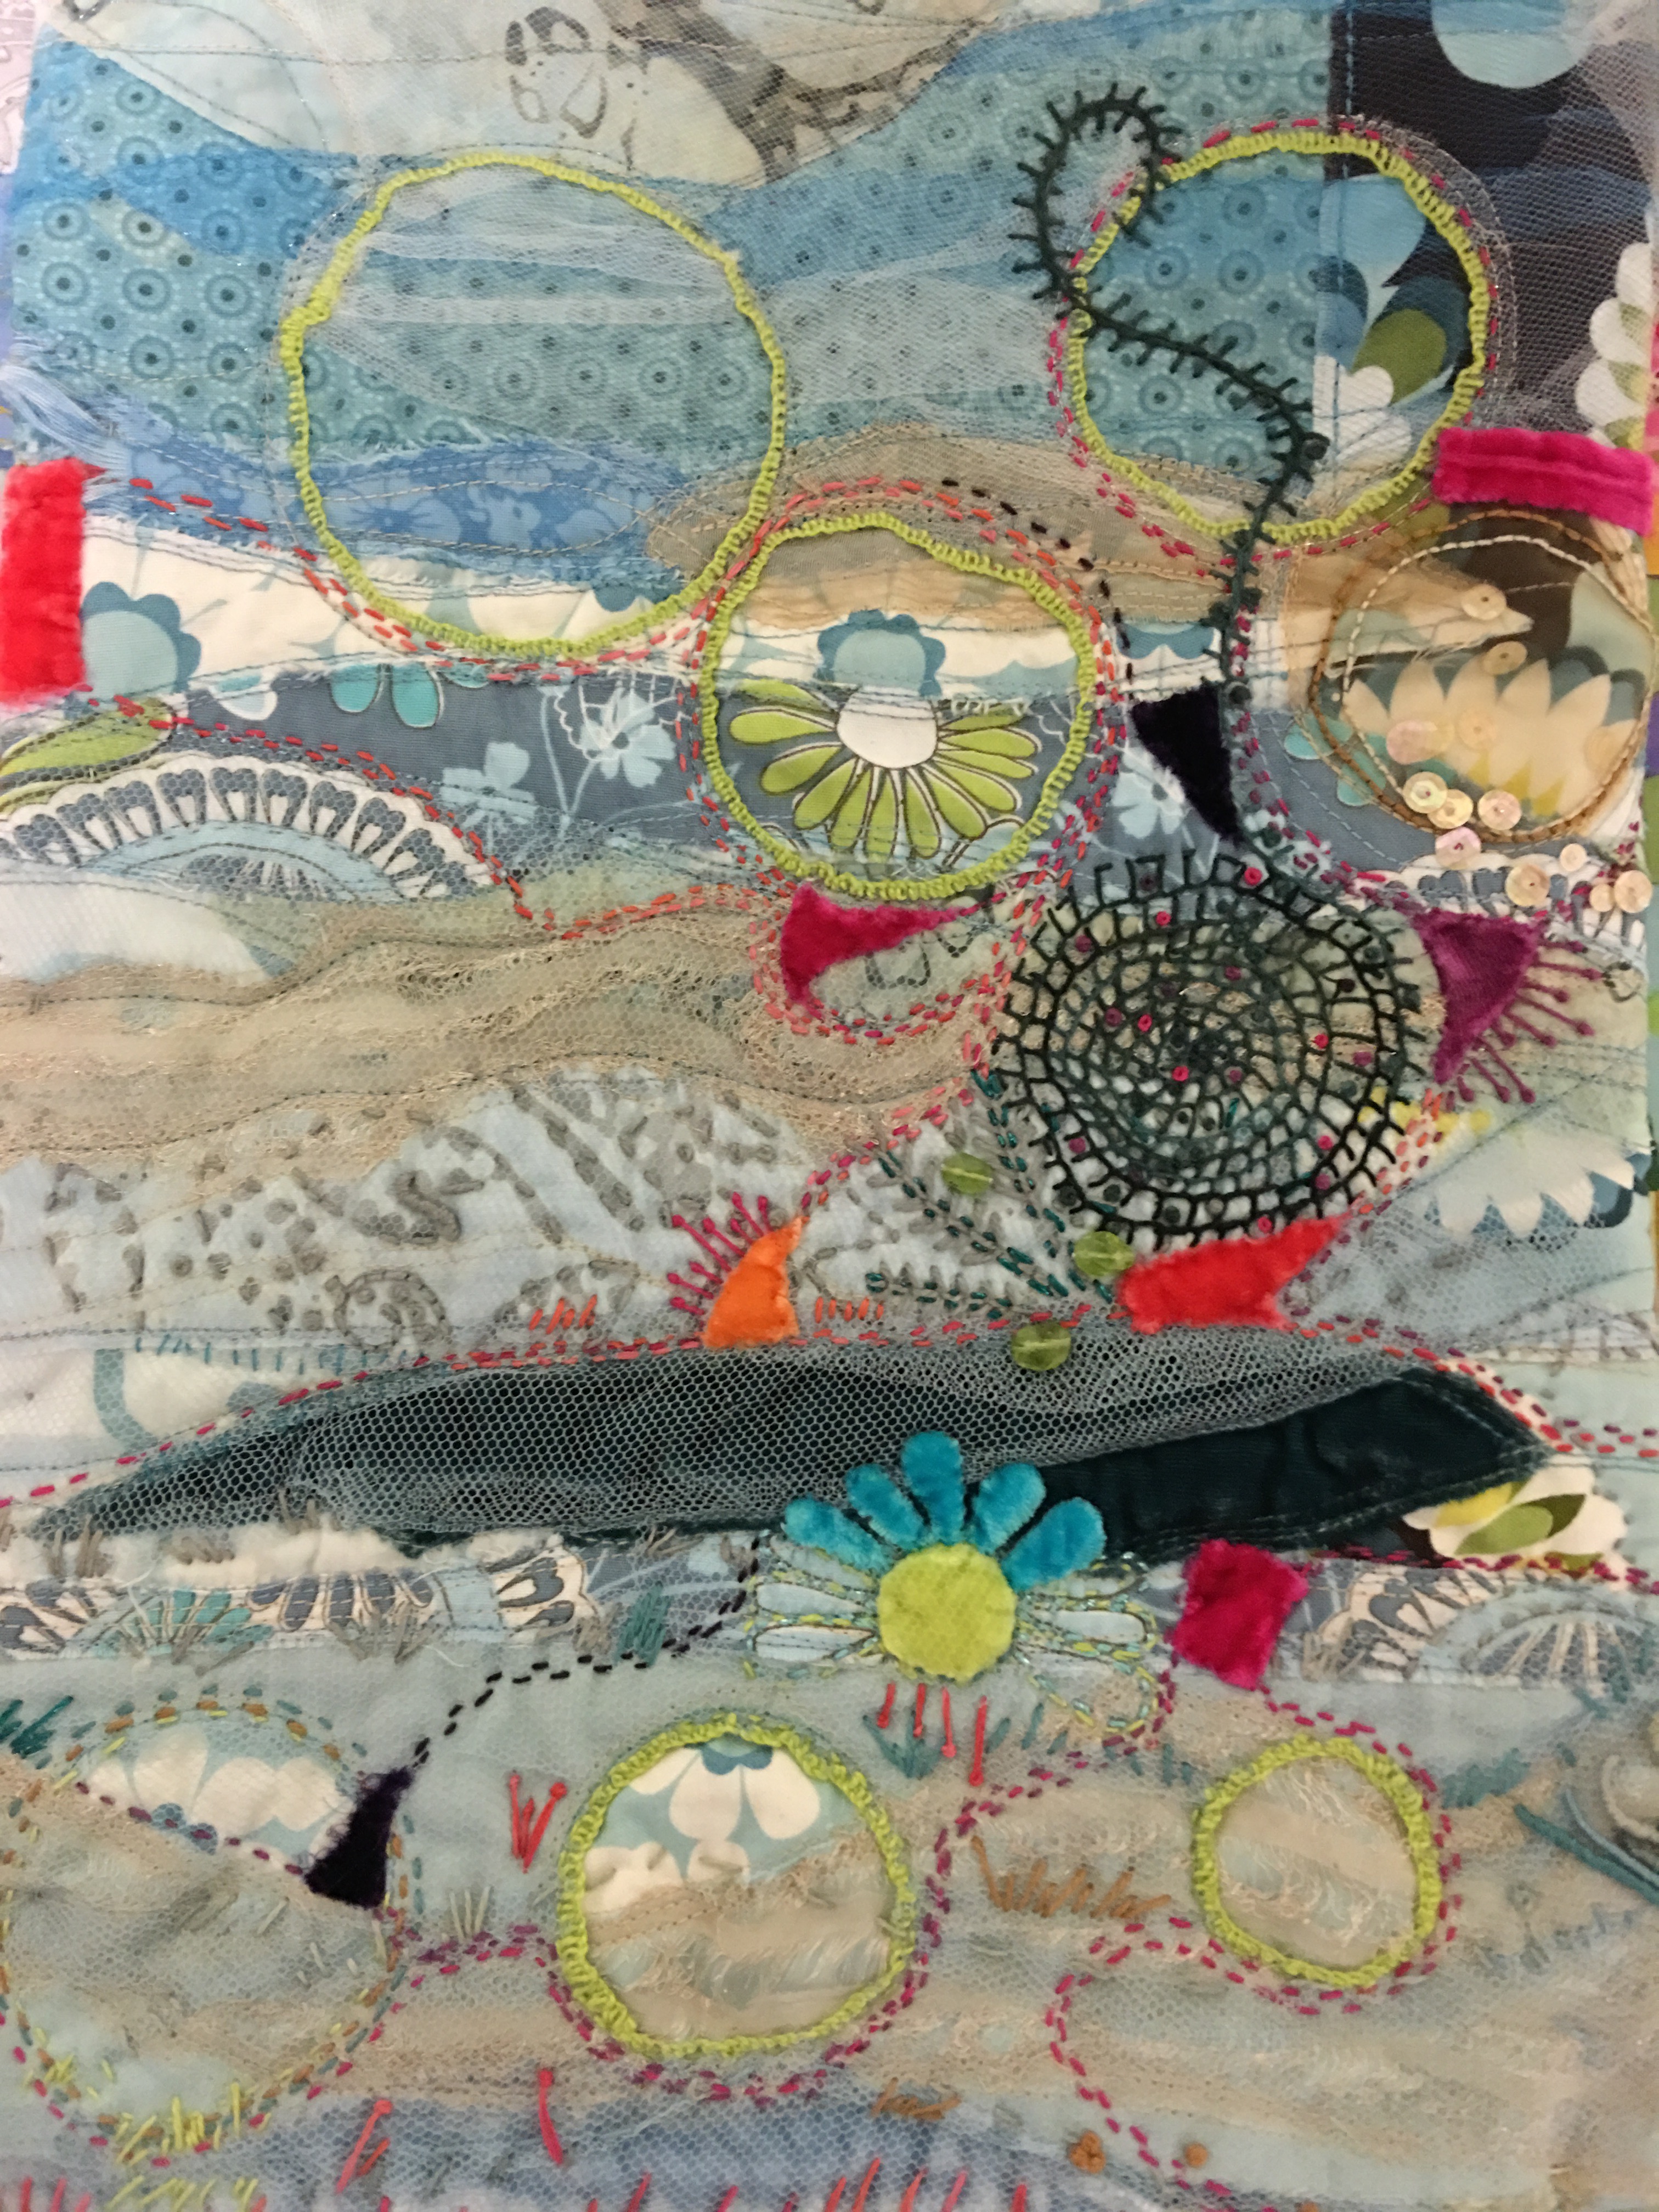
This was what I had done by the end of Day 3, beginning of Day 4. People would wander by and remark, “Ohh, pretty” or “oh the beach! I love the beach” or just, “water!” It was around this time that I came up with the title: “It’s deeper than you think” and then proceeded to muddy those serene waters by incorporating many of Rosalie’s great suggestions.
Day 4: Go with the flow. I’m a fiend and machine stitch everything I can get my hands on. I am one with my Bernina and life is good.
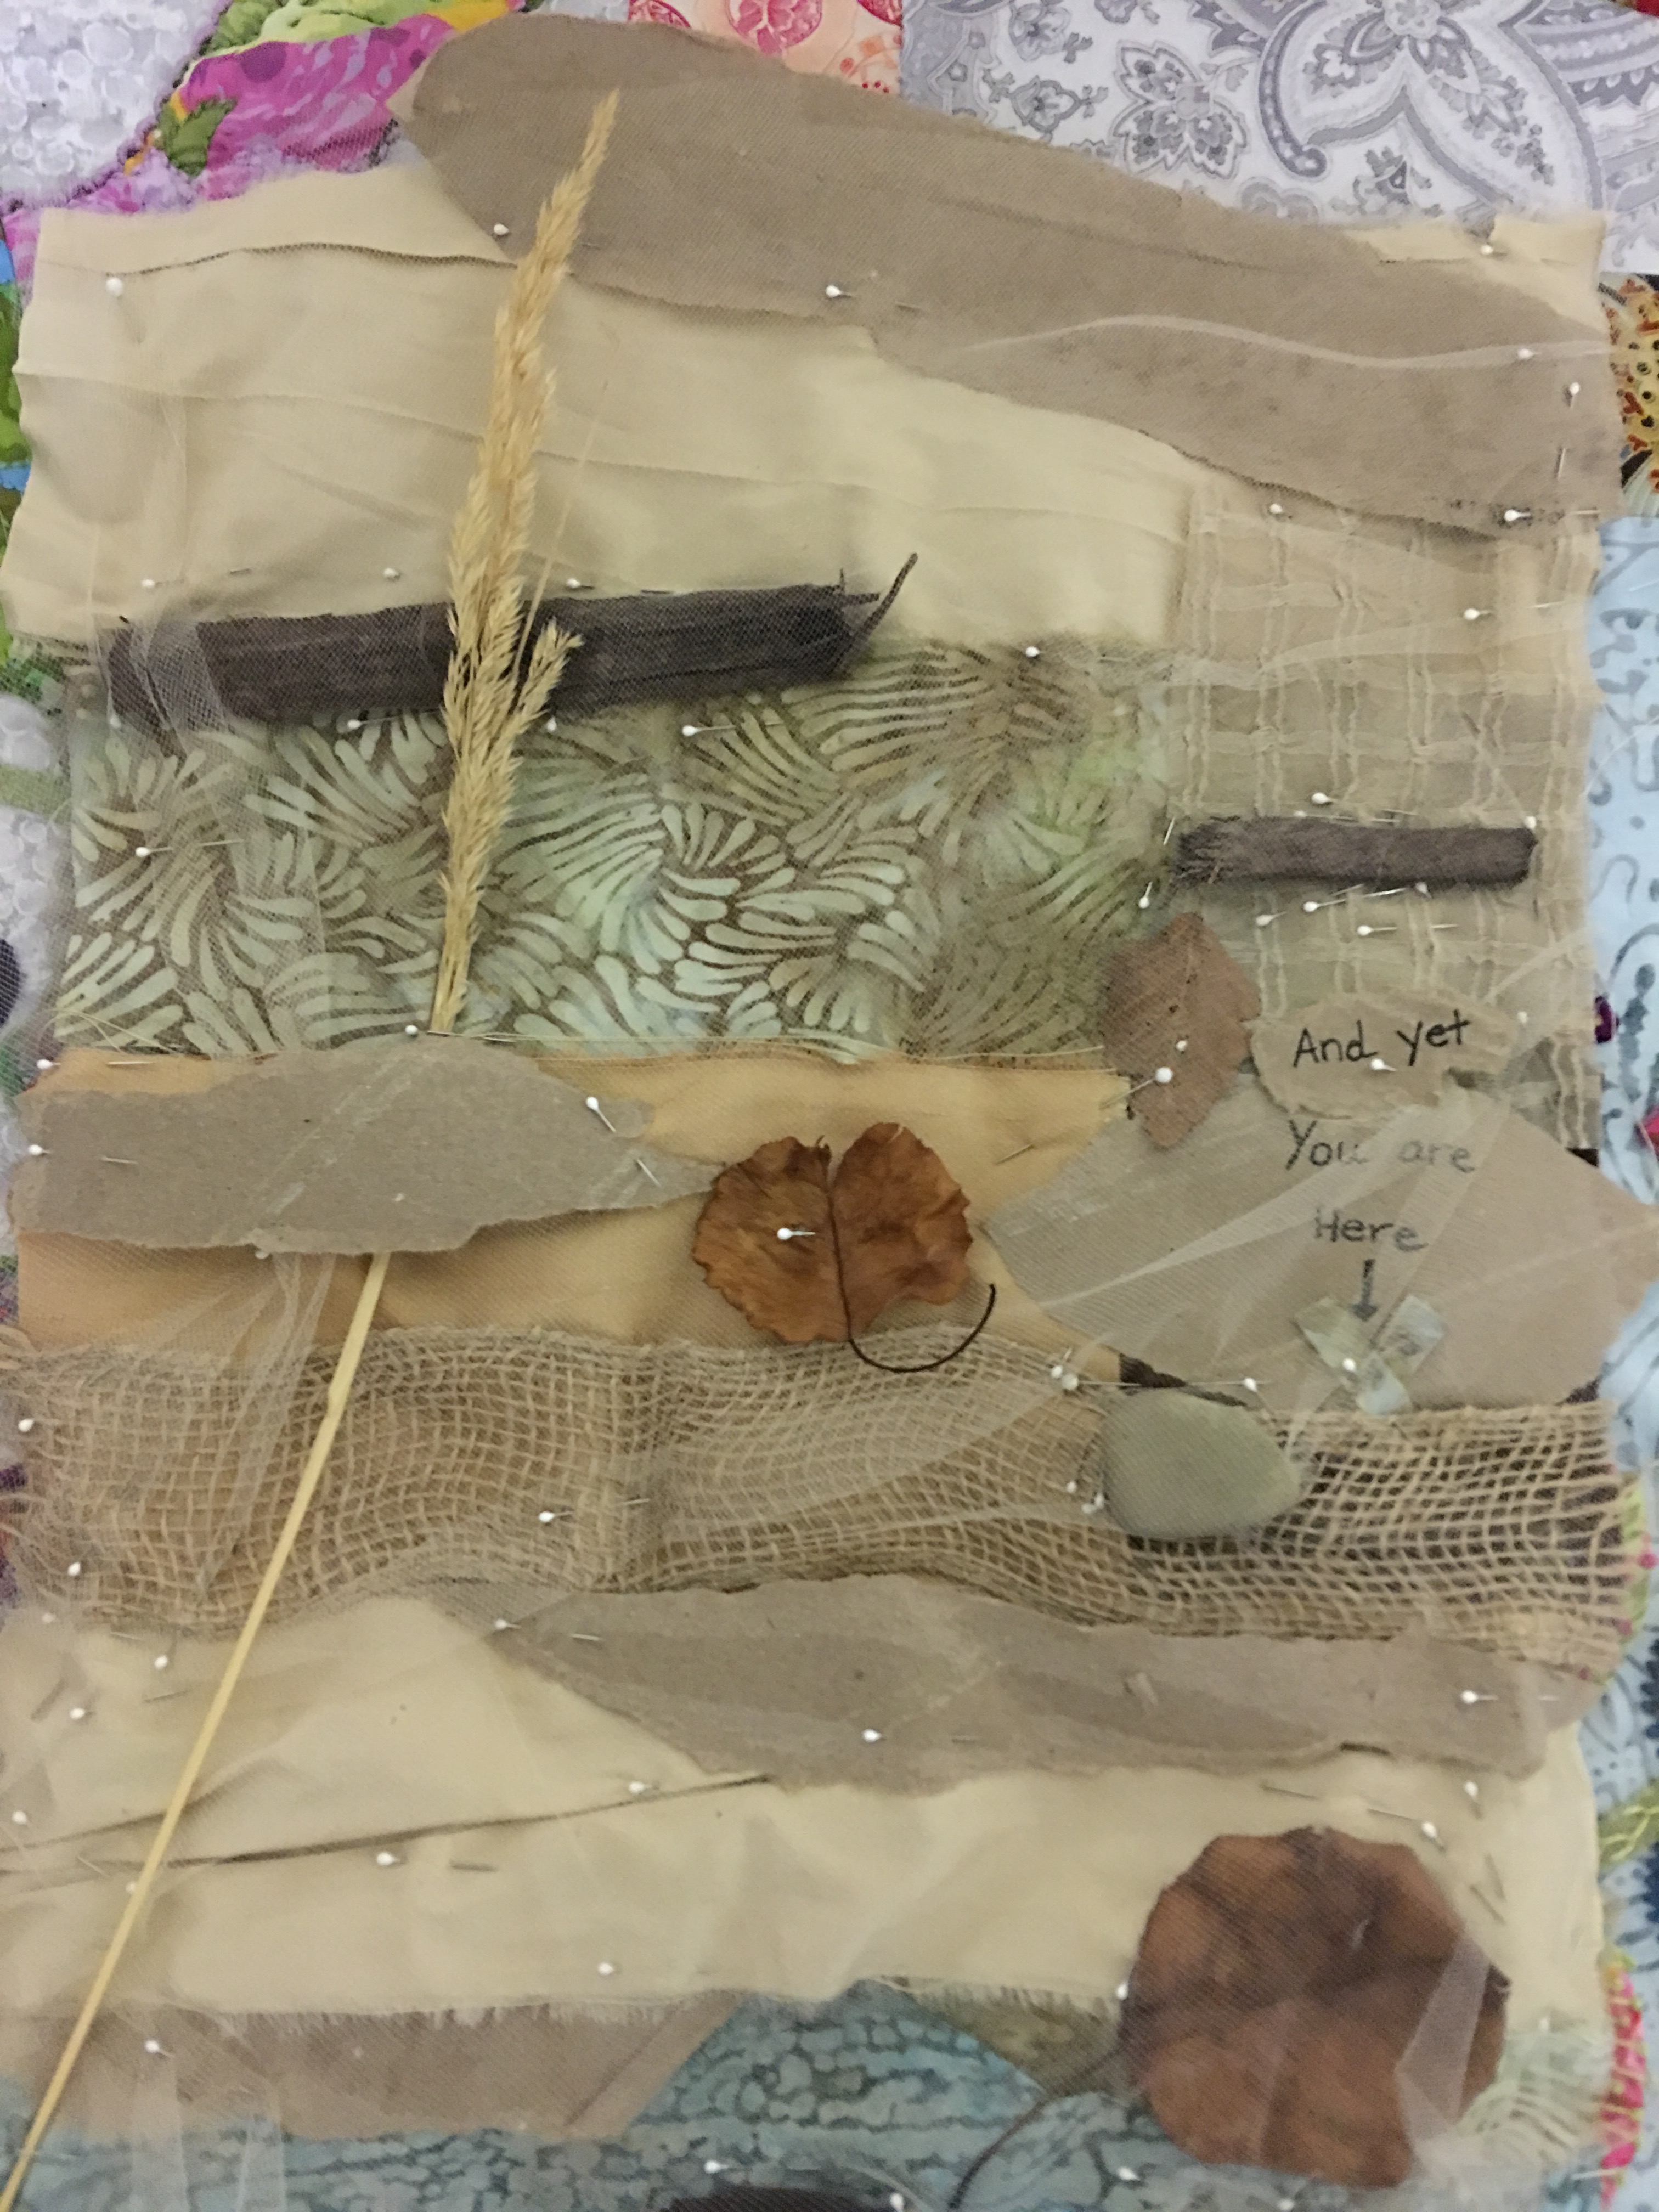
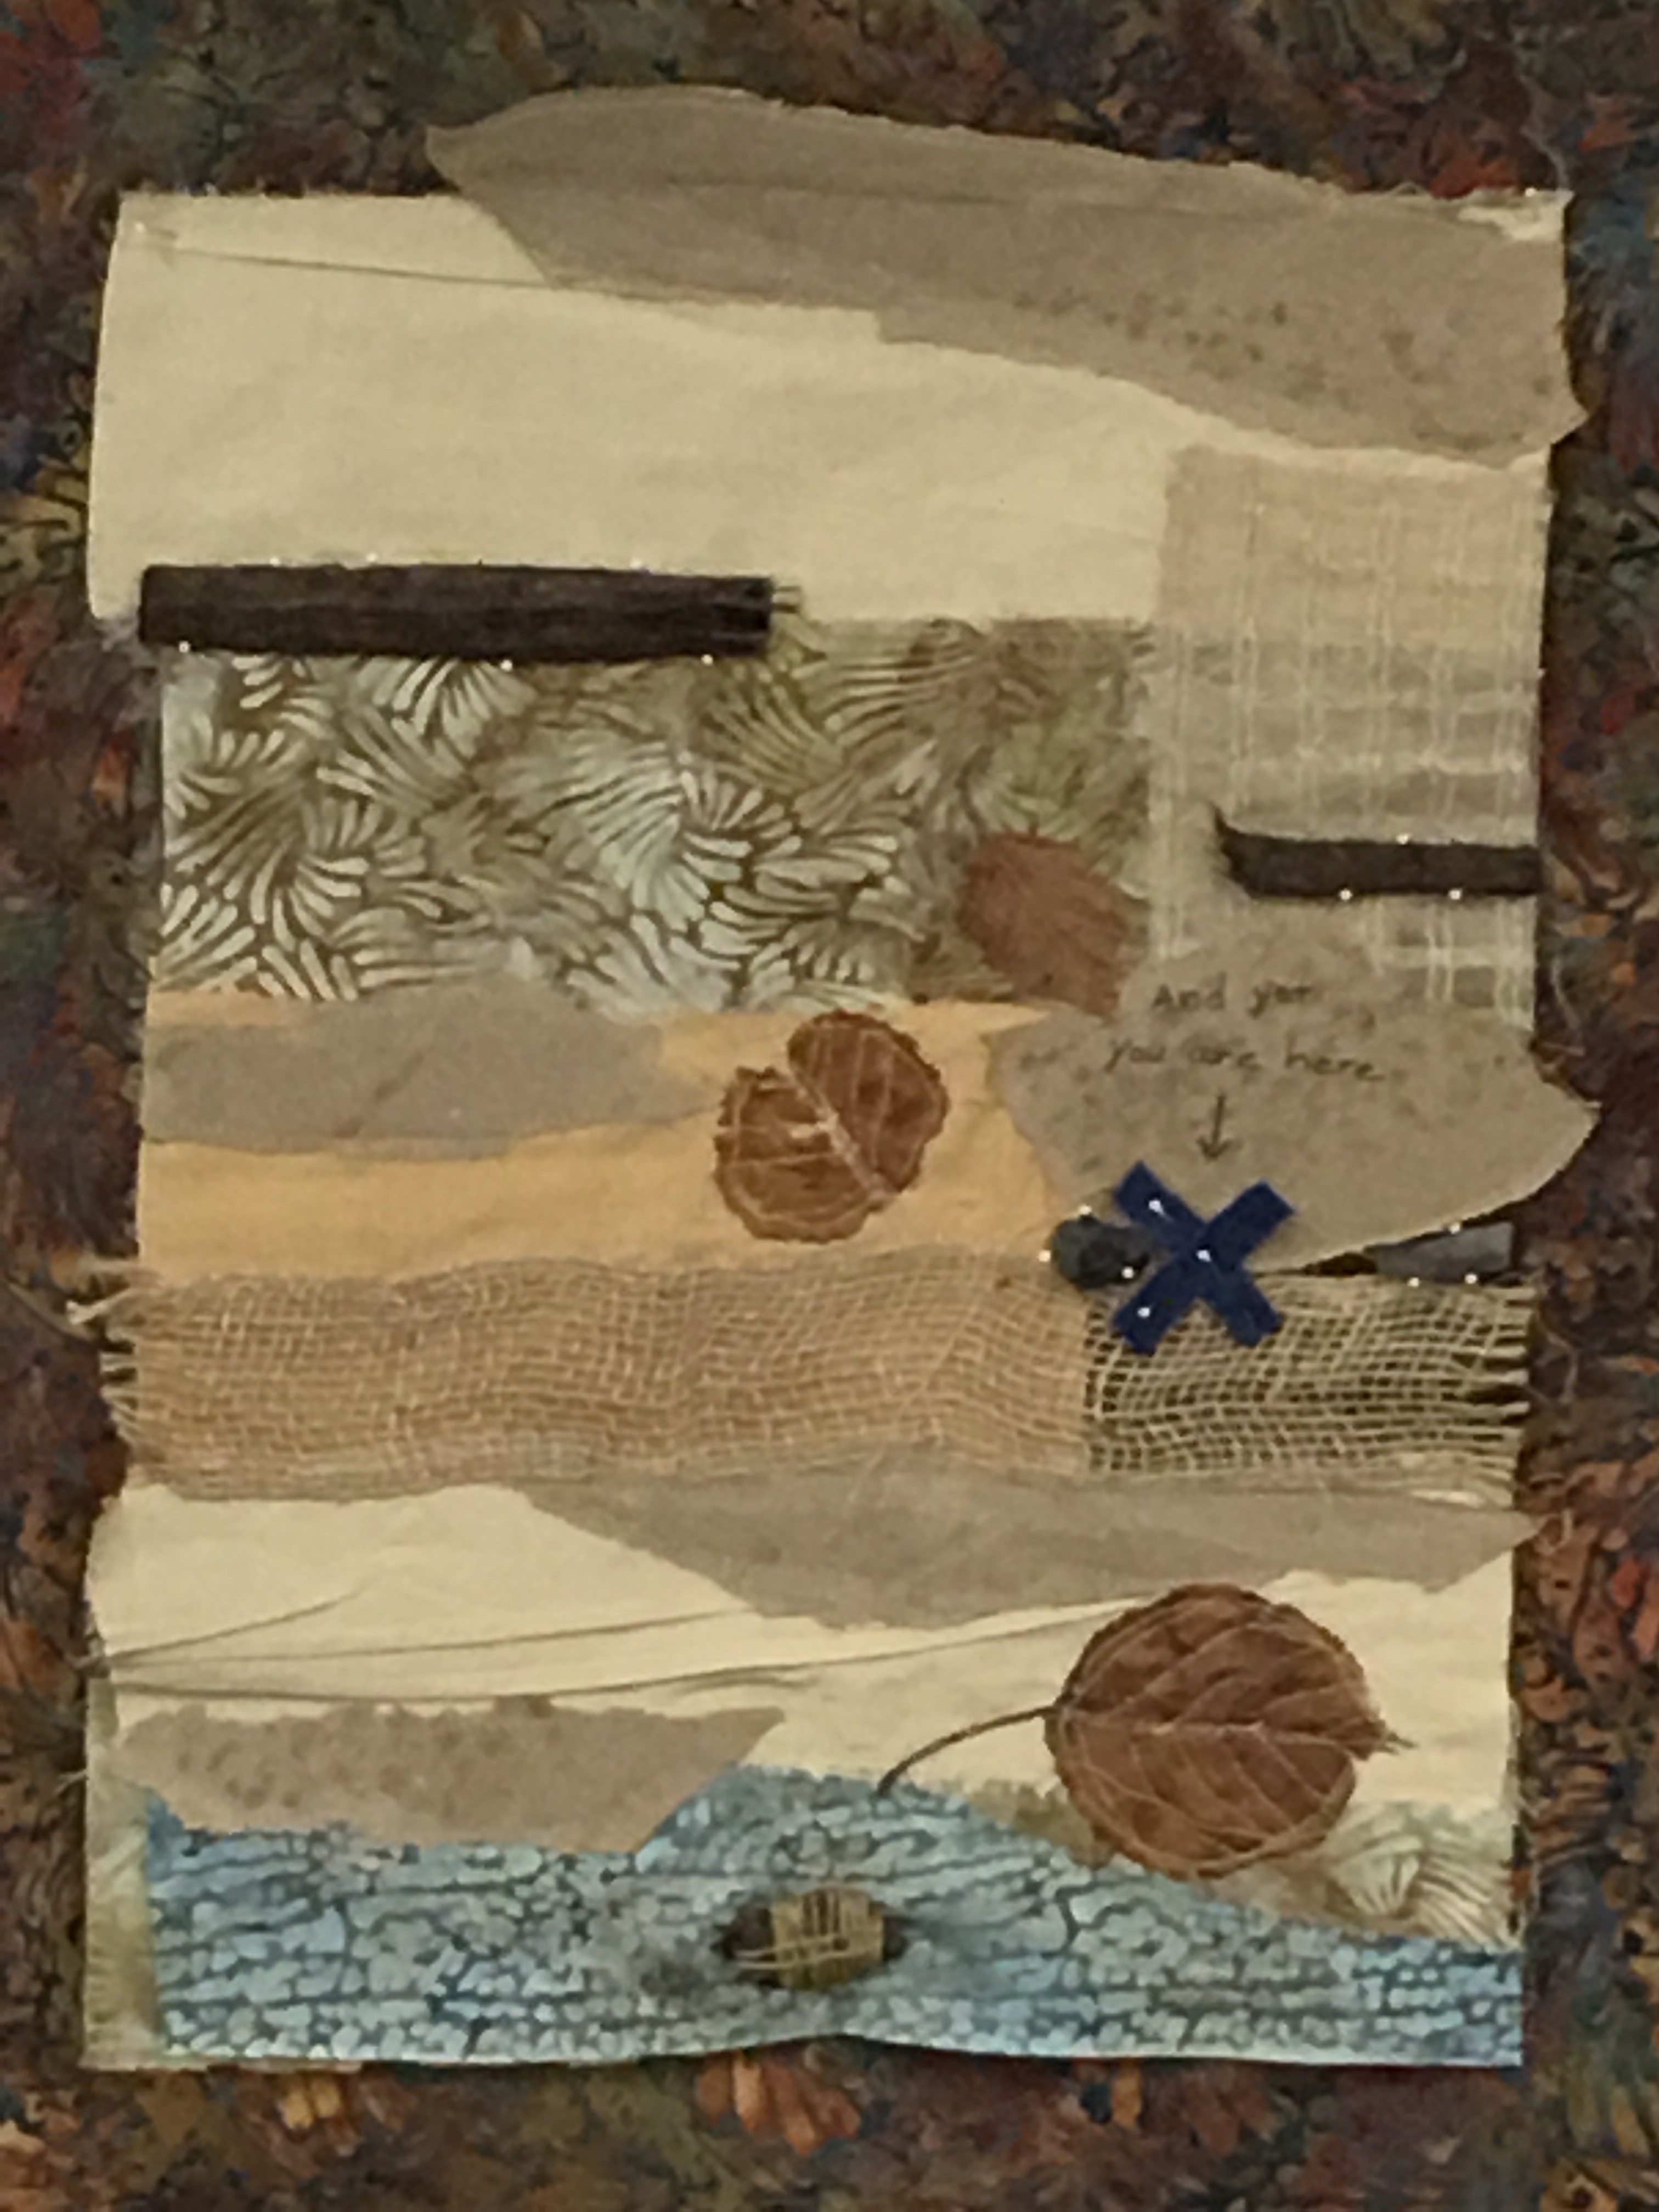
While working on the “It’s Deeper than You Think” piece I begin playing with the other study, which began with a cream colored background. I decide I have to lose the brown fabric, it’s a sink hole and is bringing everything down, including me. It morphs into this, with sticks and stones and leaves that I found on my way to class that morning. I entitle it, “And Yet, You Are Here” (I will refrain from explaining the title as I trust all of you to come up with your own interpretations!)
Day 5: I finish the “It’s Deeper Than You Think” piece and reflect on all that I learned, not just technique, but about art and the making of it, and was reminded of the often painful process and cycle of creating. Whatever genius idea I have, usually showing up in my mind at some absurd hour in the middle of the night, loses it’s luster by daylight. By afternoon I’ve decided it’s the worst idea I ever had and by evening I’m questioning the meaning of everything. Needless to say this usually spirals down into a kind of personal horror, like a set list with all the songs you’ve ever hated that randomly play loudly on a loop. Relief comes in the middle of the night with yet another stroke of genius and the cycle begins again. But, as Rosalie reminded me more than once, “It’s okay. Don’t panic.” And with that mantra in mind, I can sit with the discomfort and “keep swimming.”
It’s Deeper Than You Think
Rosalie is a force, brilliant, funny, kind, welcoming, encouraging and oh so very talented. It was an honor to be in her class.
I had the weekend to play before I began Lorie McCown’s class called “Connections.”
A brief summary of Lorie’s fantastic 5-day workshop.
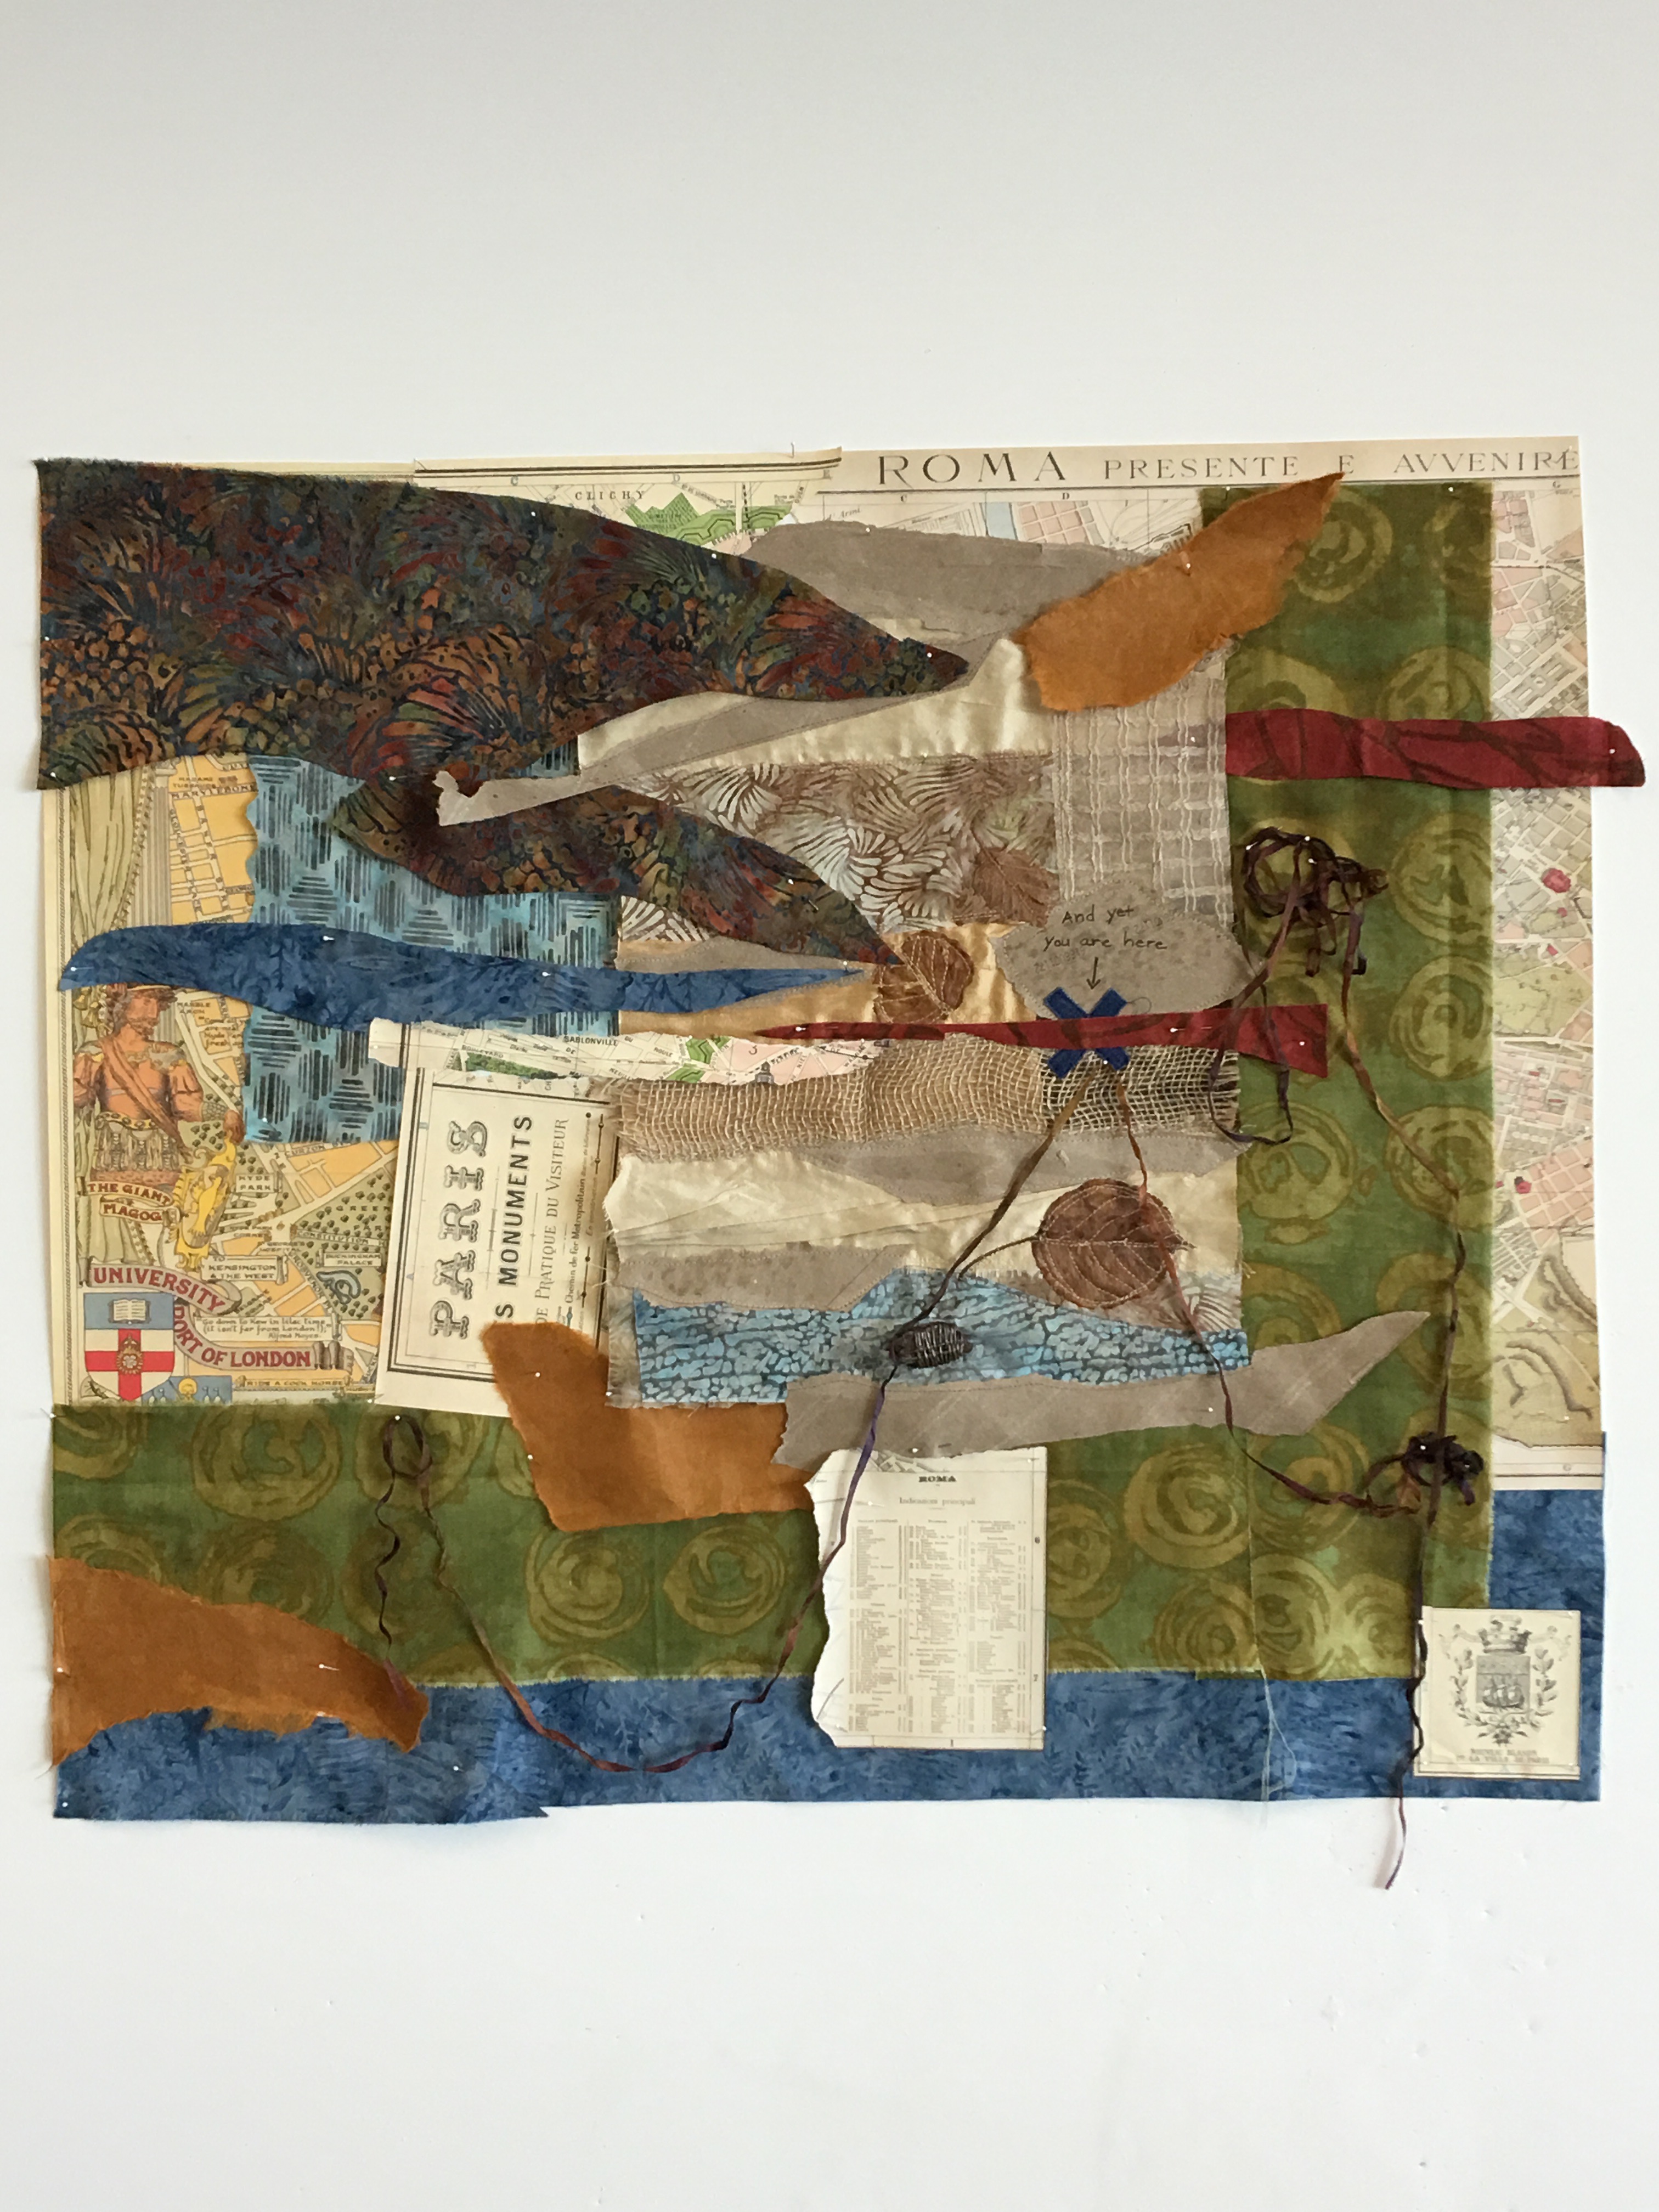
Day 1: I got this. I’m an old pro at this point and nothing is going to phase me. Lorie mentions that machines are optional and encourages us to use hand stitching (I promptly ignore her), immediately decide I’m going to resurrect (with Lorie’s okay) the other piece I started in Rosalie’s class, “And Yet, You are Here” and machine stitch the whole thing. Lorie encourages us to think out of the box, explore materials we otherwise might not have thought of. I’m open to this idea, particularly as I’ve already given my inner rebel some freedom. She shows us examples of her work that are powerful, emotionally laden and visually compelling. I decide I’m going to use paper and maps and whatever else I can get my hands on that evoke the title – “And yet, you are here.” Remember I am now one with my Bernina. All is well.
Day 2: I’m not going through the angst I experienced the week before, so things are coming along nicely. Lorie is terrific, gives lots of encouragement and suggestions and wonders aloud whether I might “go bigger” and then asks, “What do you think?” I’m totally on to her, but do “go bigger,” because, well, why NOT go bigger? and anyway I’ve already demonstrated my anarchistic streak by ignoring her whole hand stitching thing.
Day 3: I announce that I’m thinking of using silk ribbon and Lorie suggests I use it as a way to tie in the idea of “And yet, you are here” by tacking it down in various places and then bringing all the various ribbons to the “X” so they converge. I love this idea and dive into my silk ribbon stash.
Lorie discusses various backing options. I decide, since I don’t have the canvas I’d prefer, I’ll back my piece in wool, which I have a great deal of. Still very little hand stitching, almost everything is machine stitched because I’m clinging to my whole – I’m a rebel – schtick.
Day 4: I’m letting “And Yet You Are Here” simmer for a few days and decide to begin working on a version of another idea I had in Rosalie’s class.
This is what it looked like in Rosalie’s class.
And then I added to it.
In Lorie’s class I took this concept and did this.
Which then became this
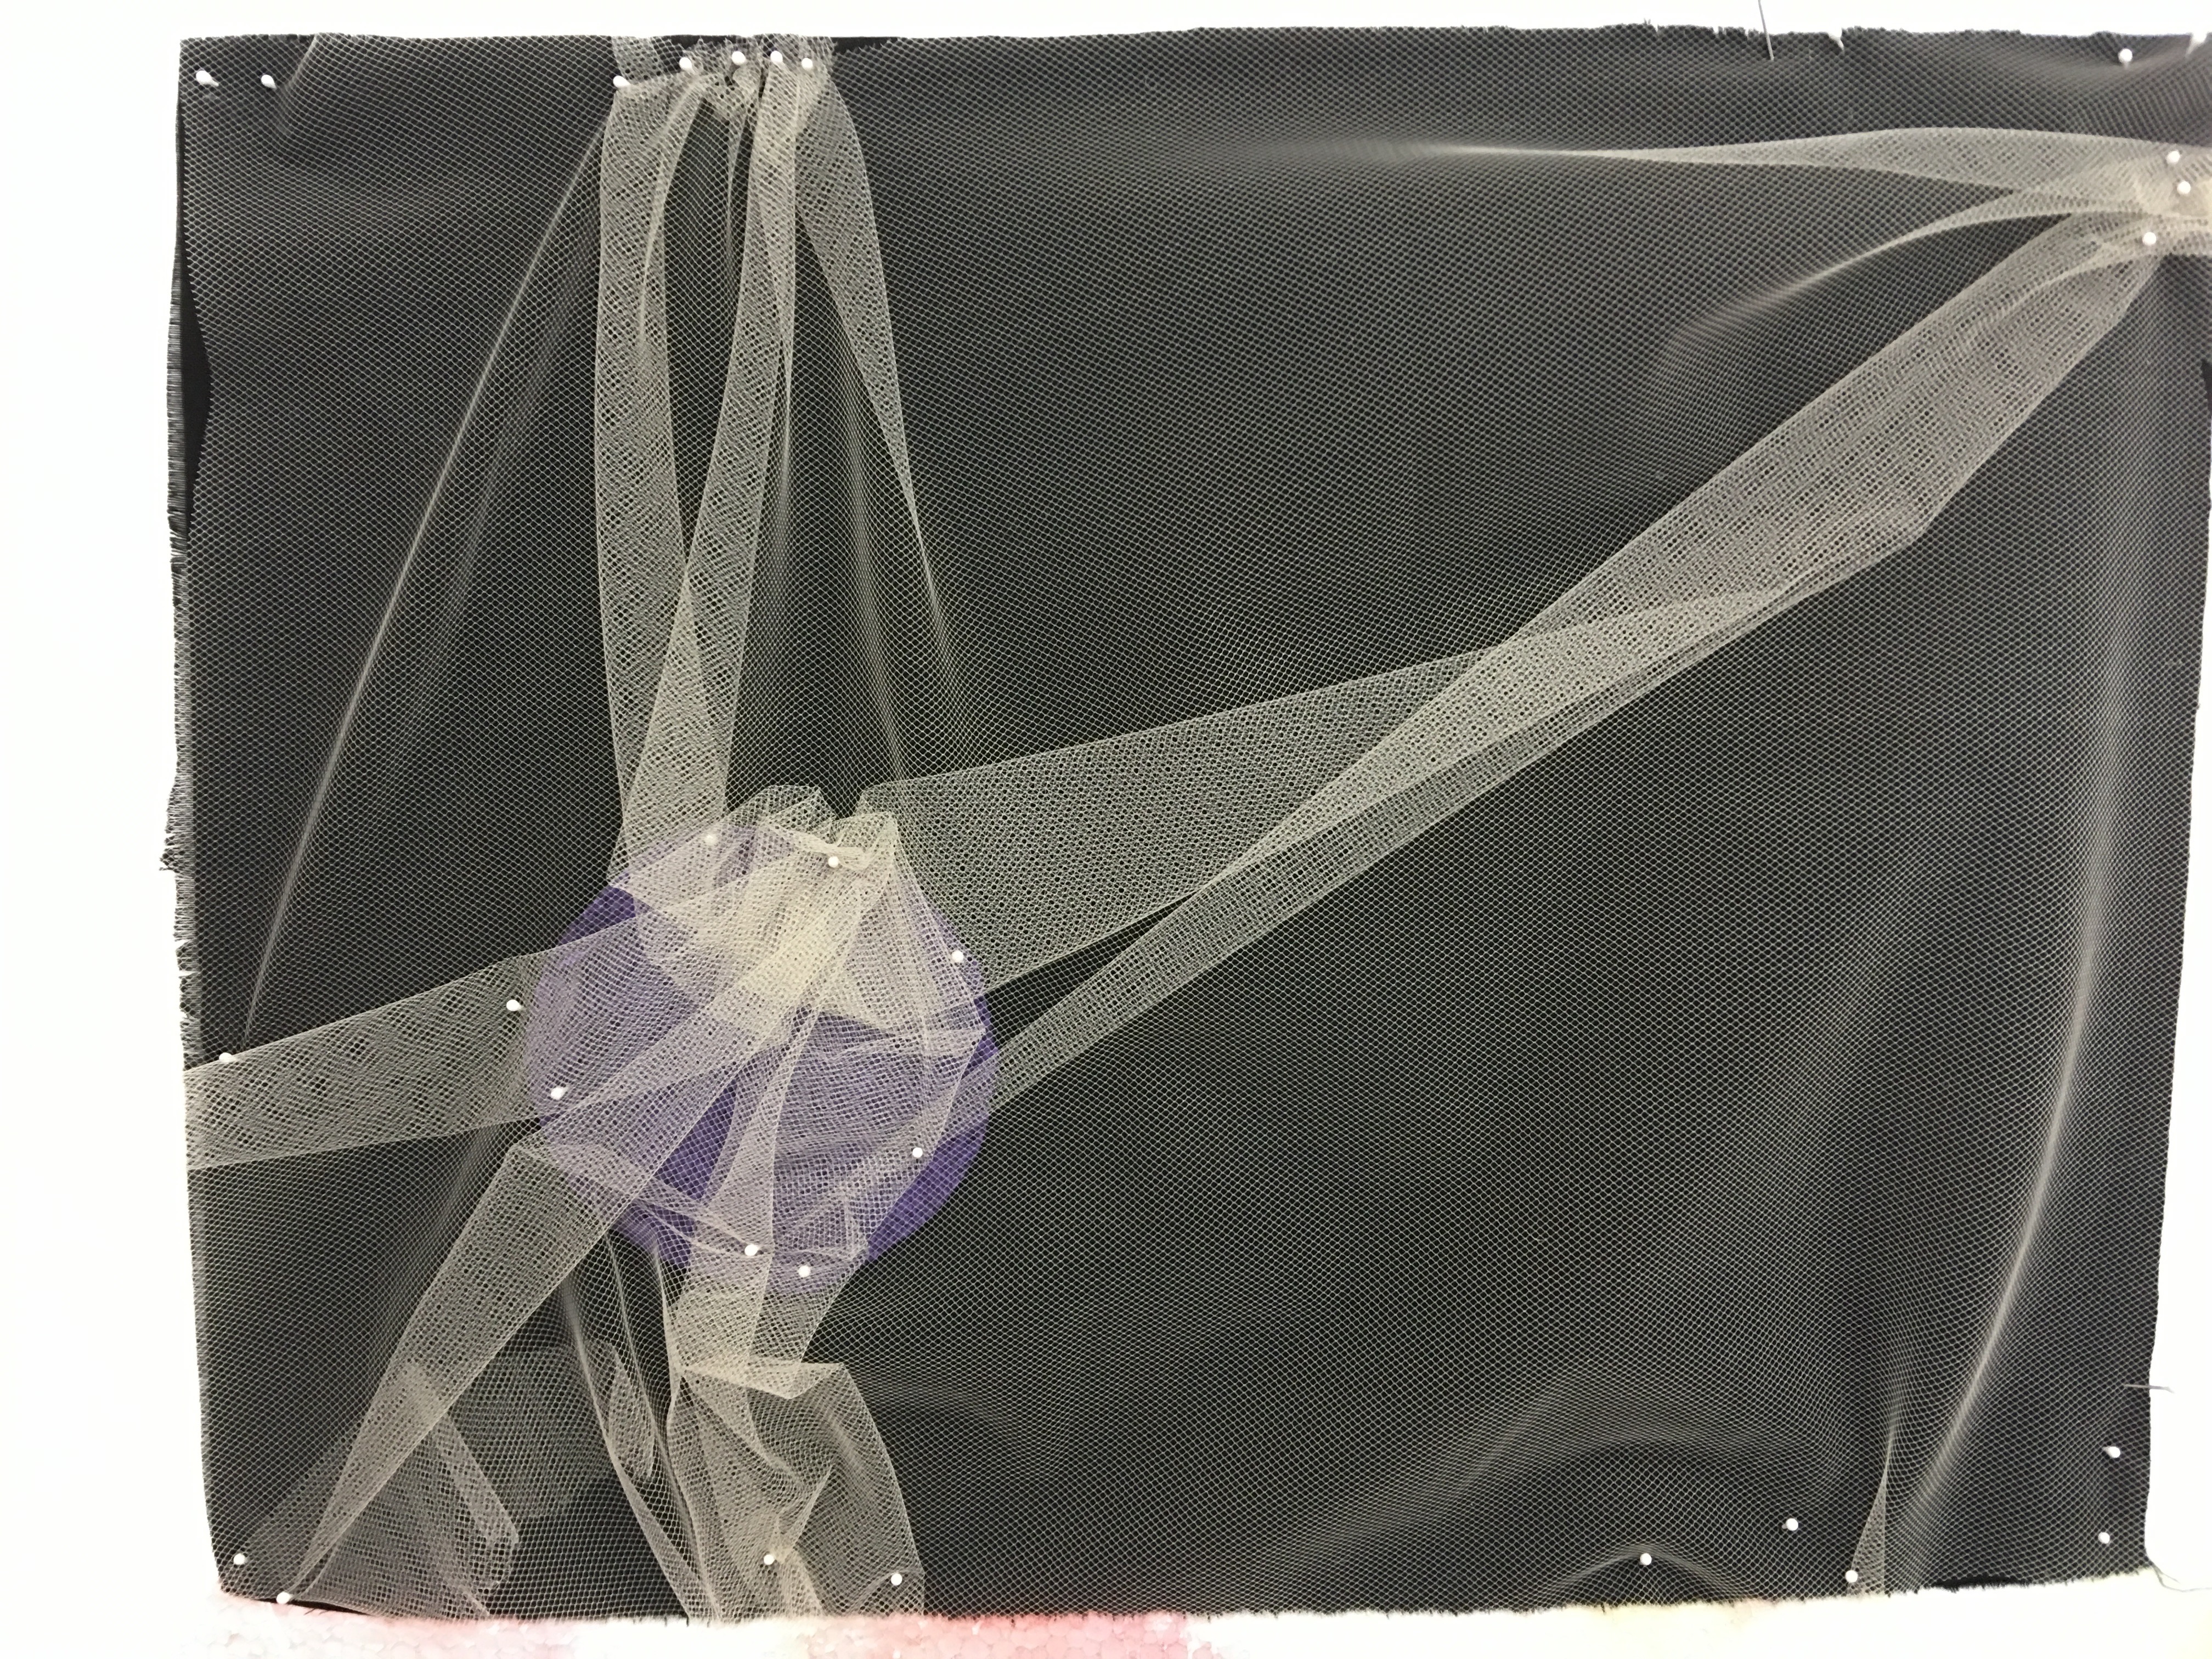
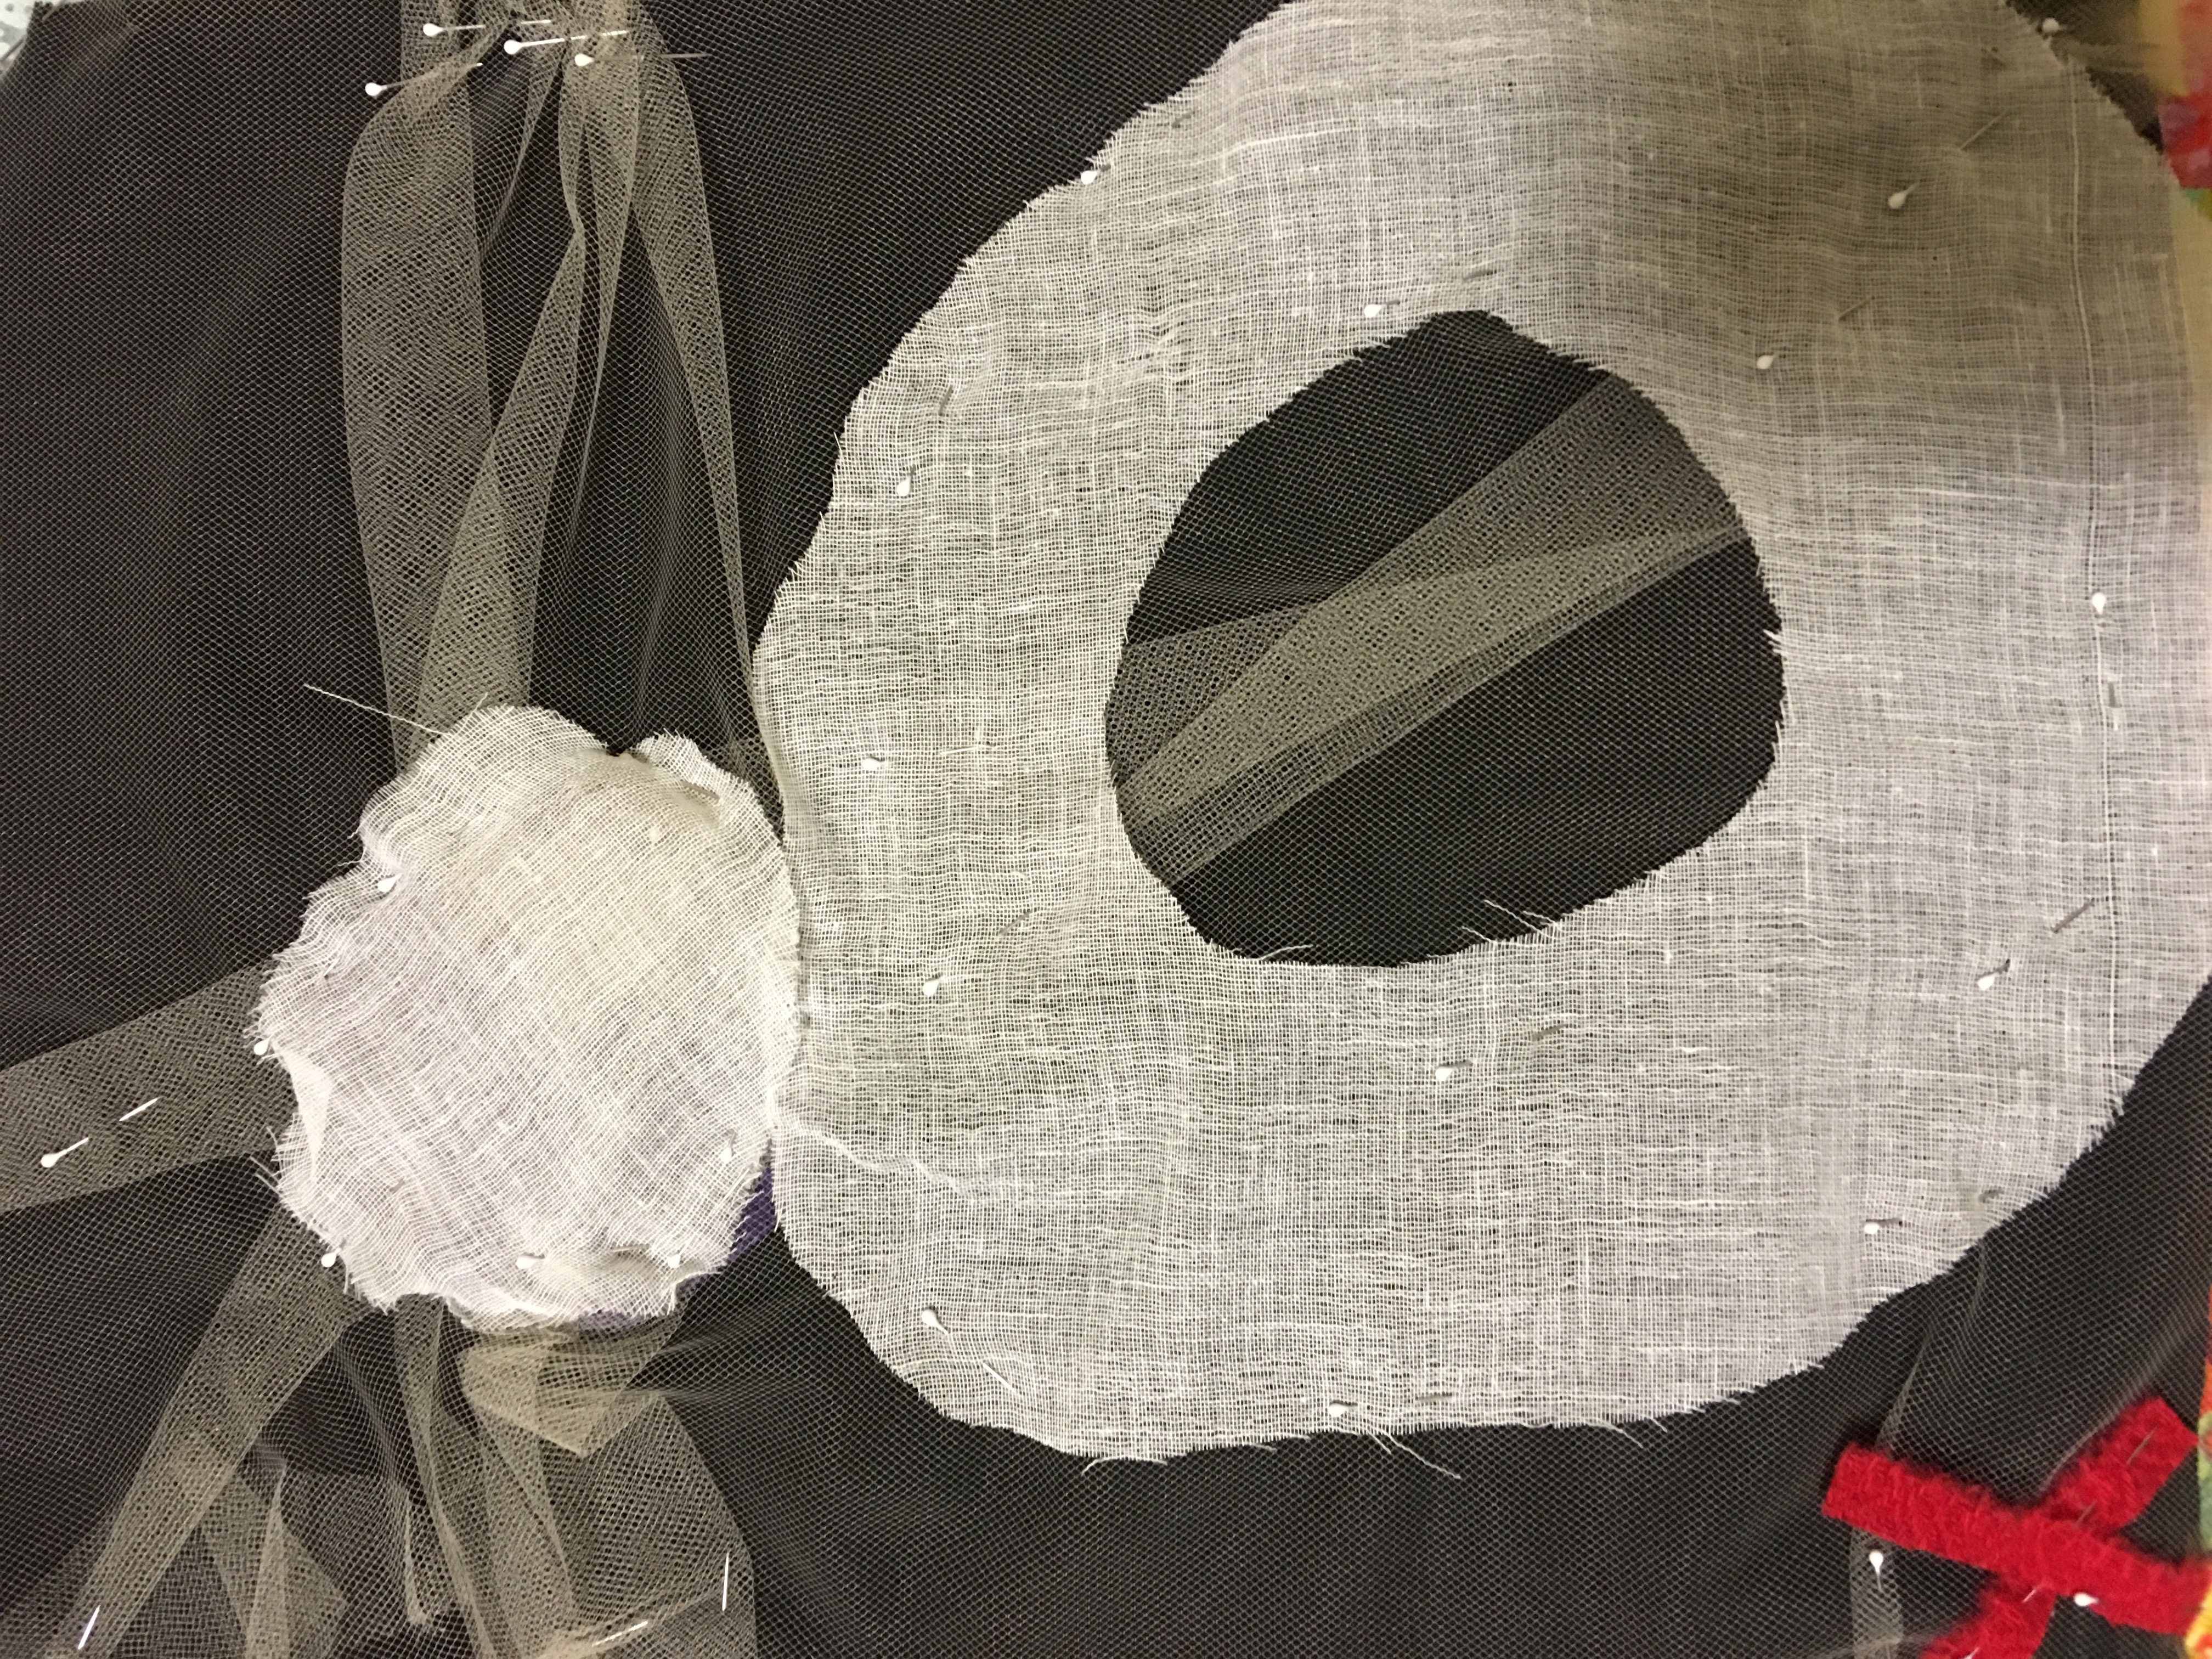
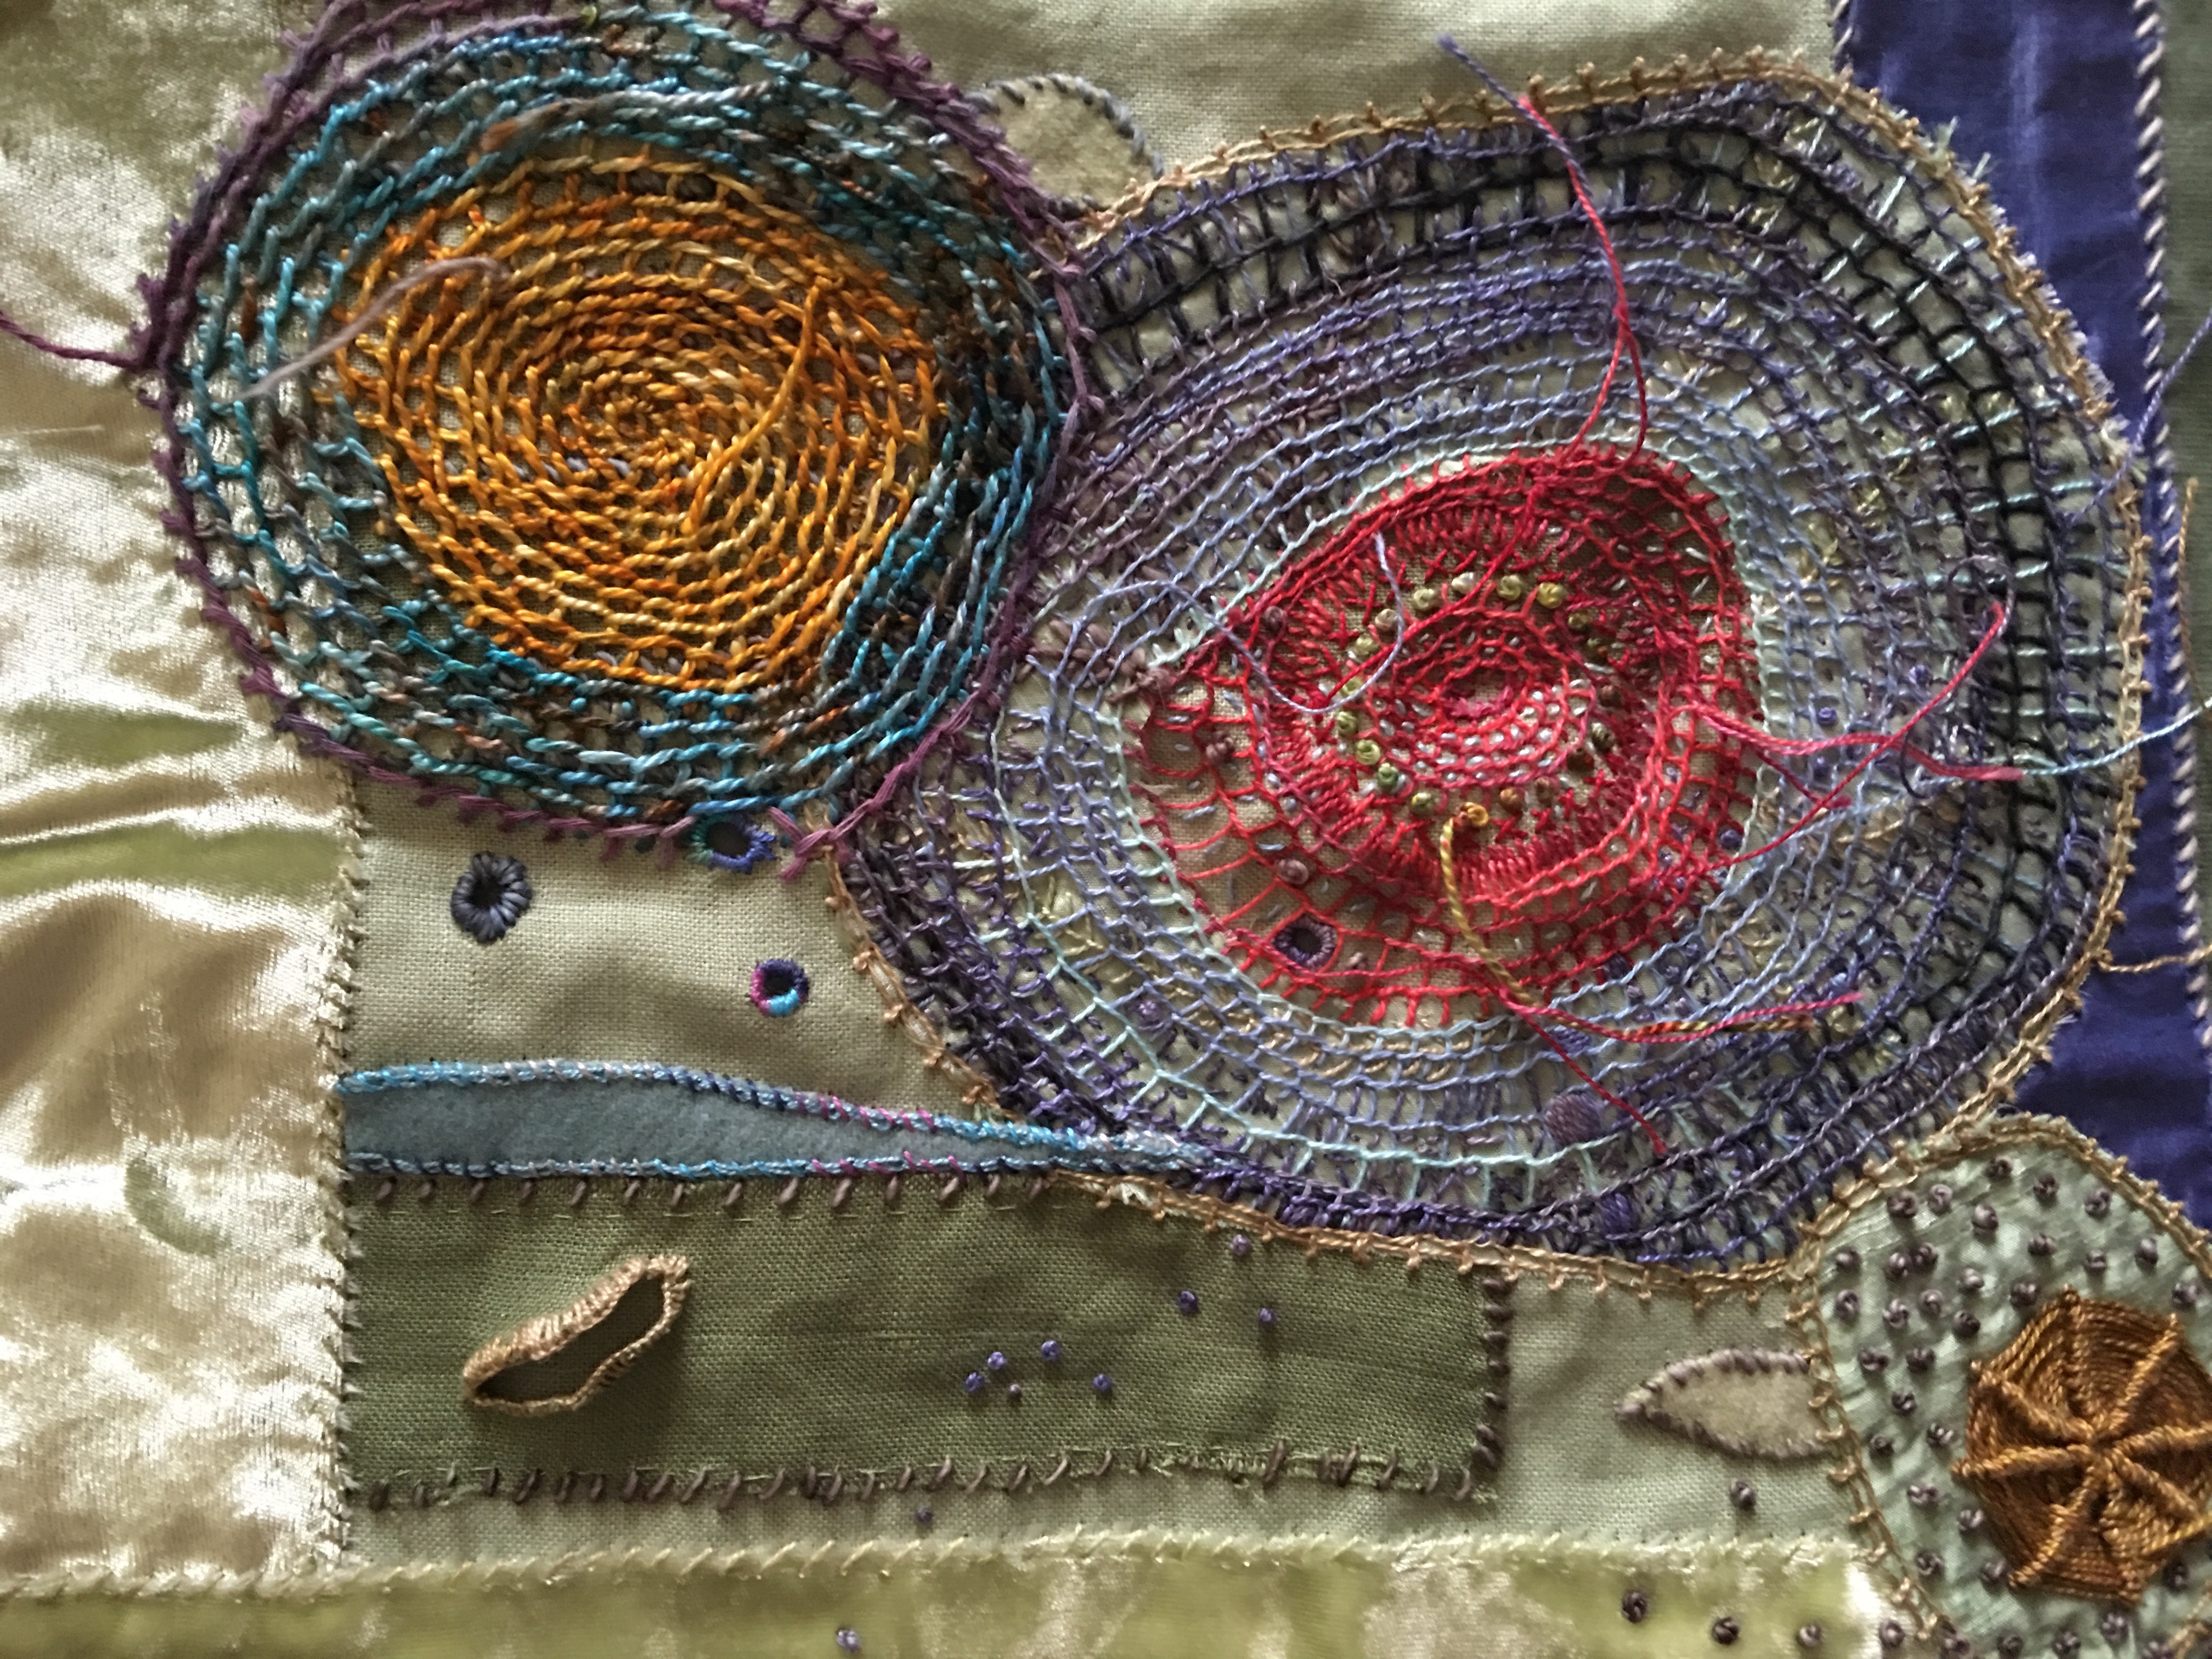
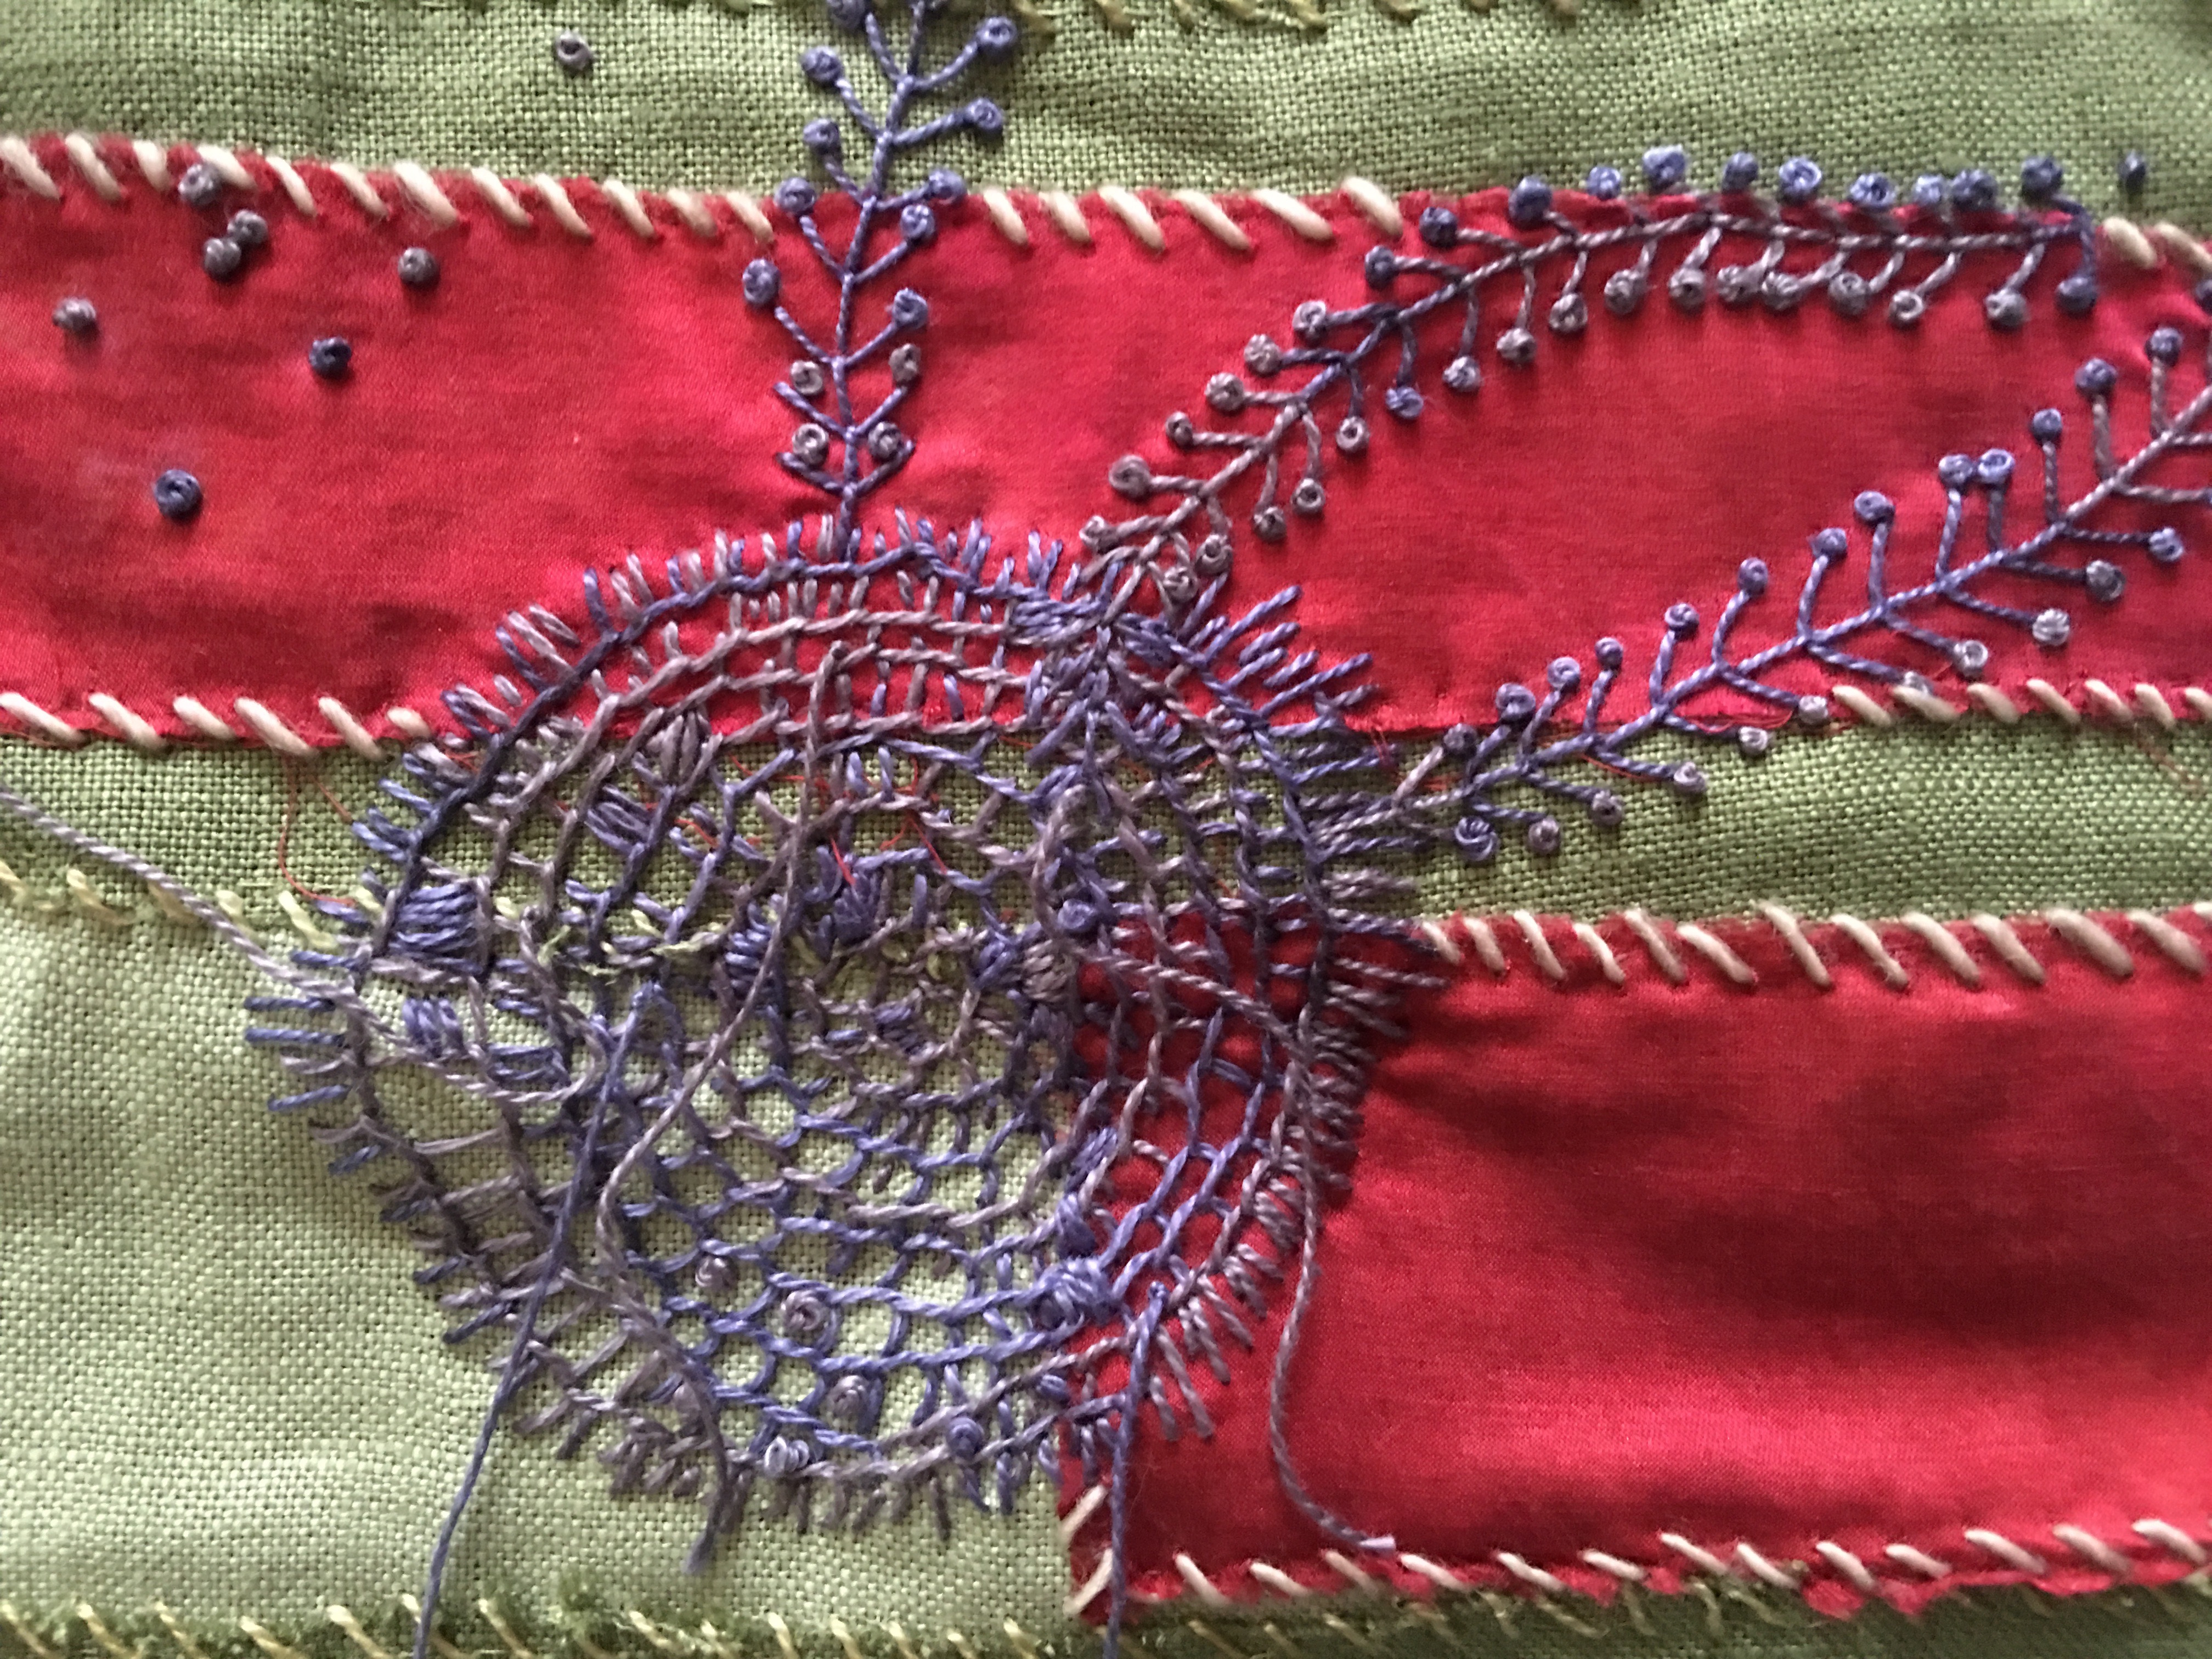
Day 5: I can be a rebel with hand stitching too! The night before, I worked until 10PM and was in class by 7:30AM. I’m determined to work in some of my ideas for this piece – holes and slashes with stitching around them. The piece now looks like this… it’s still a work in progress, I intend to do much more stitching on it and you’ll notice I hand stitched everything on this piece. I’m calling it – “Life #1” and am thinking of making a series. Lorie’s all over the “series” idea, which you can see if you visit her website, and I encourage you to!
A few close ups
Thanks to Quilting by the Lake, the Schweinfurth Art Center, Rosalie Dace and Lorie McCown, but more than anyone I am forever grateful to my husband, Richard Long, who said when I broached the idea of going away, “Absolutely, you deserve it.” And when I asked, “Are you sure?” He didn’t hesitate, “I got this,” he said. I know how much he had to do so that I could go. What a great guy! And what an amazing twelve days I’ve had!
 And I didn’t make a single dye joke. The title doesn’t count because it’s Elizabeth’s name for her class. How can you not love that title? I may go back and edit a few in, just to amuse, or you can make a few in the comments!
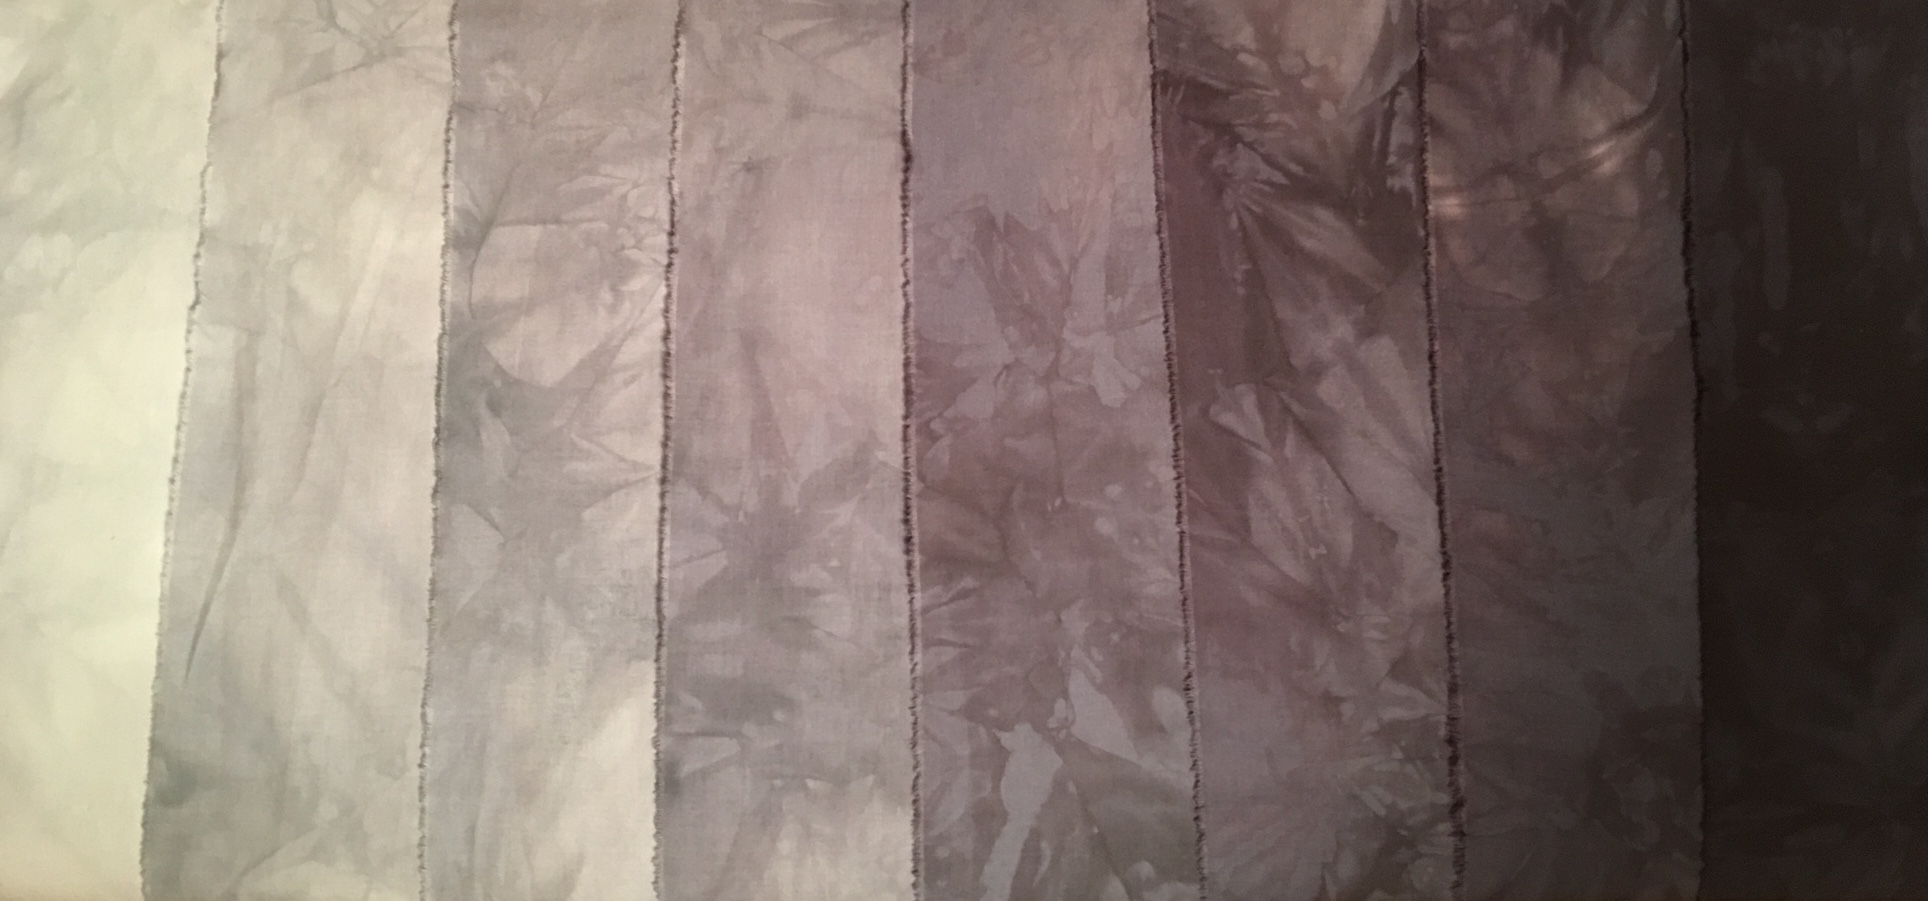 Designing a piece using these gradations was next. I had a couple ideas and with Elizabeth’s encouragement settled on this one, which also happened to be the first idea I came up with.
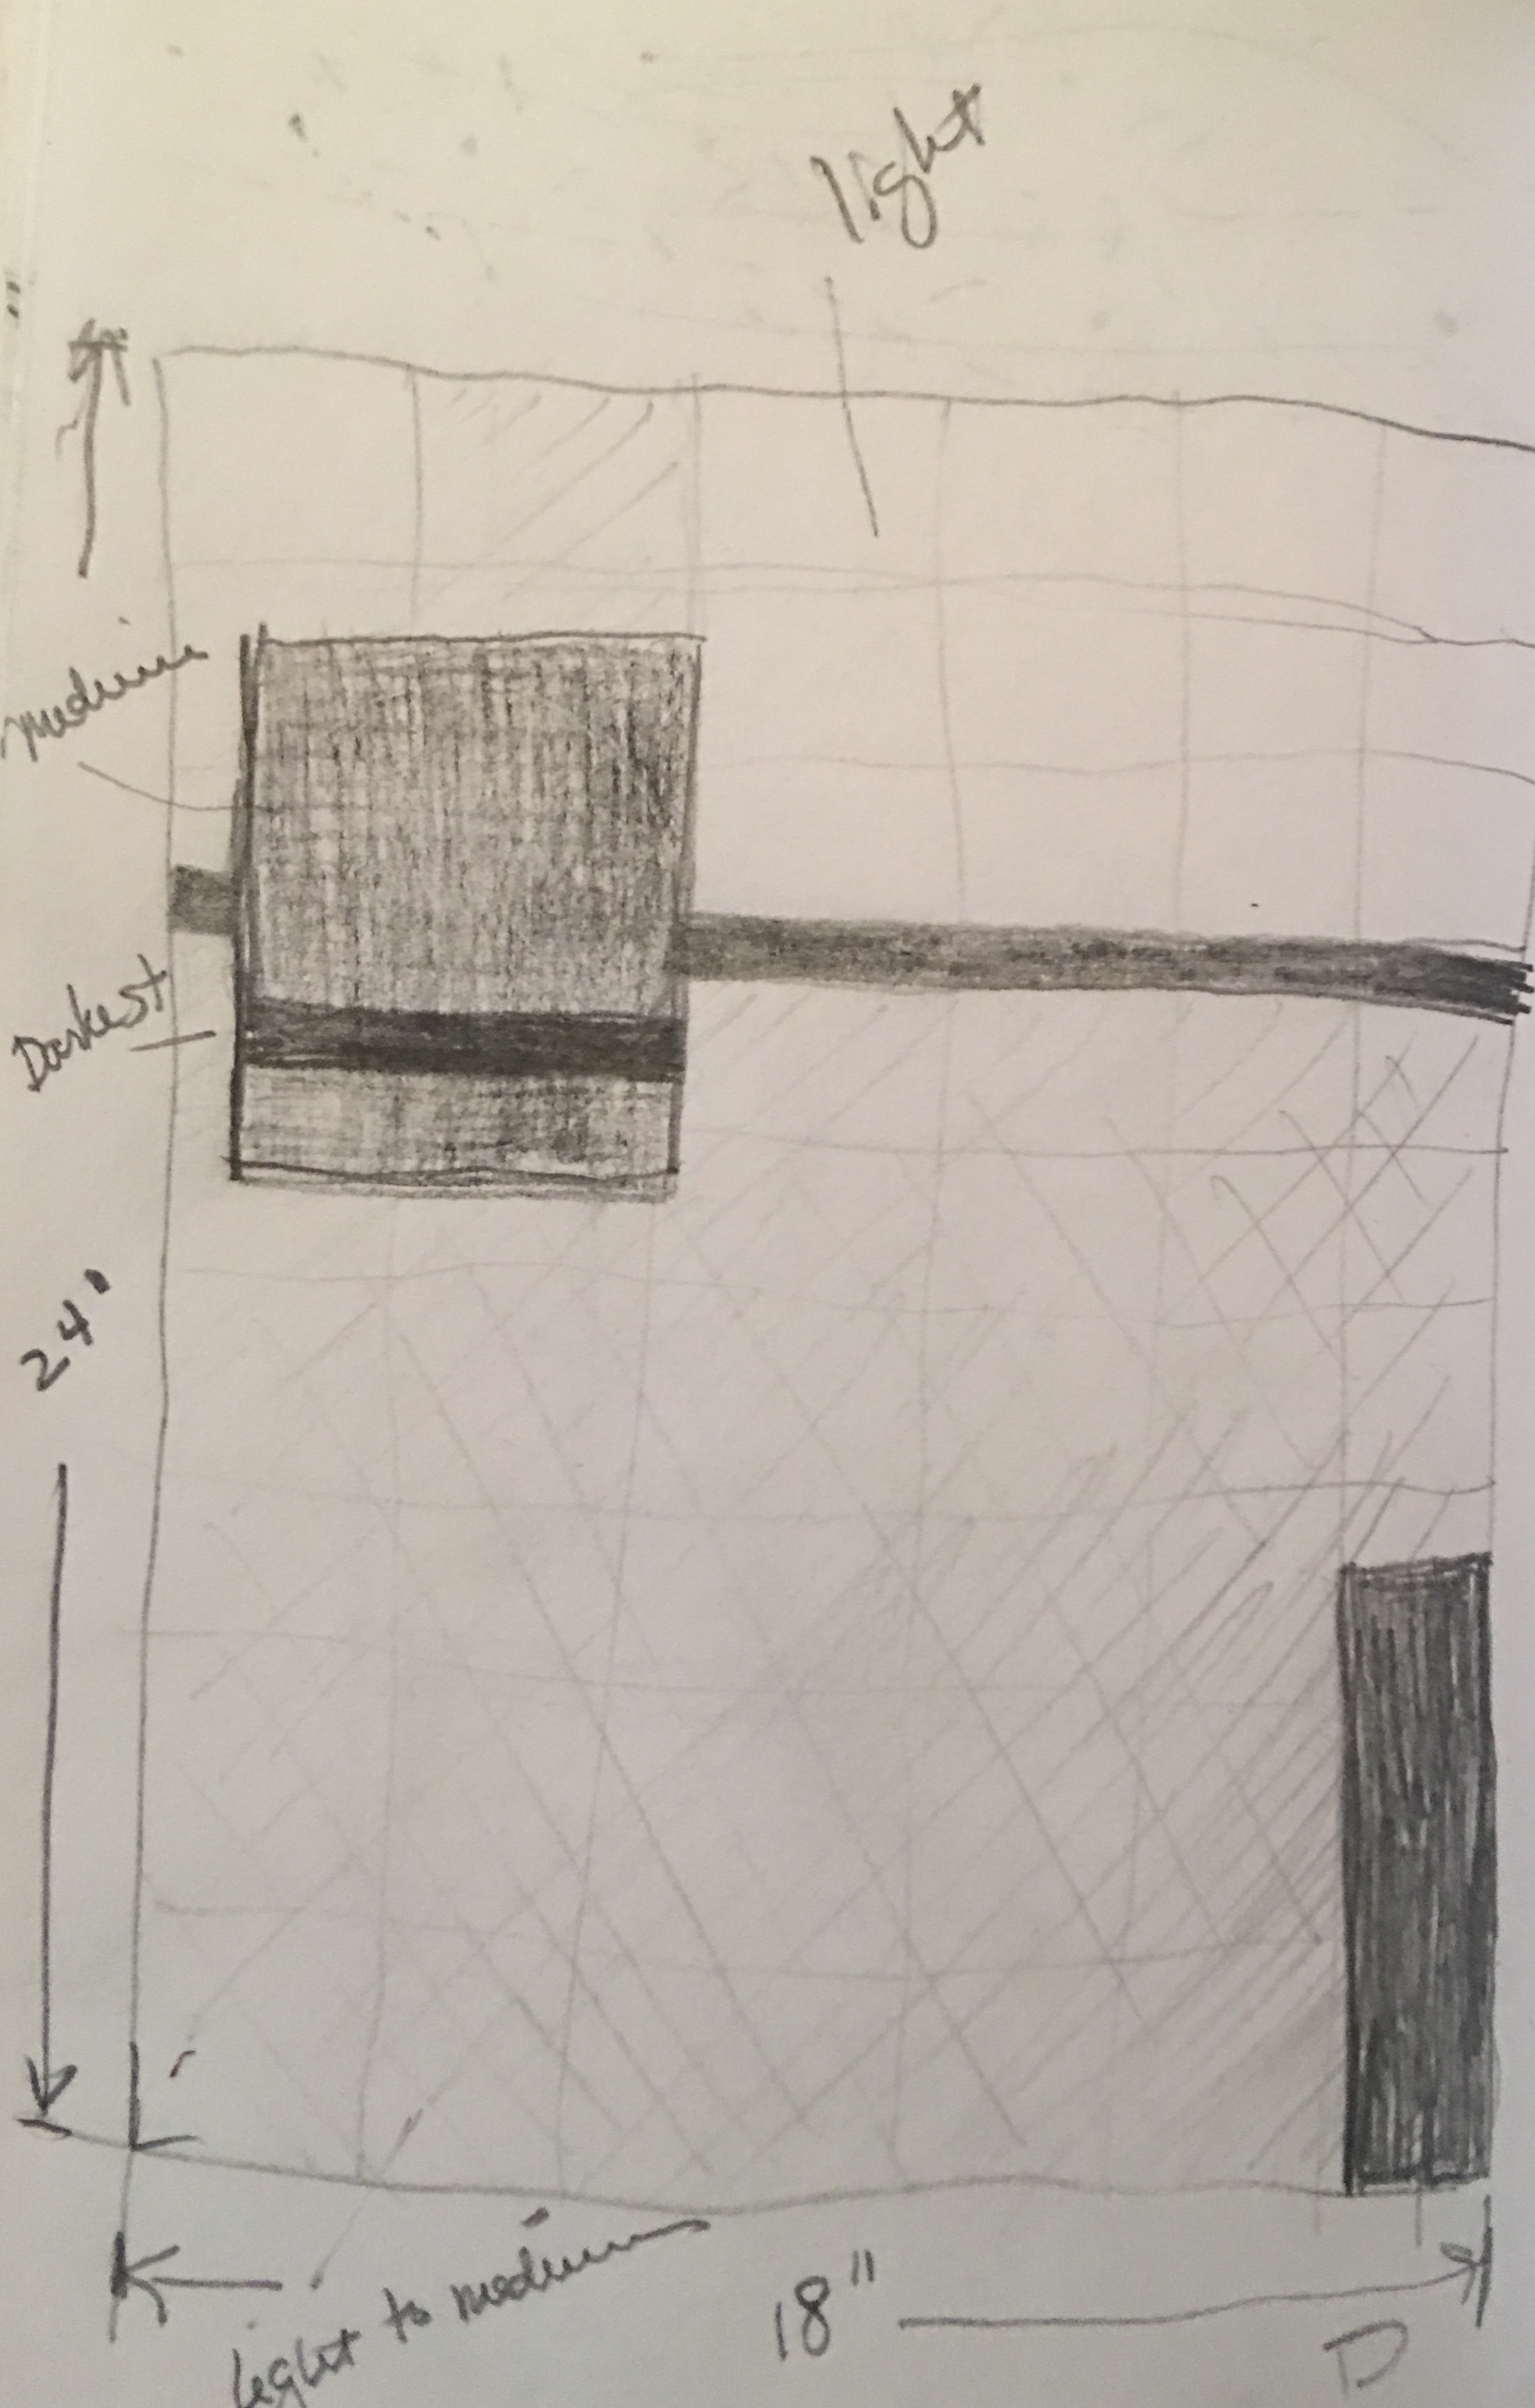
 After consulting Elizabeth (again), she suggested linear and horizontal stitching, I began quilting, but left the larger square alone as I wasn’t sure what to do with it. I wanted to do something, but couldn’t figure out what.
 The thing about dyeing your own fabric is how utterly seductive it is. You can mix any color you want by tweaking the proportions of your primary colors. The mottled effect enhances the overall feel of the fabric, making it completely unique and like no other.
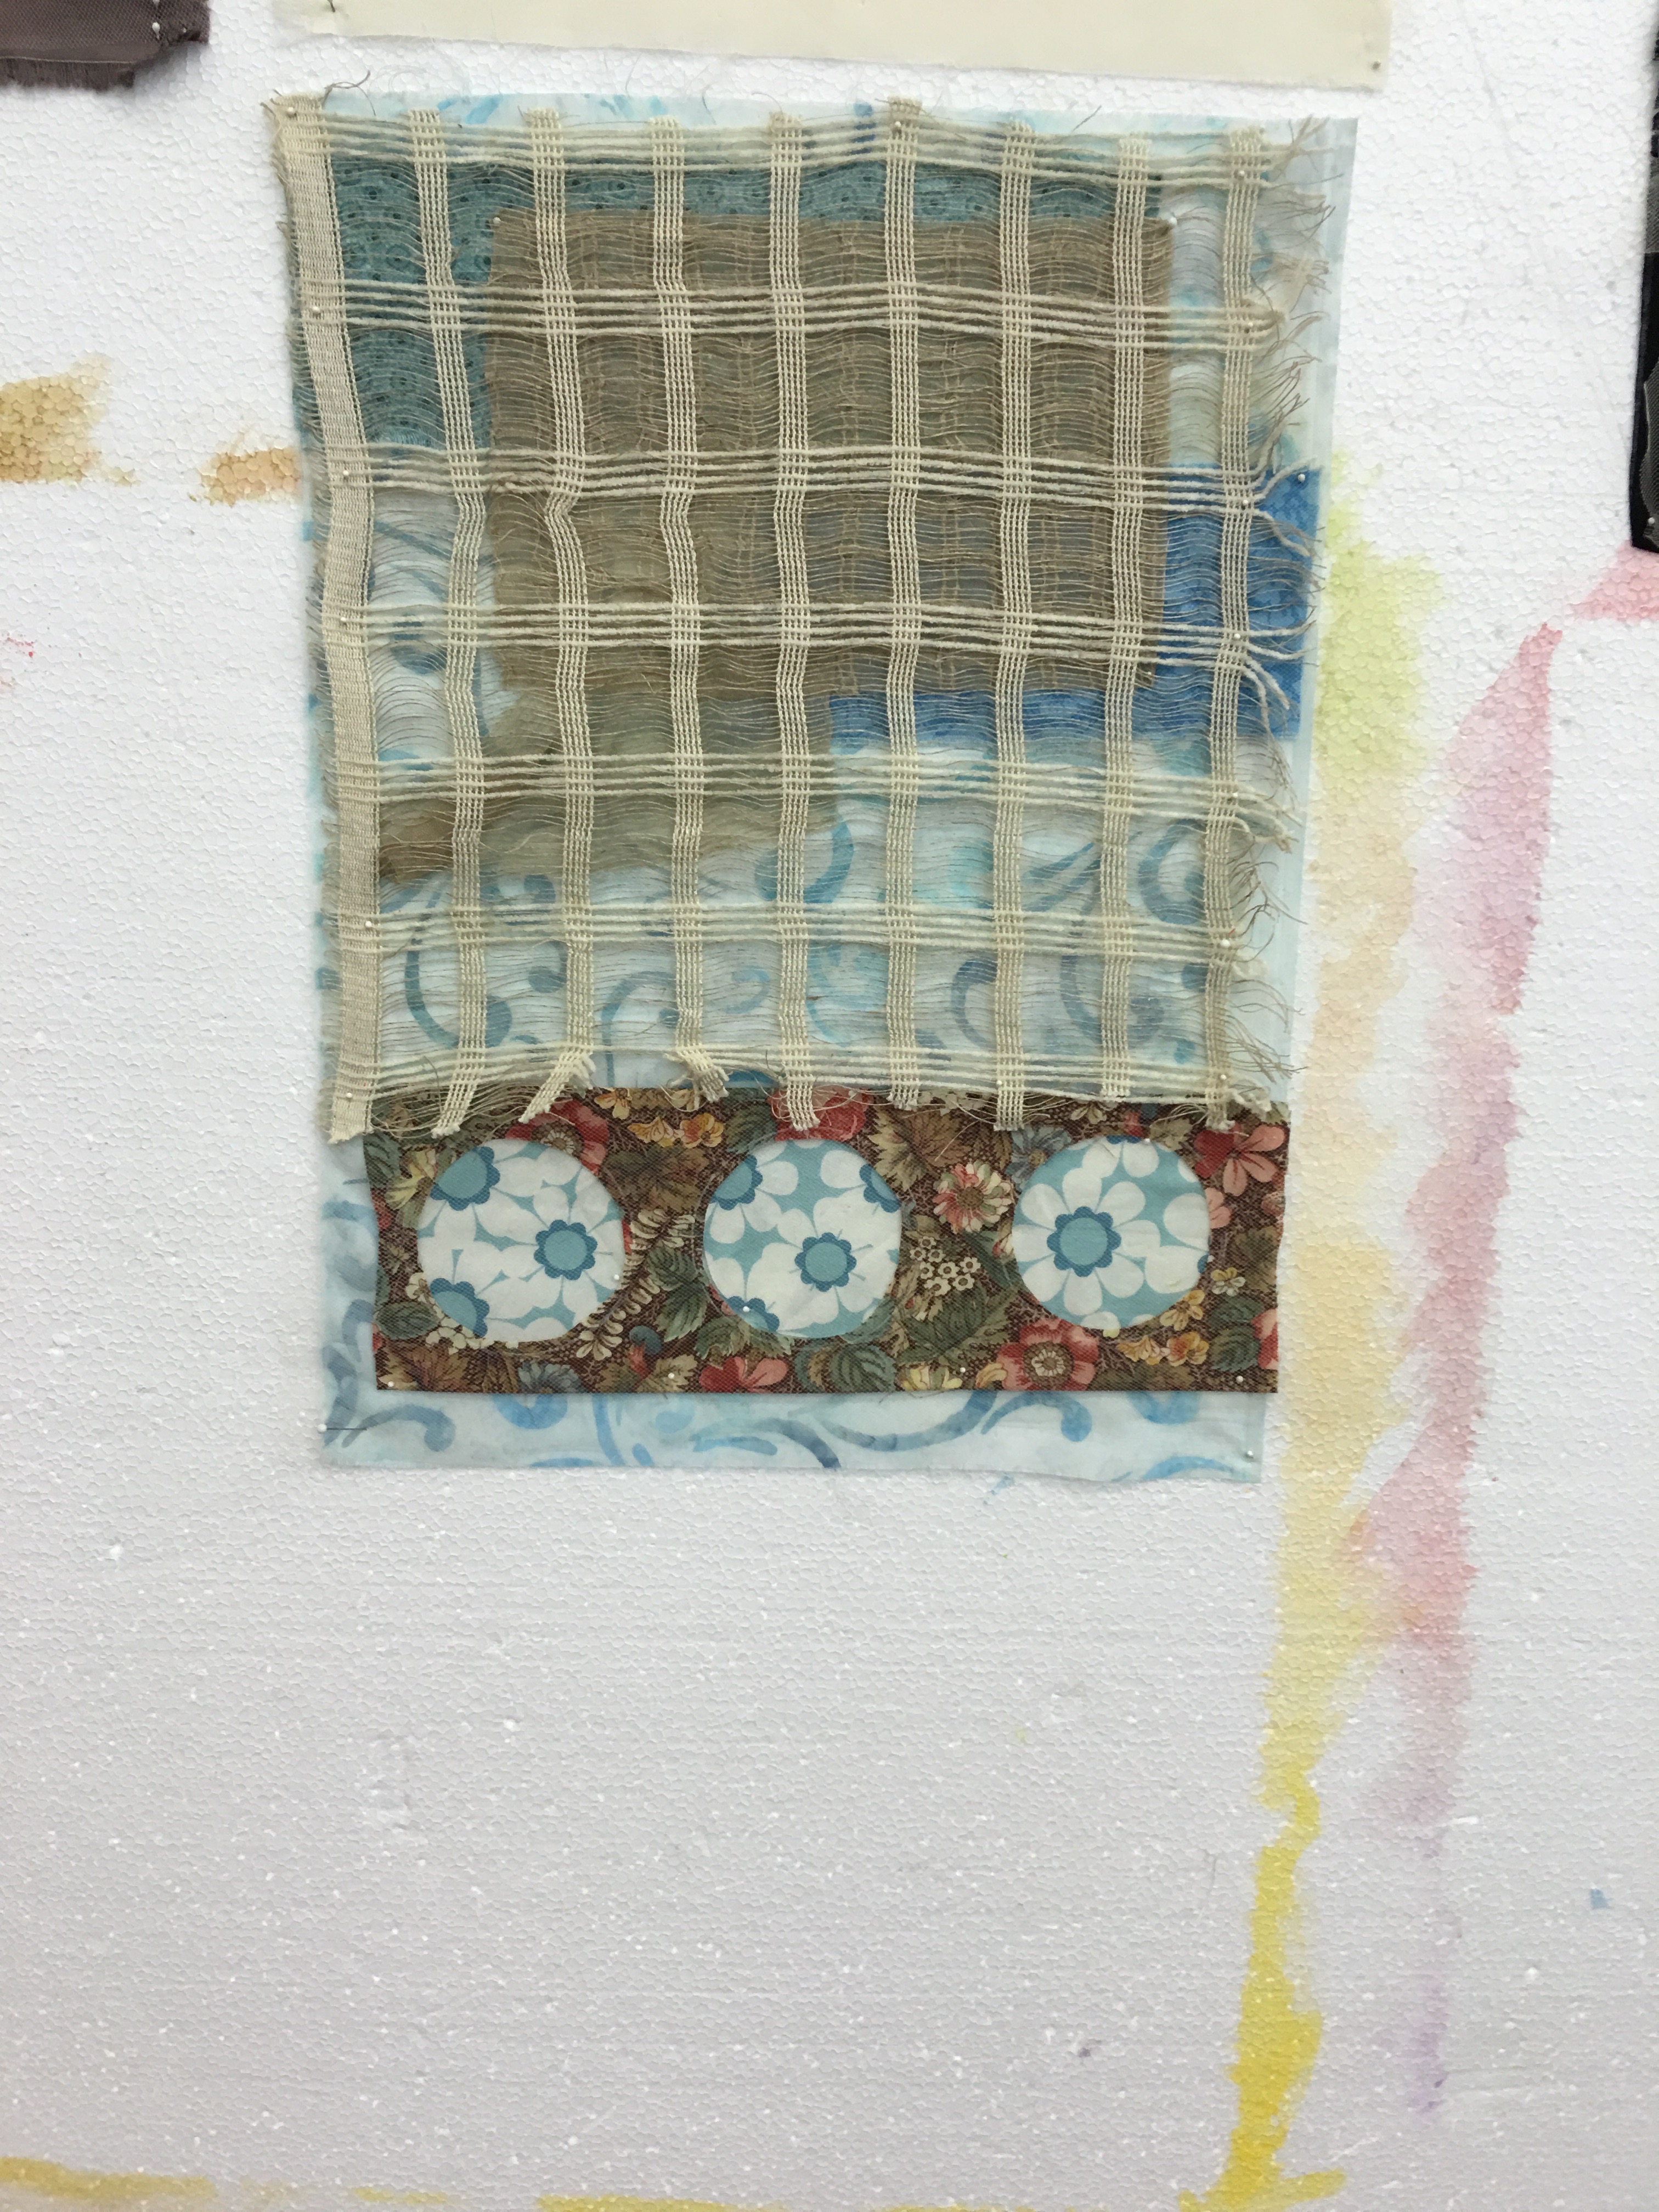


Recent comments