Someone commented on my Youtube channel about messiness, saying that she was happy my work area isn’t pristine as that would be intimidating. And it made me think about the various stages of messiness.
The gradient scale of messiness, because this is important.
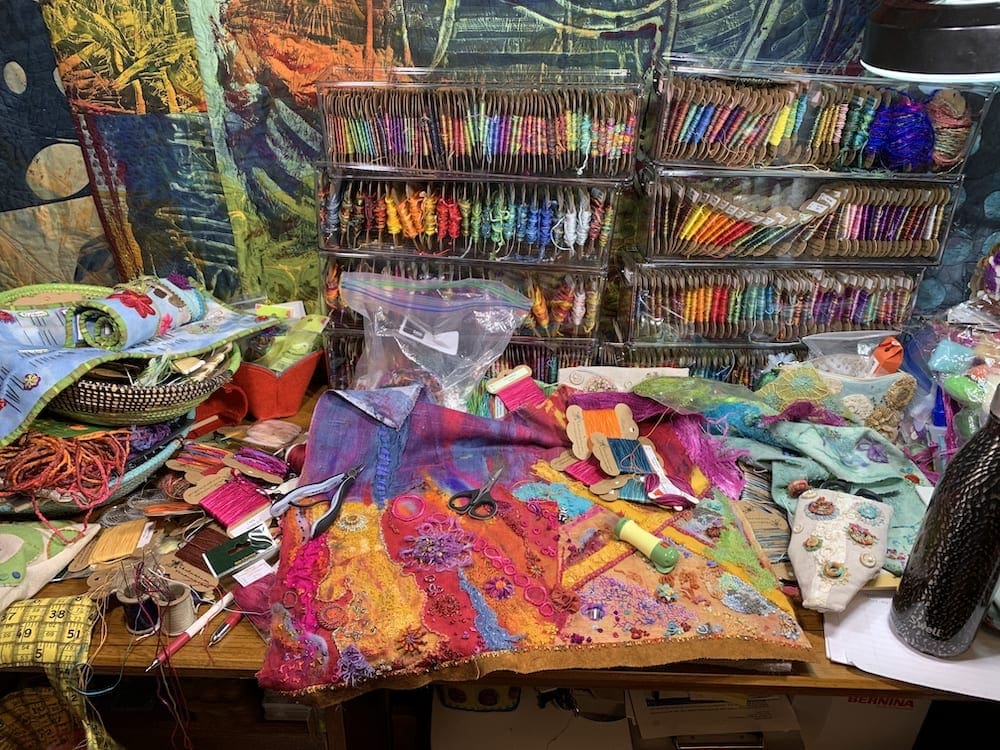
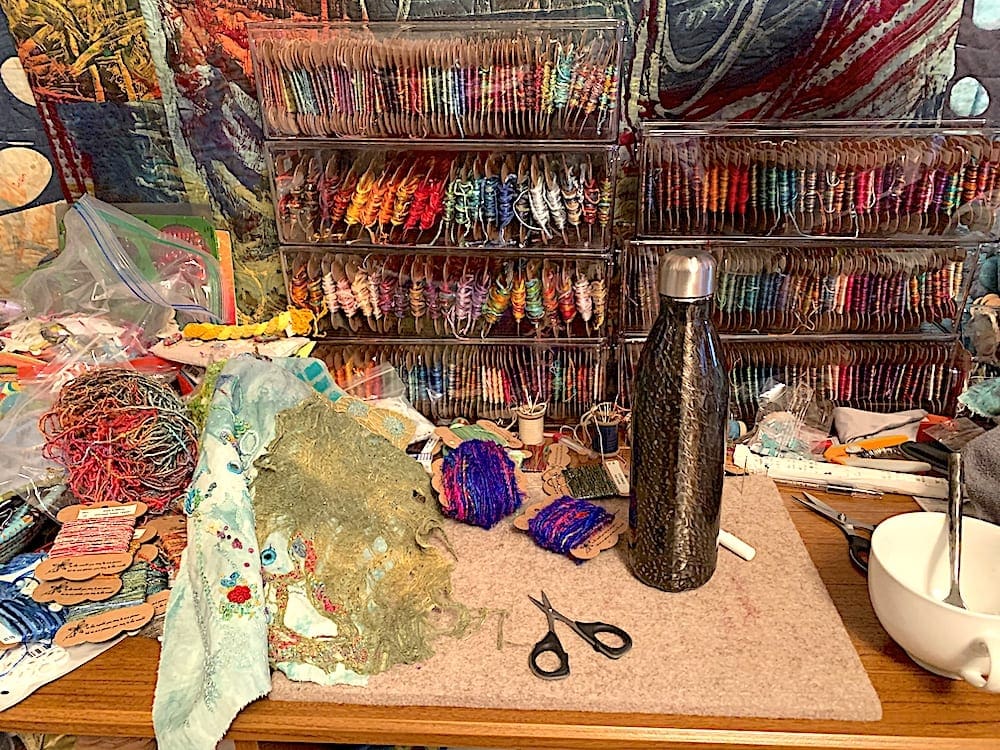
1. Kind of “messy”, but it’s not a problem and anyway to my mind, this is actually incredibly neat. Everything has its place, I know where things are, it’s easy to work on my current project and all is well with the world.
2. Okay, okay, things are getting “messy” but really it’s all subjective and yes, I’m having trouble finding things, but nothing I can’t handle. Besides, I’m working here and a certain degree of messiness is to be expected and even necessary.
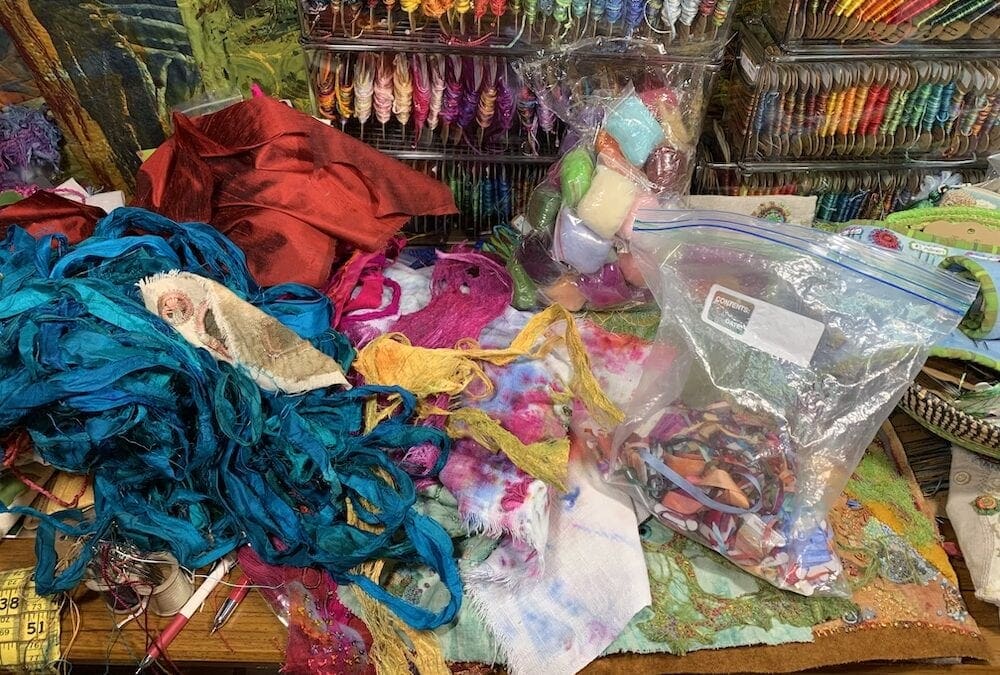
3. Messy is to some, what neat is to others, I tell myself, and I’m working and anyway I just grab whatever is easiest and closest and call it a “prompt”. However if I’m being honest it’s starting to be a problem and I can’t find things I want to use, though I will never admit this out loud.
4. The tipping point: things have gotten out of control. I know it, in my heart, but I still continue to work, despite the mess, because the work takes priority and anyway I know what happens once I start “cleaning” things up. Still this has gotten beyond “messy” and I’m spending more time looking for things than actually stitching.
5. Clearly something has to change. I can’t even find the piece I’m working on and so resolve to clean everything up… tomorrow.
6. A thorough cleaning is done. I carefully put things in places that seem reasonable and make sense to me at that moment. It’s all so neat and tidy, I hardly know where to start!
7. My work area is clear of everything but the piece I’m working on, only now I can’t find anything and spend hours looking for things that I knew were “just over there”.
8. Begin ripping the place apart in search of various much needed items.
Repeat steps 1-8.
You’ll be relieved to know I’m currently hovering at around a 3. Totally doable!
Yesterday I had to have an MRI because I’ve been getting headaches that often wake me in the middle of the night. I was quite sure I was fine, but it’s a precaution and being an adult and all, it seemed the responsible thing to do. So off I went feeling I’d prepared myself adequately. I don’t care for small, enclosed spaces, so I knew I was going to need to practice breathing and asked for something to put under my knees so my back didn’t begin to hurt. I believed I was on top of the situation and lay down, dutifully putting the ear plugs in and began counting my breath. Except once I was in the machine, I could feel my jaw shaking. As in uncontrollably and I was so freaked out that my jaw was doing this weird thing that I seemed to have no control over, I became convinced that it was so bad it would make my head move and ruin the imaging, which only made it worse. It took everything in me to breathe in and out, count my breath and eventually my jaw calmed down.
The upshot of the whole thing is that I’m fine. Perfectly fine. My neurologist called yesterday evening to tell me all looks well, “for someone your age” which of course gave me pause. “What does that mean?” I asked a bit defensively. He explained that you expect to see a few tiny white dots in “someone my age” and that this is also common in those who experience migraines. Evidently I have a couple of those white dots and also a tiny cyst, which is not in my brain at all, and is about 4mm. So another MRI in about a year to make sure that doesn’t grow. All in all the news is excellent and blood work is all good too. Whew. I knew I was as healthy as a horse.
After I returned home the skies opened up and the rain came down like some sort of end of the world scenario. That was when I decided to do a livestream, which you can see here if you care to.
And then I had to do a lot of work on my website, so I spent the rest of the afternoon and evening writing copy, learning how to input new workshops into my workshop schedule and create images for the workshops.
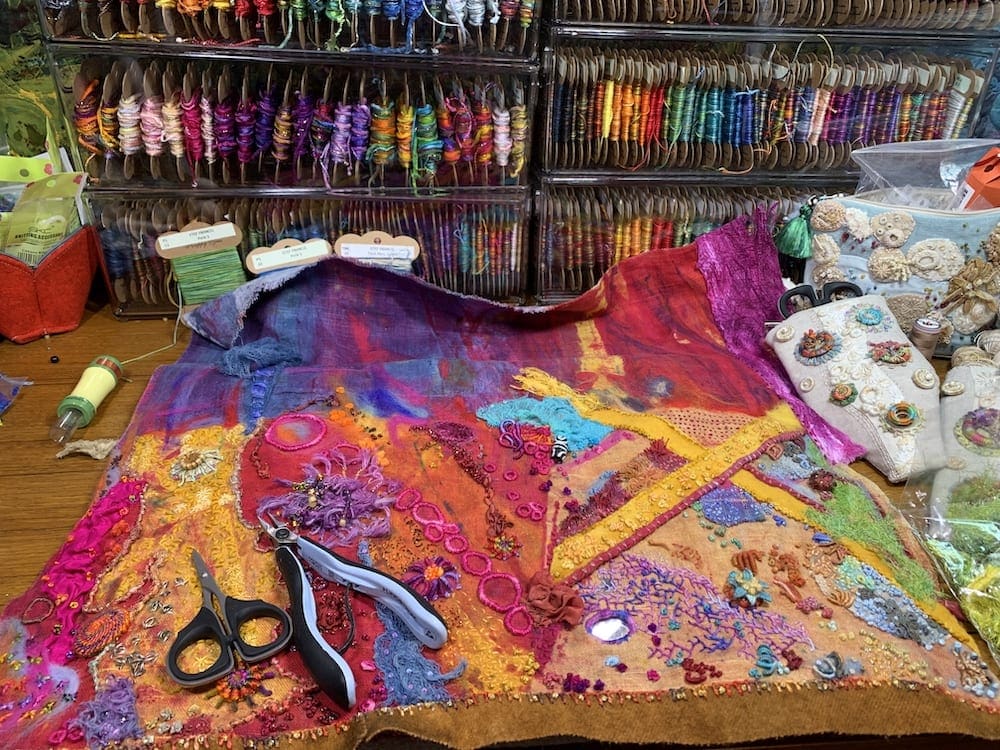
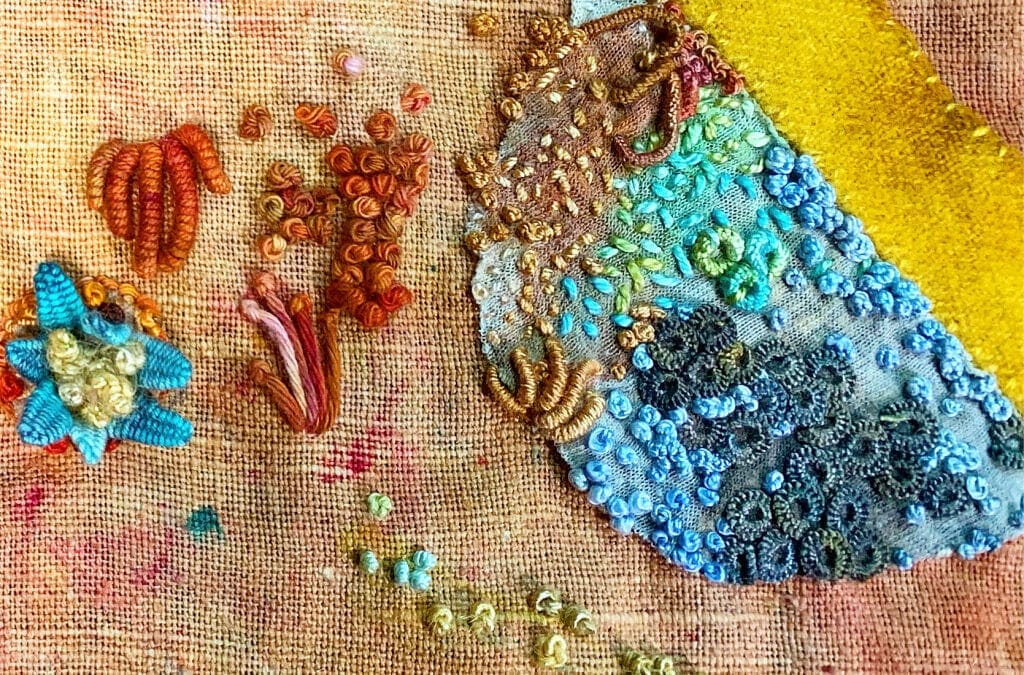
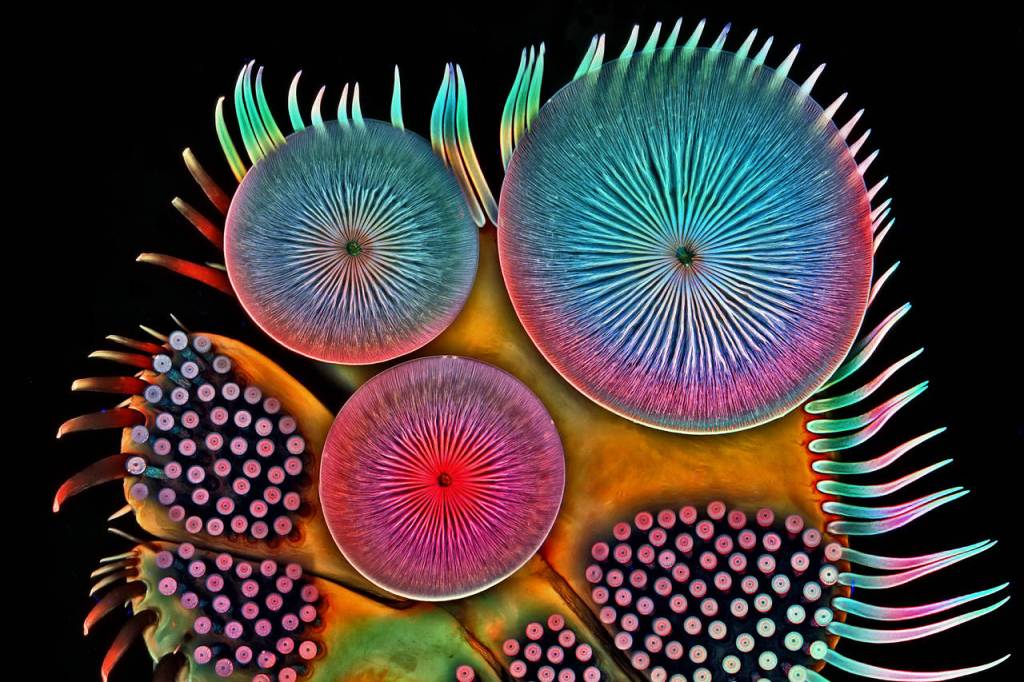
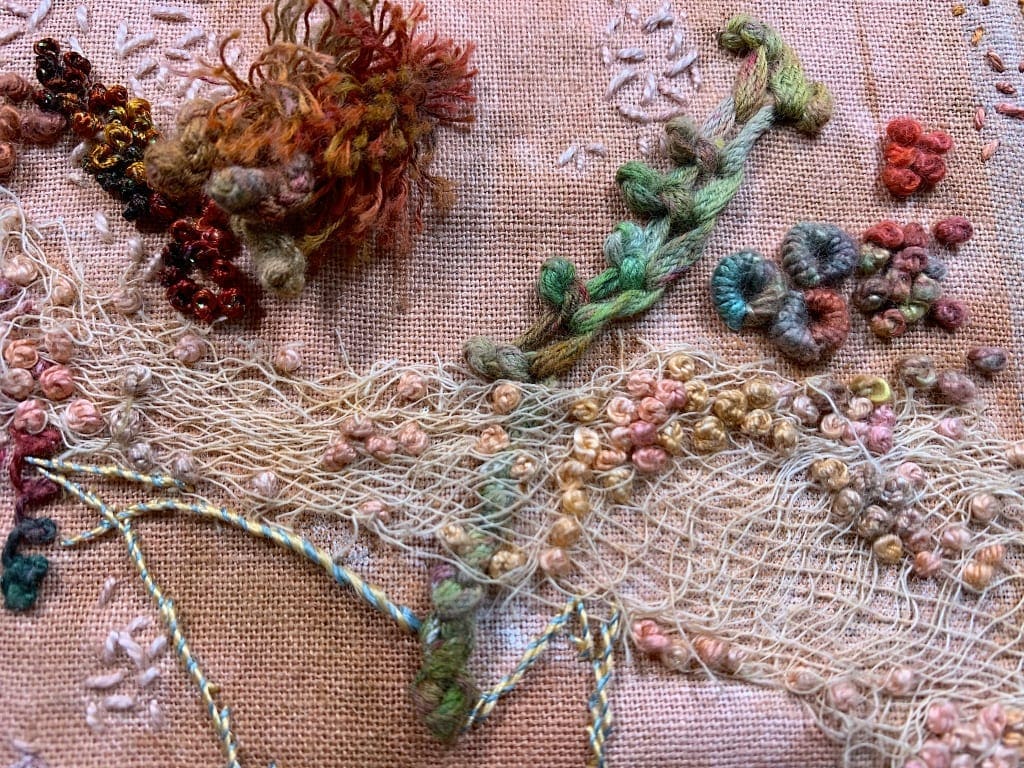
Every now and then when I needed a break I’d work on the piece below, which I’ve fallen in love with and that is inspired by plant and human cells. Pinterest is great for finding amazing images of organisms, cells and plant life that have been put under a microscope. I have a whole board where I’m saving such images.
This piece I’ve added some of my hand dyed t-shirting to and then stitched on top of it. It’s very relaxing.
My mother and two of my brothers are scientists: a chemist, an astro physicist and a bio-chemist. I was never very good at science, but I do love looking at the microscopic images of organisms and cells. They are things of such exquisite beauty.
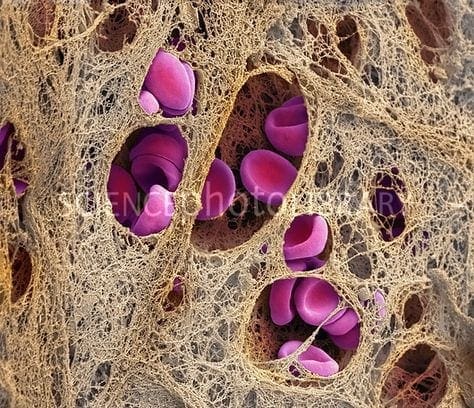
The photograph below is of a coronary blood clot, horrible, but if you remove what it IS and just view it as an image, it is incredible.
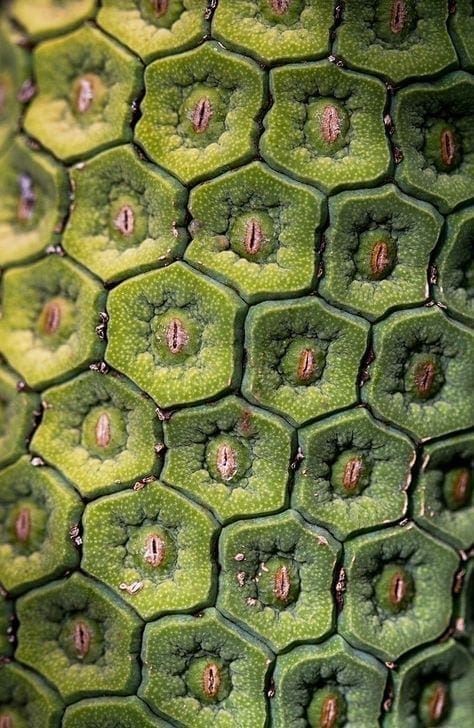
Coronary blood clot. Coloured scanning electron micrograph (SEM) of a blood clot (thrombus) in the coronary artery, showing red blood cells (purple) in a fibrin mesh (threads). Magnification: x2500, when printed 10cm wide.This is a microscopic image of a cactus (I think). Amazing.
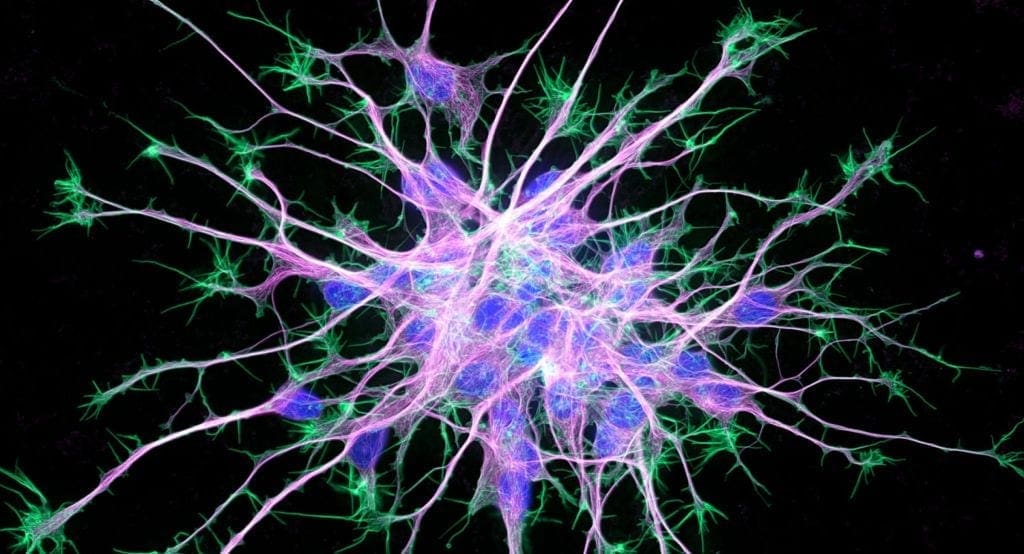
Which took me to viewing images of brain cells. Talk about inspiration!
Microscopic image of neuronsAmazing, right?!
There is beauty in just about anything if looked at through a different lens. ❤️
When last we met, I had just pulled my Bernina 790 out of hibernation only to find it did not fit my Koala sewing cabinet and so I had to order a new insert. Check, check and check. Who says I’m not getting sh*t done?
New Bernina safely back in hiding so that I could teach my Improvisational Stitching Workshop.
I know all of you want to know how Pat Pauly’s Take 2 virtual workshop went and I won’t leave you hanging. It was all that I’d hoped for and more. Just fabulous. Of course now I’m trying to talk her into doing another one: Line, Shape & Setting. I think I may have persuaded her, and the minute she adds it to her jam packed schedule I’ll tell all of you so that those of you who might like to sign up for it, can.
In the meantime I’m back to my improvisational stitching, Youtube tutorials, working on my next design, slowly chipping away at my Stitching Book, juggling my other various commitments and oh, yeah, life!
I have photos of what I worked on in Pat’s workshop, but it’s still a work in progress, so I think I’ll wait until I have something I love before I show you. Which means that I’ll have to pull that sewing machine out again or use my smaller, travel Bernina, which isn’t as much fun, but will do the job.
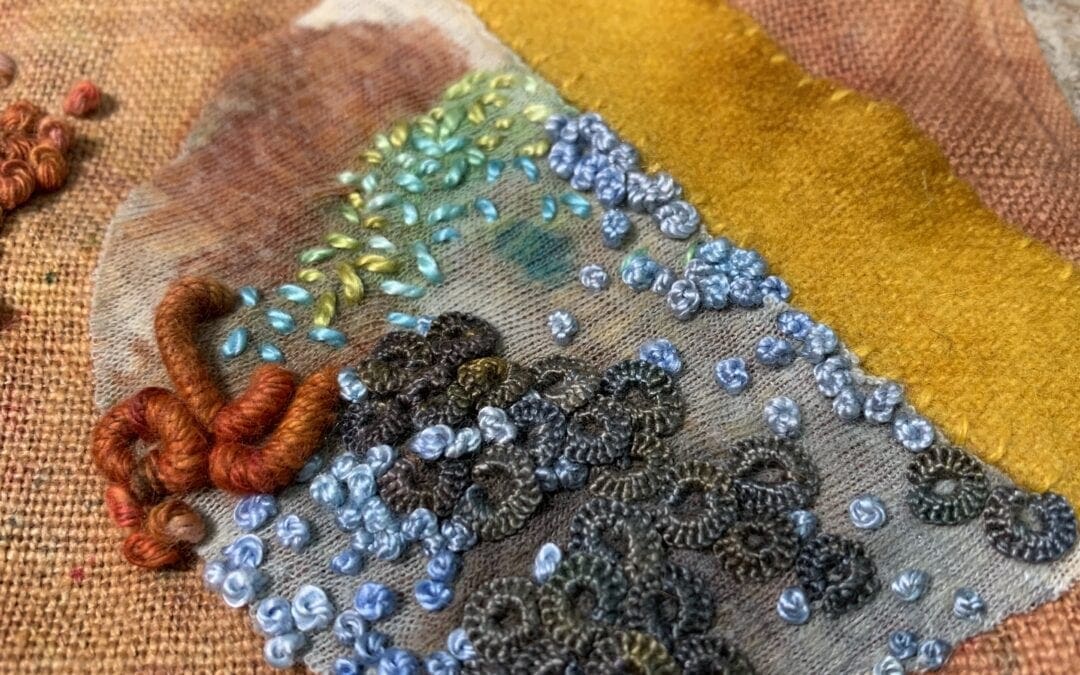
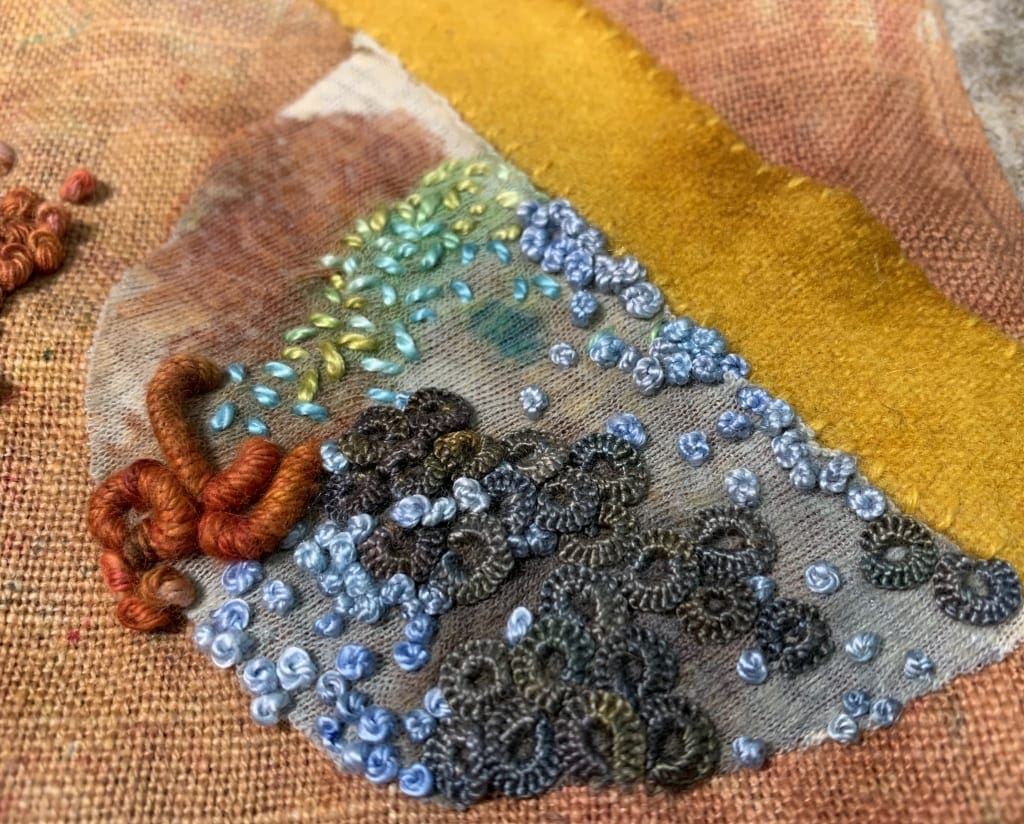
Yesterday as I was doing a livestream for my Patrons over on Patreon, I was talking and stitching away, as I do, and then I had this idea to add a piece of hand dyed t-shirt to the linen piece I’ve been playing around with and ended up loving it! I just love when that happens and it doesn’t happen all the time, so when it does, it’s just thrilling!!
Organisms
It reminds me of organisms that have been put under a microscope. I love that!
I am doing a new 5-day workshop! Improvisational Stitching!
But what does that mean, exactly? Well funny you should ask, because I’ve given it a great deal of thought. Improvisational Stitching is what I call what I do when I begin with a piece of fabric, usually a piece of hand dyed linen, with no preconceived notion of what I’m going to do other than follow the striations in the fabric and begin stitching. I don’t sketch anything out, I just begin stitching.
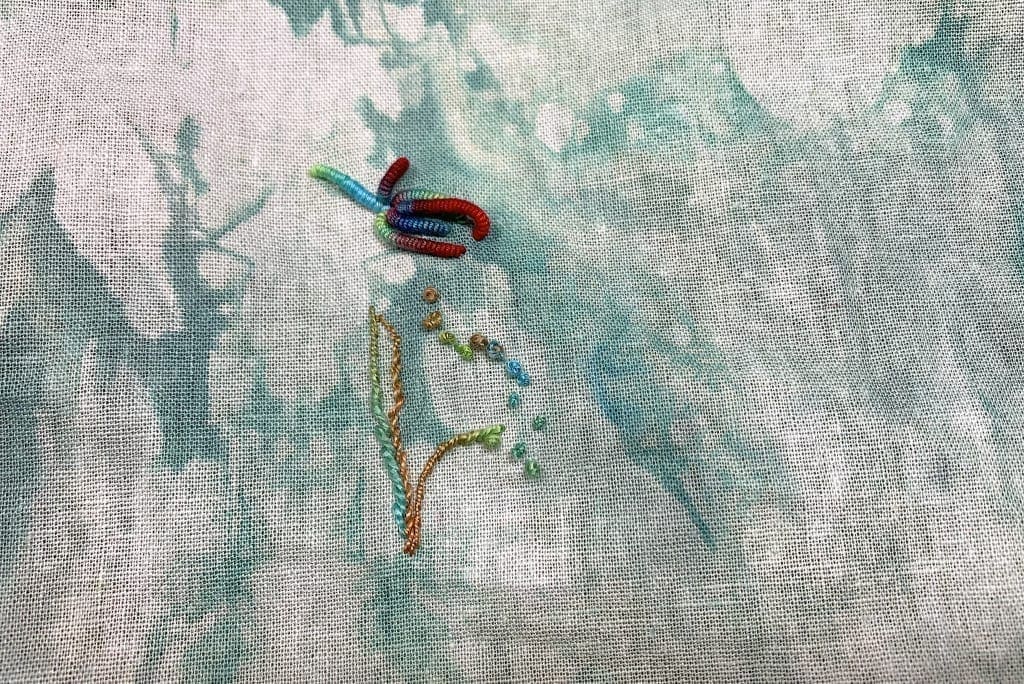
This is a new piece that I haven’t had time to do much with. Right now it’s just a few stitches, but eventually it will become more.
Over time the piece develops and I begin adding other elements. Sometimes I’ll add other materials, other times that means painting directly onto the fabric and even over the stitching, as I did with my piece, Perseverance.
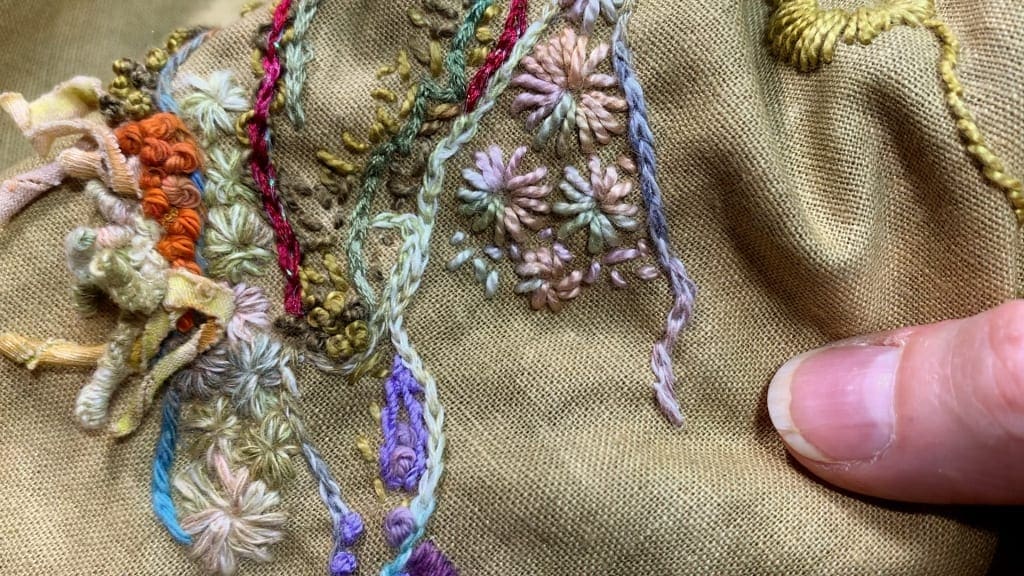
Do you see how I painted over the green ribbon floss and then covered that area with the hand dyed cheesecloth?
Eventually the piece takes on a life of its own and then it’s up to me to follow as best I can.
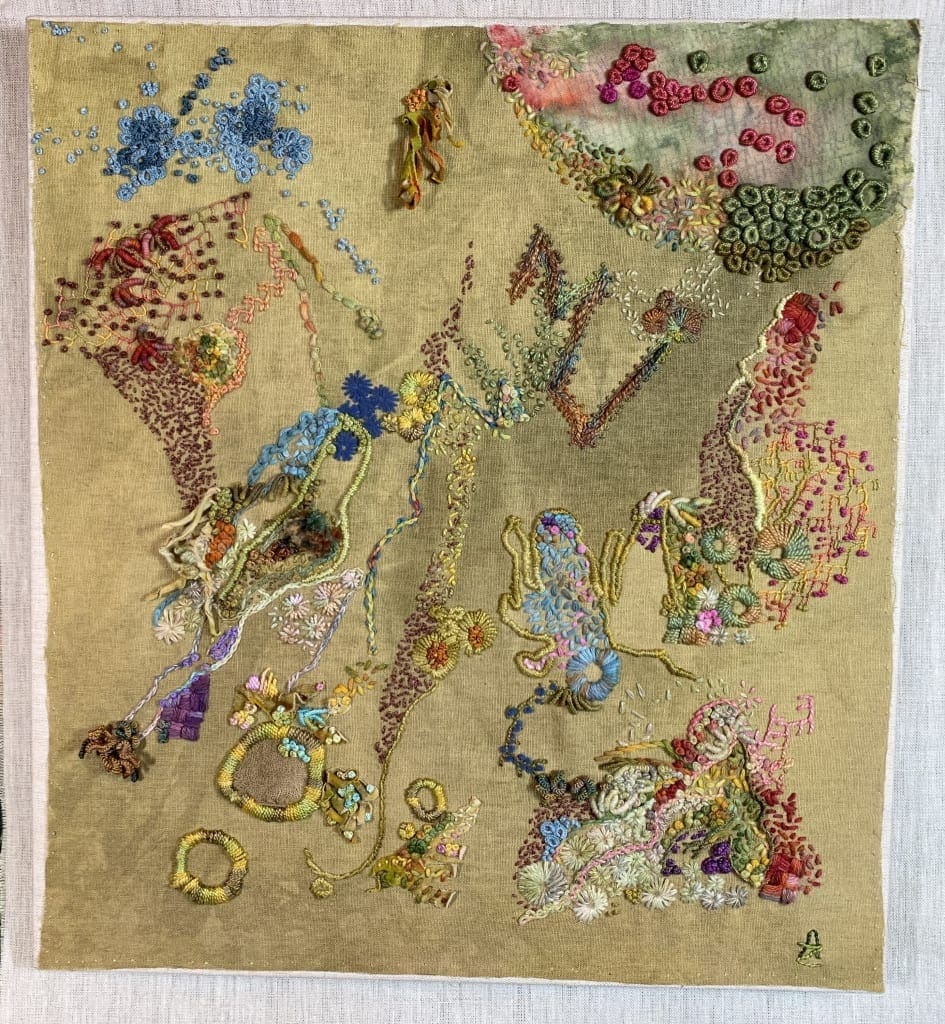
Olea began as a 14″ by 16″ piece of olive green hand dyed linen. I started stitching and adding things, like the hand painted t-shirt strips to the left.
Eventually it became this, which I titled, “Olea” but my friend Anna Bates called, “After the Wedding”.
Olea: Hand dyed Linen/Cotton blend with cotton, silk, wool, sheep’s silk threads, ribbon, t-shirt & cheesecloth This is my latest piece that I haven’t even begun stitching on, but will be soon with hand dyed t-shirt, cheesecloth and tulle.
Improvisational Stitching is so much fun! There are no rules, nothing is forbidden, anything goes. I absolutely love it!! Which leads me to the workshop I’m doing: Improvisational Stitching!
Have you ever wanted to create an improvisational piece, but felt too intimidated to start? This is the workshop for you!
We begin with a hand dyed piece of linen, loosely woven cotton or wool. I suggest starting with a piece that isn’t too large – say 14” x 16” or smaller. It can be a square or a rectangle. Choose a color that you love for the background. It can be any color, just make sure you LOVE it! If you want to piece a background together, you can also do that.
This is a “hands on” workshop, in other words, everyone will be working and creating during the workshop with me cheering you on. Using a wide variety of threads, and other materials, we will embellish with no preconceived ideas. I will hold your hand, encourage you to explore and try new things. Each week you will be given a challenge to expand and add to your piece. This is a dive-into-the-deep-end workshop. We will have a blast. All levels of stitchers are welcome. You will not be alone. I will be with you every step of the way.
Workshop Length: 5 Saturdays from 1pm – 4:30pm EDT
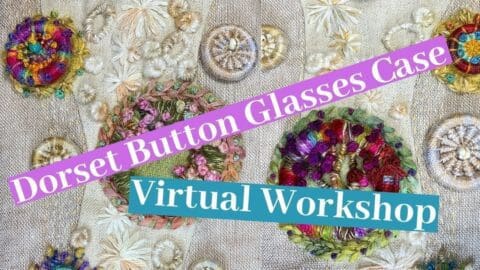
I’m doing a Dorset Buttons Gone Wild 3-hour Workshop via Zoom. (It will be recorded and uploaded to YouTube, but will only be available to view if you have purchased the workshop. You can reference the entire workshop later or whenever you like once the workshop is over.)
When: A 3-hour workshop: Saturday, March 20th from 2-5pm EDT
Cost: $40.00 – I accept payment by check, through Zelle, Venmo or Paypal using my name: Ariane Zurcher and email address: ariane@arianezurcher.com. Tell me in the comments how you are paying so that I can make a note of it.
The workshop is limited to 30 people, first come, first serve. I have 19 spots left, so reserve your spot now!
What you’ll need and what you can expect:
Have at least a few rings to make the Dorset Buttons: https://amzn.to/2PyqNH3 whatever size you like and a couple different threads. I recommend 3 wt and 5 wt threads to begin and then a few specialty threads such as 4mm silk ribbon, Aurora, Oriental Linen, Soft Cotton, or whatever else you might like to try. For the first couple you might want to use some thread you have lying around that you don’t care about to practice.
#18 Chenille needle and/or #24 Chenille depending on the thread weight you want to use. A tapestry needle will work as well, and you will also need a Milliners Needle so that you can experiment with making some wrapped stitches on the Dorset Button. We are thinking out of the box, so think about what else you might want to add!
I will demonstrate a number of different variations on the traditional Dorset button, incorporating lots of different materials and threads that I think you’ll find exciting and different! You will have completed at least one or two Dorset Buttons by the end of the workshop. ❤️
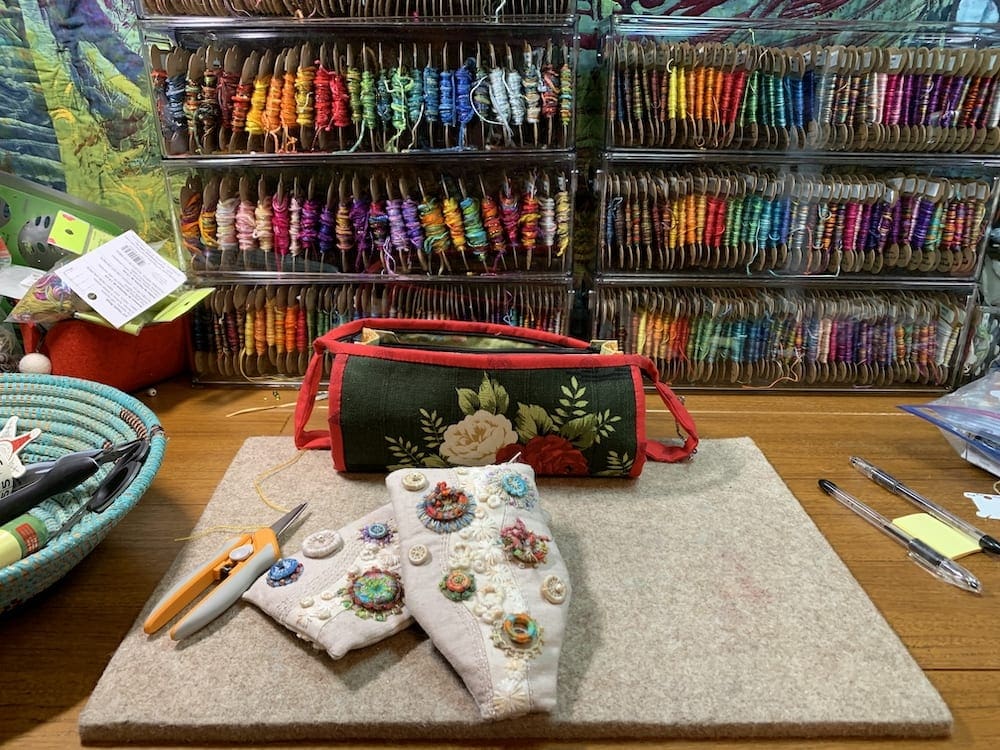
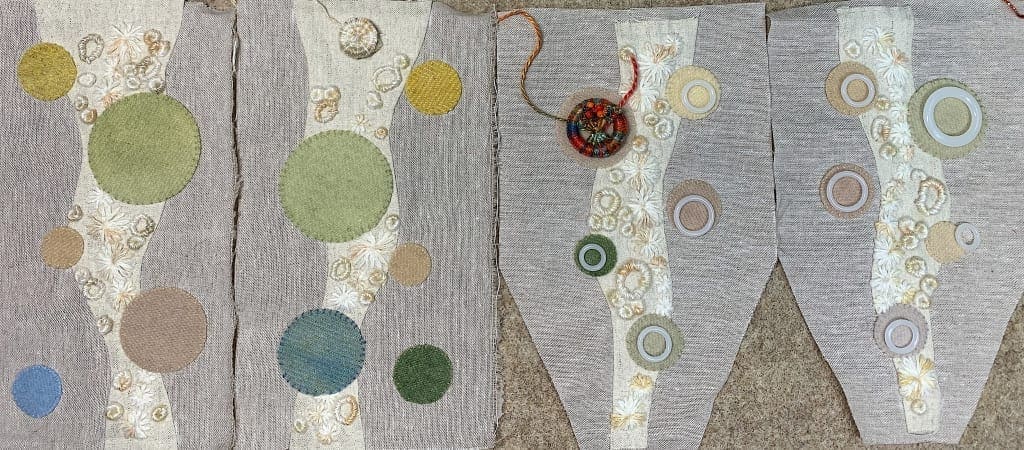
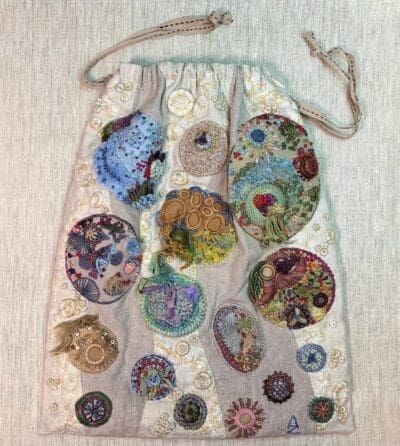
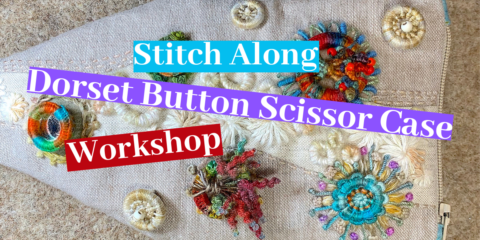
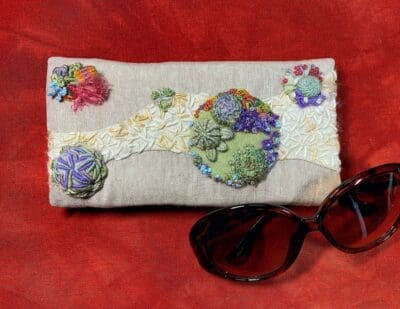
*Optional: For those of you who are really adventurous, I suggest purchasing, if you haven’t already, my glasses case and/or scissor’s case. If you choose to go this route, prep the linen, with the lighter color linen wave and whipstitch on the wool circles as the instructions describe, so that you are ready to apply your Dorset Buttons to the wool shapes. I embellished the background as you can see below. If you are signed up for the workshop and would like to embellish as I have, let me know in the comments and I will send you instructions.
Glasses Case and Scissor Case with background prepped, using the same background embellishments I used for Making Waves: A Drawstring Bag
Don’t forget to leave me a comment that you want to reserve your space and then proceed to payment.
Later today I am doing a livestream on what to do with those odd looking Silk Cocoons. A lovely follower of mine sent me one a few months ago and I put it aside, not sure what to do with it. Then someone in my Facebook group: Ariane Zurcher Stitching Circle asked what does one do with such an interesting and weird looking thing. I replied that I had no idea, but I had one sitting next to me, still in its little bag. Another helpful soul then suggested (dared me) that I do a livestream demonstrating. So I am, because I can’t let a dare suggestion like that go unheeded. If you’re curious, tune in today at 1pm EST.


Recent comments